I first got interested in woodworking thanks to the amazing videos I saw on YouTube by Steve Ramsey at Woodworking for Mere Mortals [1]. His simple explanations and exciting projects sparked a wealth of ideas of my own and I loved how easy he made it look for anyone to get involved in making things out of wood. And most importantly, he showed that you don’t need a designated woodworking shop or garage filled with all the most expensive tools to make really useful fun projects!
So this was my first attempt at making anything out of wood (since learning the basics in school MANY years ago!) and I decided on making something functional – a utility stool for the living room, so we could use it for sitting on, using as a second little table, or for resting feet on while watching tv. We have an “L-shaped” sofa, so whichever one of us is not sitting on the long section doesn’t really have anywhere to stretch their legs out, unless they sit sideways along the length of the sofa. So this stool will definitely get lots of use! Steve is extremely generous with his content and provides a detailed set of plans (they’re even colour coded!) alongside his instructional video. And Steve has stated several times he is always keen for people to try making his creations, so I am very appreciative of Steve’s website and channel for helping me to find this new hobby!
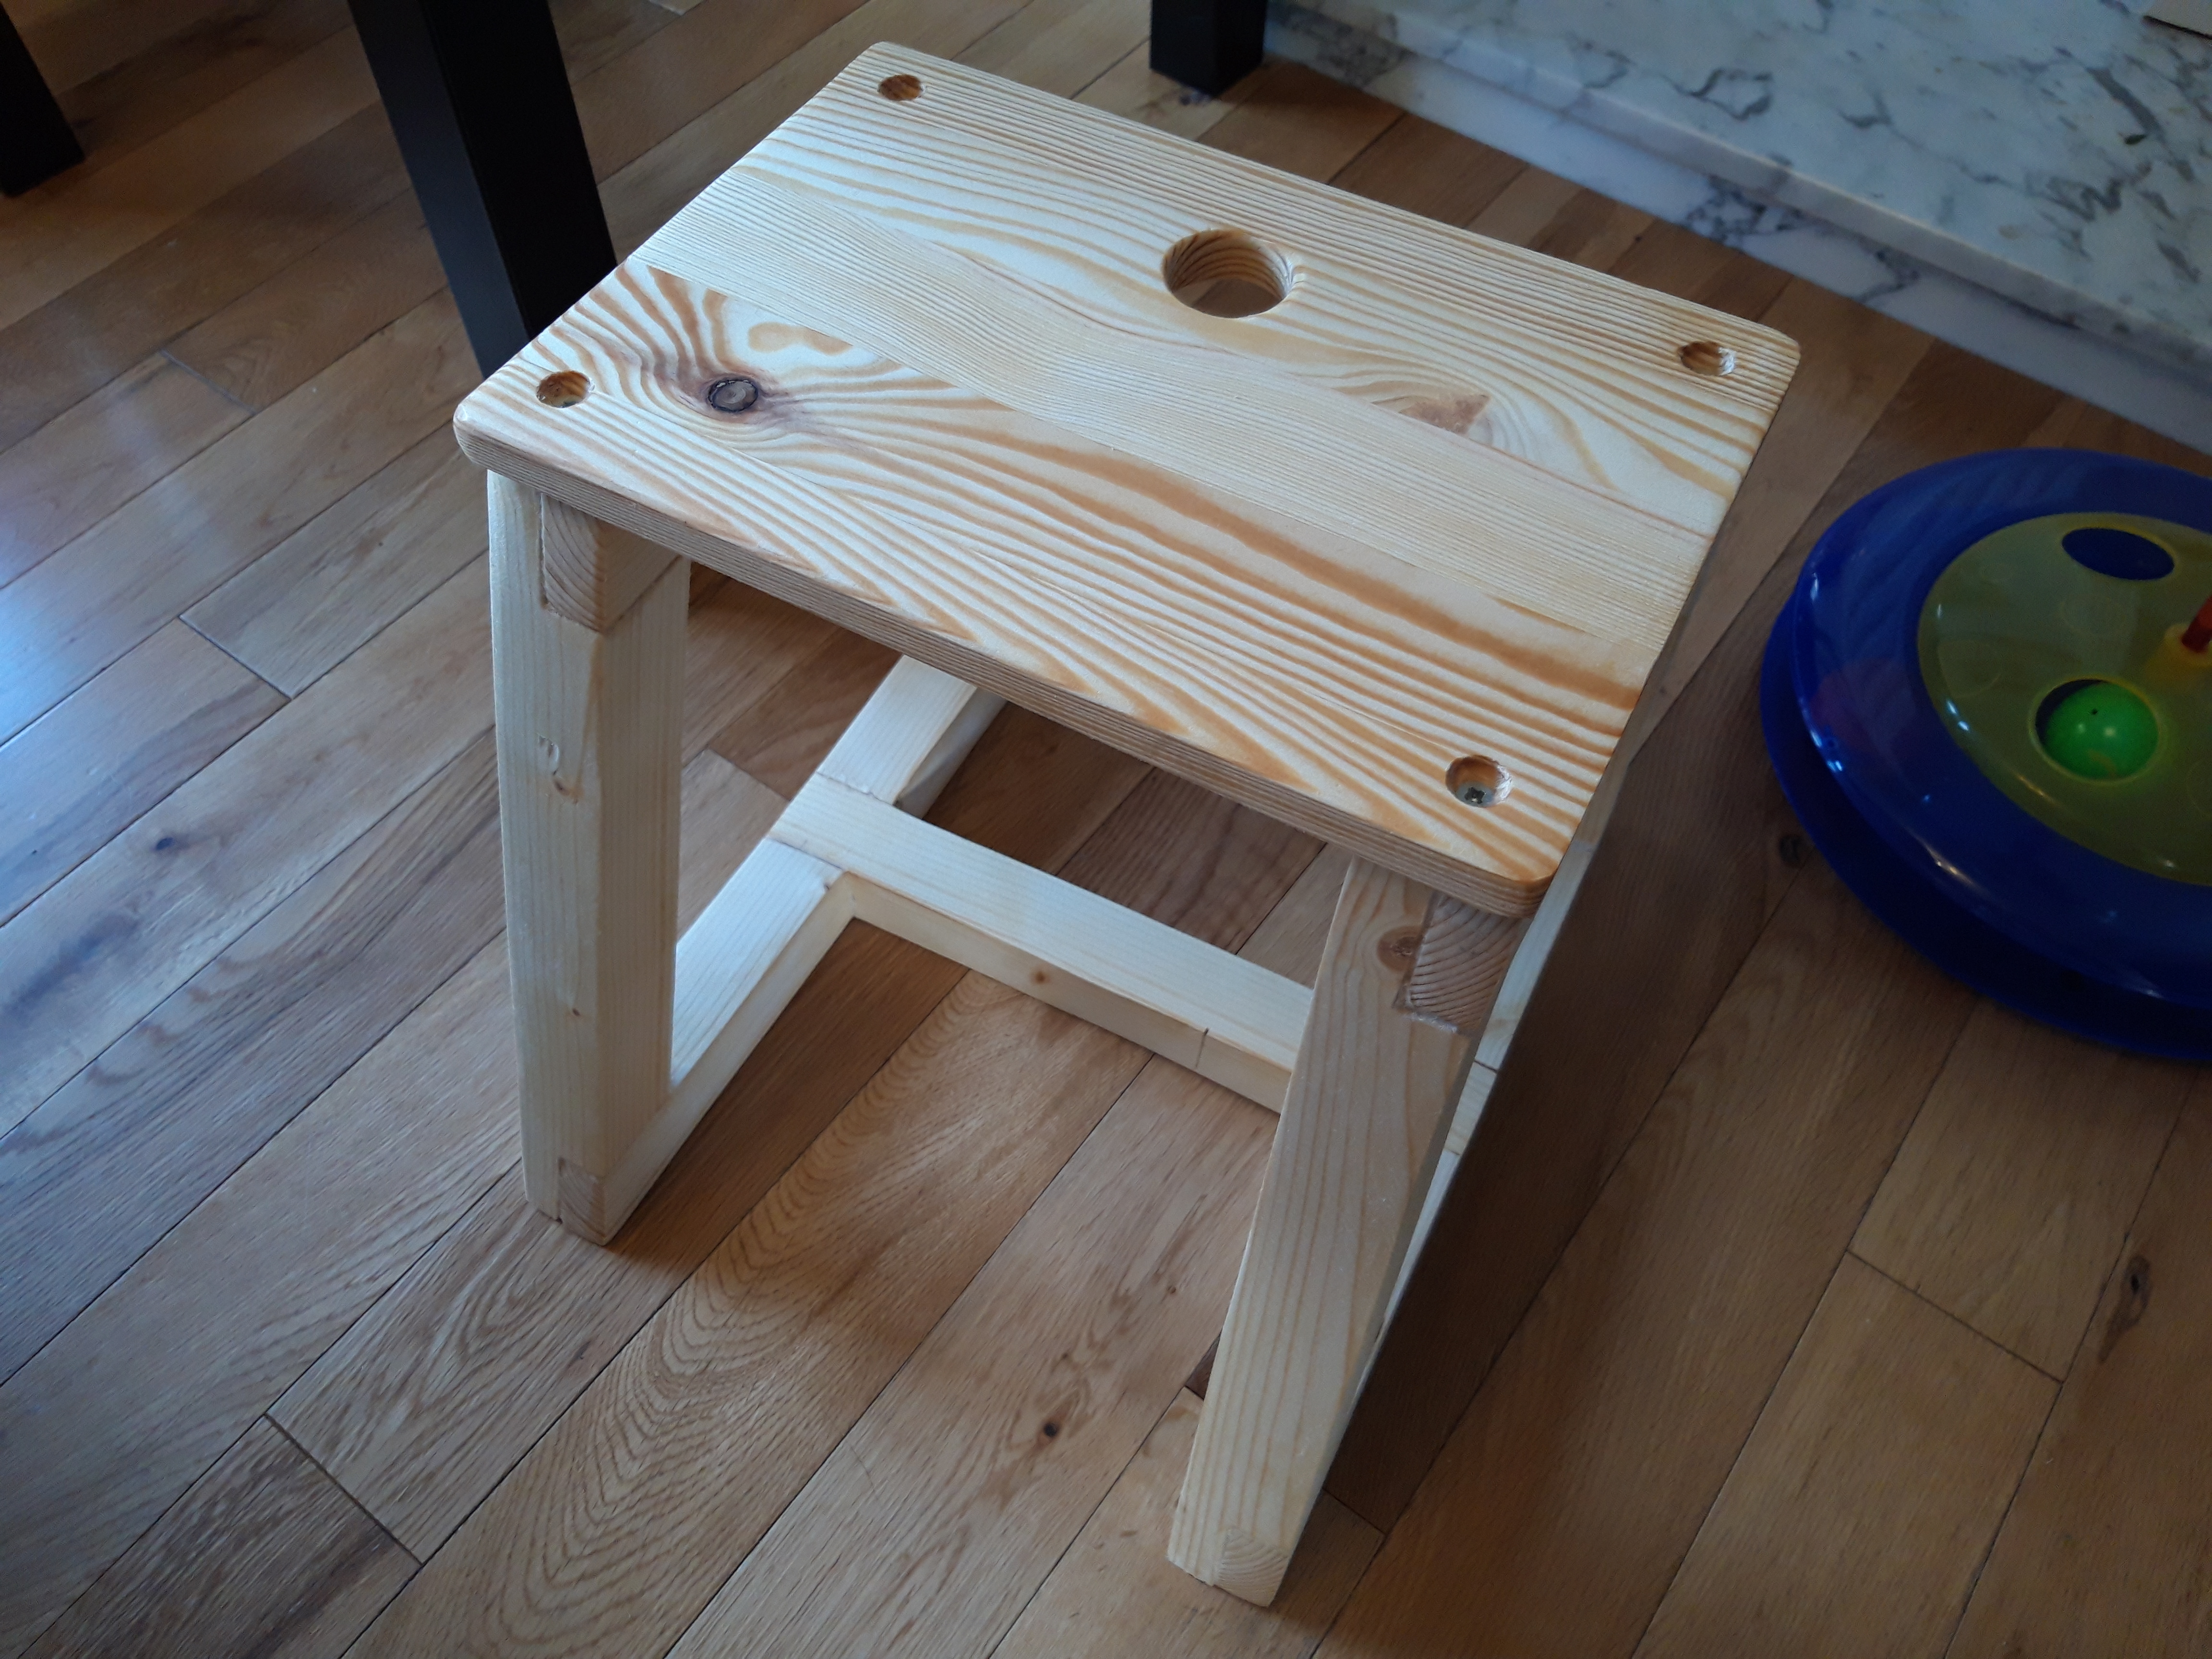
The stool itself is constructed from a single 2 x 4 (mine was a standard B&Q pine), which is ripped and crosscut (divided) into the various lengths required. At this point of my hobbying, I only have hand tools to work with, so some of the angled cuts were a bit tricky! I may have to try making this again in a few years when I have acquired some new tools! But I think I did a pretty good job – I did alter the top section of the stool and placed a single piece of scrap wood across the top (which I acquired free along with a load more!) to be the top surface, rather than several pieces combined. But that is part of the fun of woodworking – it’s highly personal, there is no real right answer as there’s always multiple ways of doing things, and there is a defined outcome – I now have a nice new stool in the living room!
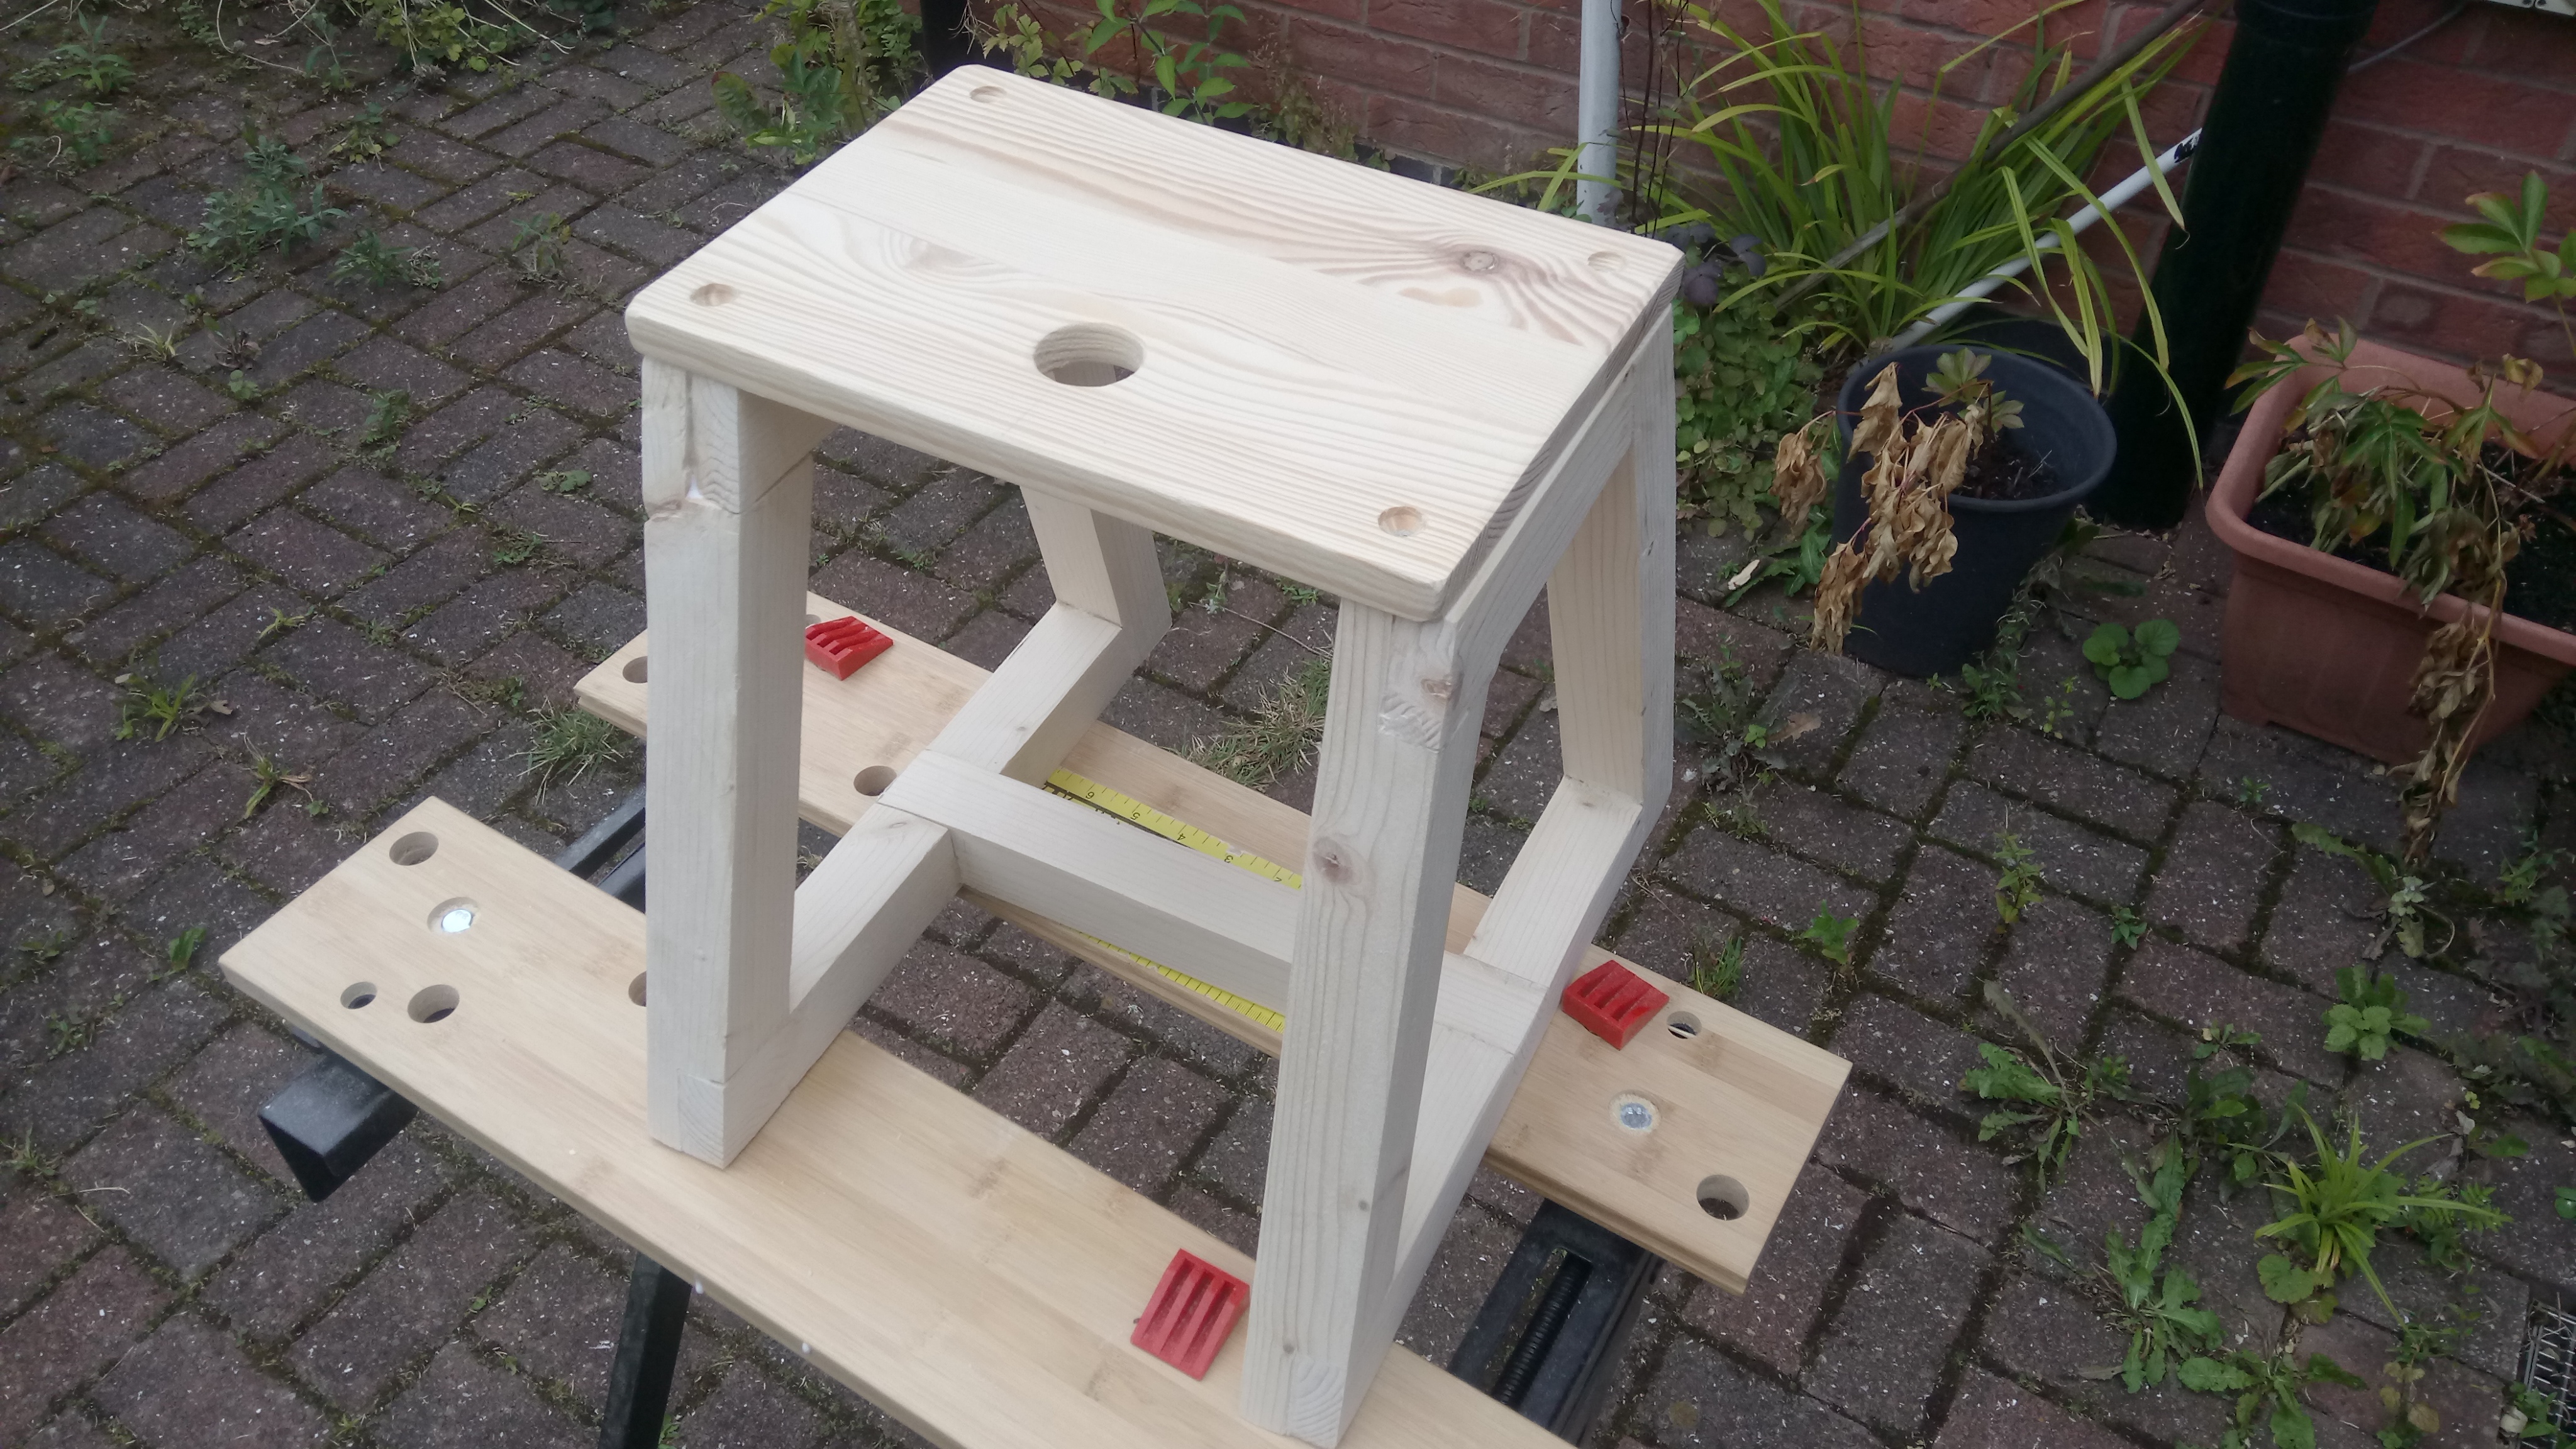
So once I had cut all the pieces to length I set about gluing it all together. As one of the other YouTubers [2] I follow has said – you can never have too many clamps! It actually took quite a while for me to cut all the pieces to size and then even longer for the glue up. I have since learned that it is useful to have several projects on the go simultaneously, so that you can carry on with the next stages of another project while the first one is held with clamps and drying! It is possible to glue and tack items to allow for progress to continue, but in this case I didn’t want to drive tacks into the legs as I was concerned they might split and I wasn’t exactly in a rush to finish. Quite the opposite in fact, as I am trying to enjoy each moment of creation, as part of my de-stressing and learning to overcome my perfectionist tendencies [see my blog post on perfectionism here]. So it actually took me a few months to complete this stool, principally because I don’t have in the current house, anywhere sheltered I can make things out of wood. Yes we have a garage, but the front has mats down and all my weights and punch bag and the back has shelves, the lawn mower and the garden furniture. So there’s not really any space for me to set up a work bench and I don’t really want to be filling the garage with saw dust if I’m going to be doing intensive workouts in it and deeply breathing in huge quantities of air! So I therefore had to rely on the wonderful British weather actually being nice and dry (or at least only slightly damp) so I could get outside and make a bit more progress before the next deluge arrived. And so this is how it was for a few months until I finally reached the point of the final assembly and glue up. And I know I have been quite vague as to how I have actually created the stool, but it is not my intention to use this blog as an instructional source but a merely discursive (and possibly entertaining) one, in which I can simply document and record all my projects. I will of course post links to the people from whom I obtained the plans for specific projects [I think intellectual property theft is a real problem sometimes] and anyone interested can obtain more detailed instructions from there.

Once the glue was applied, I wiped off the excess with some kitchen roll and left the stool to dry for a nice long time (several days actually due to the weather!). When I resumed the project, I gave the stool a thorough sanding, going from low grit sandpaper up to higher grits to ensure a nice smooth finish. I then applied a generous coat of linseed oil to bring out the grain and give it a bit of a finish. As this was my first project, I decided on a finish that would be easy to apply (rather than some solvent-based products that require face masks etc) and not break the bank! I did a lot of reading about linseed oil before using it, so as to make sure I didn’t run the risk of the discarded rags catching fire (as linseed oil oxidises in air after use, the oxidation reaction is highly exothermic within the rags. If this raises the temperature high enough – reportedly above temperatures as low as 120°C – the linseed soaked rags will spontaneously catch fire and result in flaming combustion!). I rinsed all the rags I used thoroughly and left them to dry outside stretched out to evaporate dry with nothing covering them. And nothing caught fire (this time!) so it was clearly the right approach.

So upon reflection, as this was my first project I am very aware of bits that could be improved – some of my joints were not perfect due to the inaccurate angles – but that’s what makes the stool personal and unique. And seeing as I’m using this hobby as a way to try and move away from a perfectionist mindset, if the stool looks “pretty good“, will take my weight without collapsing (it will, I jumped up and down on it!), and I’m proud of what I’ve made, then it was a resounding success. And it has been well used in the living room already, and the cats don’t seem to totally hate it either. So here’s looking forward to starting the next project – I already have so many ideas of what to make next! 🔨
[1] Plans for the Utility step stool here
[2] April Wilkerson – another YouTuber I love watching, who has shown that anyone can learn to make amazing things!

1 thought on “An indisPINEsable Utility Stool – my first project!”