One of the main problems I’ve found since I started wood working as a hobby is where to store all the various pieces of wood I have been accumulating! I only have a small space at the back of the garage (which is also my home gym, where we store garden furniture, and the home for the mower and my pedal bike!) in which to keep everything and as I have been trying to avoid spending excessive amounts (it’s very difficult with a new hobby!), I have tried to acquire as many free pallets and as much scrap wood as possible for my projects.

Pallet disassembly – successfully salvaging lots of planks for projects
This led to interesting attempts to break apart pallets with a range of tools, trying to salvage as much usable wood as possible. Following attempts with a hammer, a crowbar and much levering, I now have the Roughneck Pallet Buster which I got through Amazon here. I really like the tool and it meant I managed to save ALL of the planks off several pallets, even ones with lots of nails- I now have quite a few different pieces of wood of varying sizes!

So now that I have so many different pieces of wood, I needed some way of organising it all, so as to keep the garage at least vaguely tidy! I do have several reasonably large pieces of sheet wood (mdf, plywood etc) which I obtained from the reduced section at my local B&Q. These are currently taking up a small amount of space at the side of the garage , but I decided I needed some kind of container for all of the planks and smaller pieces so as to prevent them just being in a heap. I looked into what other people do in their setup and planned out and started making a very sturdy crate (possibly over engineered!) with a relatively small footprint and in which I could stand up a large number of planks without it falling over. The first step was making a sturdy frame for the outside of the crate. As I will undoubtedly make changes in future as I accumulate more (!) wood and hopefully more space (we will be moving house at some point in the next 6 months), I decided to secure the various sections with wood screws so I can diassemble it again if needed.

In order to avoid splitting the wood (that I worked so hard to salvage!) I made sure to pre-drill all the joints before screwing it together. The base was made out of 4 pieces of pallet slats, which I cut to size and spaced evenly using a small wedge divider. I decided to leave a gap between the slats to allow air to circulate so as to prevent the wood at the bottom of the crate from getting damp, particularly as the wood will probably be kept in the back of my garage for quite a few months before I use it. And it’s England so it rains so much of the time!
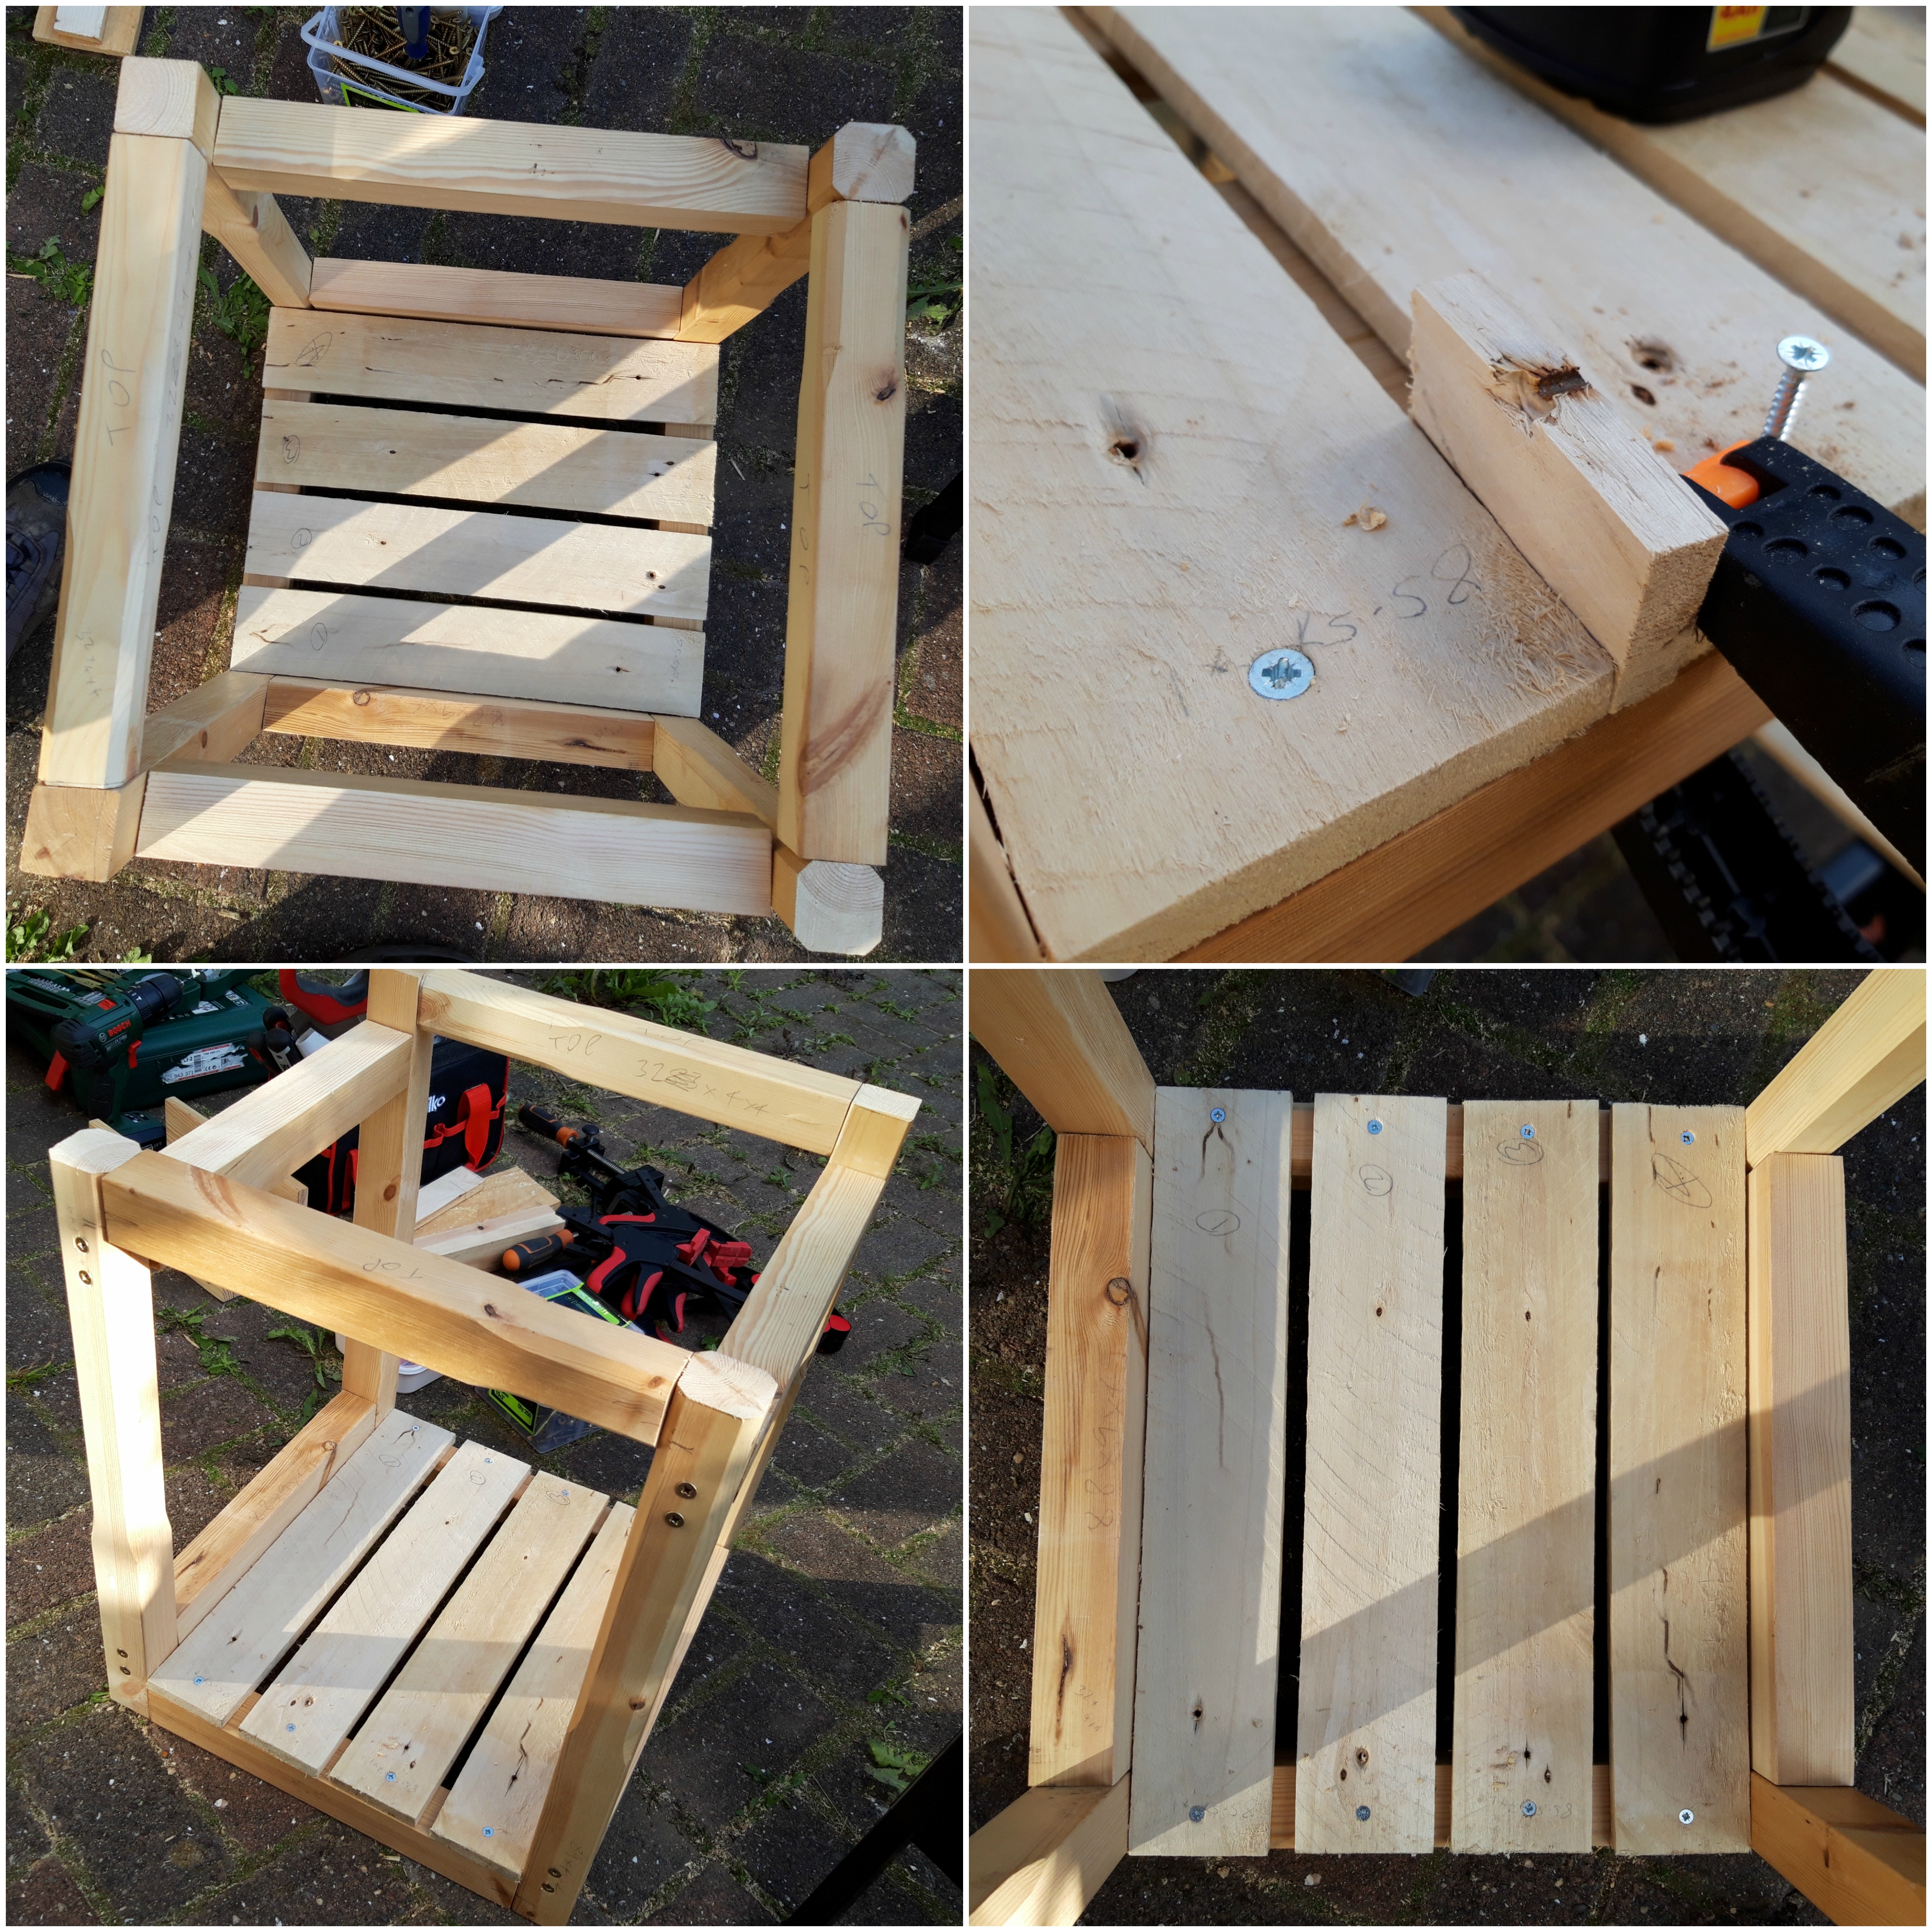
The rest of the crate was then completed with multiple slats on each of the four sides, again secured with pre-drilled screws to allow me to make changes or reuse the wood in future. The combination of the solid frame with the slats around the outside makes for a very sturdy construction and there is no warping or flexing.
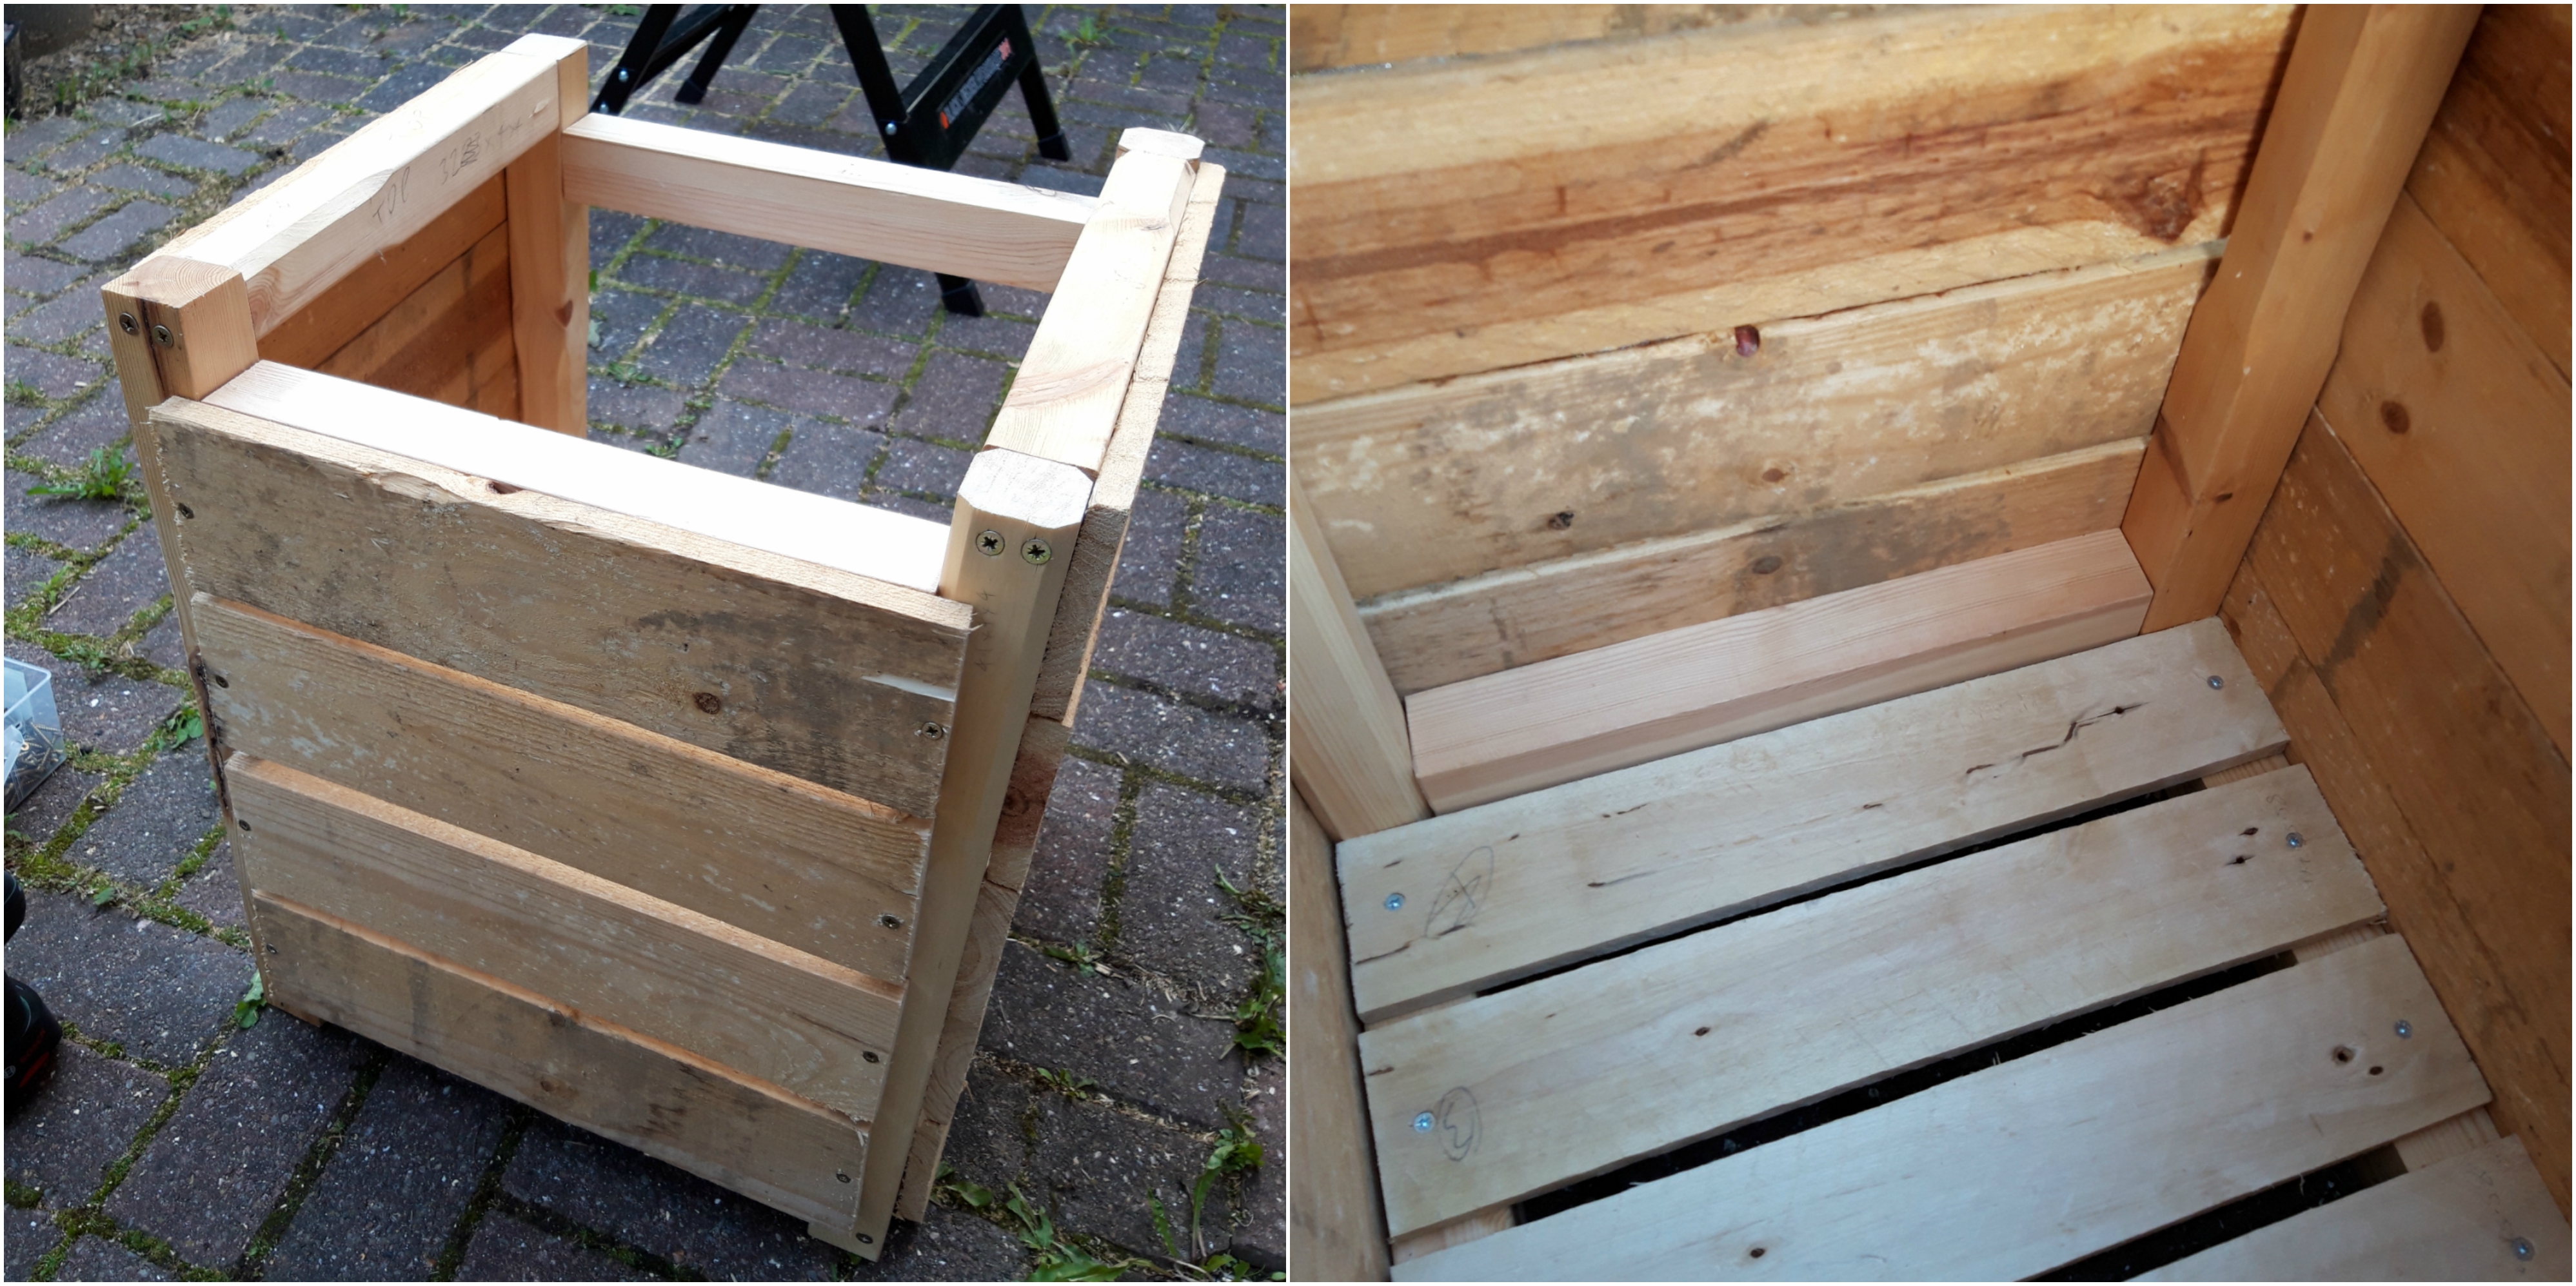

I finished off the crate by notching out sections in the side of the frame to allow me to fit a central beam to divide the crate into two sections. This means I can store longer pieces in one side and still access shorter pieces in the other without having to dig through the whole crate to find what I want! So now that I have all of this wood nice and neatly arranged, I can start planning what I am going to make next- I have a lot of ideas and I will continue to share them with you all going forwards. This was my first project for my “shop” so I will probably have quite a few more shop projects in future to help organise and tidy everything! 🔨

7 thoughts on “Sawlving the problem of Wood Storage”