At work every Christmas they organise a Secret Santa involving making things to encourage everyone to bring out their creative side and to not require a huge expense from people at a very expensive time of year. As I only started in October 2018 I was yet to experience this tradition, but this year the present idea was name labels for our filling cabinets. We will be moving to a new location over the next few months (which is why I will be moving house soon too) and will be having individual lockers there for our stuff, which was the main purpose of the name labels.

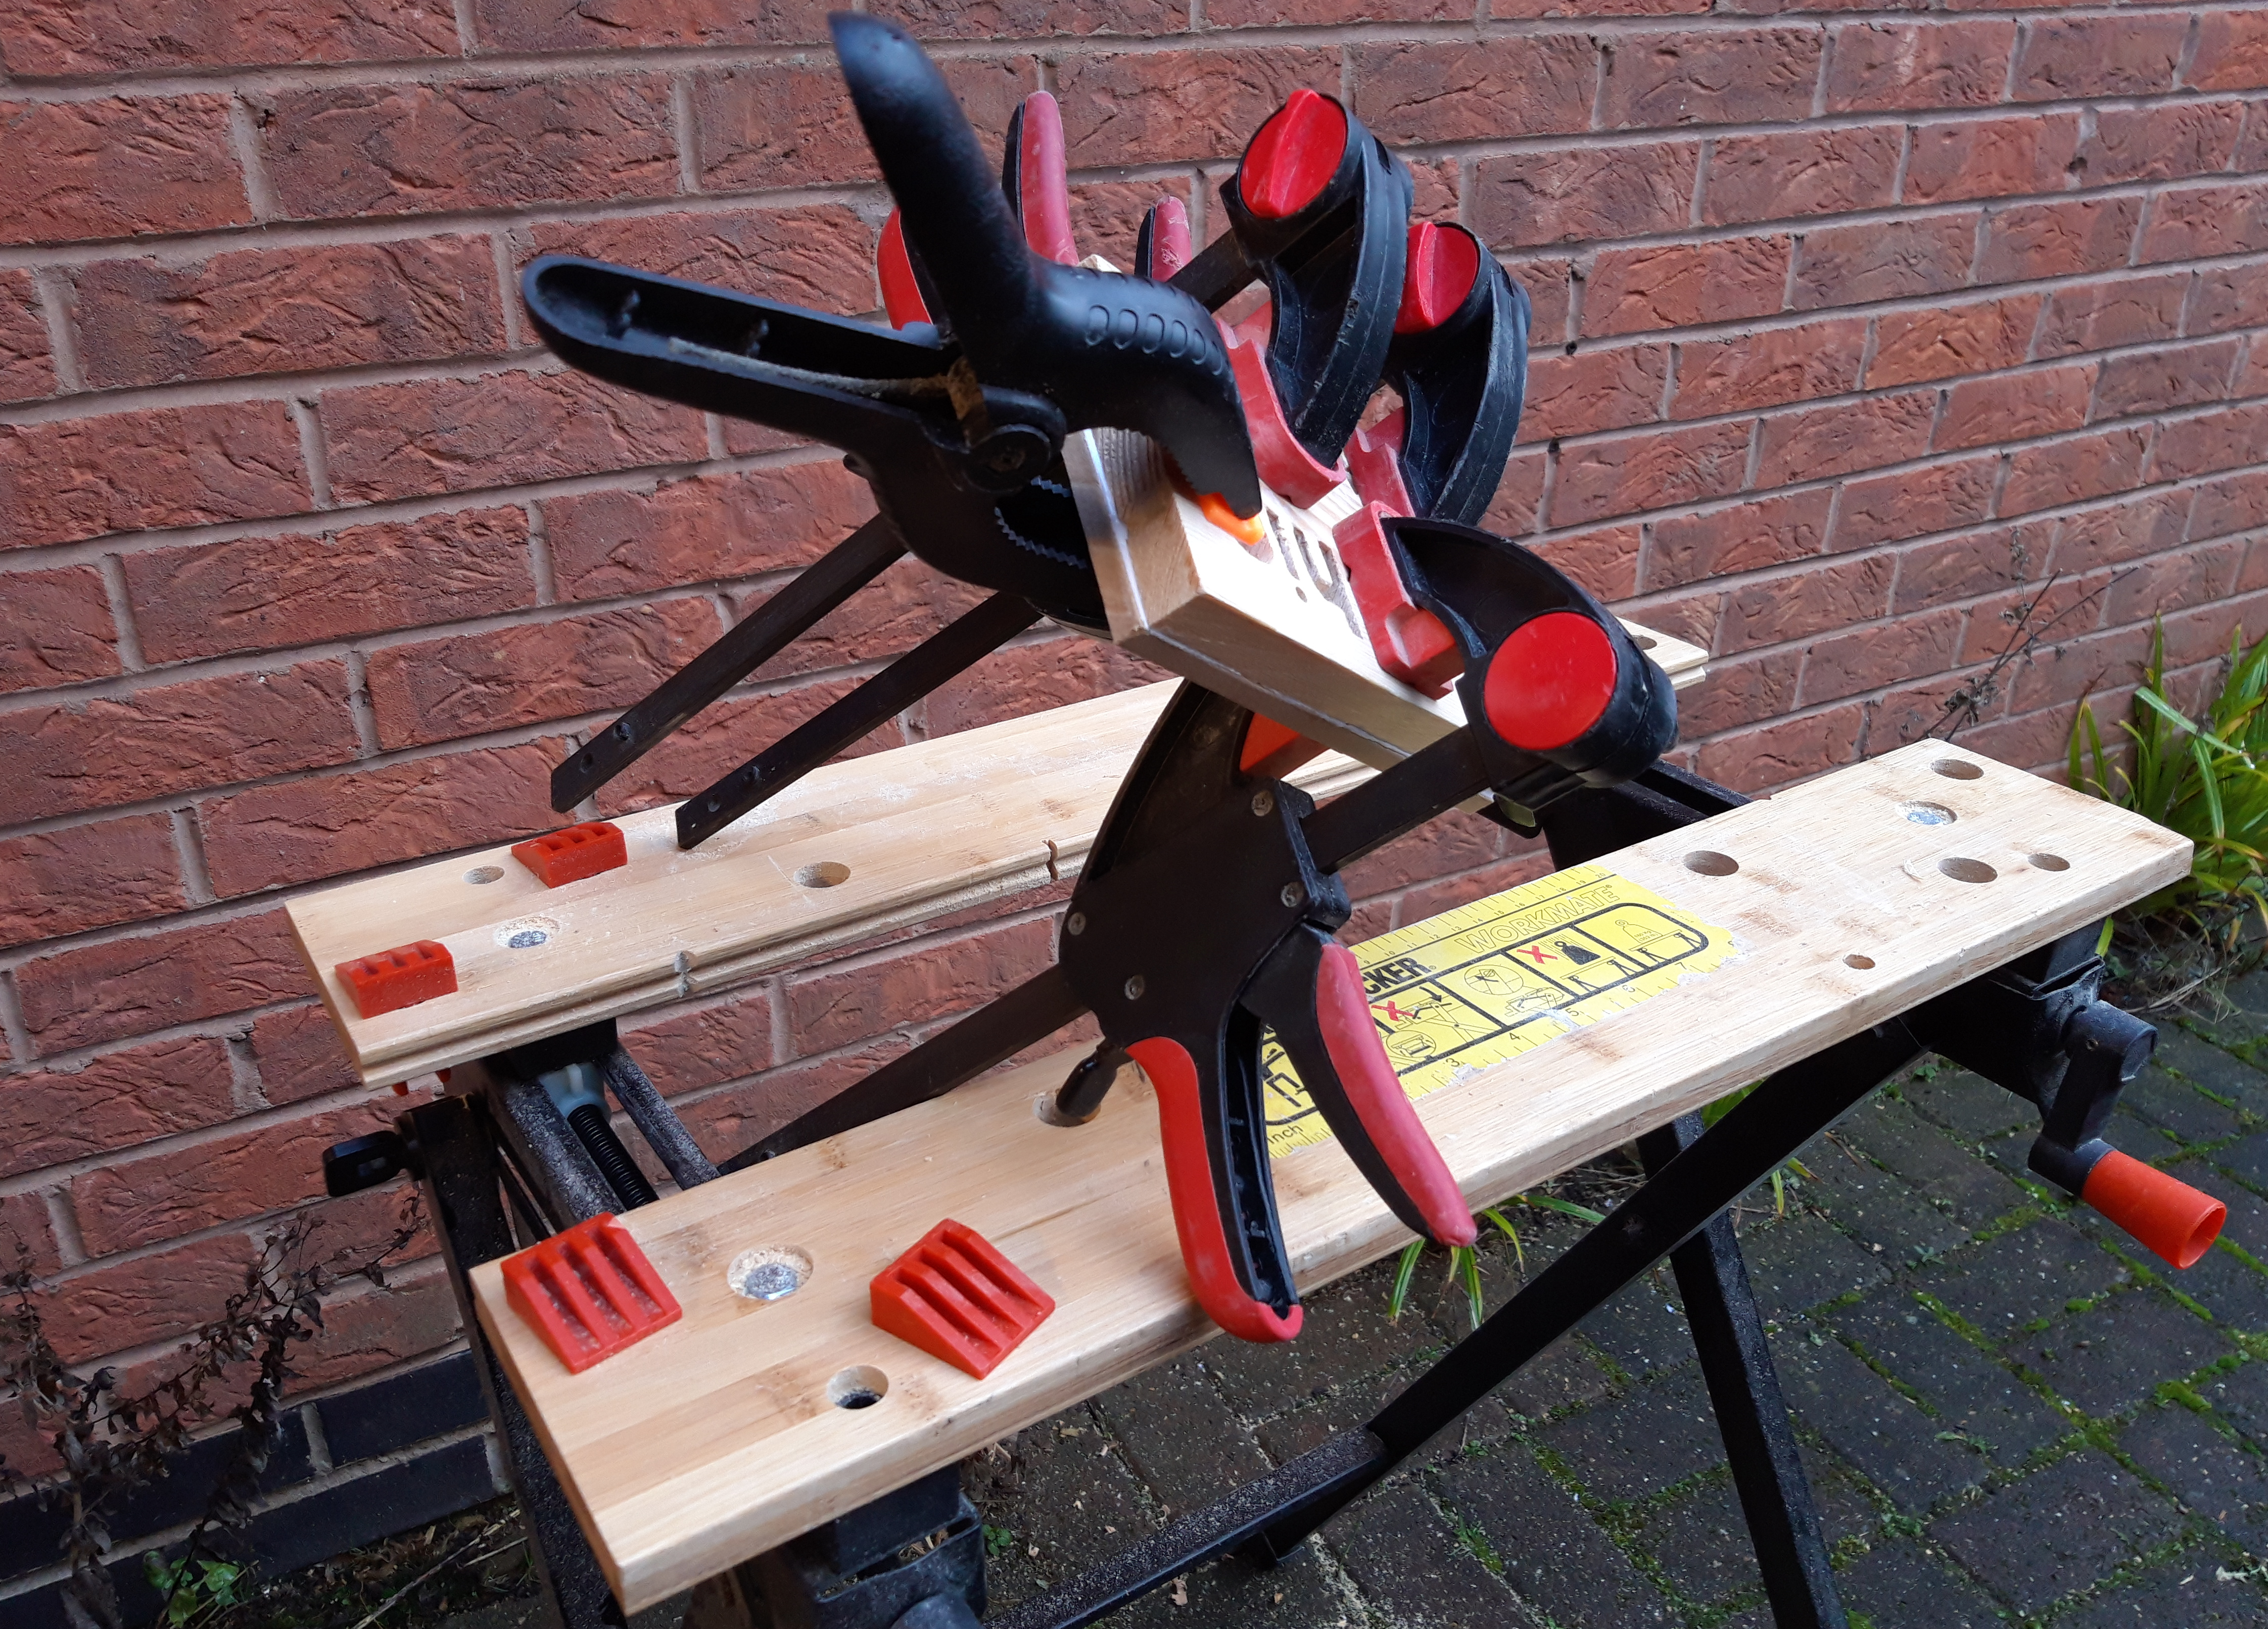
I drew one of my colleagues called Sophie out of the metaphorical hat (actually a small bag!) and set about planning on how to make it an interesting name label. As I am pretty terrible at drawing and painting – pretty much anything requiring fine motor control – I decided I would make her label out of wood. Plus it would be a fun way for me to learn new skills and to try out my new jigsaw which was a present to myself for Christmas! As with all my projects, I planned it out first and found a nice piece of wood to use (actually one of the off-cuts from the top of this stool). I then set about drilling out all the letters so I could fit in the jigsaw blade to cut out the rest of the letters.
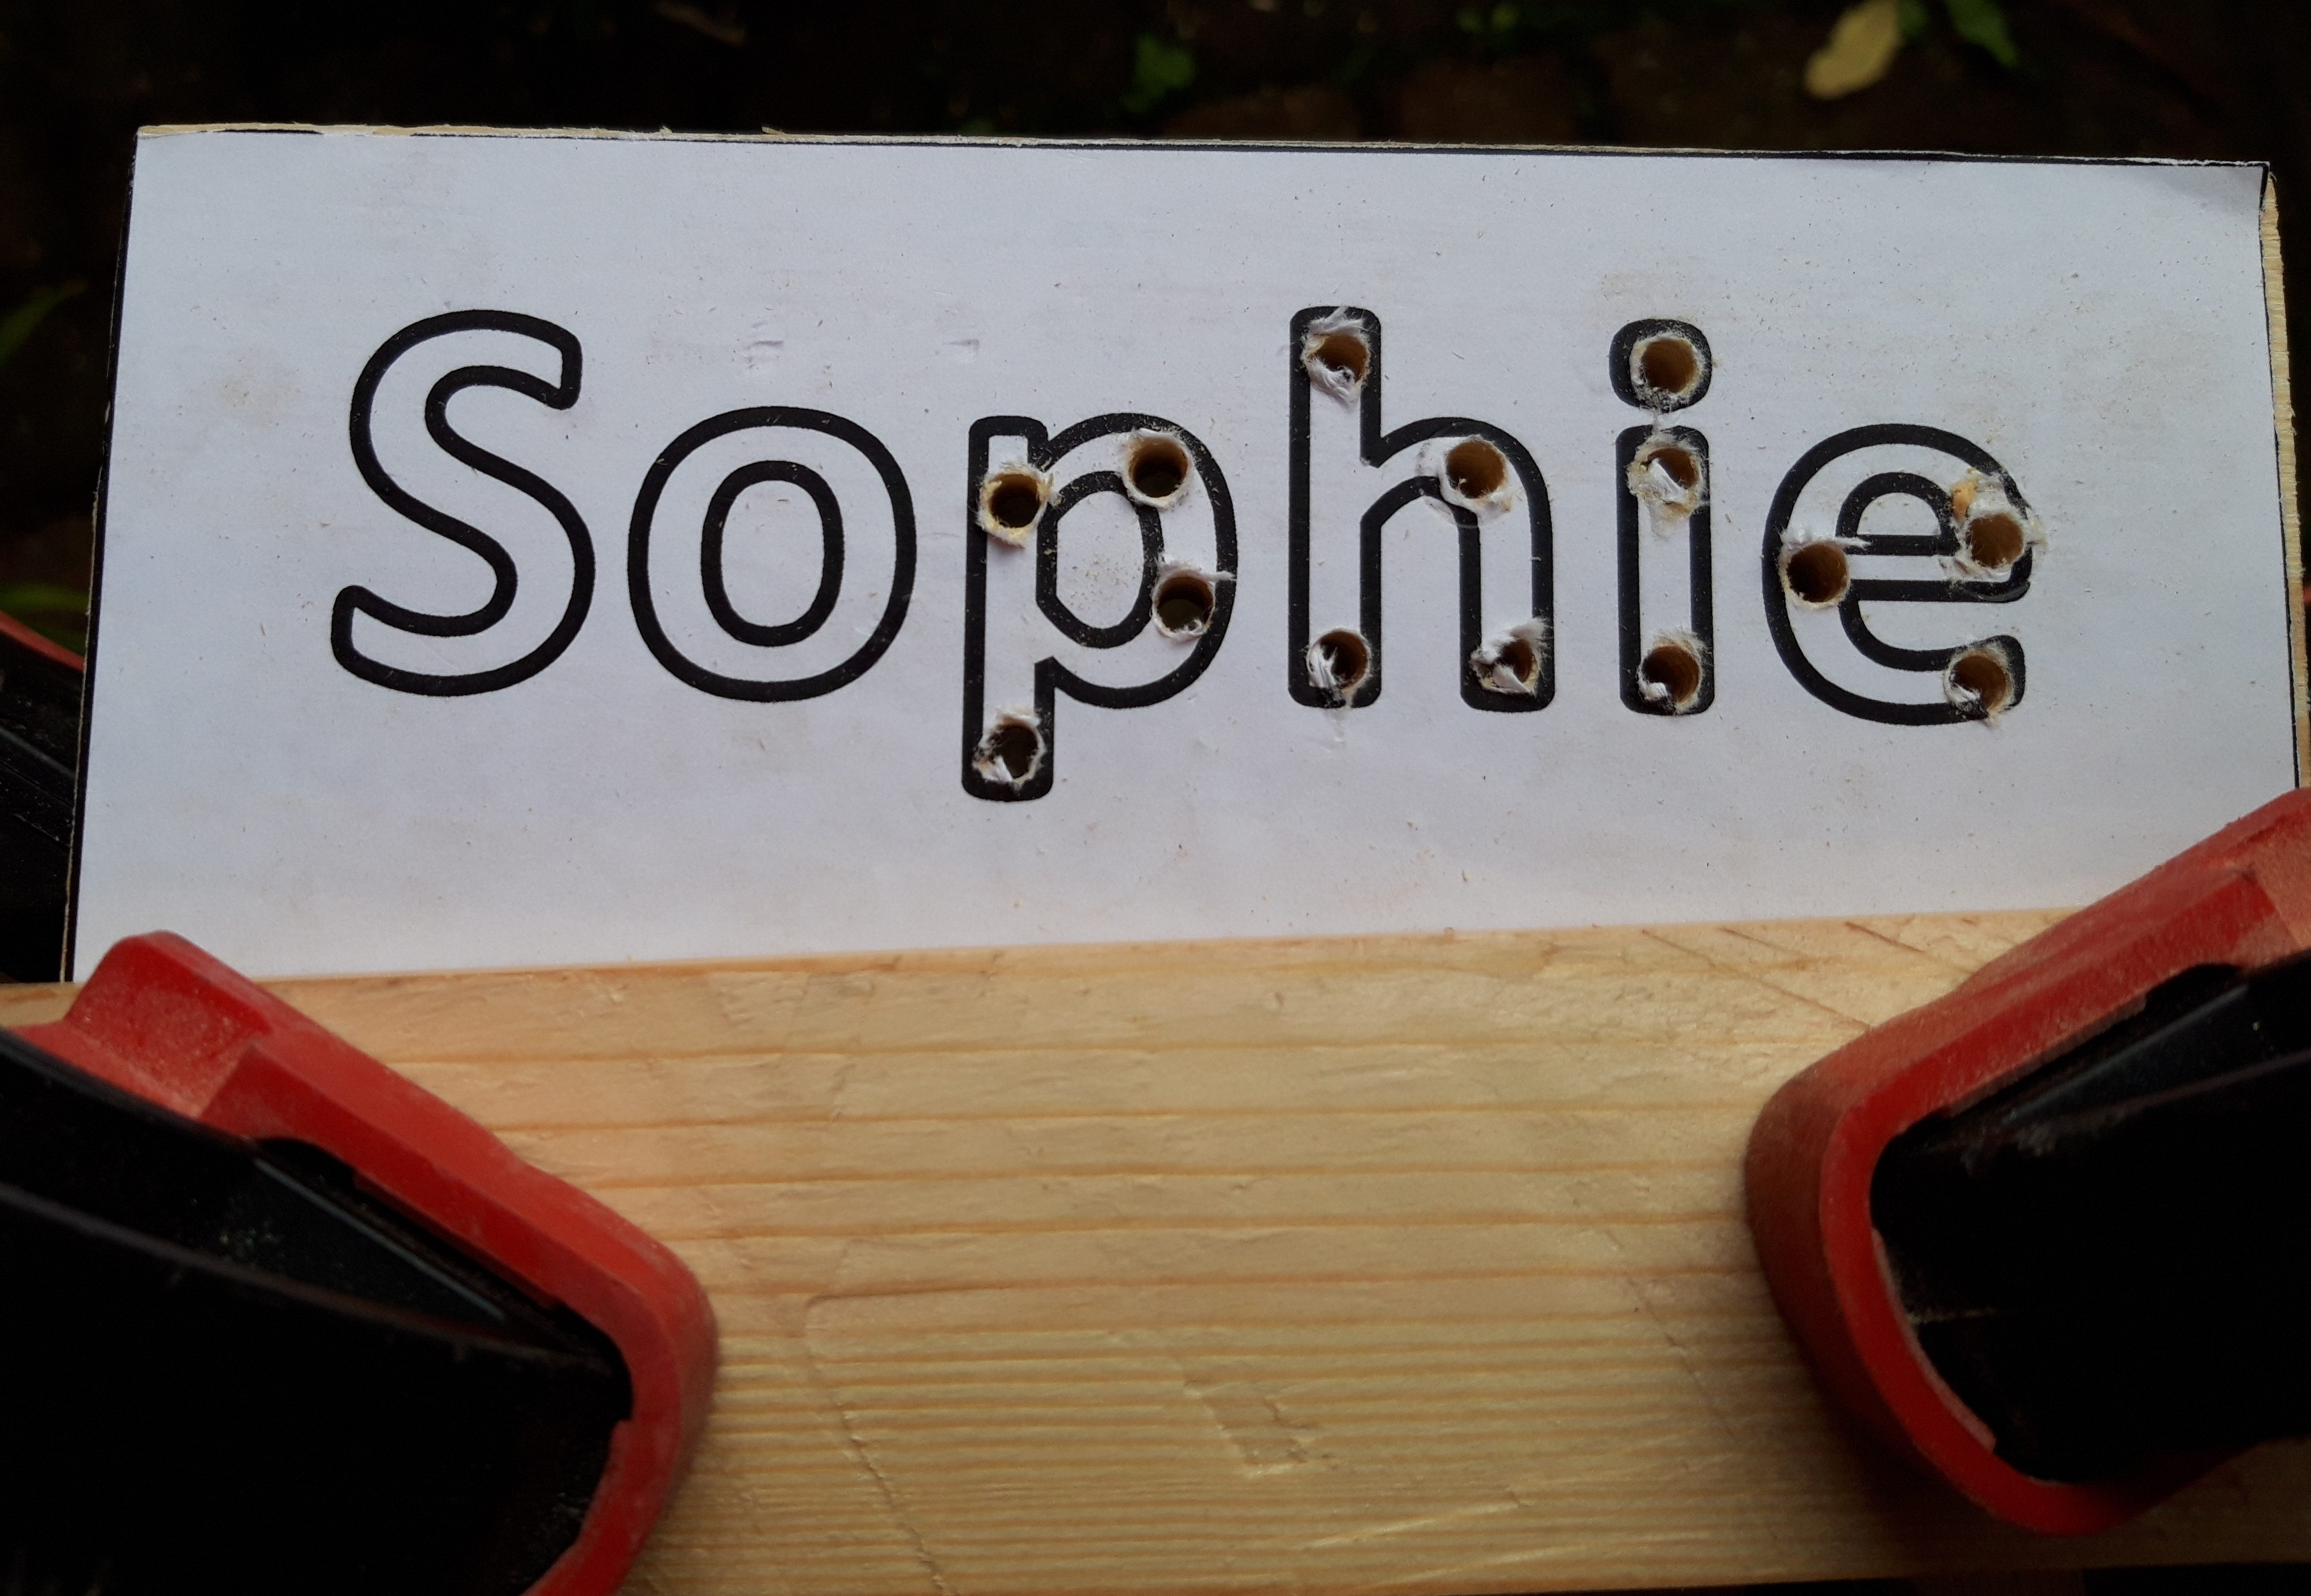
The jigsaw made cutting out the letters particularly easy – I did try initially using my coping saw, but this required me to remove the blade and insert it into every letter which took a long time, was very fiddly (not good for someone with poor hand-eye coordination for small movements!) and was quite frustrating due to the amount of time it took to do a single letter. So the jigsaw was a massive help and I managed to cut all the letters out with relative ease in a short space of time.
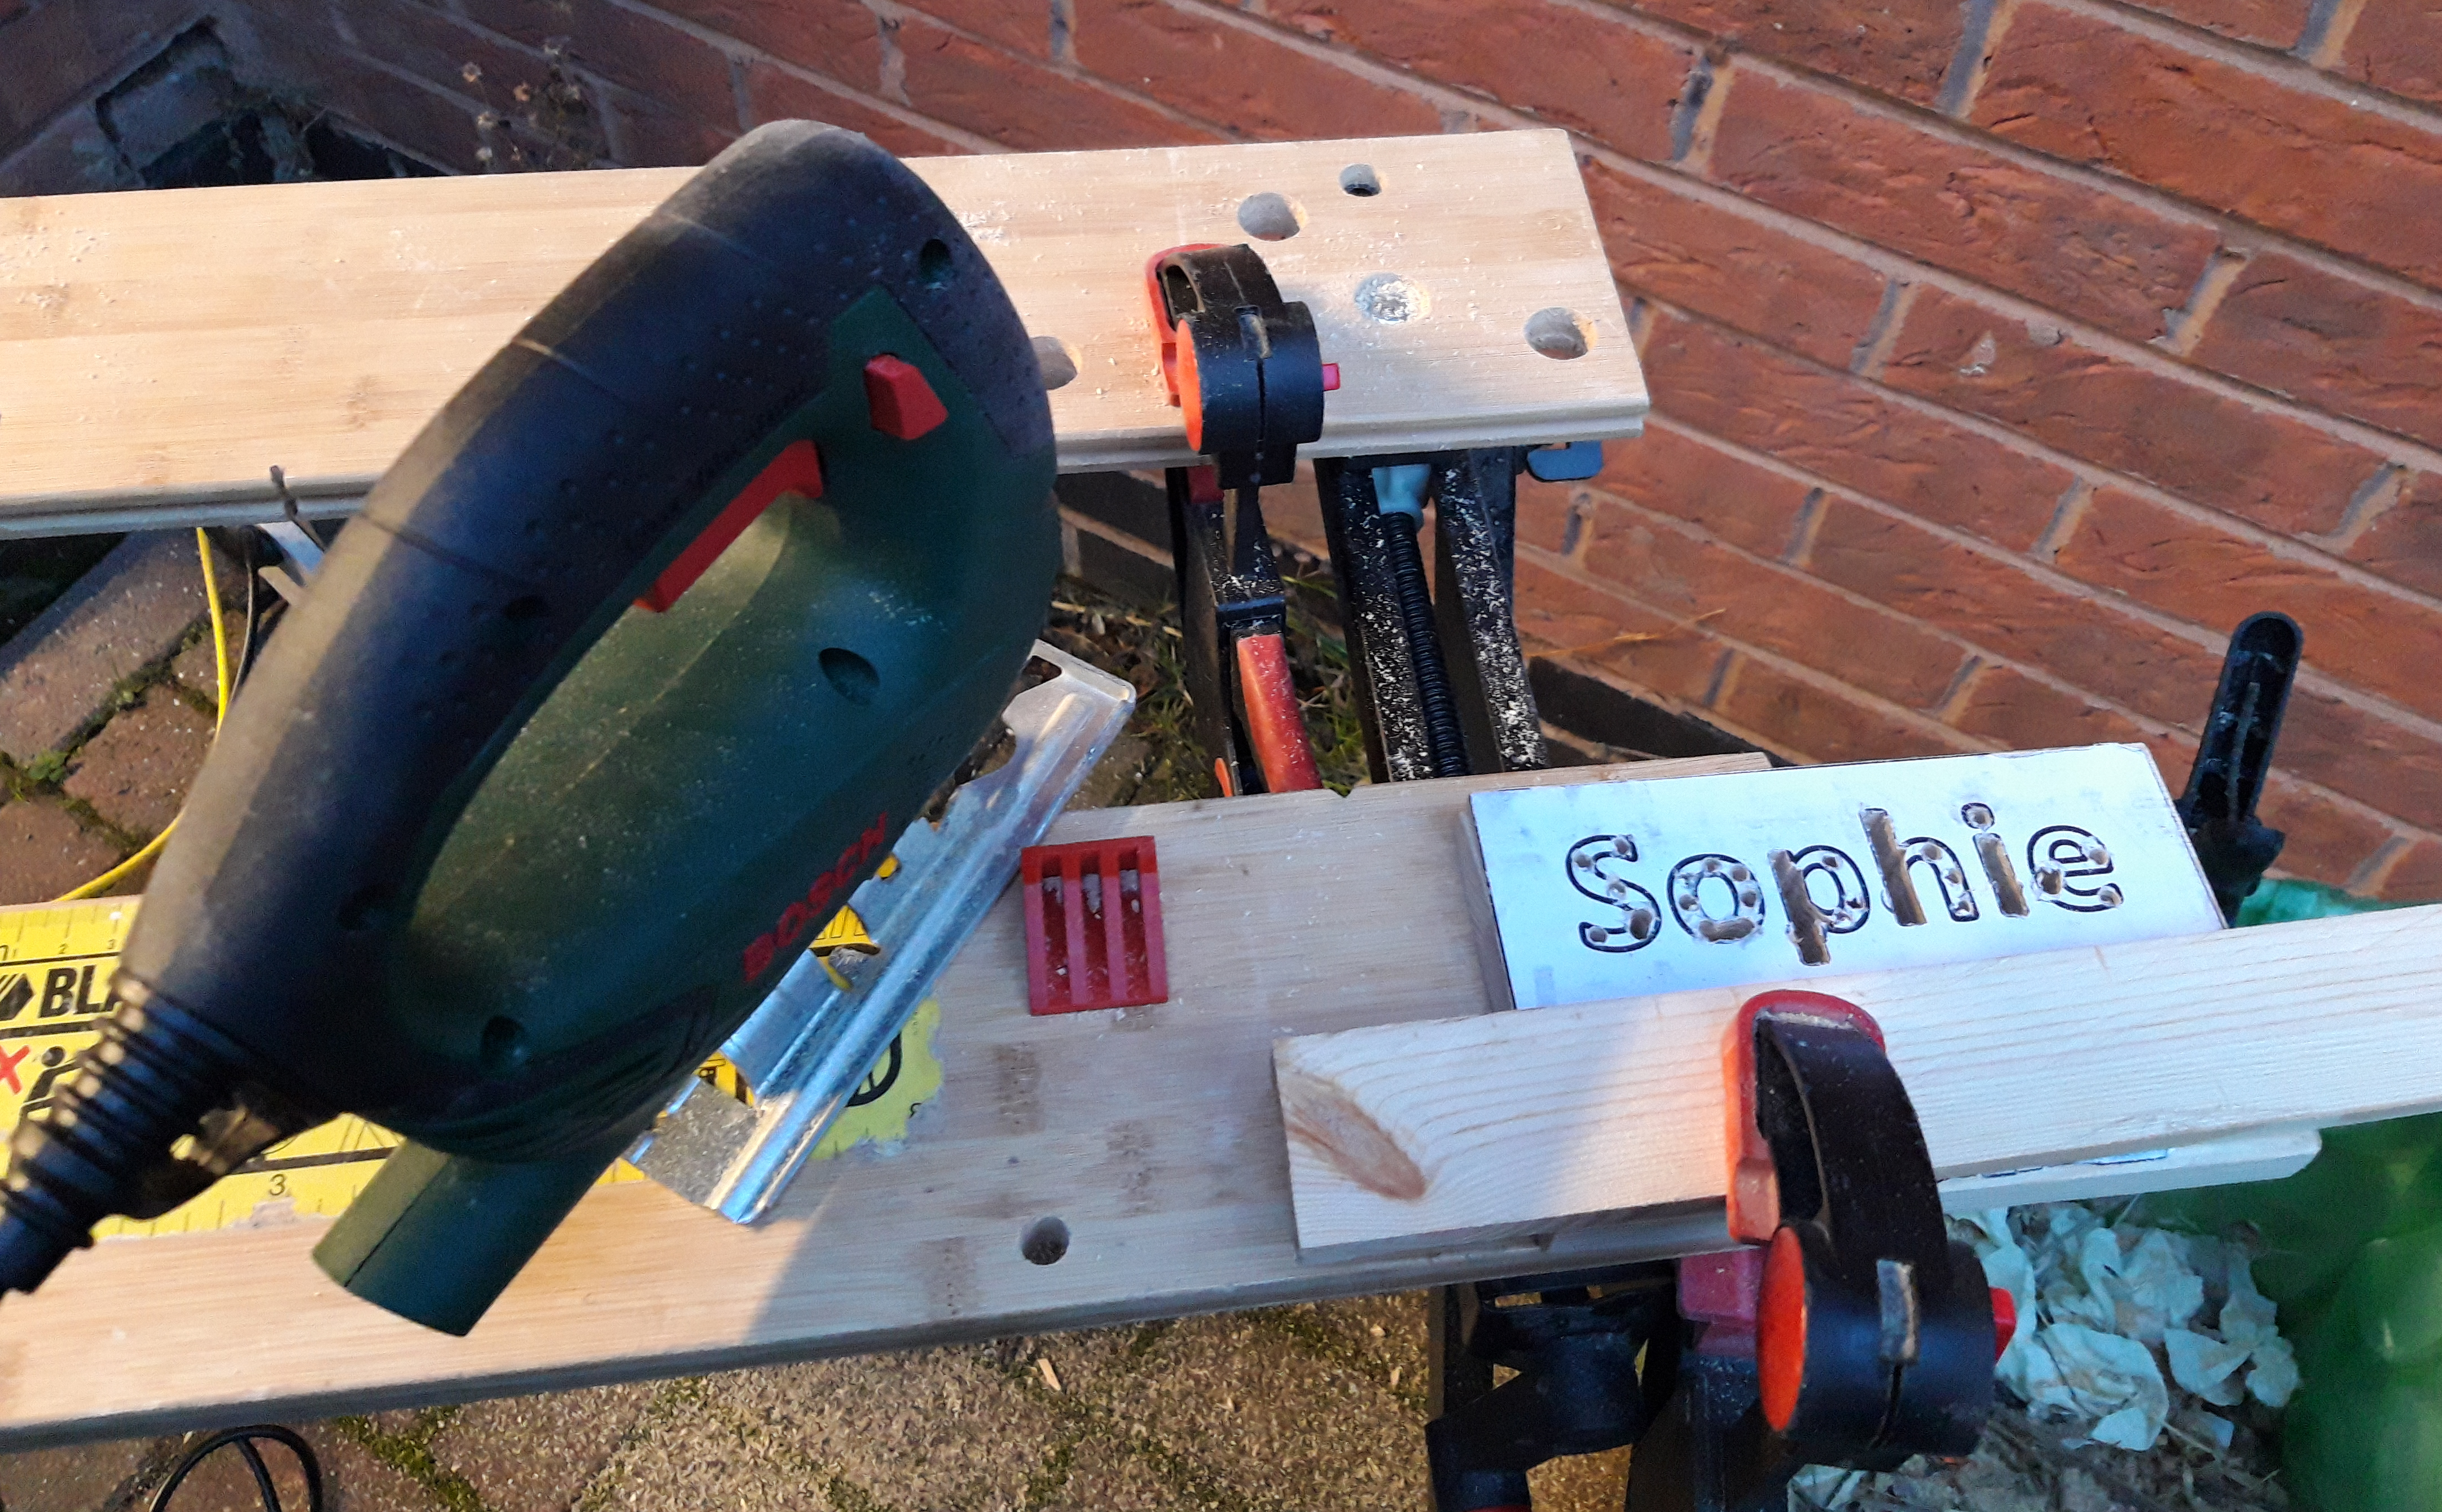
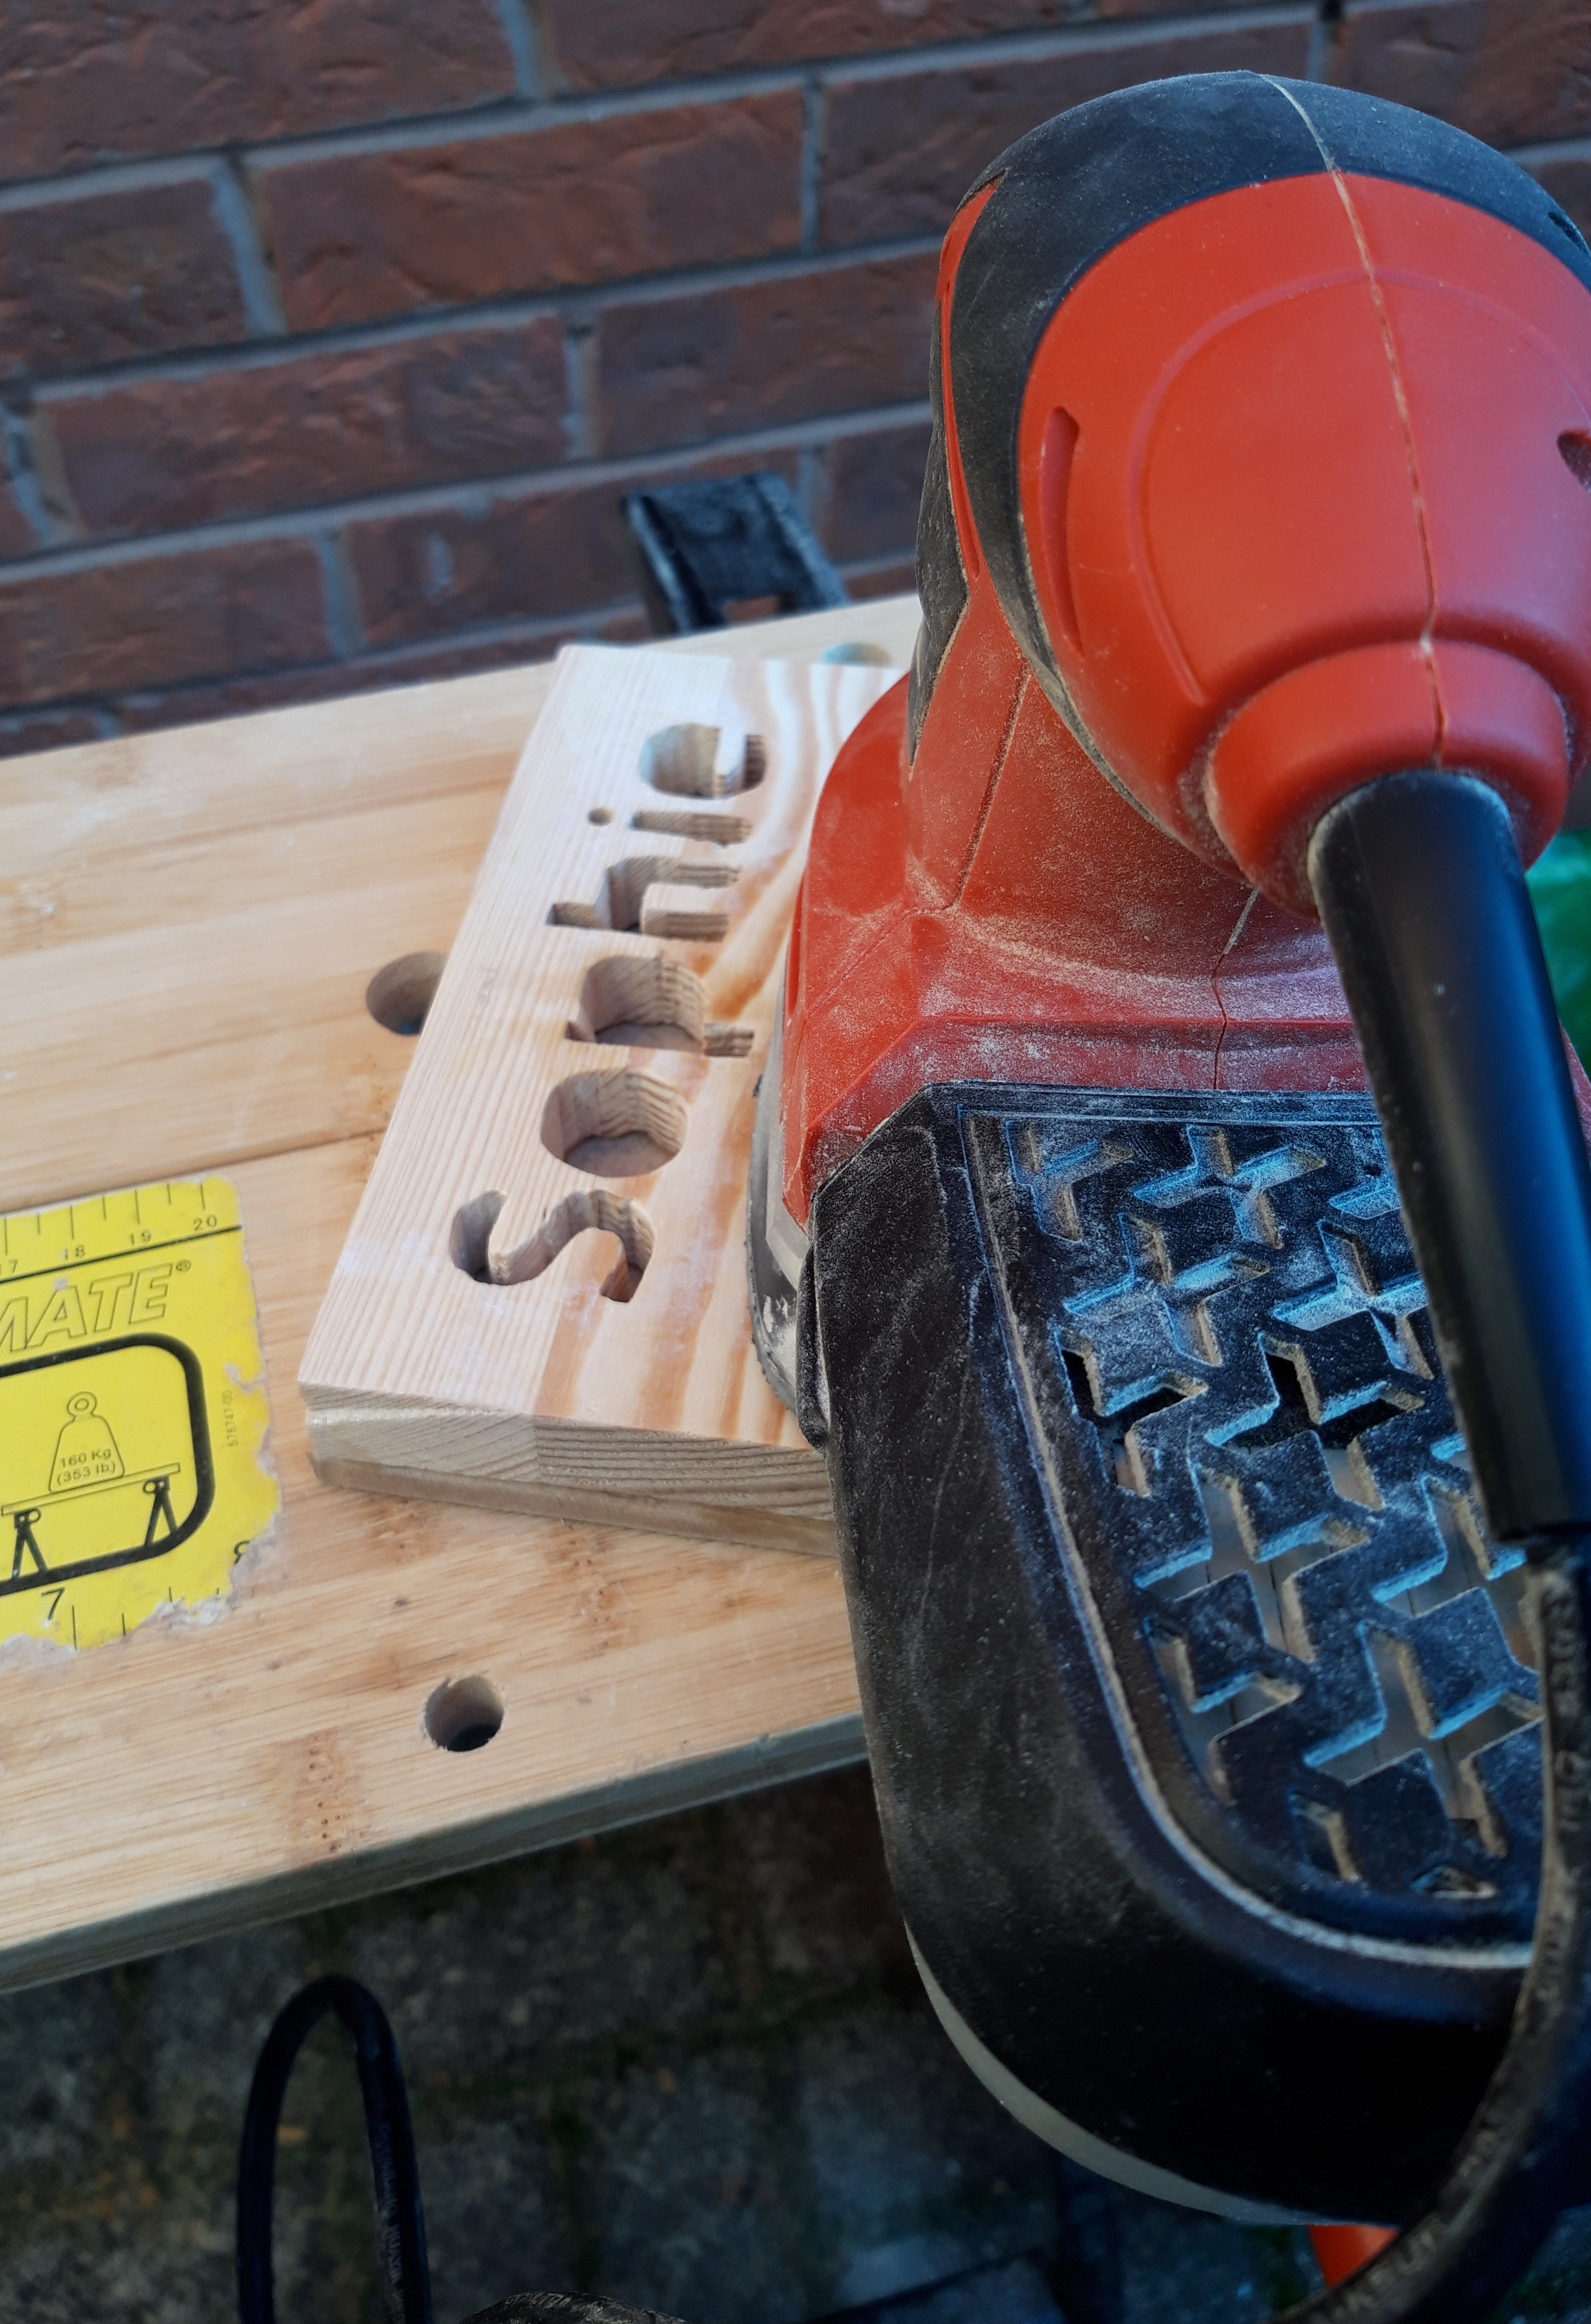
Once I had finished cutting out all the letters I then got comfortable on my one-board stool and set about sanding all of the various inside surfaces of the letters to smooth them out. This understandably took quite a while, particularly as some of the letters, like the “p” and the “e” were quite fiddly and required me to fold the sandpaper into a very thing strip. But I was very happy with the result when I finished and I could definitely see an improvement from the somewhat jagged cut lines present when I started.
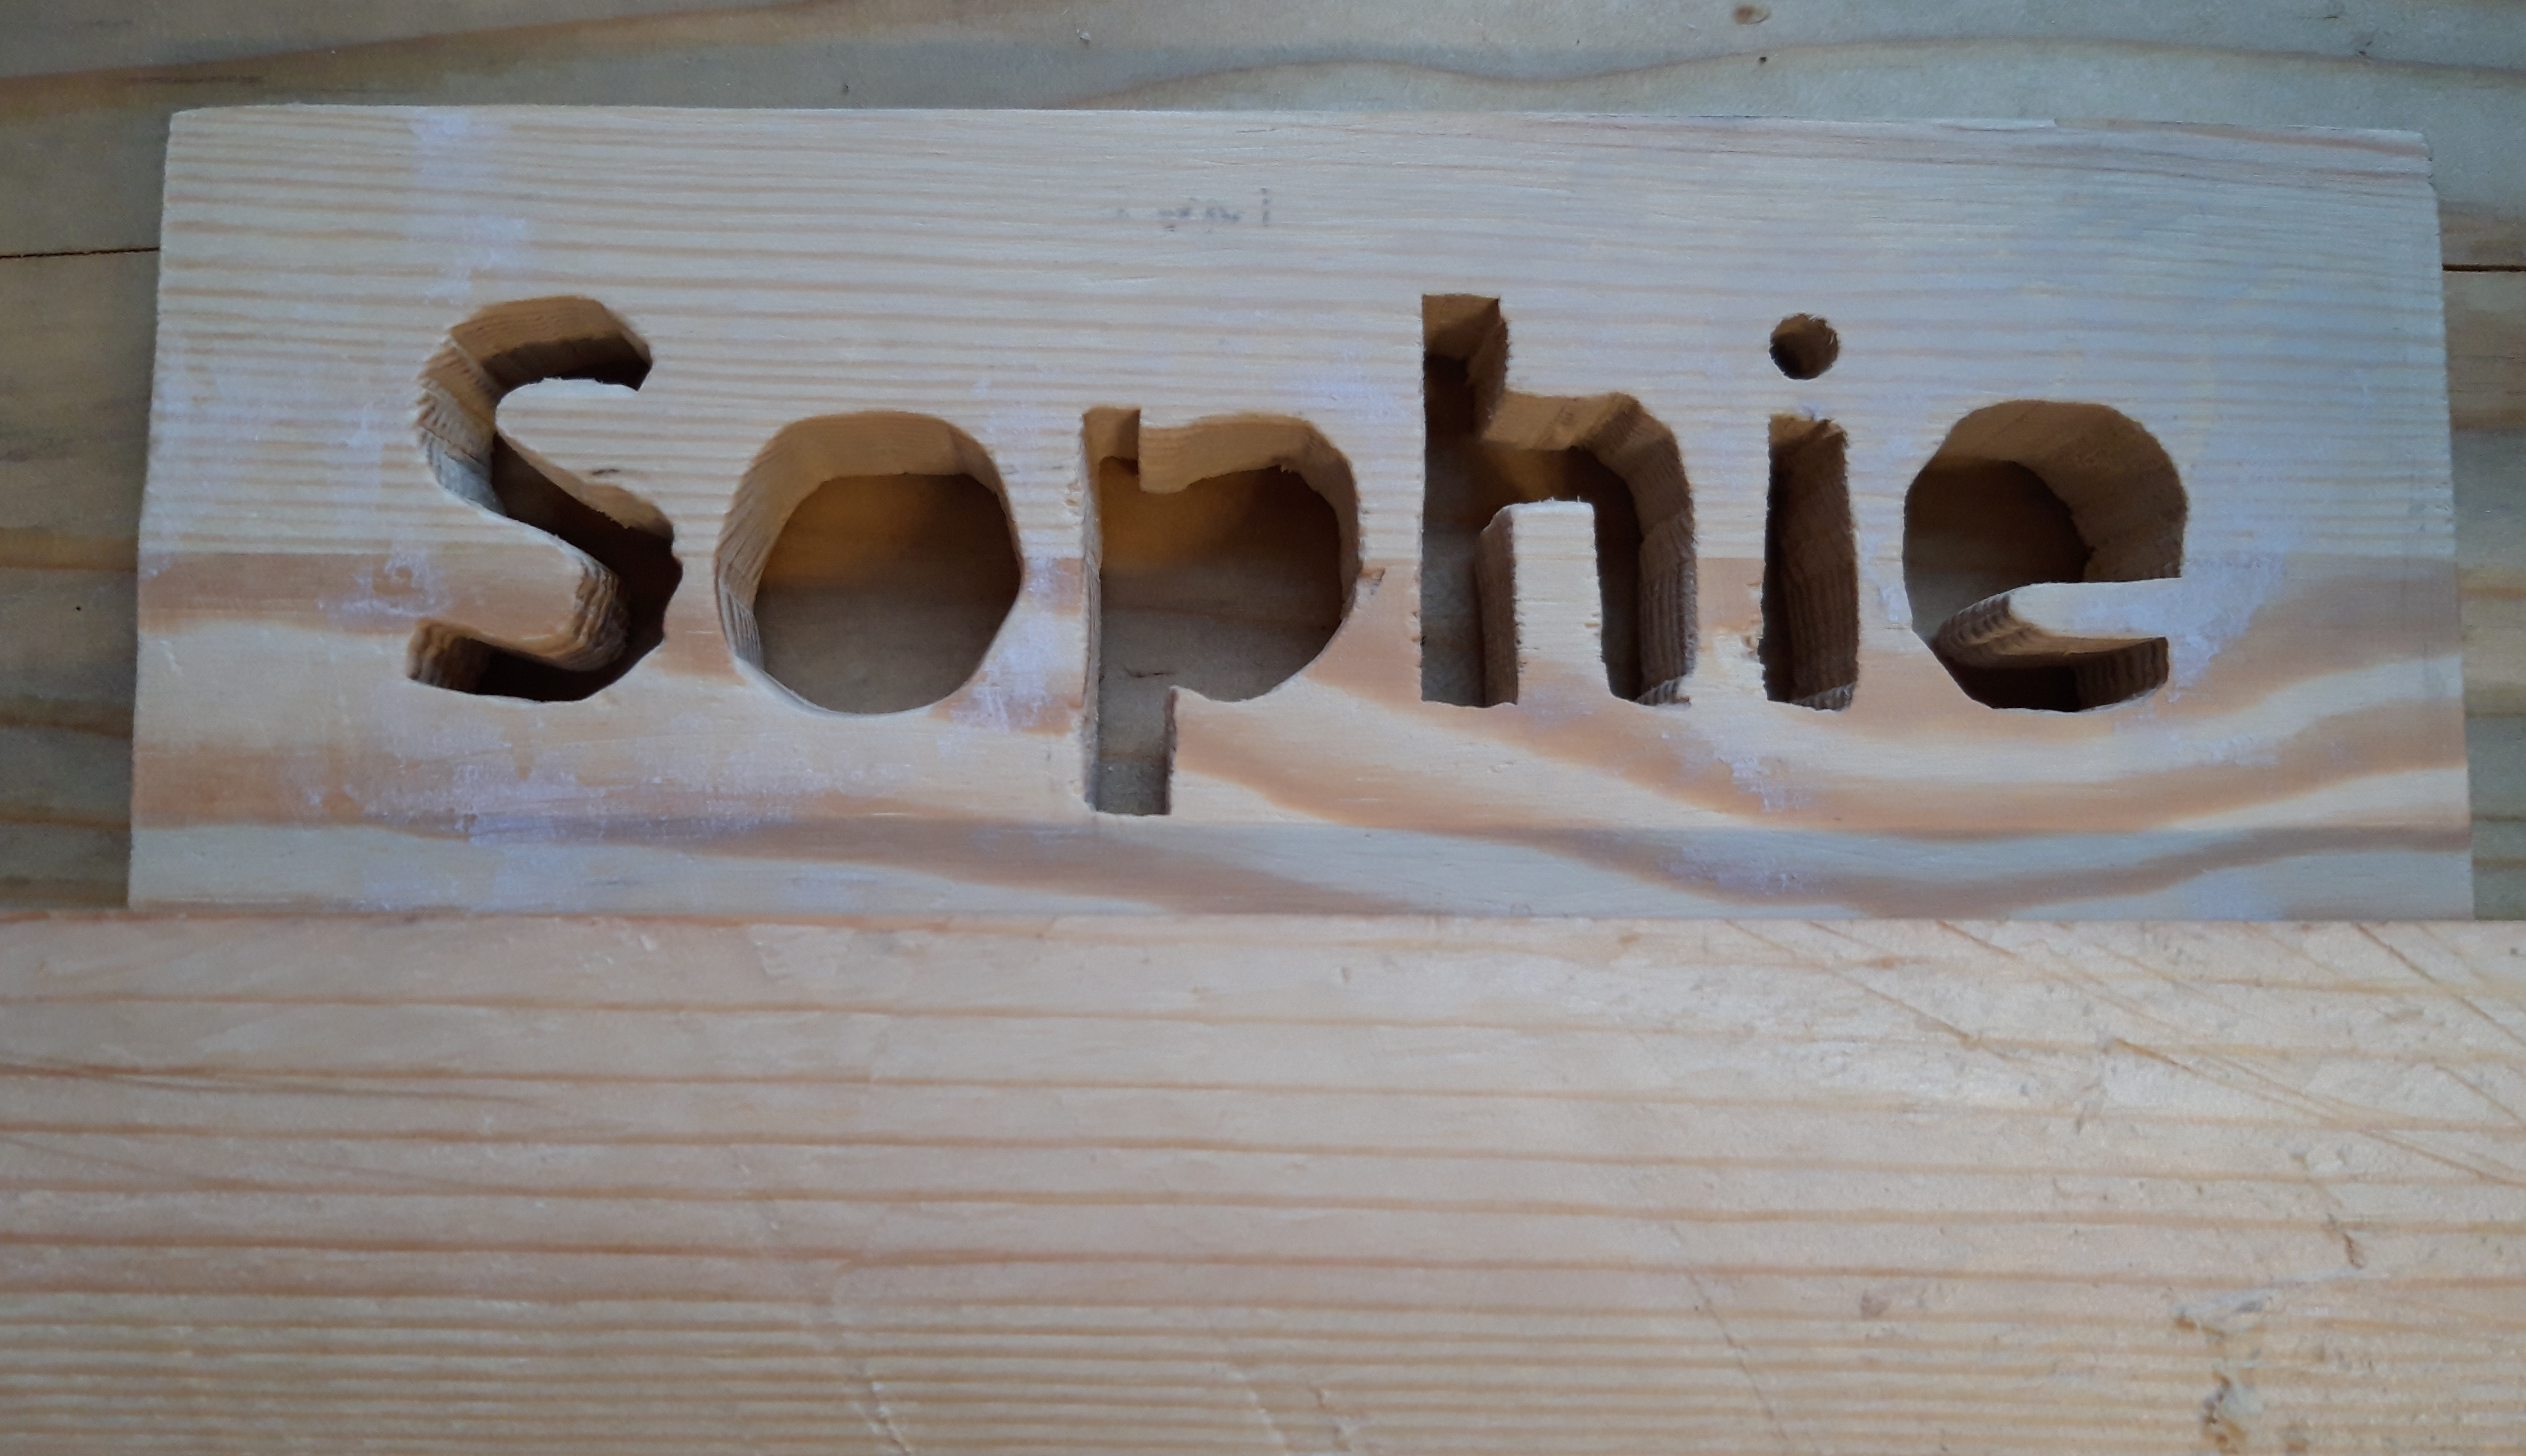
In order to put the inside sections into the letters “o”, “p” and “e”, I decided to put a back plate on the name label so I could then glue the sections to it. I used a scrap piece of mdf I had in my wood store, as I wanted a significantly darker coloured wood to contrast with the paler pine so as to make the letters show up more vividly from a distance.
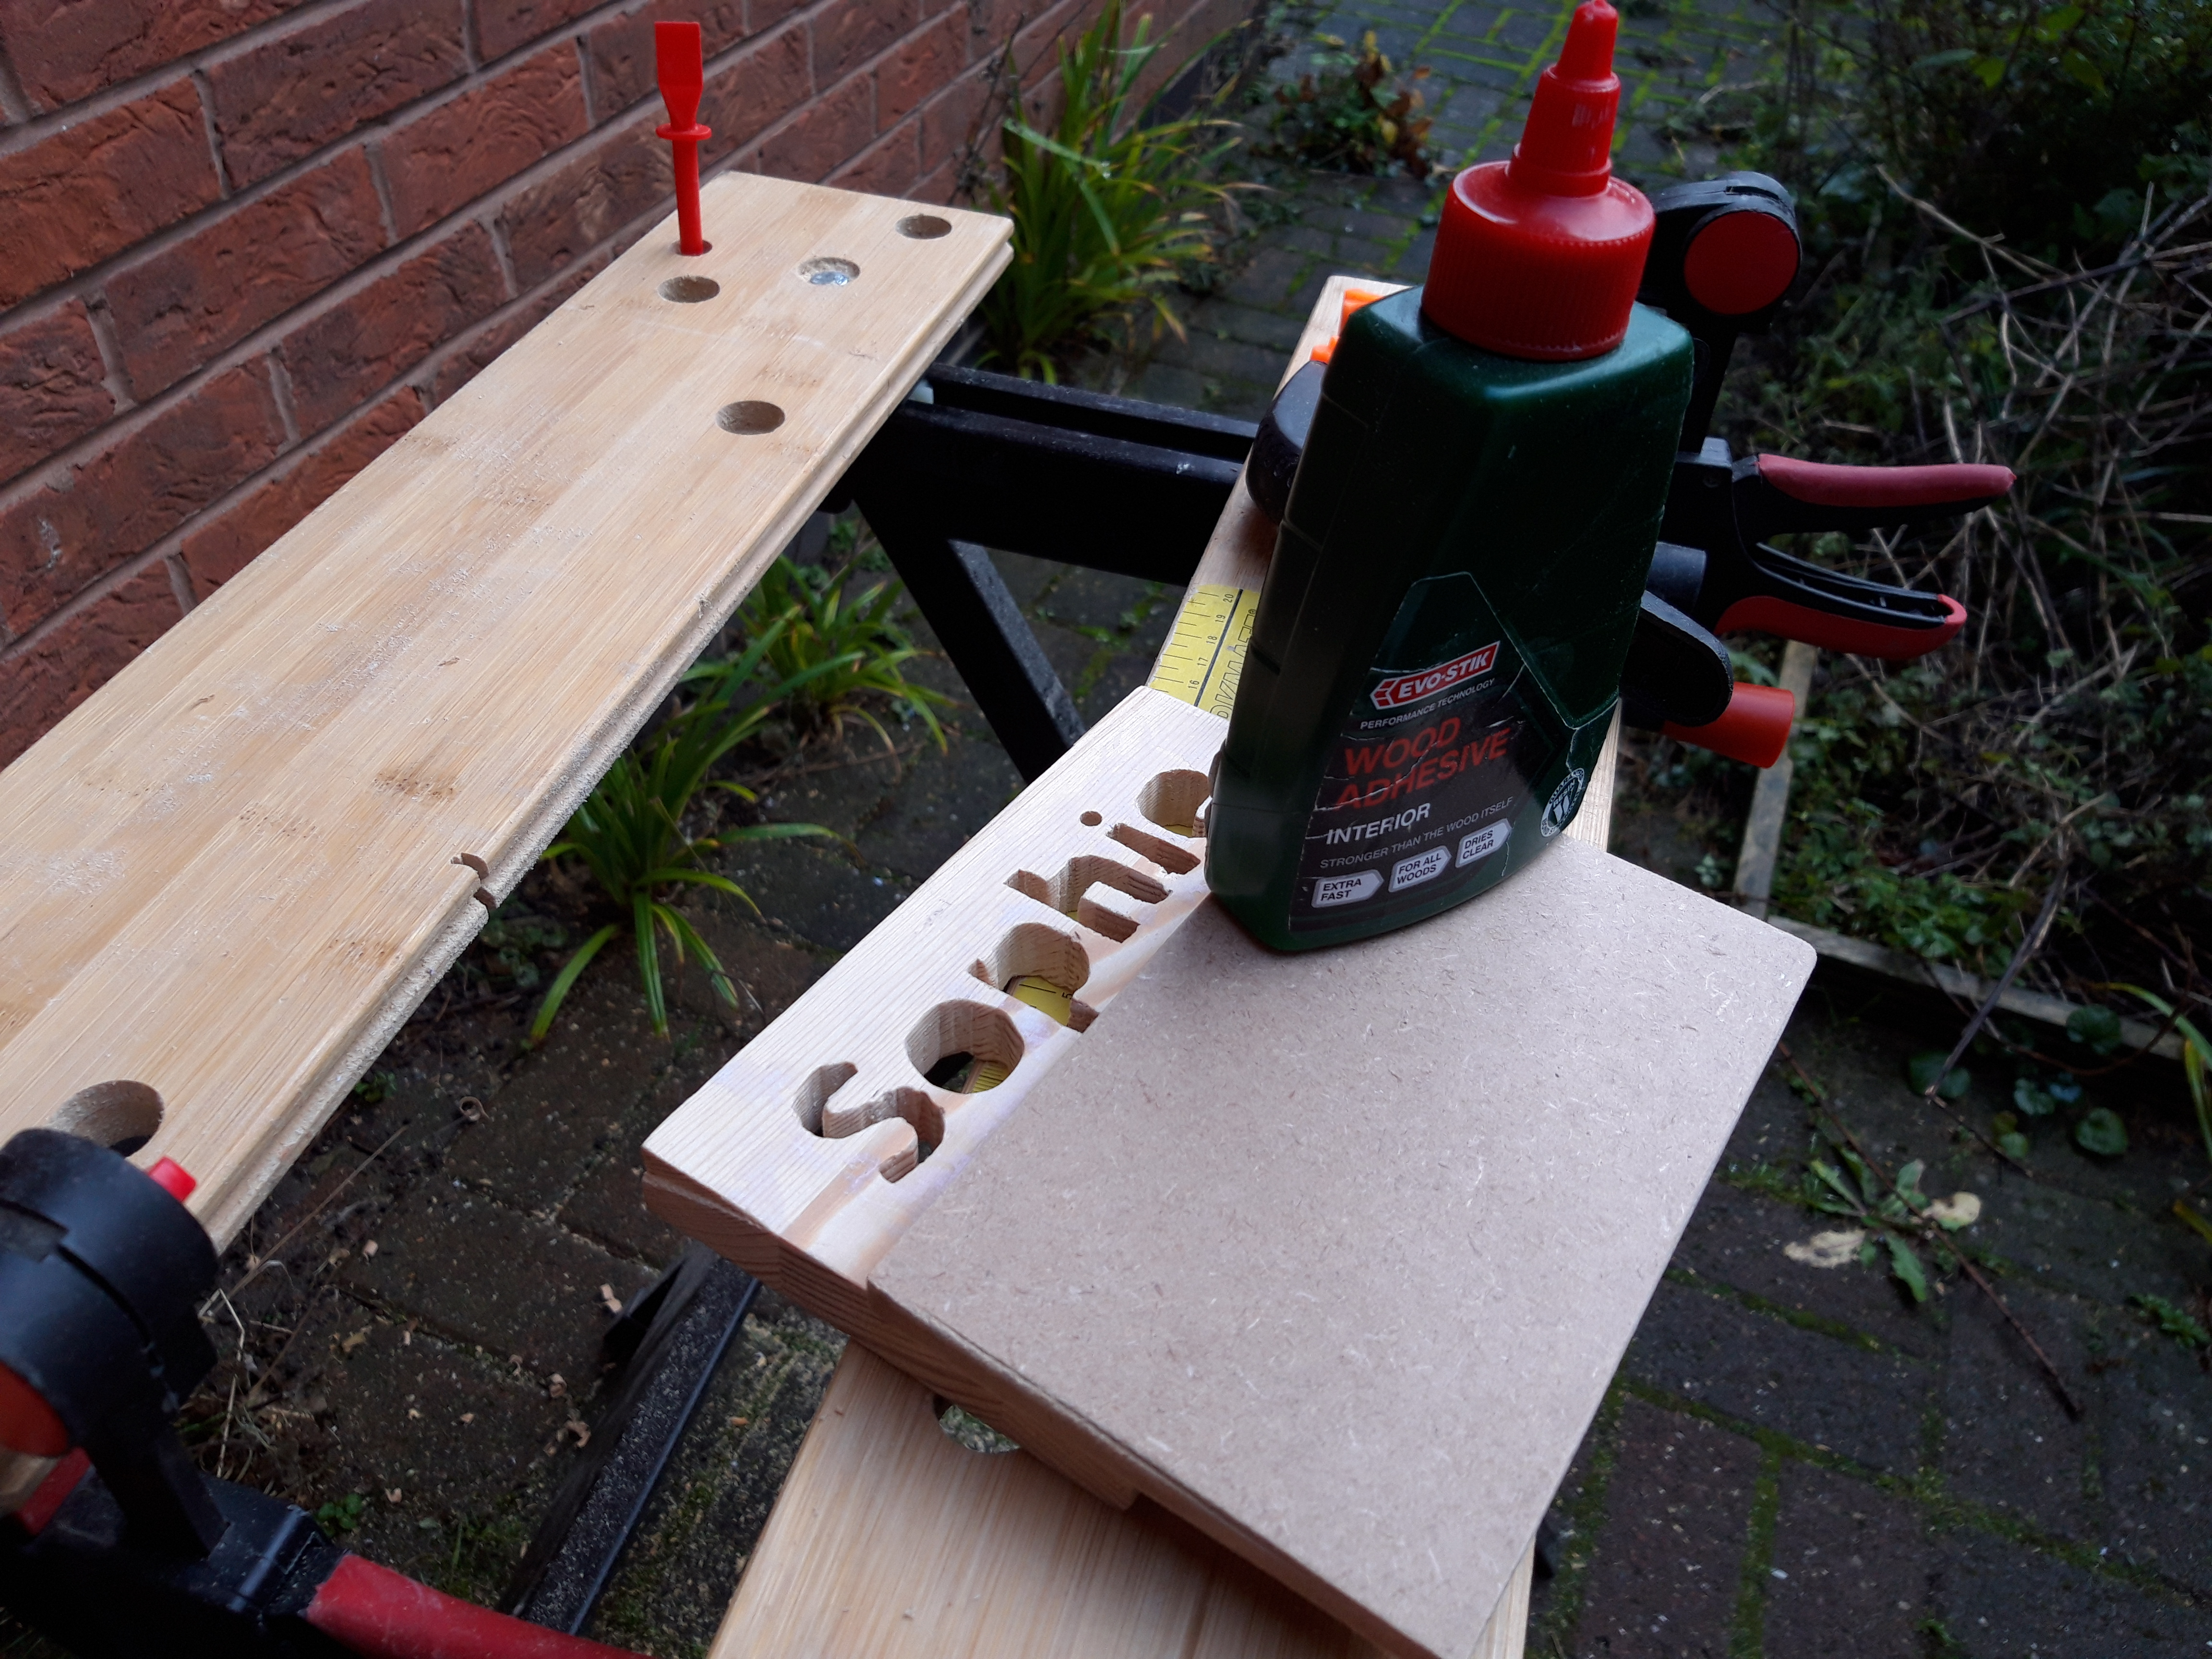
Once the back plate was glued on, I sanded the inside sections and then glued them in place. This was quite a fiddly operation and required the use of thin-nose pliers, lots of glue and so many clamps! I then gave the whole thing another thorough sanding to smooth any raised grain and to remove any dried glue from adding on the back plate.
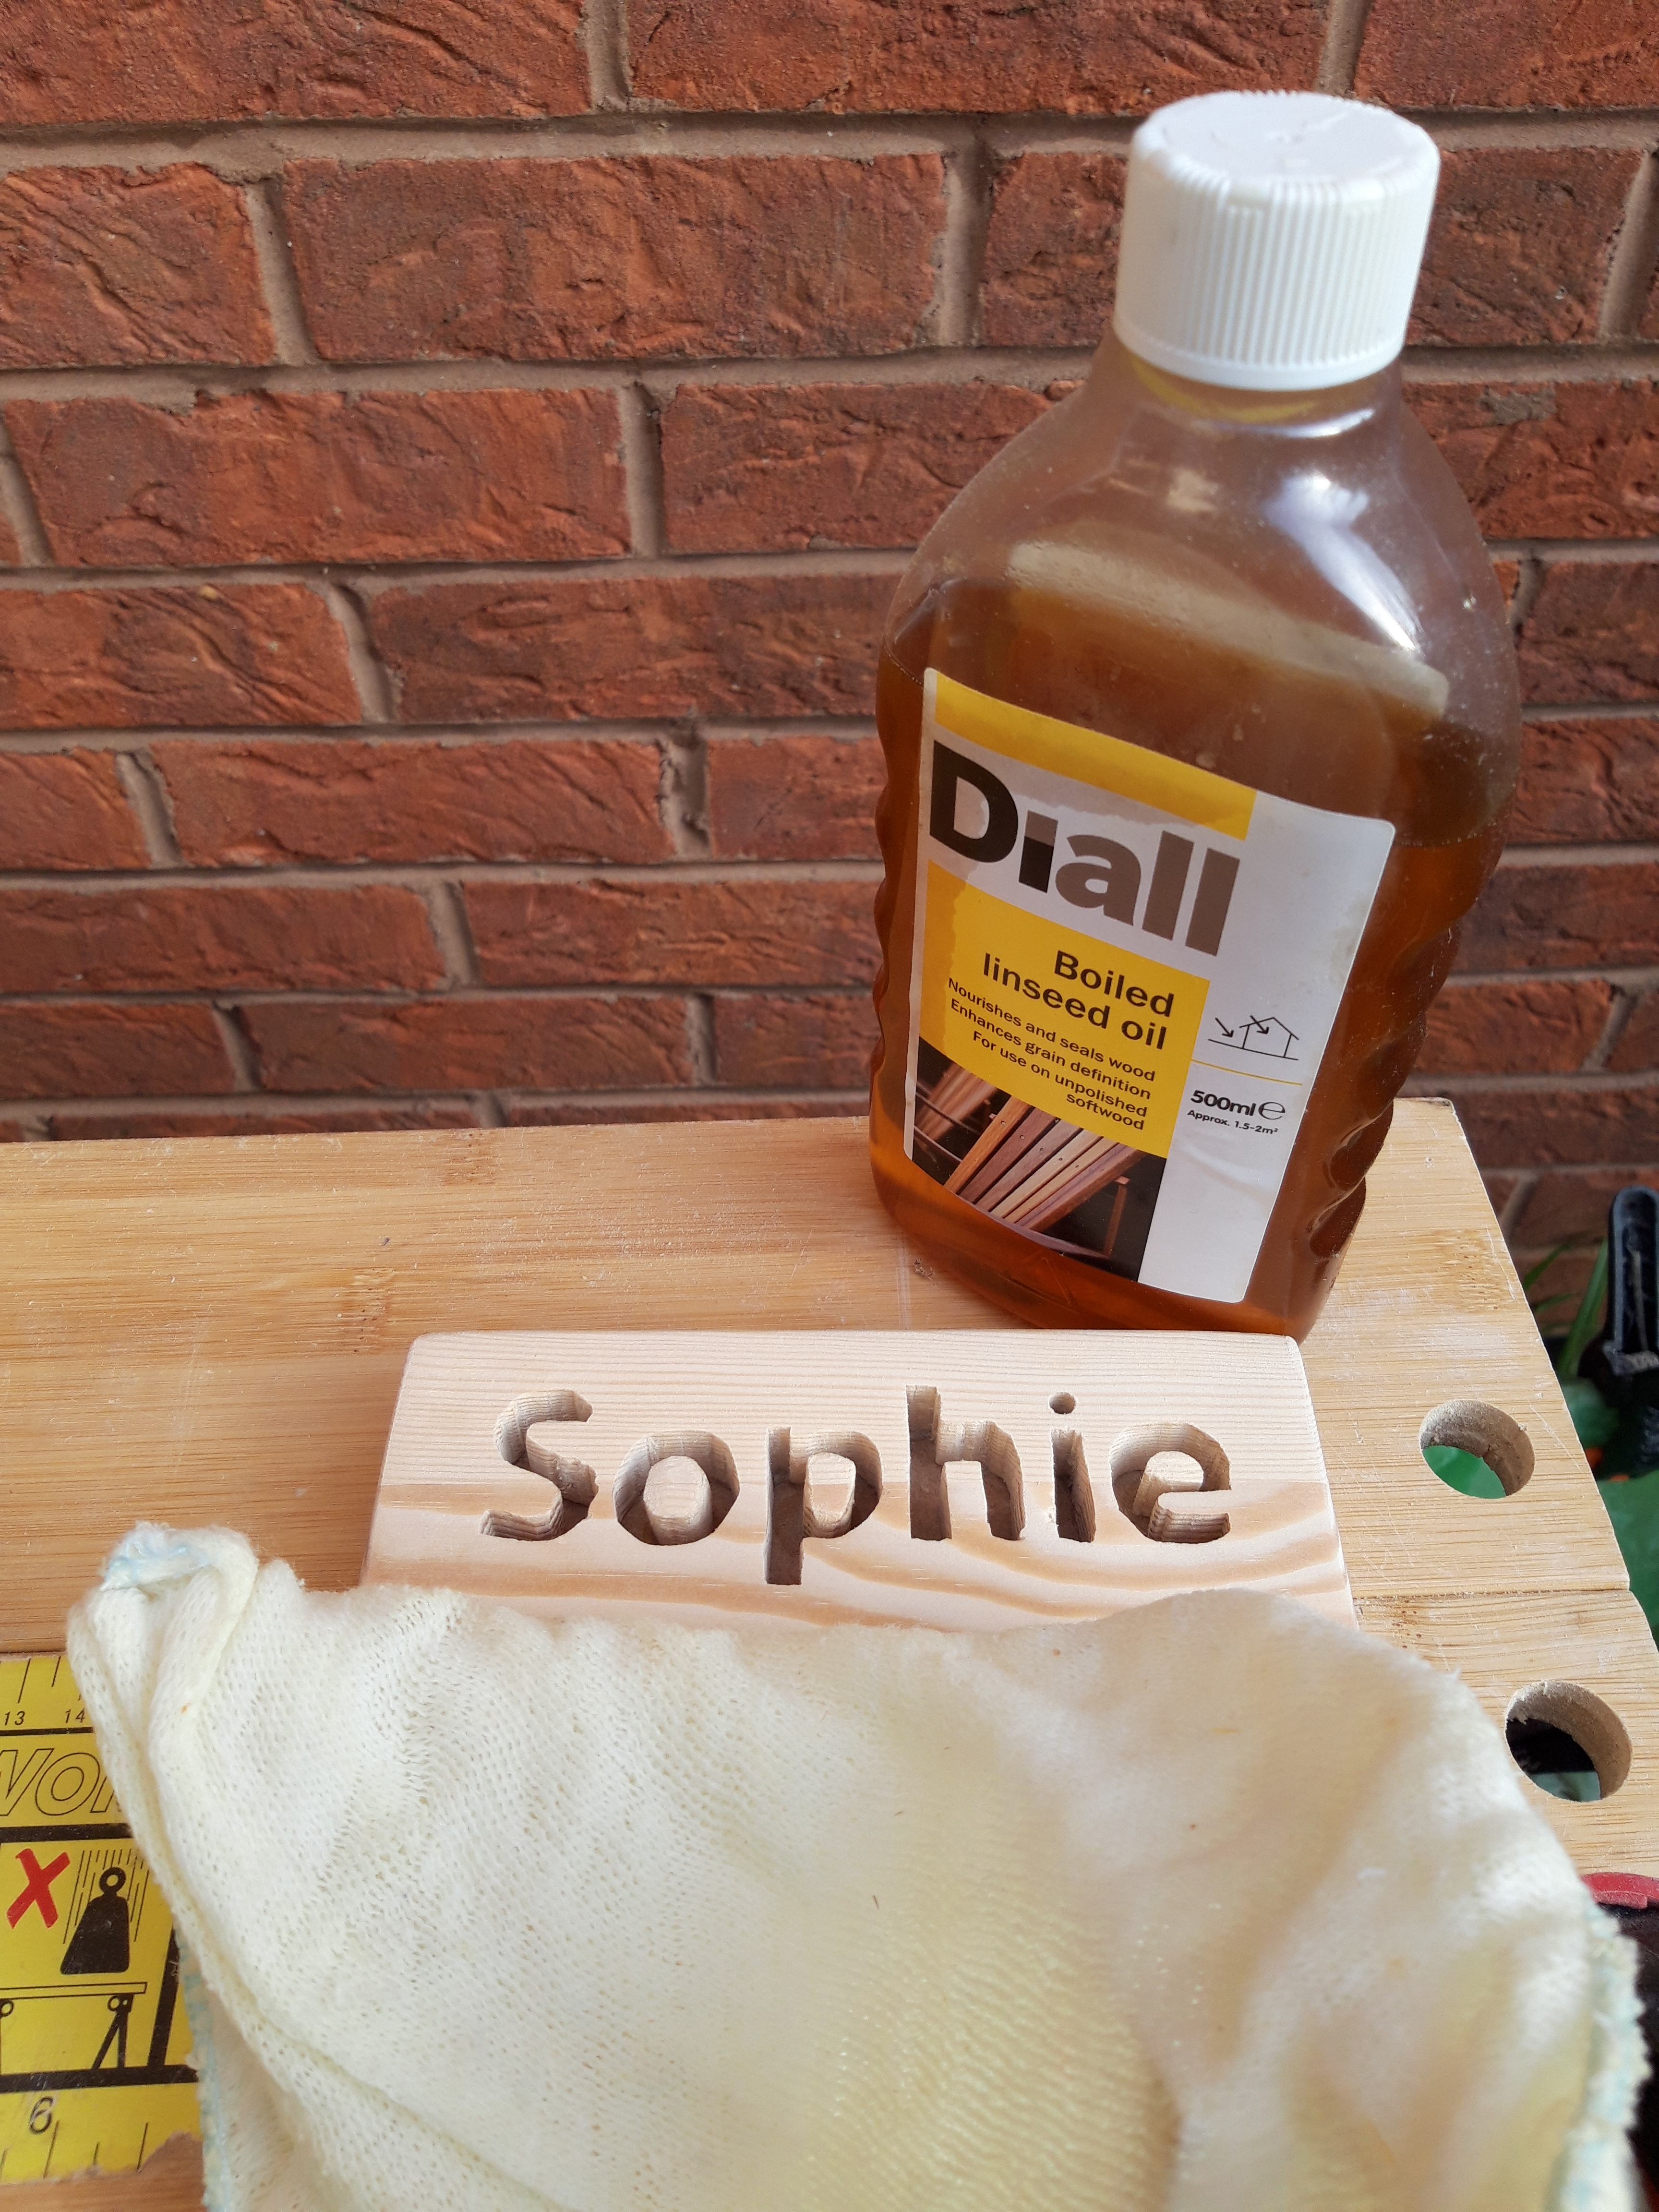
The final stage was to finish the wood, which I did using linseed oil to give the wood some protection and to bring out the grain. I haven’t really experimented with other stains yet, like polyurethane or anything solvent-based, mostly due to limited funds, so as I still had lots of linseed oil, I thought I would use that and see how it turned out.
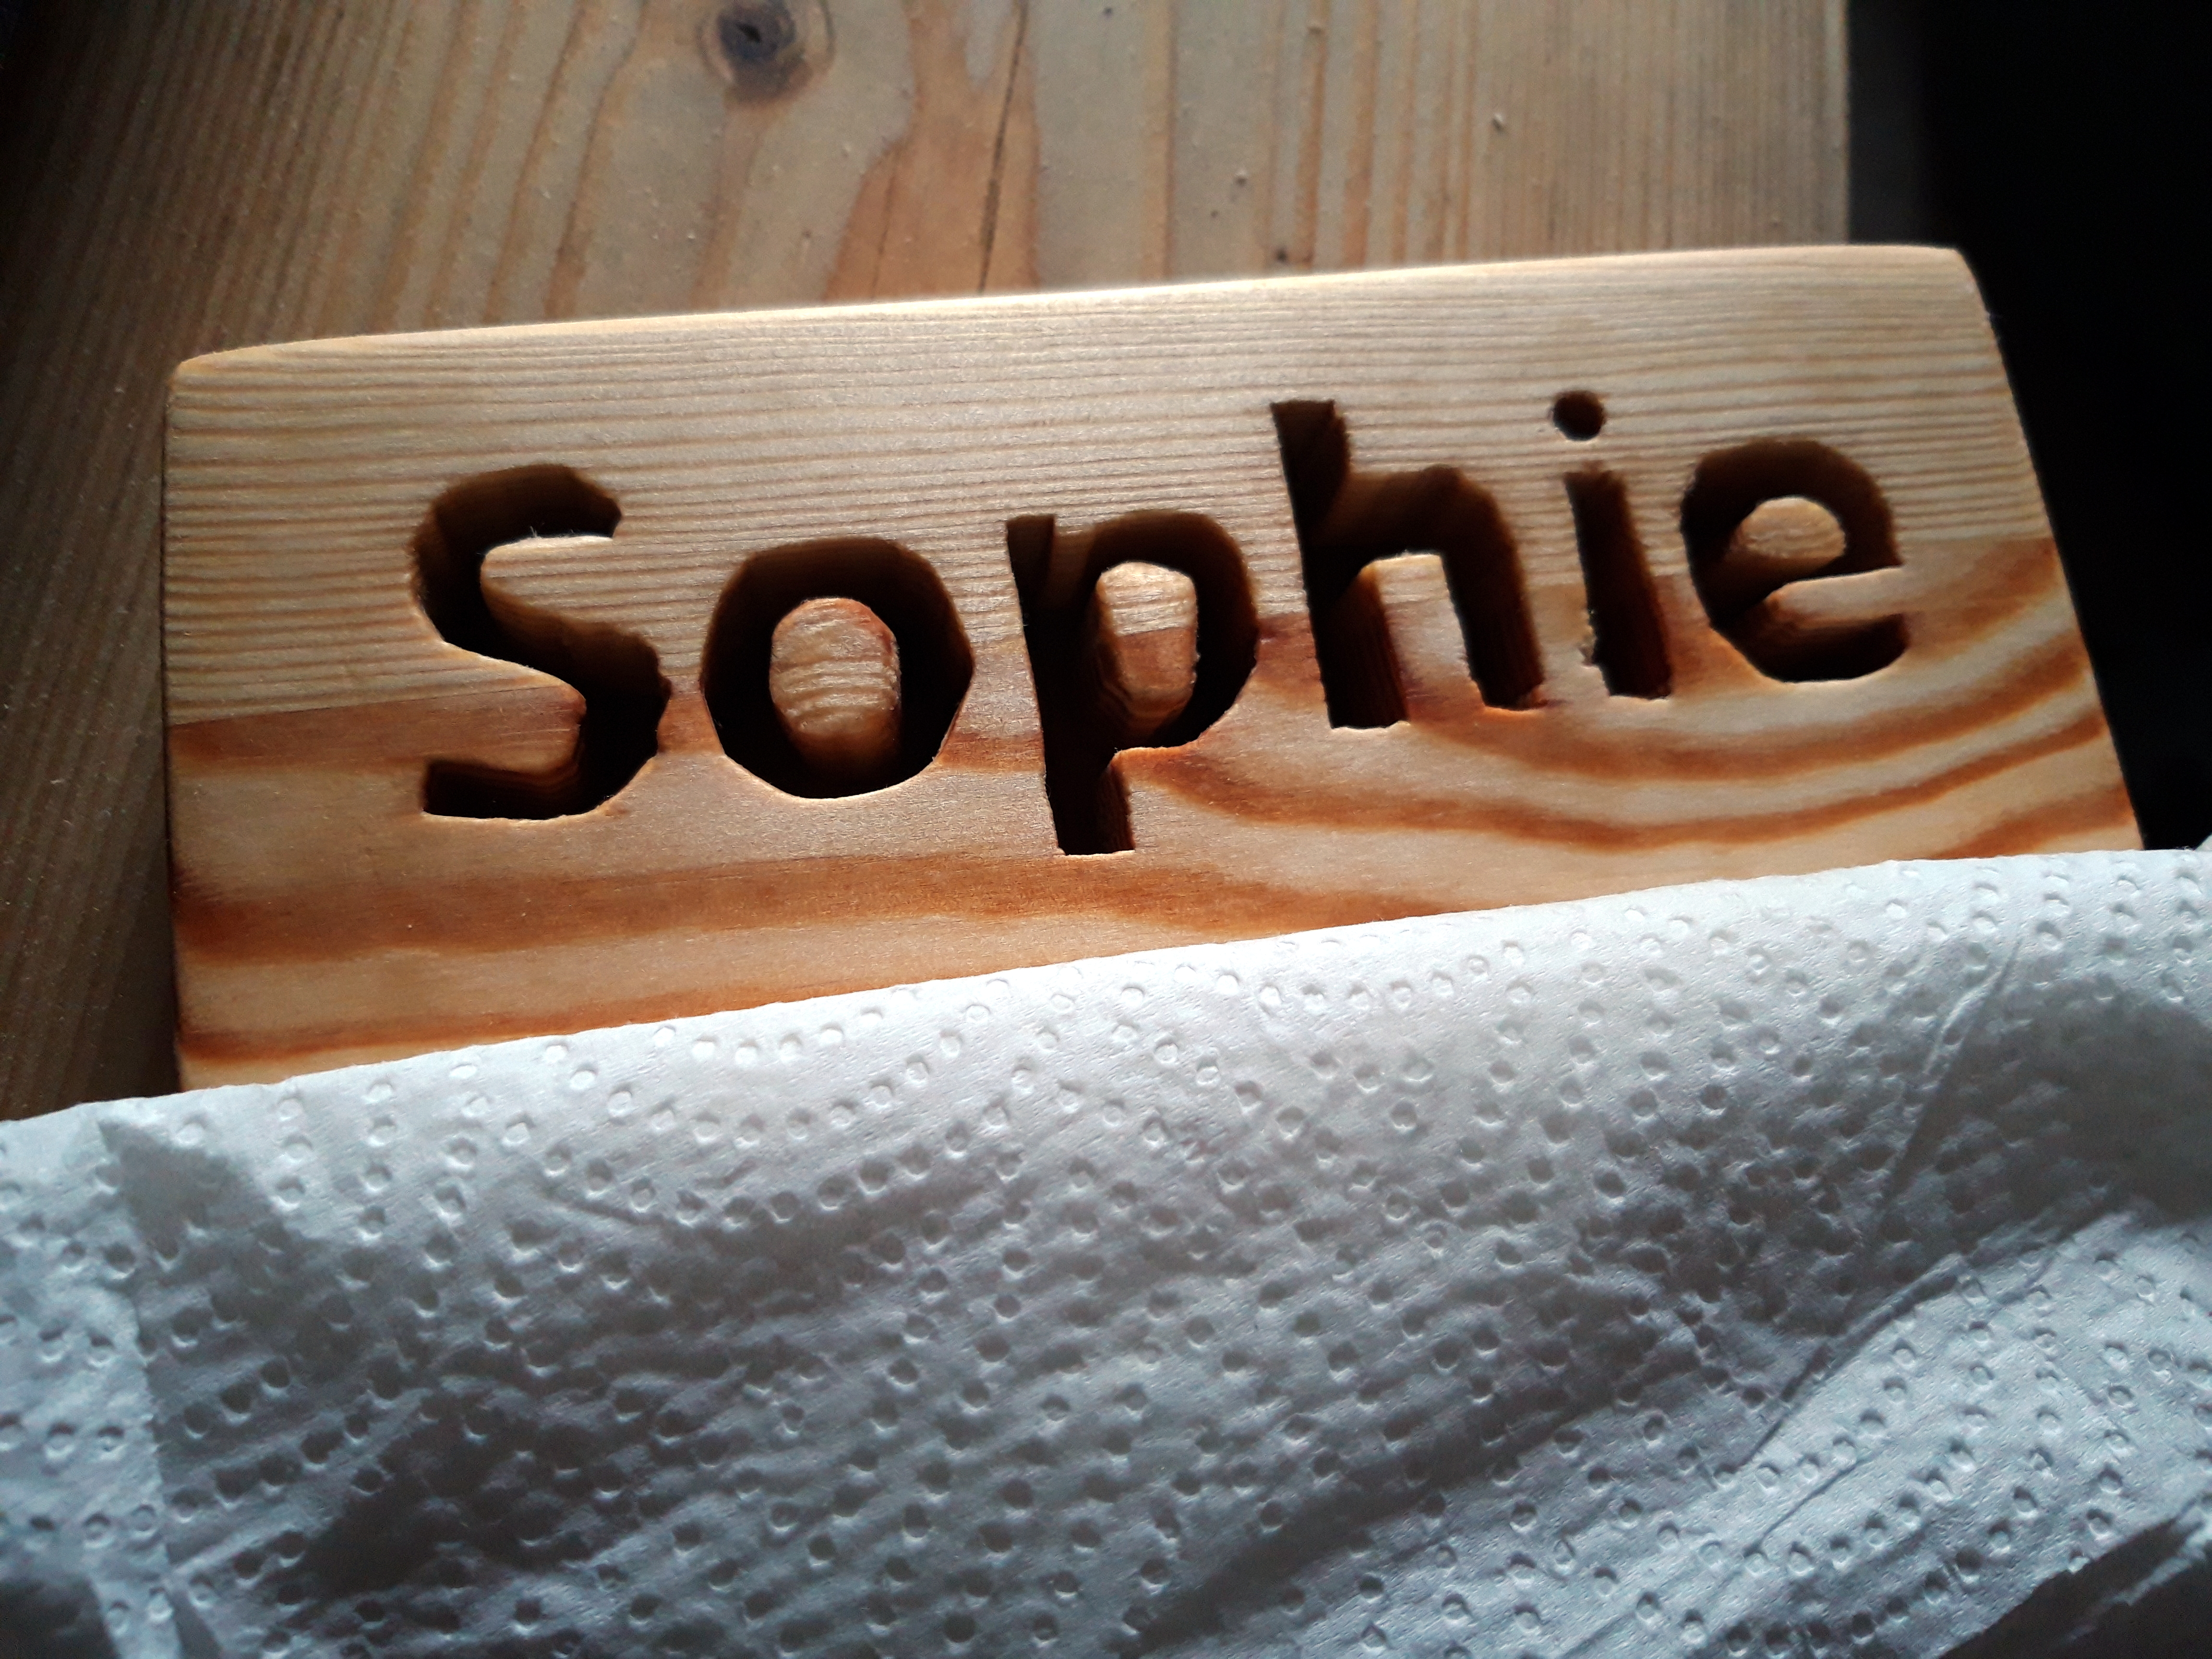
And I am really happy with the result! The finished name label looks very smart I think. To mount the name label onto the filling cabinets/lockers, we were given a sticky-back magnetic strip. I used several strips of the magnets to make sure they would be strong enough to take the weight of the wood and tested this on the fridge several times to make sure it didn’t fall off (it didn’t!).
Lastly I initialled the back with “TWS”, wrapped it in kitchen roll and placed it in a padded envelope ready to be given for Secret Santa! As I didn’t see when Sophie got the envelope I don’t know if she likes it, but I am very happy with the result and greatly enjoyed the challenge of both making something new and using new tools too! 🔨
