I have previously talked about the construction of my mitre saw bench: from creating the basic frame (here), adding the surfaces to the top using 18mm mdf (here) and then installing shelves above the bench for storage and organising my tools and jigs (here).
During the construction I recognised the need for the whole mitre saw bench to be on wheels when I opened the up-and-over garage door one weekend morning after a particularly heavy nightly downpour to discover a steadily growing lake creeping across the garage floor underneath the mitre saw bench. I solved this temporarily by raising the bench on some ceramic tiles I had in the garage but when the “pond” got too deep, it easily went over the tiles and started soaking into the bench legs. As I want the bench to last a nice long time, I went in search* of some heavy duty casters, capable of supporting the weight of the bench and raising it up off the floor permanently.
(*sat on my laptop and browsed for positive reviews across a range of sites from other people having already done the same thing)

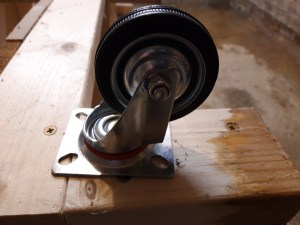
I found several decent sets of casters with positive reviews, and settled on a set with four fully swivelling wheels to enable me to easily move and manoeuvre the bench. The set had two standard swivel casters and two with brakes fitted, which would be perfect to allow me to lock the bench in place when I’m using it, and then quickly release the front casters to pull the bench out or move it around when needed. I ordered two sets, so I would have eight wheels in total, allowing me to have a full set of four wheels under each side of the bench. That gives the centre support too and allows for a much better overall weight distribution across the whole bench.
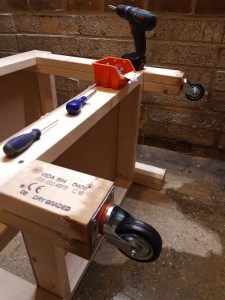
After spending so much time adding shelves and securing the mitre saw in place in the middle of the bench, the first step was to undo both these steps! I pulled out the bench with some difficulty as it is now quite heavy (another reason for needing casters!) and then unscrewed the shelves and removed the mitre saw. I could then tip the whole bench onto its side and fit the casters to the legs. Although it would have been easier to turn the whole bench completely upside down to fit the casters to all eight legs at once, due to the floor still being wet from the rain flood and the overall weight of the bench, it was easier for me on my own to simply lie the bench down on one side, fit those casters and then turn it over and do the same on the other side. If I have to do it again in future, I would fit the casters during the initial assembly process, which would be a lot easier!
To add the casters to the bench, I positioned them in place at the bottom of each leg where I wanted them to go and then marked with a pencil where the screws should go. I removed the casters, made an indent with a bradle on the pencil mark and pre-drilled a small hole with a small drill bit to prevent the wood from splitting when driving in the screws. From other woodworkers I’ve seen online, you can get screws designed to basically create their own hole as they go, removing the need for pre-drilling. But I don’t have any of those and I know they are quite expensive! So for woodworking on a budget, it is simple enough for me to just always pre-drill before adding screws. I put a piece of tape on my drill bit to mark the depth and made sure to drill in line with the leg direction so the screws didn’t break through the side of the leg and stick out. I then repositioned the casters over the drilled holes and secured them in place with four screws. I moved along the bench repeating this “hold-mark-remove-bradle-predrill-reposition-screw” process with each of the four top legs until I completed all of the casters on one side.

The fun part was then flipping the workbench over onto the opposite side so I could fit the other caster in each pair. This was quite entertaining as the legs with casters now seemed to have other ideas about where the bench should be going. But after some persuasion I had the bench upright and then laying down again on the opposite side, the legs with the already fitted casters at the bottom. I planned ahead and put some scrap wood on the floor in the wettest parts of the garage, so I could avoid laying the bench in one giant puddle and just rest it on the scrap wood instead. This worked really well and meant my bench didn’t “wick up” any of the remaining water during the few minutes the bench was lying down. I then repeated the same “mark-drill-screw” process again for these four casters which were the ones with the brakes fitted, and yes I did check as I went along to make sure I didn’t get them mixed up!
Then I just had to stand the bench up again on its wheels, refit the shelves and add all the tools and equipment back again.
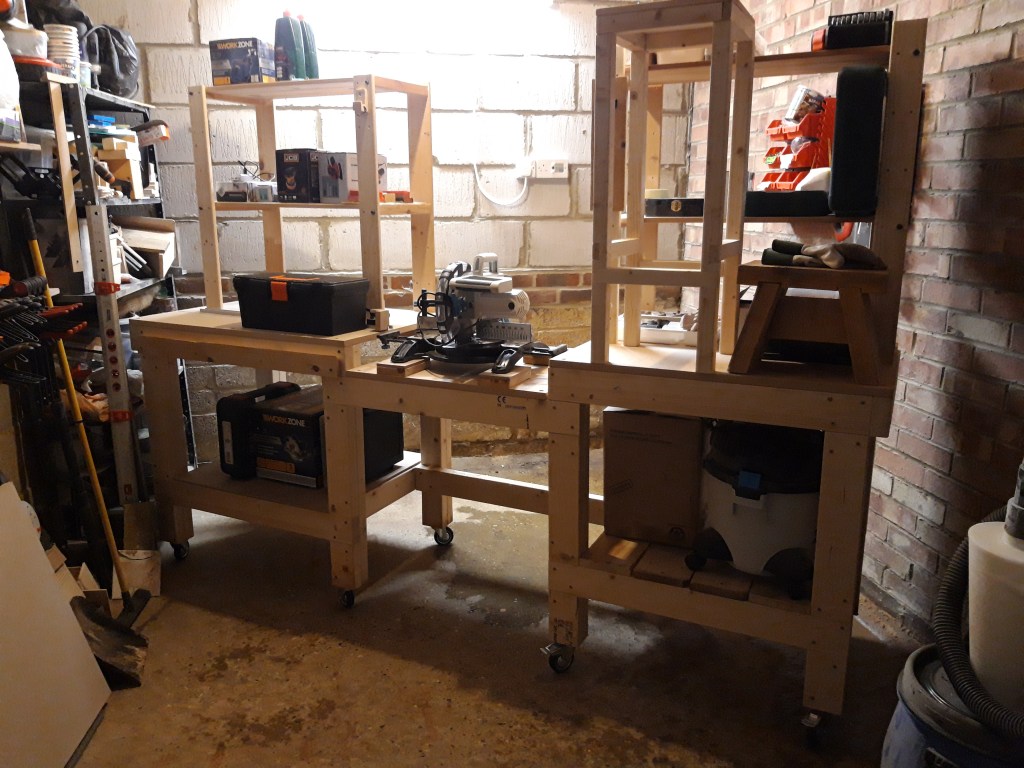
I’m really happy with how the mitre saw bench has turned out overall and especially now it has casters fitted. I can easily move it completely out of the workshop if I need or put it against a different wall if I decide to try a new and improved layout for the workshop. And yes, I am trying to deal with the water getting into the garage issue too!
In the picture just above on top of the bench on the right hand side you can see two stools – one is the one board farmhouse stool I built and shared previously, and the other to the left of the farmhouse stool is my newly assembled tall-legged shop stool. I built this to try out the completed mitre saw bench and used my mitre saw to make a series of repeated cuts. This new stool will be the topic for a blog post coming soon! 🔨

3 thoughts on “Mitre saw bench – Part 4 Manoeuvrability”