One of the things we have noticed recently is the lack of anywhere to sit in our hall to put your shoes on when leaving the house, and somewhere to sit to take shoes off or to put down shopping or work bags when you first come in the door again. This sounded like something I could easily solve!
So I set about designing a really simple hall bench using just pine 2x4s to keep the project as cheap as possible, and constructed using butt joints so I can make it nice and quickly. Due to the amount of surface area of each piece that will be glued together, I figured butt joints should be sufficiently strong. And I could always add extra strengthening if needed once I had the bench assembled. So after a trip to the local B&Q (hardware store for anyone not in the UK), I had a selection of the least bent 2×4 pieces I could find, ready to be processed into usable parts for assembly!
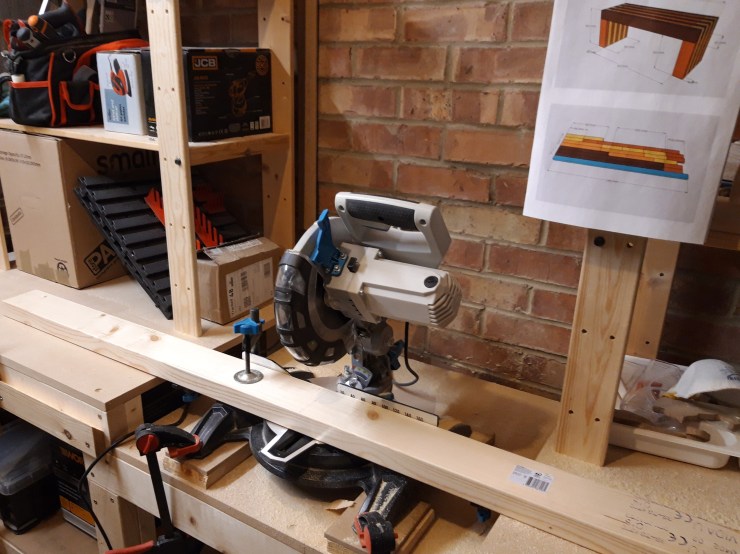
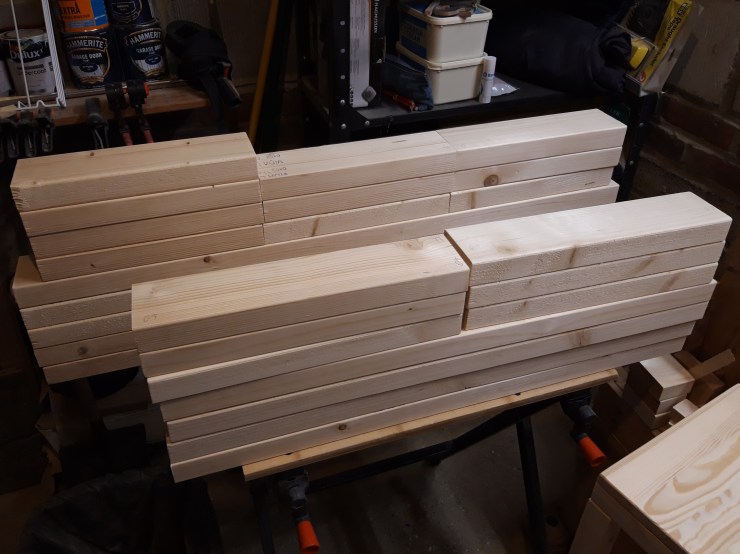
The first step was to measure out and cut all the lumber needed. I planned out a detailed cut list so I could get as many pieces as possible out of the 2x4s and used a stop block to assist with making repeated cut on the mitre saw. Having a detailed set of plans also helped keep track of which pieces were needed, due to the slight differences in length for the top runners, which alternate between being inside and on top of the leg pieces.
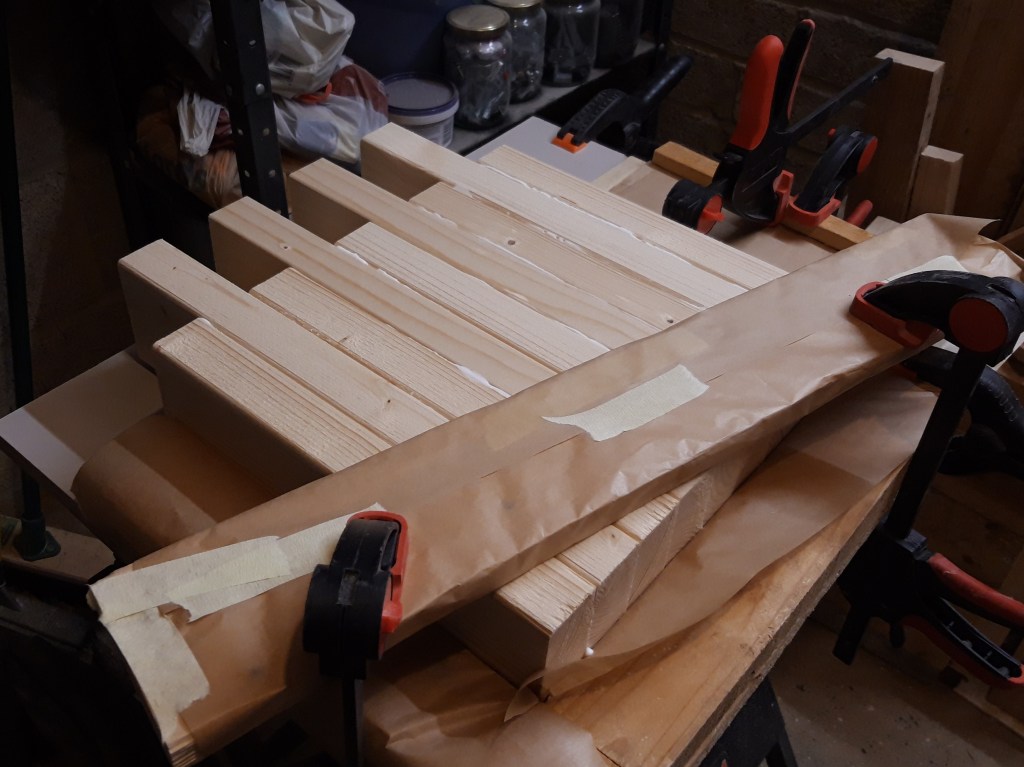
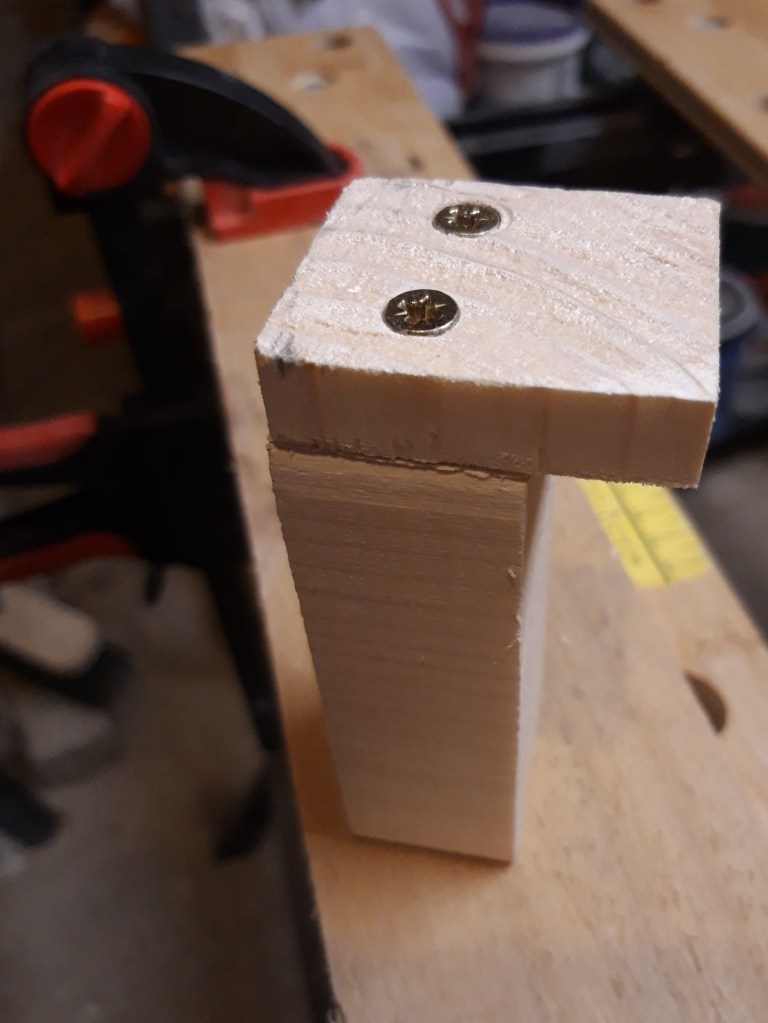
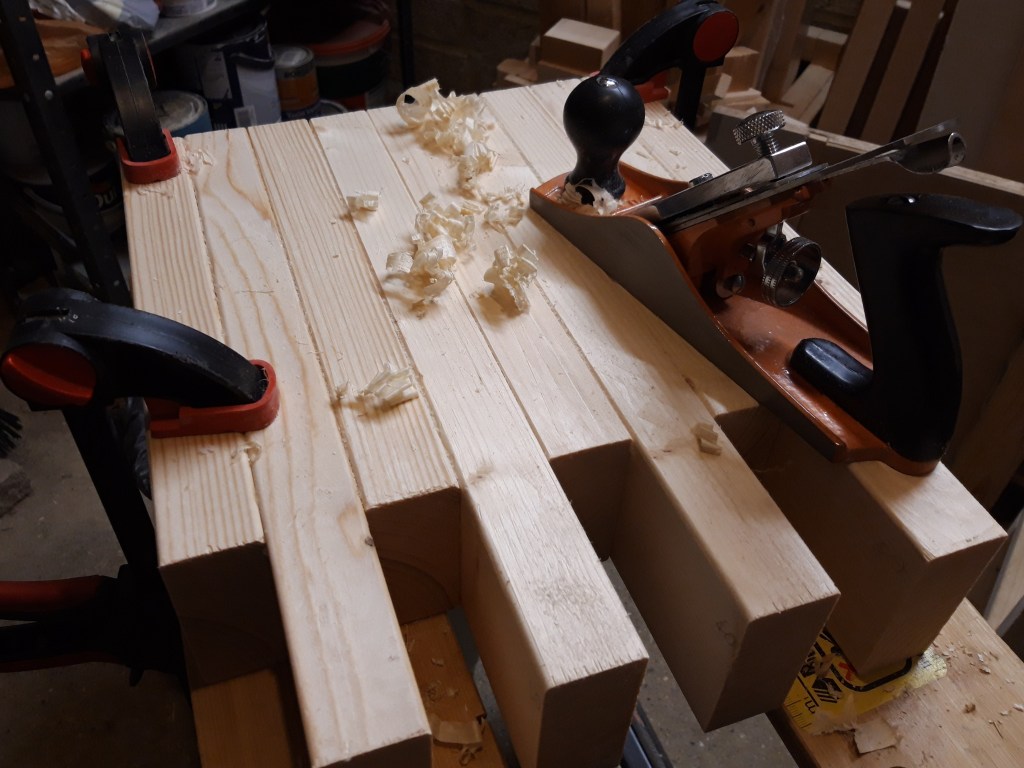
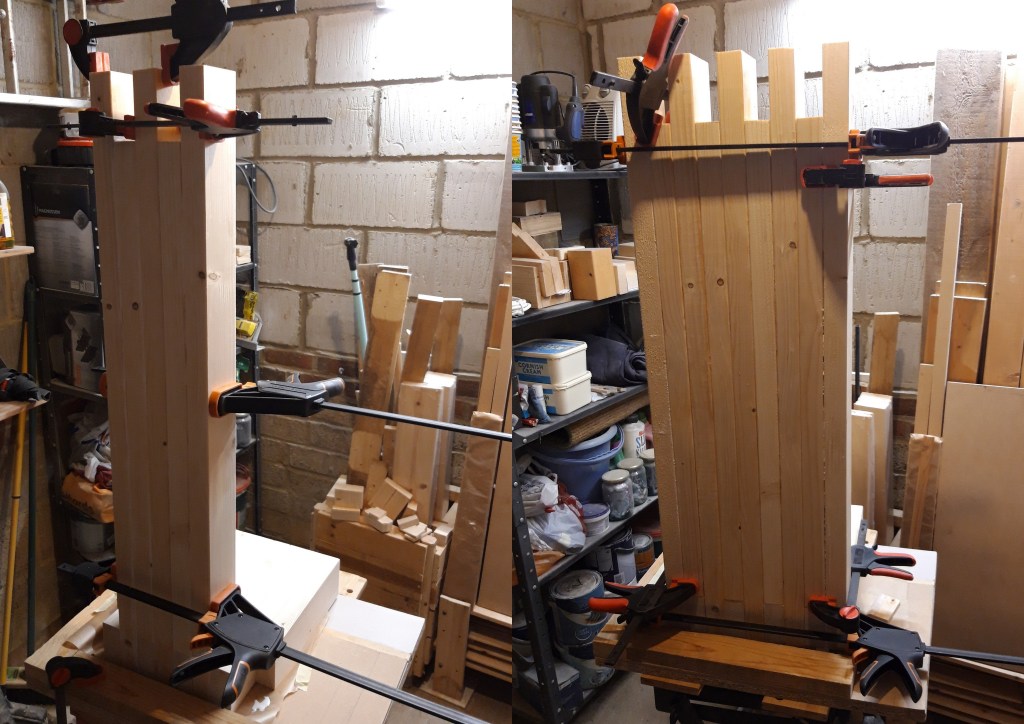
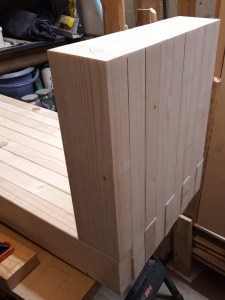
Once I had all the pieces cut, I made a simple jig with some off cuts to assist with getting the pieces correctly aligned. By hooking the jig onto the top of the longer leg pieces, I could therefore easily butt up the shorter leg piece to the jig and flush the base too. This made it much easier to assemble and also let me check that the spacing at the top of the leg was the correct size for another 2×4 to run perpendicular in the space, and was also the same for all the pieces across the leg section. I used copious amounts of glue to hold the parts together, clamped them in place and then clamped a scrap piece of wood with a non-stick wrap on top as a home-made caul board to keep the pieces pressed down. Once the glue had dried I spent a while planing the rounded surface off the 2x4s to give a nice flat surface on both sides of the leg section.
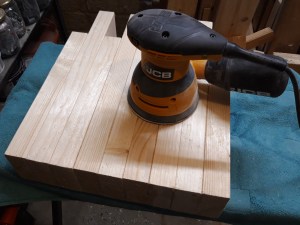
After I finished all the planing, I then spent time sanding the leg piece smooth with my random orbit sander. Although I had the small dust collector fitted, all the sanding generated a substantial amount of sawdust, so I definitely need to sort out some kind of dust collection setup soon! I decided to sand as I went along, as it meant I could more easily move the pieces around and could also get the sander into all the flat sections – something that I anticipated would be much more difficult once the workpiece is fully assembled. It also meant that I wasn’t spending such a large amount of time sanding in one go, which, due to the amount of vibrations generated by my random orbit sander, isn’t so great for your arms after a long time being vibrated!
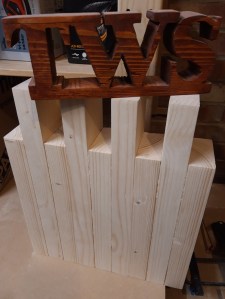
Once I had one set of legs complete, I then repeated the whole process to make a second set – gluing up the alternating shorter and longer pieces using the small off cuts jig, and then once the glue was dry, planing the sides smooth and finally sanding to fully flatten the workpiece.
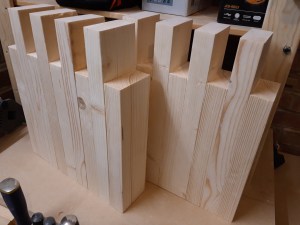
As the pieces alternate in length across the whole workpiece, I considered several different assembly methods. As I don’t have a large assembly surface (yet!), I figured it was easier to make the short ends and then use them to assist with putting the top section together. I secured one leg section to my workmate-style workbench and then glued and clamped the long bench top sections in place. This ended up working really well the jig helped me again to keep the pieces neatly aligned as I worked from one side to the other.
After getting all the long pieces glued into place, I lay the workpiece down and applied lots of glue into the joints for the opposite end. I then slid the completed second leg section into place. This ended up being slightly more difficult than anticipated, as although all the pieces of lumber came from 2x4s, there were some slight variations in the dimensions. I therefore need to do more lumber preparation steps than I did this time in future, although I don’t have a planar or jointer yet, so will have to figure out a way to get a uniform size!
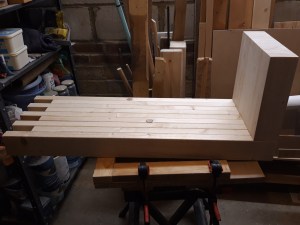
I propped one end of the workpiece up on my mitre saw bench and then used clamps (and a rubber mallet!) to work the end section into the joints on the top section. In the end, it was a nice tight fit and all went together successfully with some persuasion!
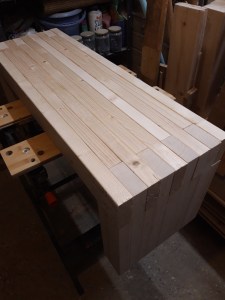
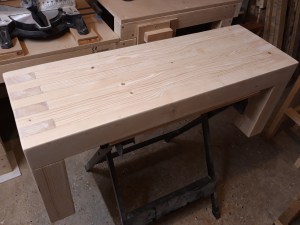
I left the bench overnight so the glue could fully dry in all the joints before I did anything further and I made sure to keep it up off the floor in case it picked up any damp (my garage floods in very heavy rain). I was really pleased with the rough shape of the bench at this point, although I could see a few steps were still needed to tidy up and finish the workpiece.
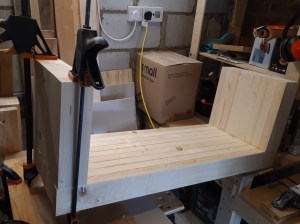
The next step was to plane the top of the bench flat to match the leg sections. This took a very long time due to the size of the top, and in future something like a router with a straight bit and a router sled might make it a bit easier. But it was a good arm workout and was fun seeing all the fine shavings coming off with each pass!

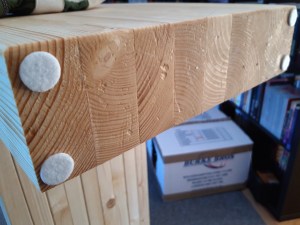
I used a small block plane to flatten the butt joints, where the end grain from the side piece came above the top of the bench, so as to prevent tear out or chipping. I alternated the angle of the block plane and worked from each side of the joints in diagonal motions to follow the grain of all the wood in the joint. This prevented almost all tear out aside from a minor chip caused by a crack already in the lumber – easily fixed with some wood glue!
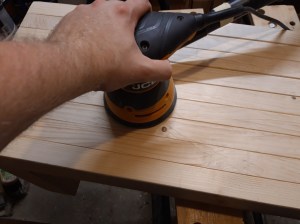
And then it was time for more sanding! I sanded the top even more thoroughly than the sides as I wanted to make sure there was no risk of sitting on a splinter (ouch!) or hurting your hands on any rough bits on the front side of the bench. I also rounded over the edge on the front side of the bench, to make the corner less of a sharp angle into the back of your legs when sitting down.

I made up a mixture of sawdust and wood glue and filled in any small gaps between the pieces and then left to dry overnight. After another overall sanding, increasing the grits to generate a smooth feel to the bench surfaces, the workpiece was ready for finishing.
I decided to use boiled linseed oil to finish the work bench, primarily because I had some on hand from another project, but also because I didn’t want to change the colour of the wood, like I’d get with a stain; or end up with a more plasticky-shiny surface, like with some types of varnish. I would like to explore how Danish Oil behaves as a finish at some point, but as I don’t have any currently I would have had to have gone and bought it specially for this project.
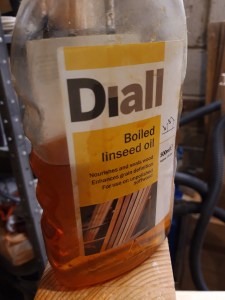
I applied several coats of linseed oil, giving the bench time to dry in between each coat, and then a light sanding by hand before applying the next coat. Linseed oil has quite a distinctive smell, although I don’t find it unpleasant (my wife is less convinced by it!). I did make sure to have the garage door fully open though, so I could get lots of fresh air in!
I left the finished bench for several days to ensure the oil had a chance to fully dry before I brought it into the house. I put some felt feet on the bottom to protect the floor and then moved the bench into position at the bottom of the stairs in the hall, where it will be used for putting shoes on and off when we leave the house, as well as a surface for putting bags down on (and probably a temporary storage space for anything to go upstairs!).
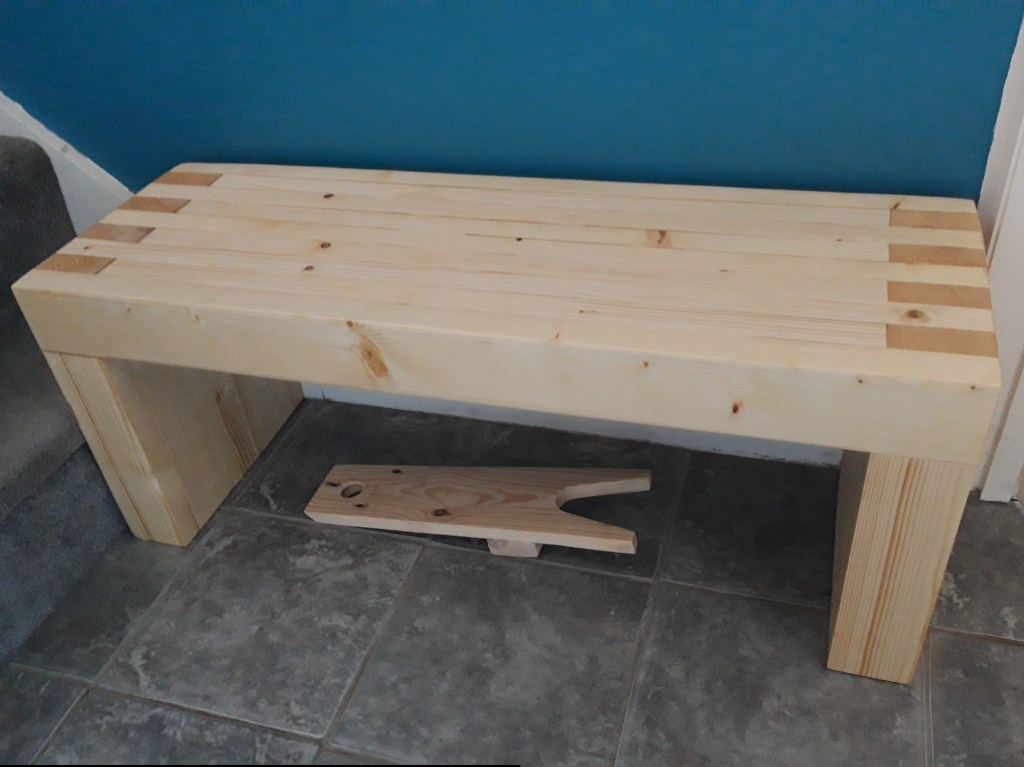
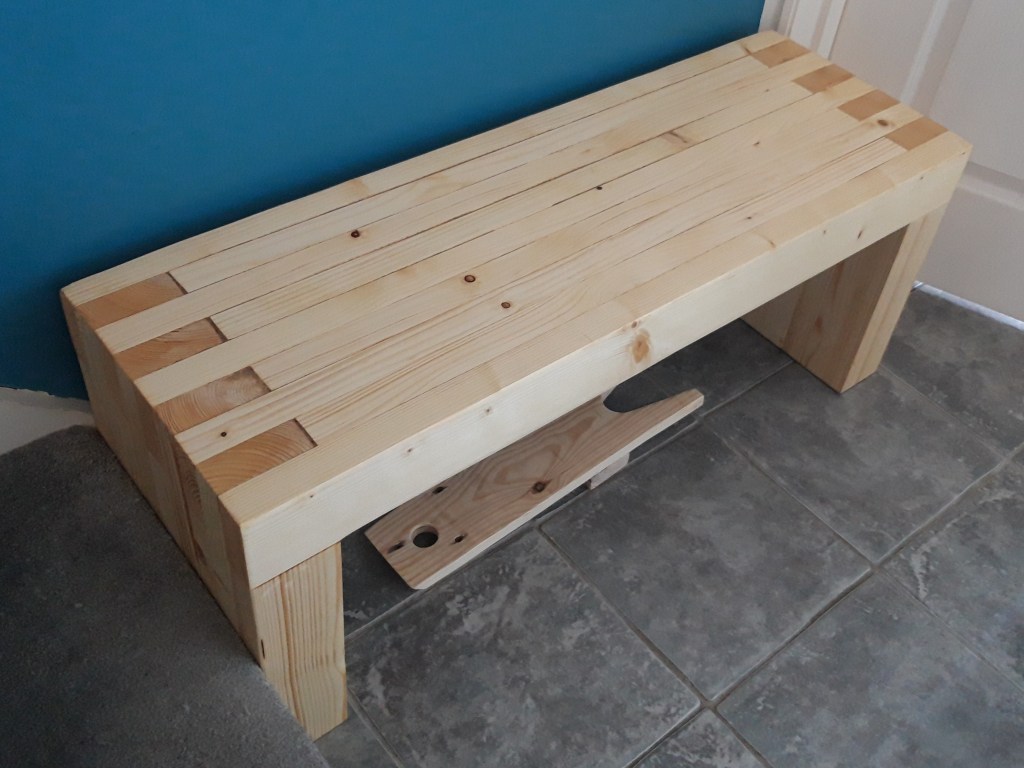
You can also see a boot jack in these photos, which is a second version of one I have talked about previously. I made some slight changes for this version and will talk about it in another post at some point!
I am really happy with how the bench has turned out! It fits really well into the space – doing a proper design with accurate dimensions definitely helped- and is really solid and comfortable to sit on, with plenty of space underneath to store bags or shoes if we need. I have had lots of compliments since I finished the project from people who have seen photos of the finished bench. And, quite pleasingly, I have already had several requests from family and friends to make one for their hallway! 🔨

3 thoughts on “Hall bench”