I have previously made a bench for our hall so we had something to sit on while getting ready to go out and putting shoes on, or as a surface for resting bags on when coming home. My brother really liked the idea and requested one for his hall, so I set about planning and making a new bench for him!
I planned out the design for the bench with the dimensions my brother gave me and this version was slightly shorter in length than the one I made previously. Once I figured out how much lumber I would need, I did another trip to the local hardware store and then set about making a series of repeated cuts with my mitre saw and a stop block.

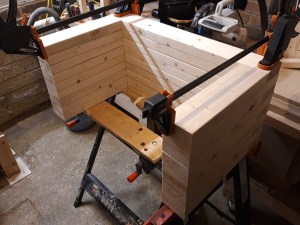
Once I had all the pieces cut to the right lengths, I started the glue up process. This time I tried doing the whole glue up in one go, building the legs and top up together, rather than building it in three separate sections and combining it later. This seemed to be a slightly easier way of doing it and meant I was able to get flush joints across the bench.

Once the bench was fully dried, I spent an afternoon planing all the surfaces flat and then made clouds of dust with a very thorough sanding, working up through the grits to a nice smooth finish. I rounded over the edge slightly by hand to make the bench slightly more comfortable to sit on and then used some Danish oil to finish the bench and give the wood a nice colour and a bit of protection.

After a few days of drying the bench was finished. I managed to fit the finished bench on the back seat of our car and dropped it off to my brother. He was very happy with the finished workpiece and it now lives in his hall, making getting ready to go and putting on shoes much easier. And his cat sits happily on it too! 🔨

2 thoughts on “Bench #2”