Last year my Dad turned 60 and I wanted to give him something really special – a large personalised wooden trunk! I spent quite a while planning out and designing the trunk to figure out how best to approach such a complicated project. Once all the planning was done, I was ready to start making it, starting with the frame!
Due to the multitude of steps involved in making the trunk, I am going to be sharing it across 8 posts over the next couple of months. Links to all the associated pages below will become live as each subsequent part gets written and shared and I will put links on each page so you can go through all the posts and follow the entire build sequence from start to finish!
Part 1 Planning and sourcing wood
Part 2 Framing (this post)
Part 3 Lid
Part 4 Panels
Part 5 Corner braces
Part 6 Hardware
Part 7 Initials
Part 8 Final assembly and staining
The first step involved creating the core frame to form the shape of the trunk and to provide a solid surface to attach the various side panels to. I used pine 2×4 constructional lumber for the frame as I wanted something strong and sturdy that would be able to provide a solid structure to the trunk but not add too much weight to the workpiece.
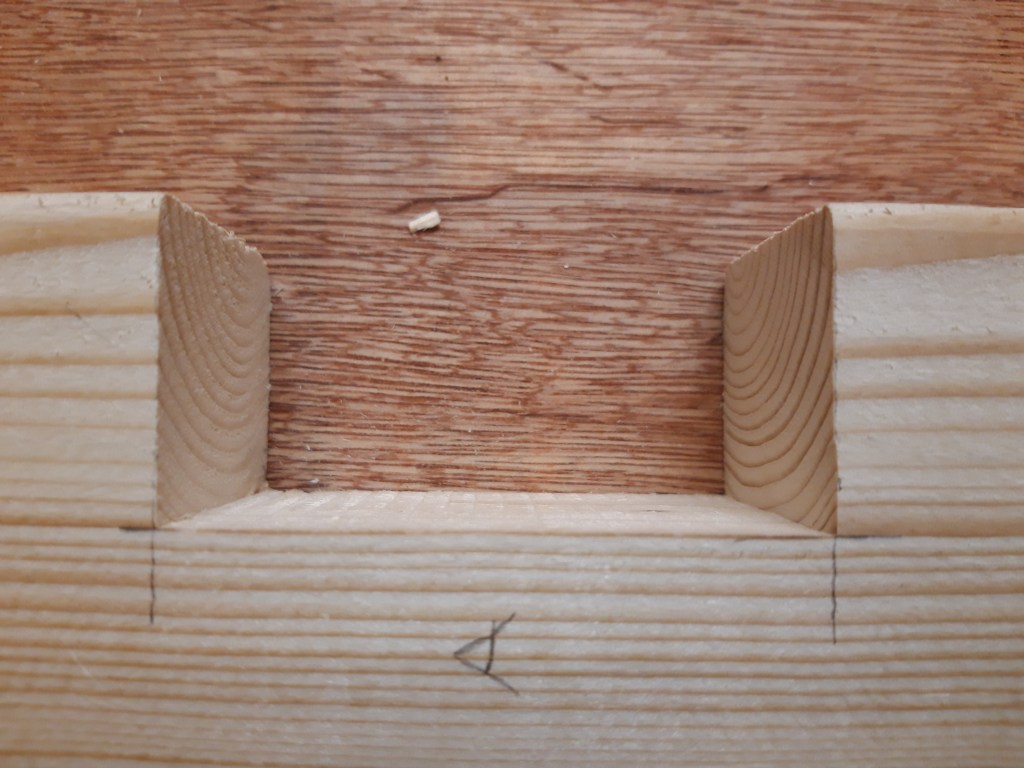

I started by figuring out how to make 3-way joints for connecting the corner posts into the bottom stretchers and chiselled out a mortise for the centre support to slot into to provide a large surface area for glue. Each stretcher connected via a mortised section at the end of the 2×4 piece, which provided a bit more area for glue that a butt joint would alone. The corner posts run straight down to the base of the trunk which means the weight from anything supported by the posts doesn’t have to pass through a joint which might get weakened over time through wood movement and slight deforming of the structure as the trunk gets lifted and moved around.
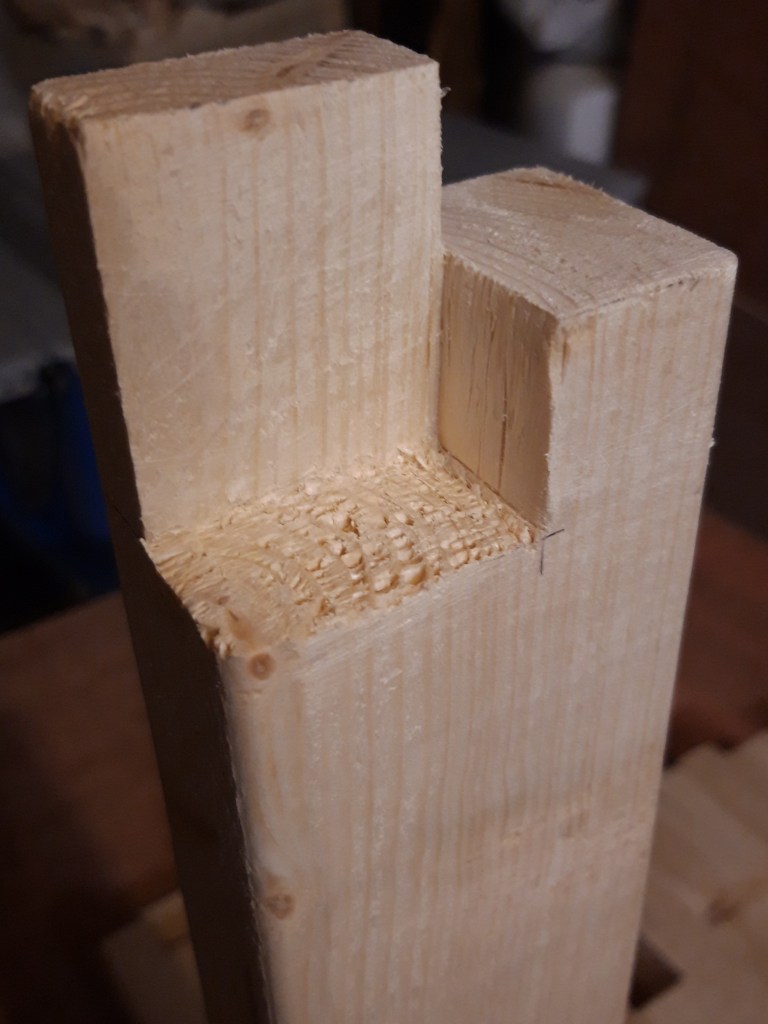
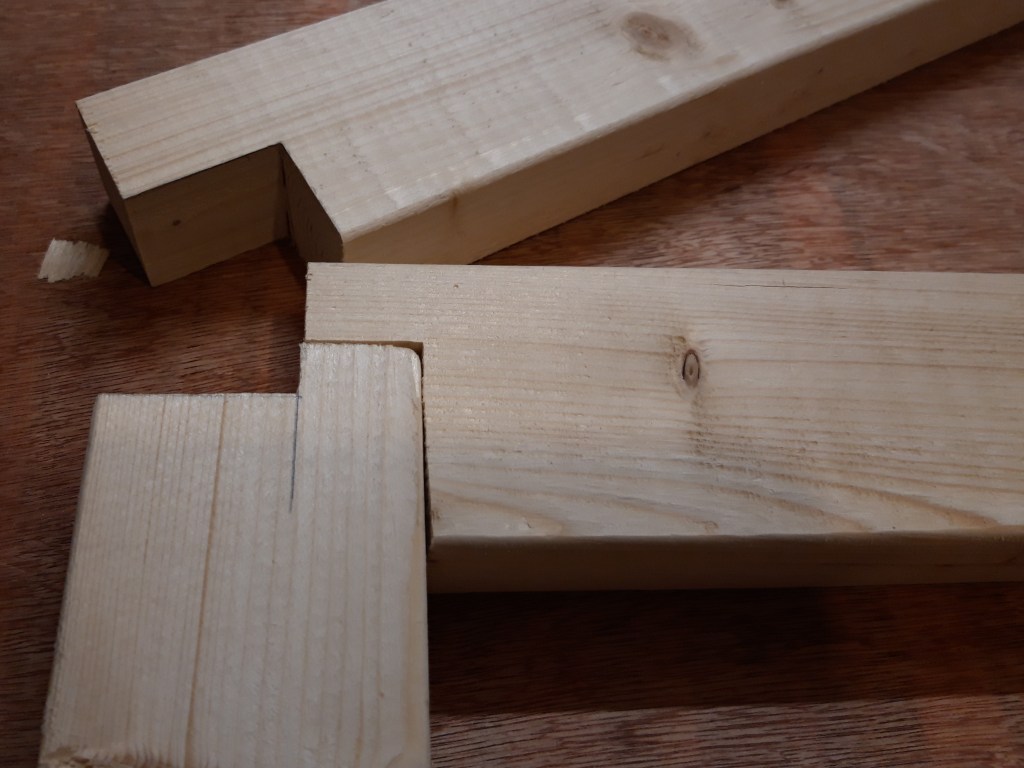
I then measured and cut the corner posts, and spent some time figuring out how to connect the top stretchers in another 3-way joint. I designed this one slightly differently to the one at the base of the corner posts, as I wanted the weight of the stretchers to be supported by the corner posts. That also means that the weight of the lid when closed sits directly on the four corner posts which channel the weight straight down to the base of the trunk, reducing the overall stress on the trunk frame.
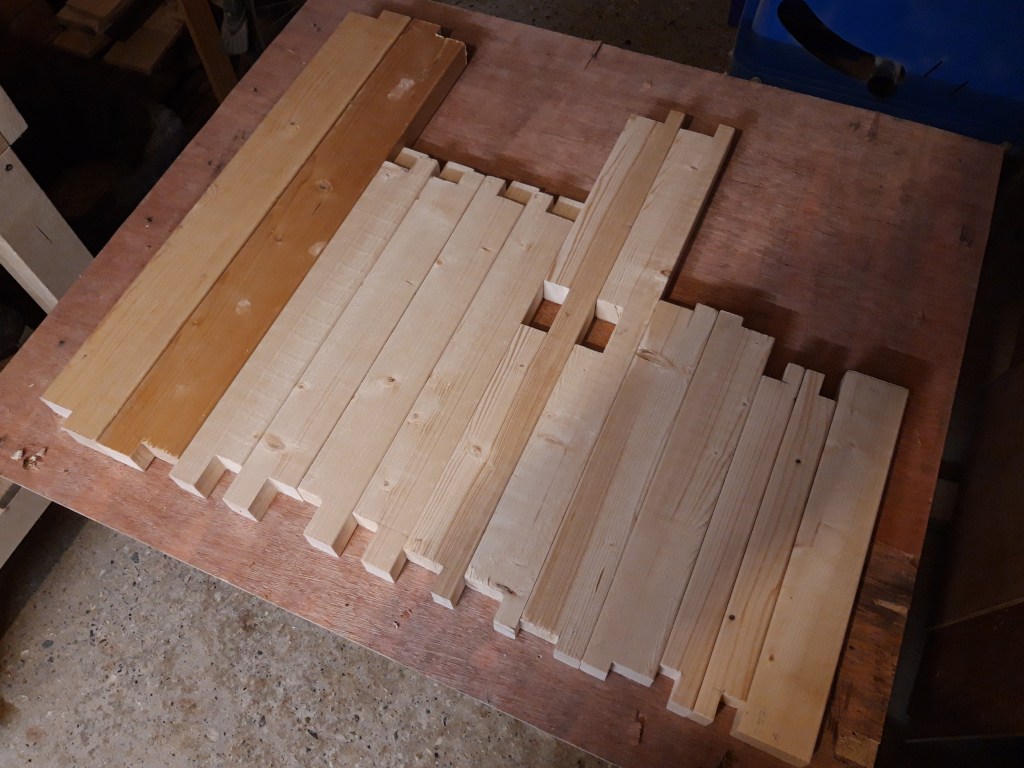
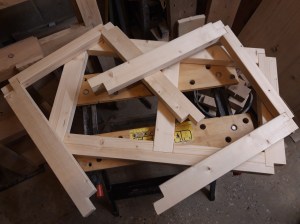
After a lot of cuts with my mitre saw to get every piece to length and then a lot of repeated measuring and chiselling, I had all the components completed. The final long stretchers are also made of 2×4 but I used an older one which had changed colour quite a bit! Once I sanded all the pieces however (which took an age!), all the components were a very similar shade of pine again. I carried out a test dry fit of all the pieces together, which I had been basically doing in stages throughout cutting and chiselling all the components, and was very happy with the result. The centre support in the base of the frame was a little tight but was fine with some glue applied and a few gentle taps with a mallet to get it into place!

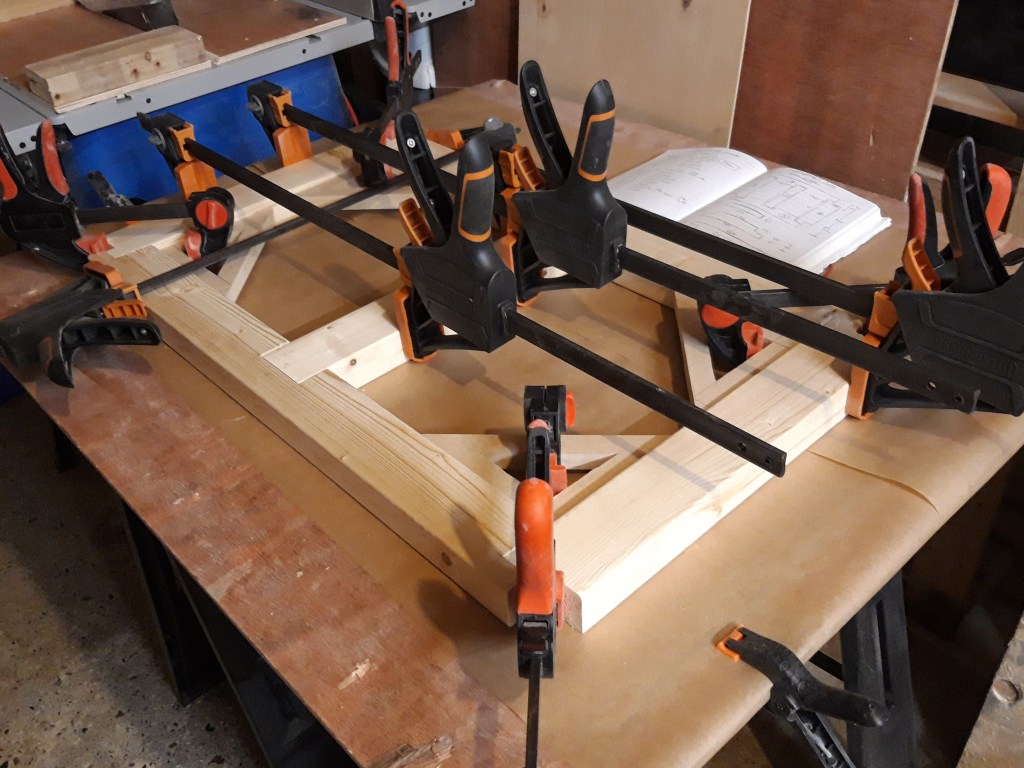
I started the glue up with the base and used a selection of clamps to hold all the joints together. I made some 90 degree (right angle) triangles out of mdf and then used my jigsaw to cut out a smaller triangle in the centre section. This gave me the ability to clamp the corners together at exactly 90 degrees with one clamp and ensured there was no racking within the frame as the glue dried. I do have a specific corner clamp, which I have used several times for simple assemblies. But as I wanted to do all 4 joints within the base simultaneously to ensure the angles were spot on, I made my own triangular variation!
While the base was drying, I glued the corner posts to the top short stretchers separately which produced two sets of uprights to be added to the completed base. This was a little easier than gluing up the full base was, as I only had two corners to glue simultaneously. It would have been a lot easier though with a larger workbench rather than just a sheet of plywood on my workmate, so I will really have to start planning out an upgrade to my current situation soon!
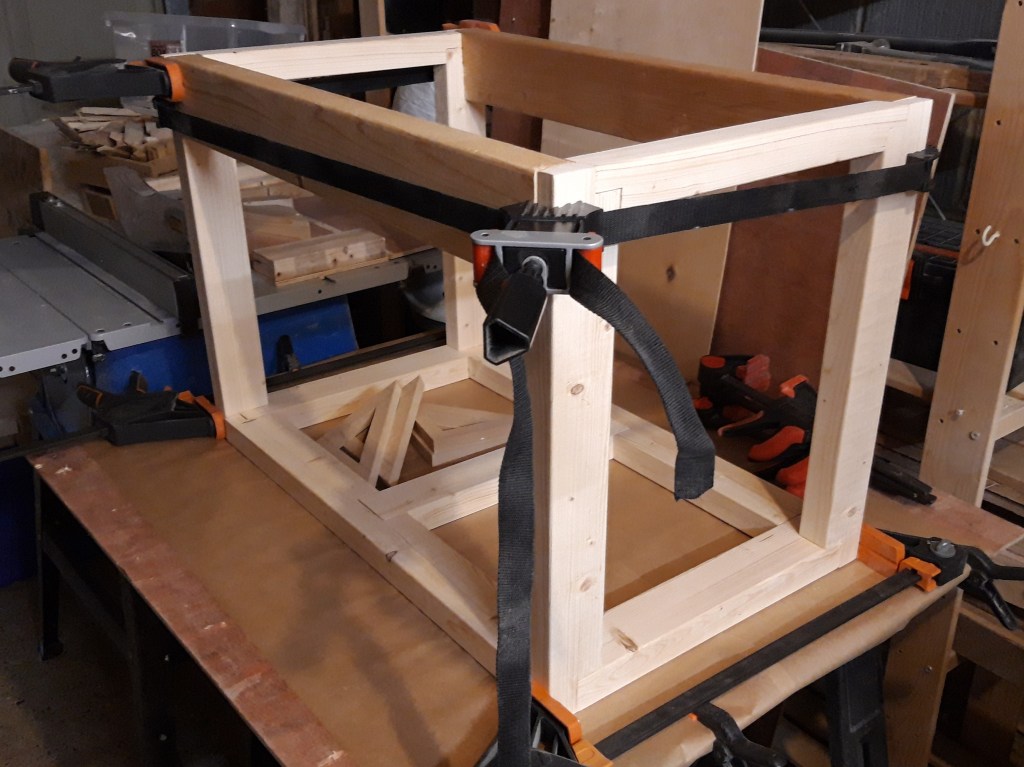
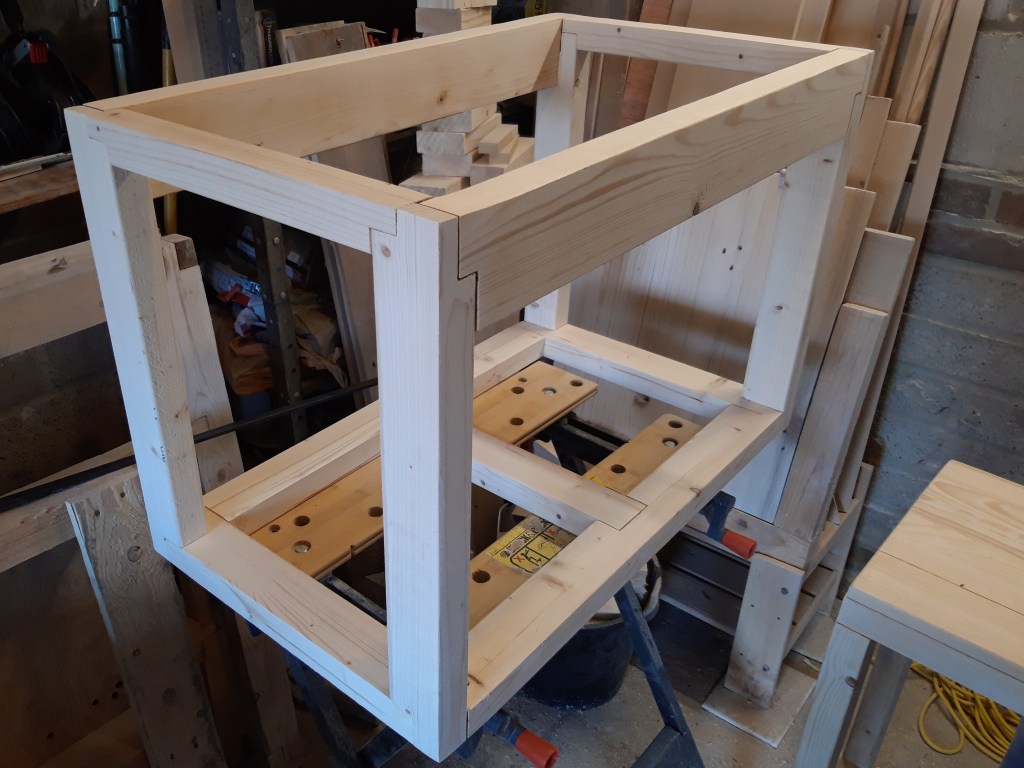

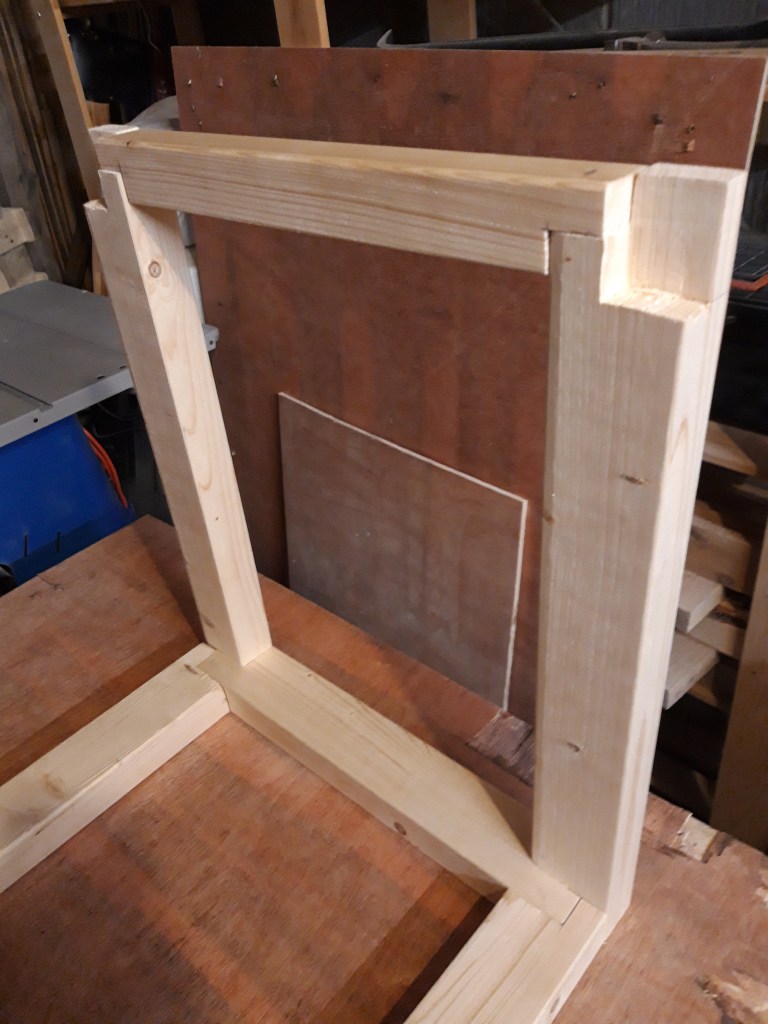
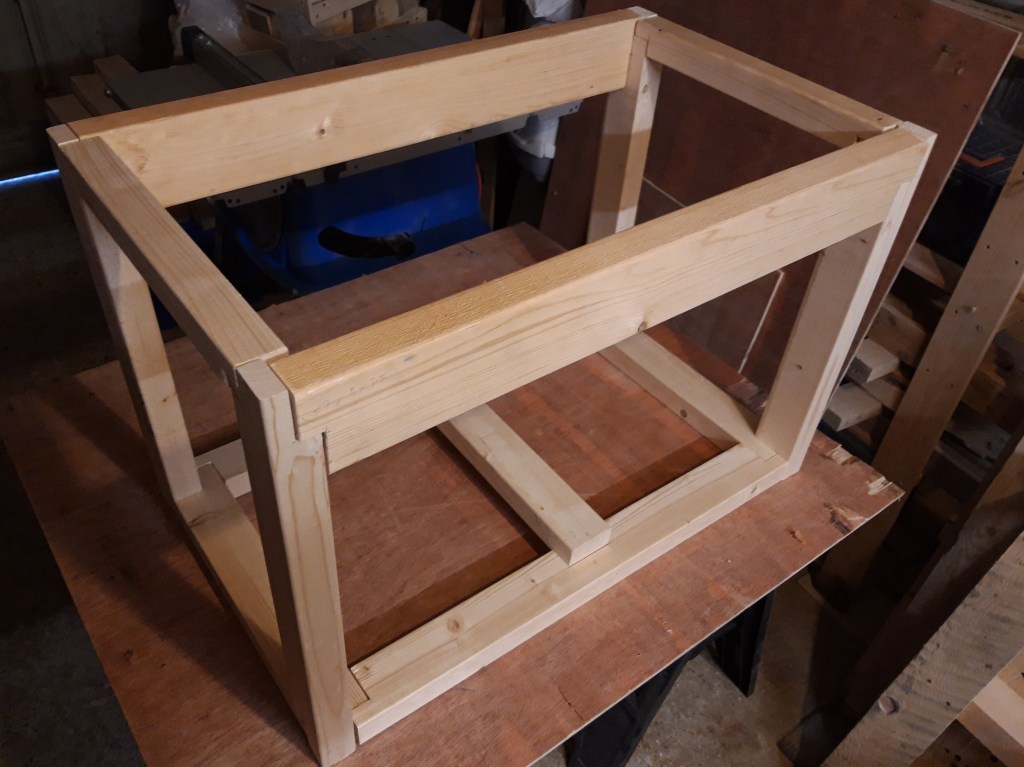
Once the base and uprights were fully dry, I glued them together as well and then slotted the long top front and back stretchers into place. I used long clamps combined with a band clamp to tighten everything together while the glue dried and then a couple of days later, spent another age giving everything a sand to remove any excess glue squeeze out that I’d missed and to ensure the joints were all flush.

Part way through the assembly, I decided to add some additional hardware to the project, in the form of black metal handles on each end to assist with lifting and moving the trunk (and to match the planned hasp and staple trunk latch). I realised that the handles, unless right at the top of the trunk would not have any frame to be secured to and the whole weight of the trunk would be held by small screws going into 1.5-2cm thick panels. I didn’t think this was sufficient and the handles being at the top of the trunk looked a bit odd. So I added an additional crossbeam into the upright end sections part of the way down. As this was going to be a butt joint I made sure to apply lots of glue to the 2 new pieces and let them dry a bit first before adding them into the workpiece with more glue to ensure a good bond between the end and side grain. Adding this extra crossbeam into the workpiece was a bit difficult as I wanted the fit to be pretty snug. But some gentle persuasion again with a mallet and the new crossbeams were slotted into place. I used a clamp to ensure they didn’t move while the glue dried.
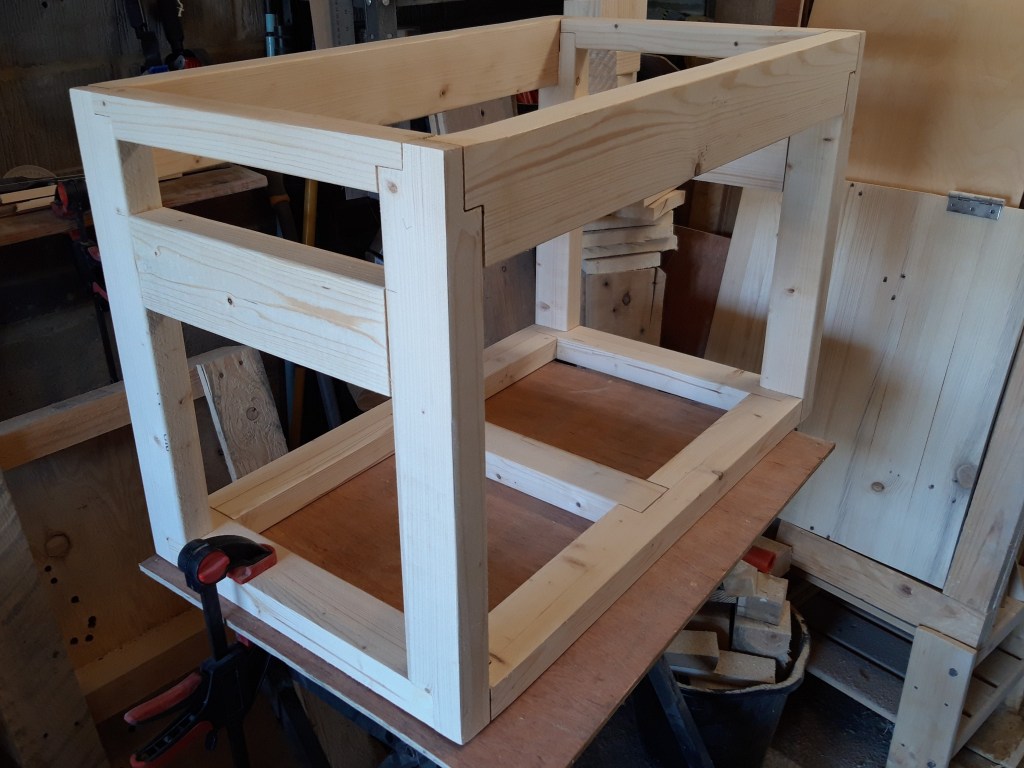
I gave the frame with the additional crossbeams another day to dry before giving it another sand. I will be sanding the inside of the trunk frame again when it is finished but it is much easier to do it thoroughly now when there are no side panels in the way! Once all the sanding was finished, I started planning out what I needed for the next step in the construction of the trunk – making the lid! 🔨

7 thoughts on “Wooden Trunk – Part 2 Framing”