The old house had a log burner so we had a pile of logs outside the front of the house. As the logs were quite untidy and not particularly protected from the elements, I decided to build a log store to keep the wood dry and tidy. After building the frame and constructing the sloping roof and solid base, I finished the log store by adding side slats and then applied stain and varnish to protect it from the elements.
Constructing the log store is split across 3 posts to allow me to share the steps and my thoughts in some detail, with the construction of the frame and the roof and base. I will update the links as I complete the posts so the full build can be followed from start to finish.
Part 1 – Frame
Part 2 – Roof and base
Part 3 – Side slats and finishing (this post)
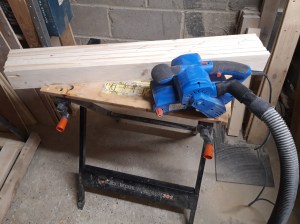
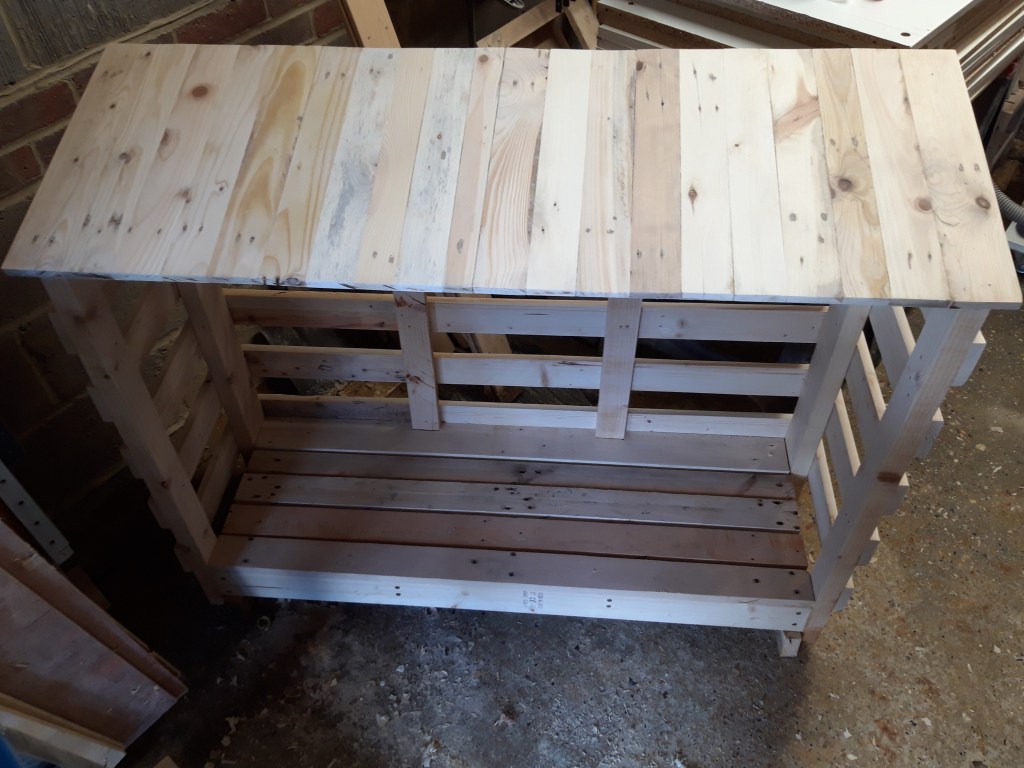
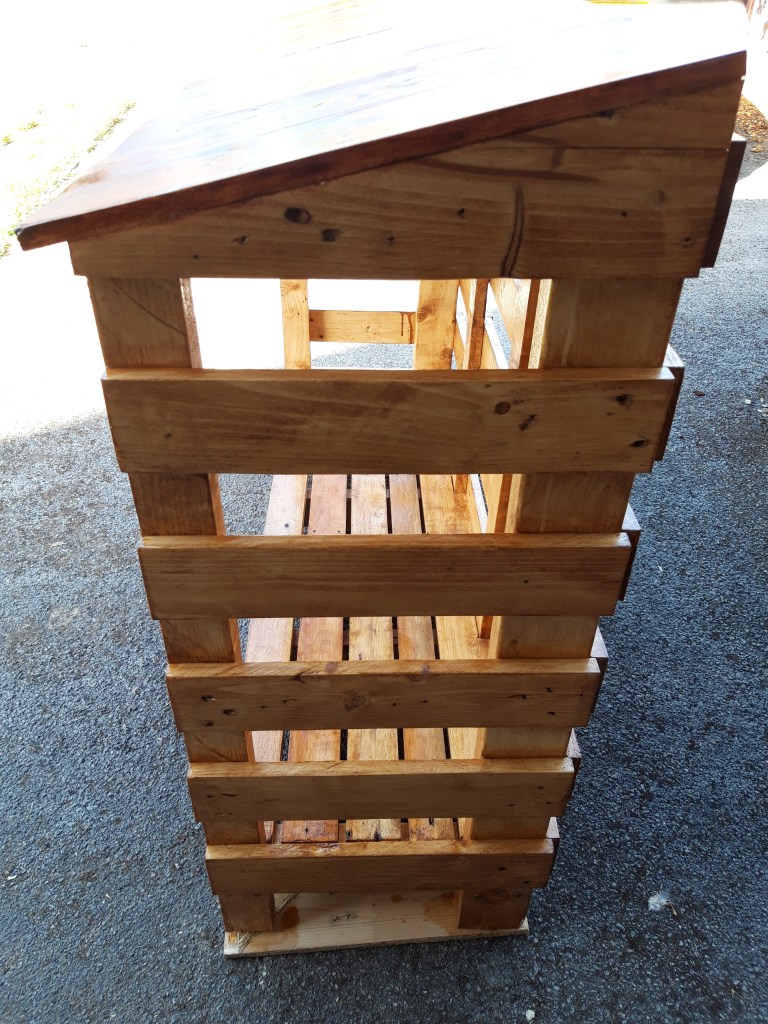
The final steps to complete the log store began with selecting suitable pallet slats to make the side slats. I cut the pieces to the right lengths using my mitre saw and a stop block so I could repeat the same cuts multiple times. I then used my belt sander to smooth out the slats and flatten any holes where nails had blown out the surface or I had made tool marks during dismantling.
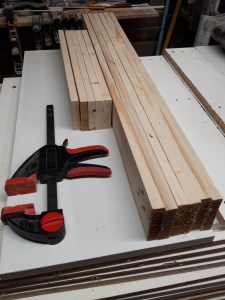
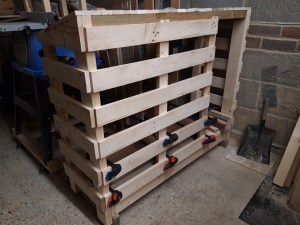
I fitted the side slats to each end of the log store with glue, using clamps to hold the pieces in place while the glue dried. I used a spacer block to position the slats equally on each side, which also helped me make sure the slats were level.
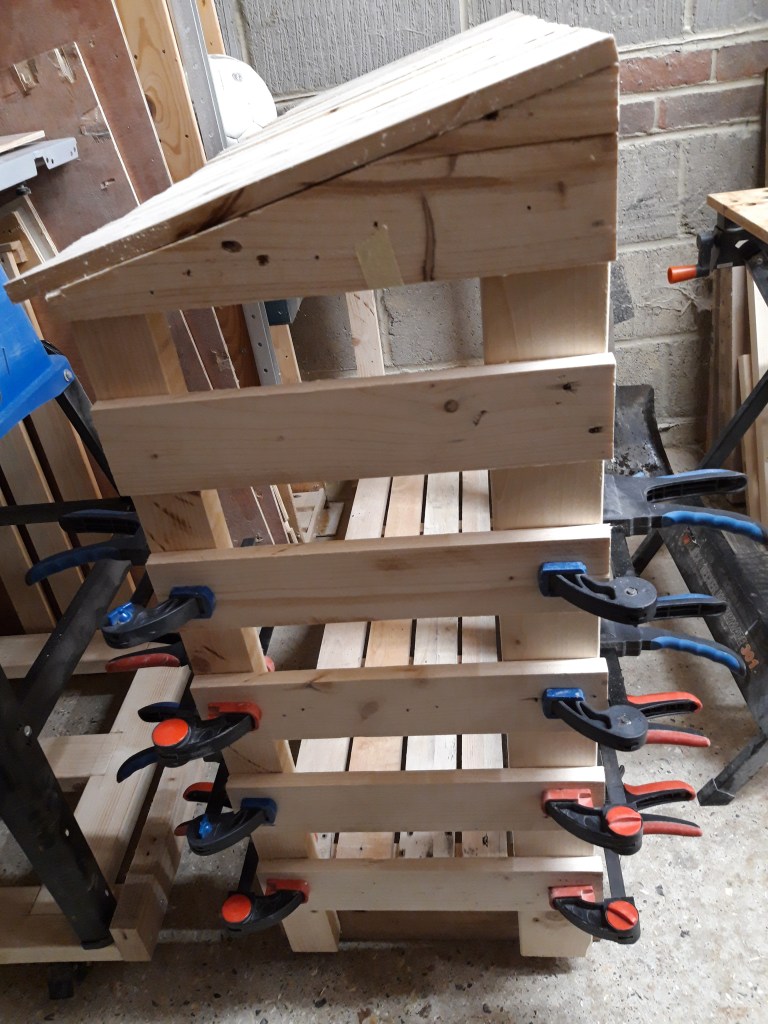
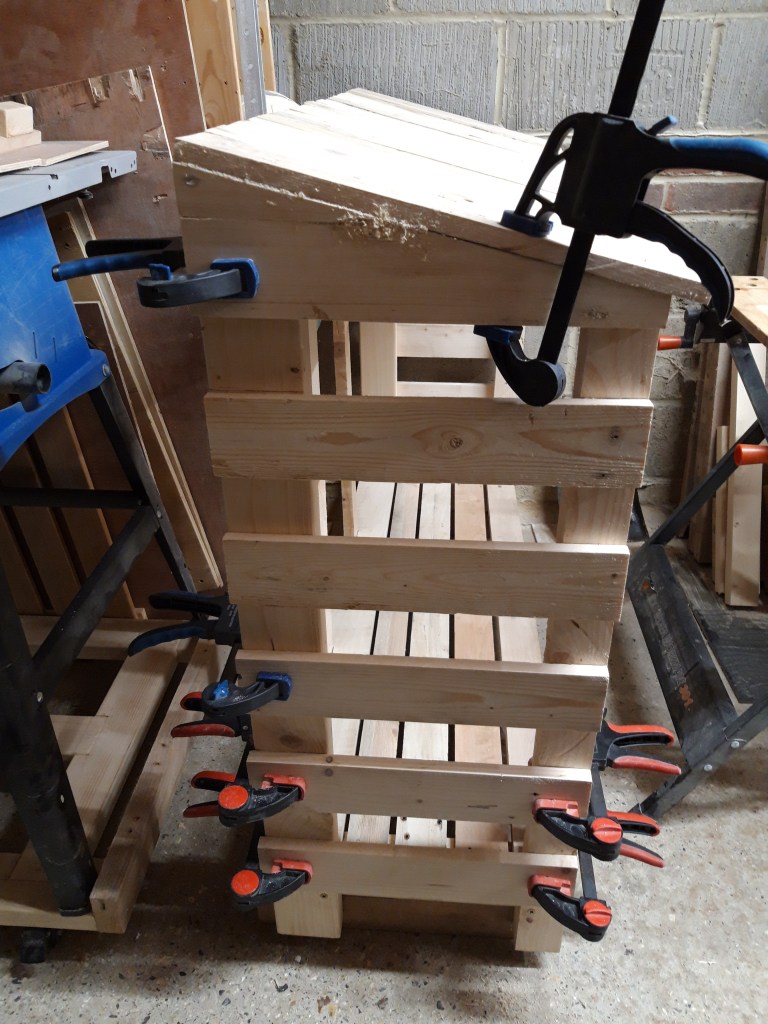
I cut the top slat on each side to fit snug under the sloping roof and then used the cut-off piece to fill in the space above the top slat at the back. I glued and clamped these into place and filled in any holes with a mixture of wood glue and saw dust. I then moved round on to the slats along the back of the log store.
The total width of the log store was too large for any of the pallet wood I had to be able to fully span the whole gap, so I used the vertical bracing on the back to allow me to fit two pieces, spanning 2/3rds and 1/3rd of the back space respectively.
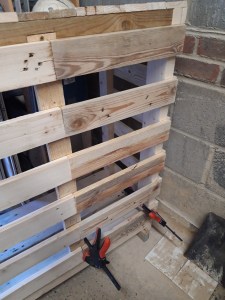
I worked my way up securing the long rear slats starting from the bottom, again using a spacer block to assist with making the gaps between the slats uniform and ensuring the slats were level. I then repeated this process for the short rear slats and left the log store to sit overnight to ensure the glue was fully dried.
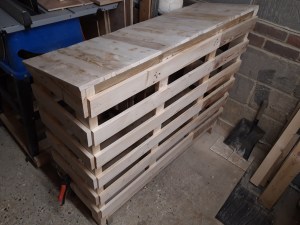
The next day I sanded all the surfaces up to 180 grit with my random orbit sander and tidied up the areas where I had filled the nail holes in the side and rear slats with the glue and sawdust mixture.
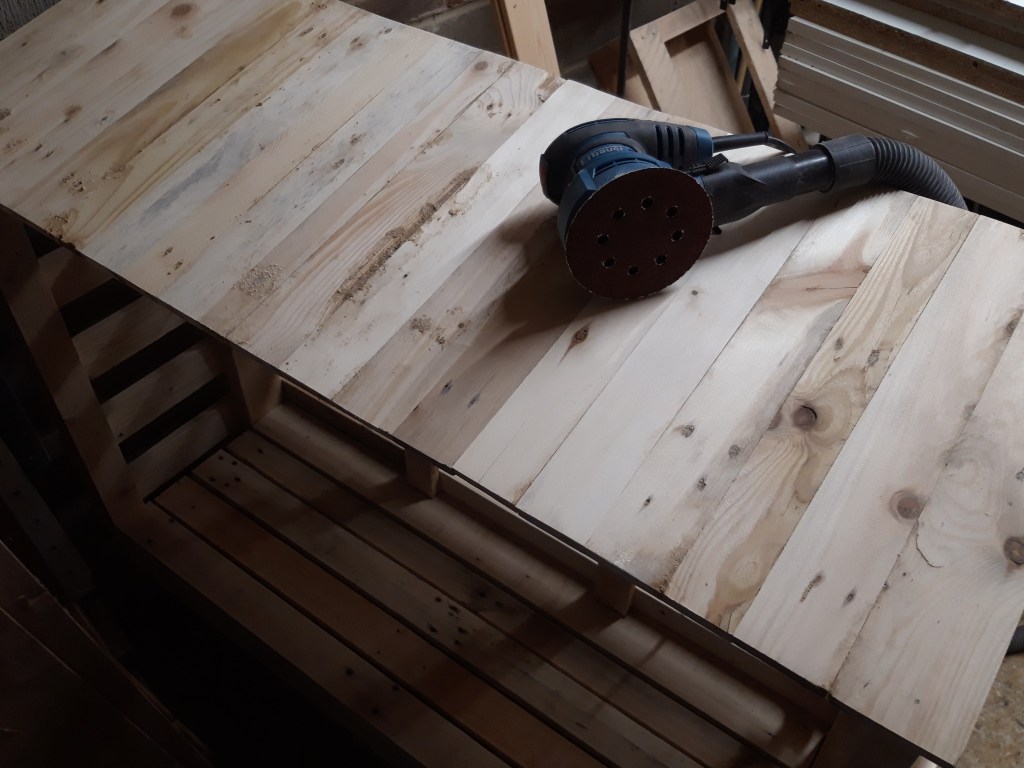
One the sanding was complete (which took quite a while!), I wiped all the surfaces down with a cloth to remove any remaining sawdust and selected the two colours of stain I wanted to use.
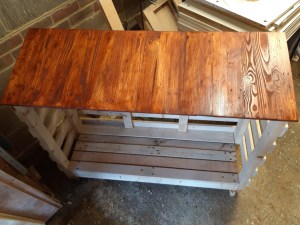
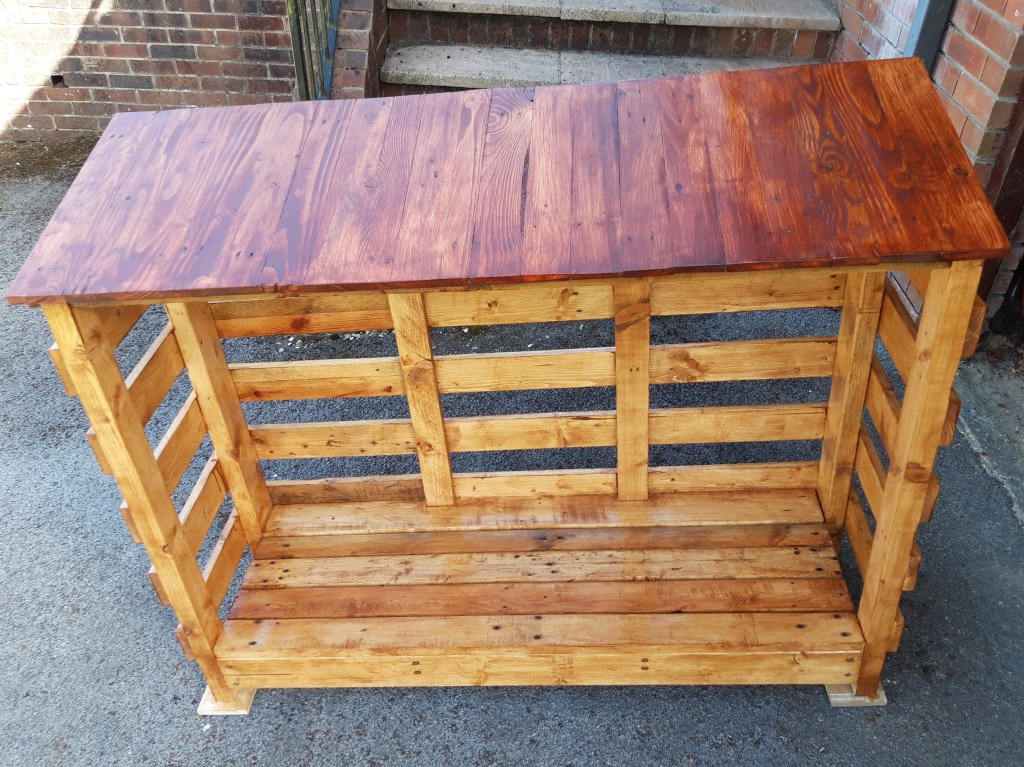
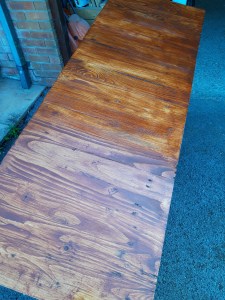
I applied several coats of both stains with a brush over a couple of weekends to allow enough time for the stain to fully dry in between. I chose a mahogany-coloured stain for the roof and an oak-coloured stain for the frame. I especially like how the mahogany brings out the grain patterns in the wood on the roof and the darker-coloured roof has a good contrast against the lighter-coloured frame. I also think the oak colour softens the harsh brightness of the almost white frame.
After the stain had fully dried on both the roof and the frame, I applied multiple coats of a matt finish varnish, making sure to apply thoroughly to the roof, which will catch the rain and the bottom of the legs of the frame to protect the wood from any moisture coming up from the ground. I applied both the stains and the varnish outside in order to give me more ventilation, although I did still wear a mask to prevent me breathing in too much of it!

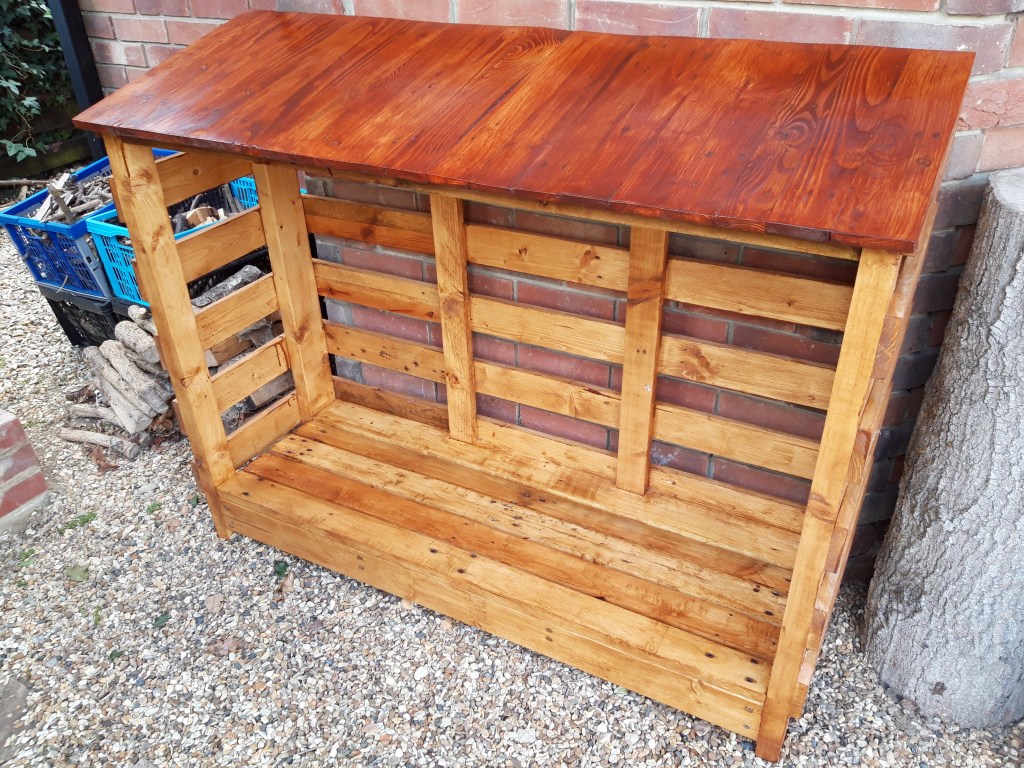
I left the log store for another few days to fully dry and then moved it into position in front of the old house. I was really pleased to see how well it fitted in and that my measurements had been correct for it to fit neatly in the space under the window!
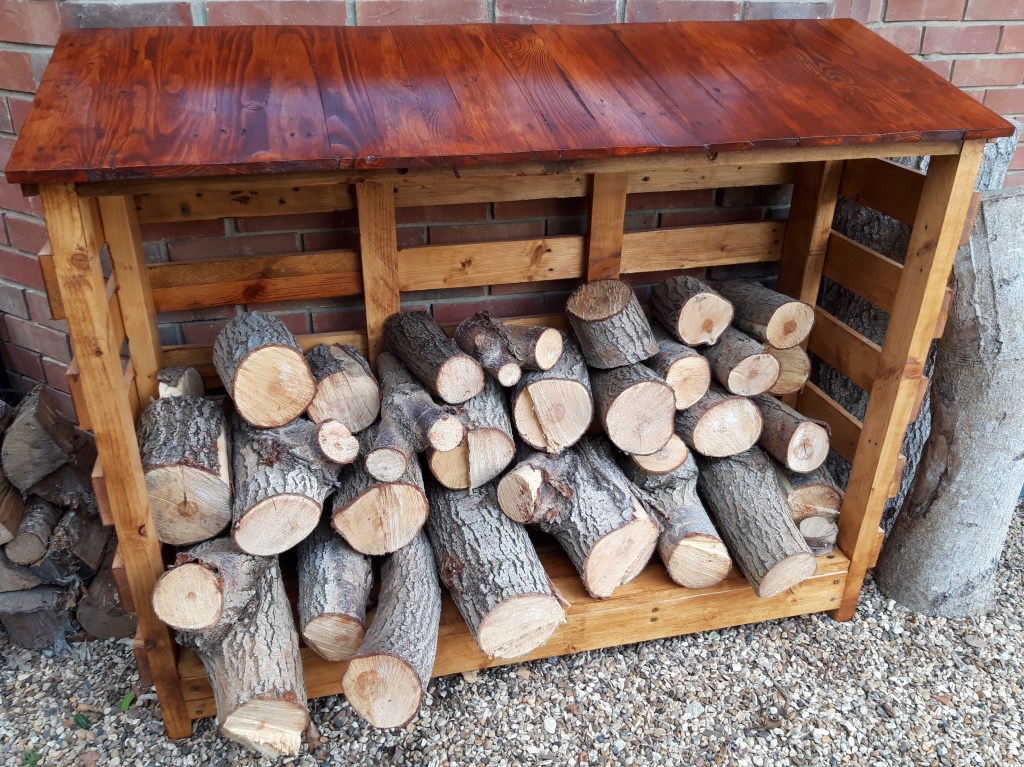
I loaded up the log store with the assorted sizes and types of logs – it is very stable and definitely not going anywhere! And it made the front of the old house look so much smarter and tidier.
When I moved, the log store came with me to the new house and is currently living in the garage here, as the living room doesn’t have a log burner. But it has been a very useful project and means I’m still able to keep all the logs neatly organised. Plus the side slats and slatted base allow plenty of air to circulate which helps dry out all the logs too. I’m looking forward to maybe getting a fire pit soon for sitting out in the evening and relaxing after a bbq in the garden, if it ever stops raining! 🔨

2 thoughts on “Log store – Part 3 Side slats and finishing”