What do you do when a tree falls down in heavy storms? Use the wood to make something fun!

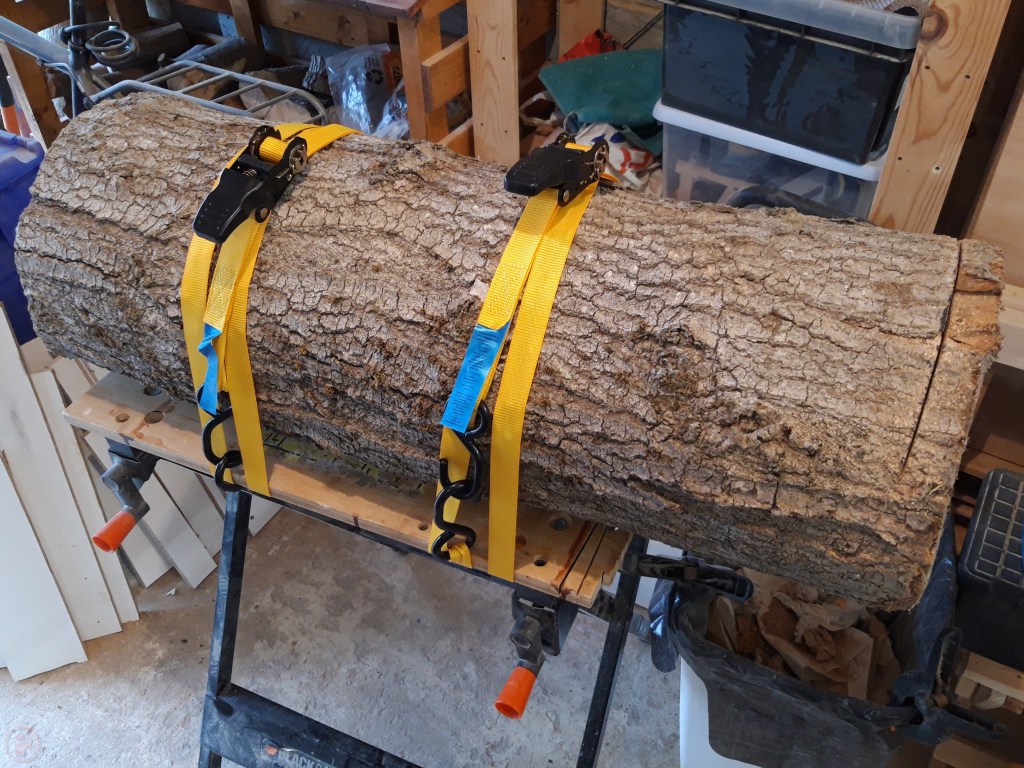
I started with a huge piece of log, which was a huge effort to move around the workshop! I fashioned a log holder using my workmate (which slightly struggled under the weight!) and some ratchet straps to hold the log securely in place.

I then set about trying to cut some sections off the log, to make a cake platter/slab for my wife. This was hard going with the tools I had and after an hour of sawing, I was only about halfway through the log and had worn myself out! I decided some greater firepower was needed so did a load of research into electric chainsaws (I chose electric over petrol). So I am now the proud owner of a relatively small electric chainsaw and accompanying safety gear!
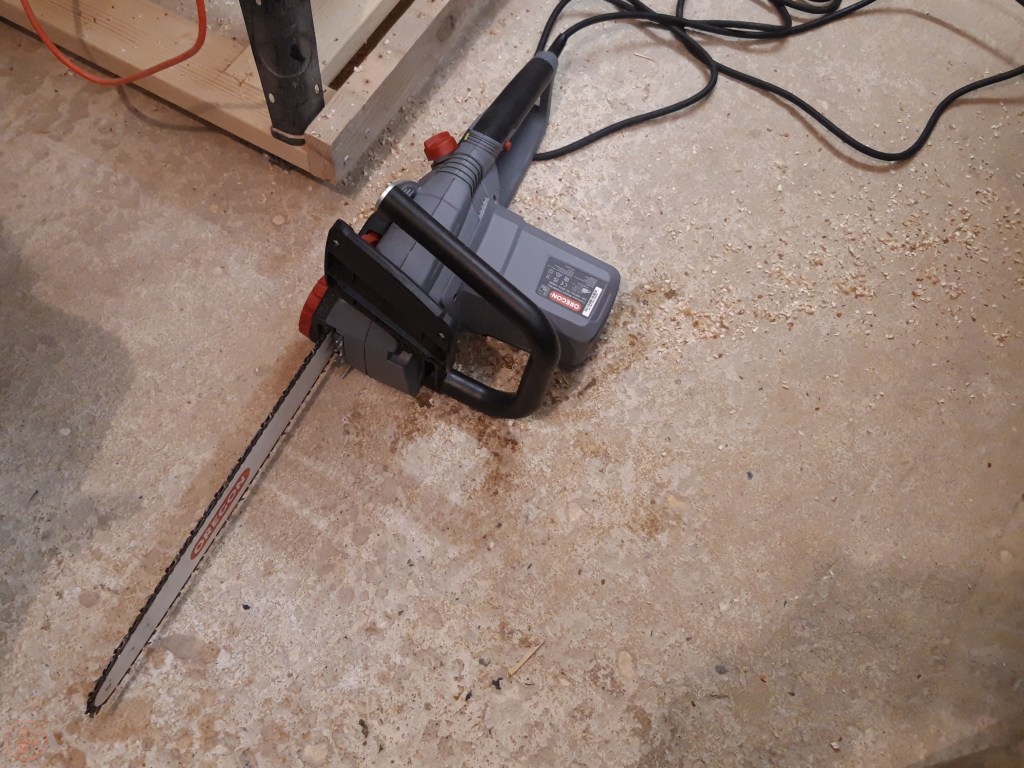

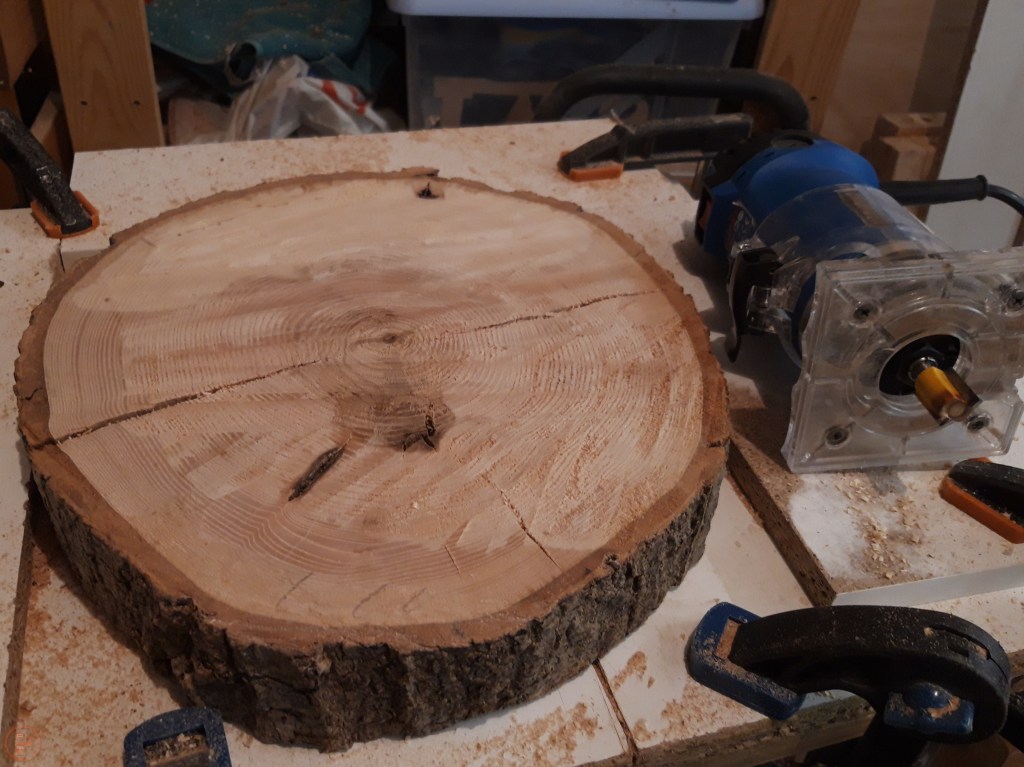
Using the chainsaw I was able to carve off a very neat slice of log in under a minute! Now that’s much better! As the slab is designed as a platform for putting things on top (cakes or table decorations), I wanted to make the surface as flat as possible. I therefore made a sled for my router (see separate blog post to follow!) and using a flat-bottomed straight cut router bit, I went backwards and forwards multiple times across the log slice.
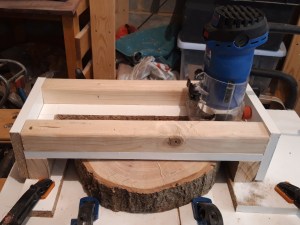
This was my first time flattening something with my router and I was really pleased with the result. It still needed sanding to get a completely smooth finish, but the surface was now flat.
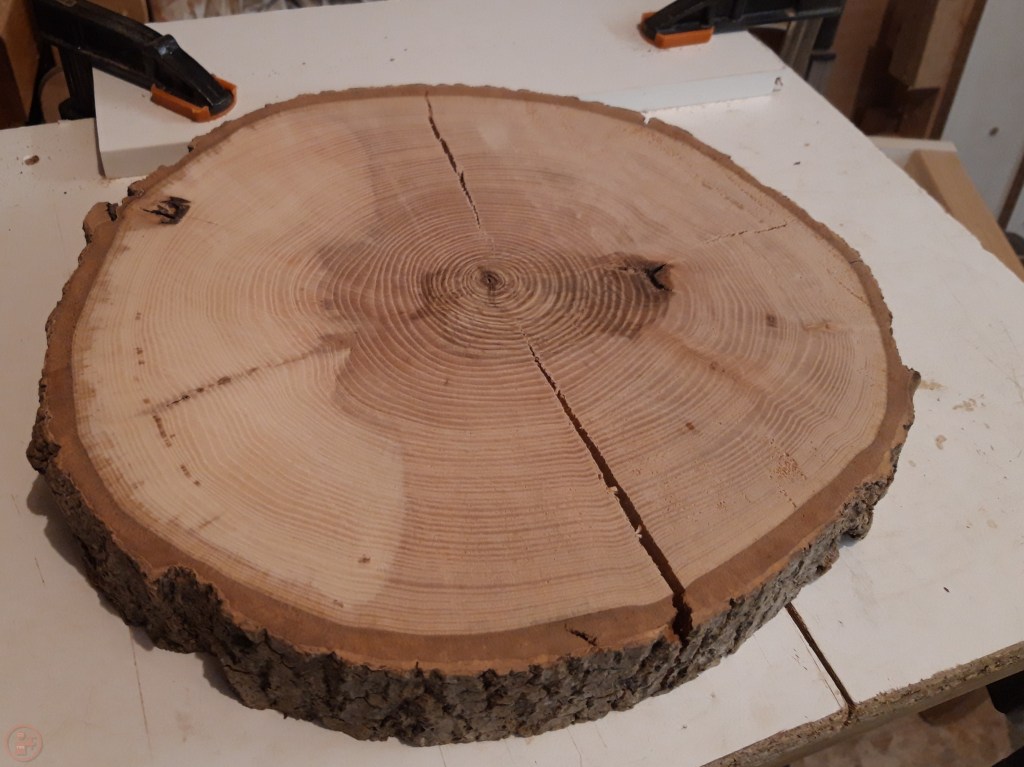
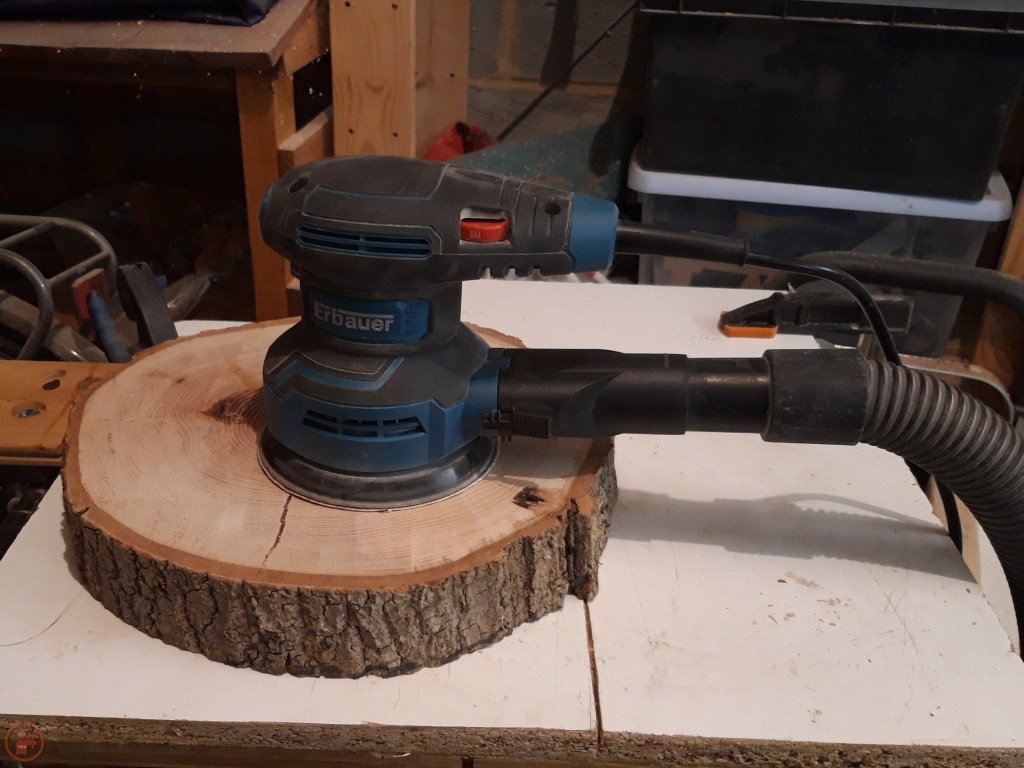
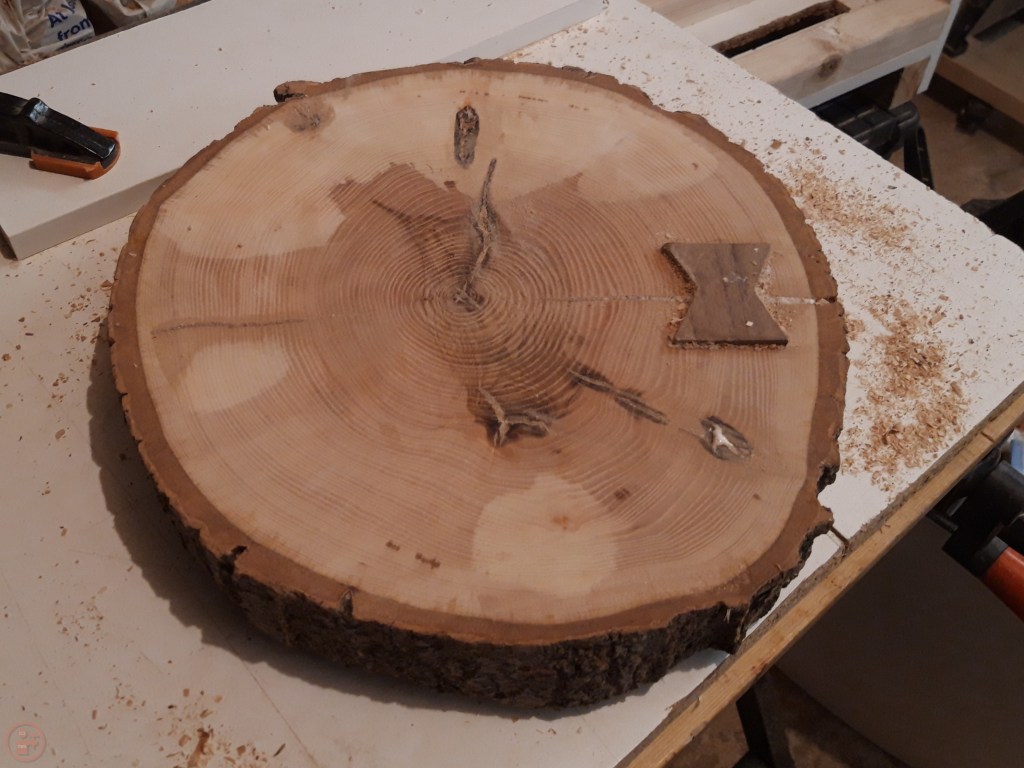
After a whole load of sanding up through the grits, I had a nice flat and smooth slab of wood. I noticed there were several cracks through the slice, possibly as a result of the tree falling down (!) so I decided to make some little bowties to add additional strength to the slab.
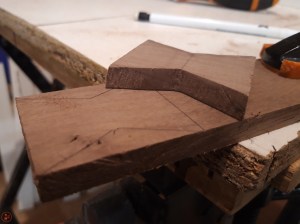
I cut three bowties out of some walnut leftover from a previous project and then positioned them on the slab. I drew round the bowties in the three spots and then used my chisels to remove the material.
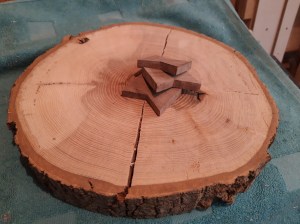
I placed two bowties on the “top” of the log slab and one on the “underneath”. I applied glue into the chiselled shape and then tapped the walnut bowtie into position using a rubber mallet. I made the chiselled hole slightly less deep than the thickness of the walnut, so I could plane and sand the bowties flush with the top of the slab.
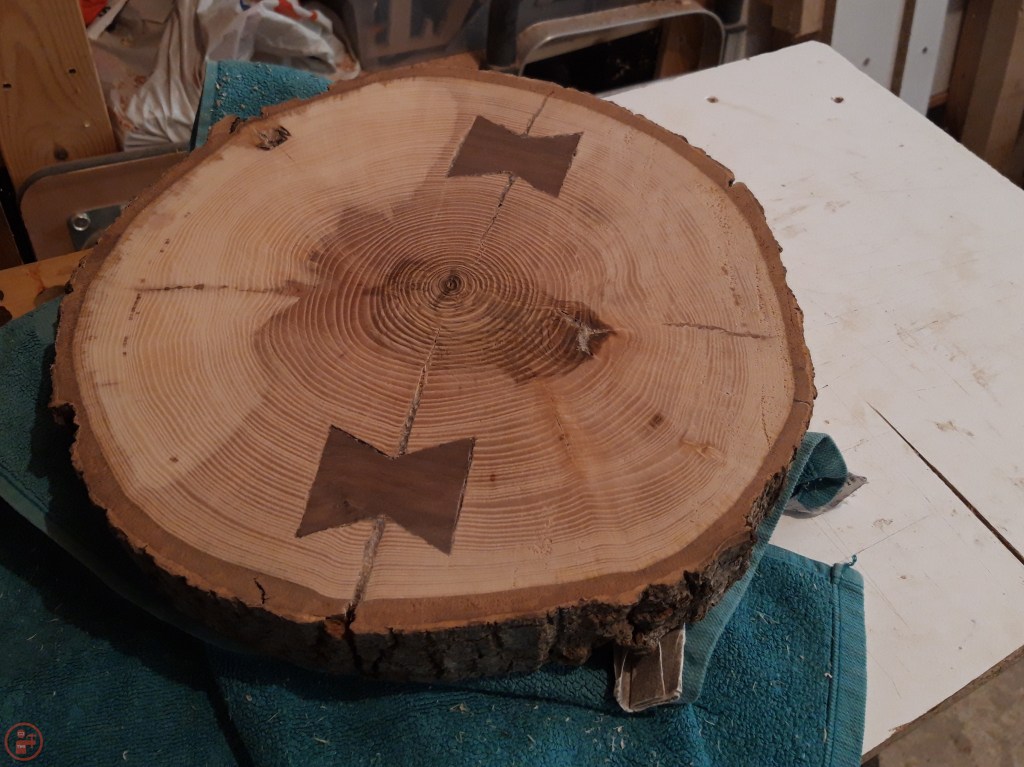
After much sanding up through the grits the slab was complete and ready for some finish!

I used foodsafe mineral oil as a finish to make sure it would be fine to put food on the slab, if we were to use it as a presentation surface. The wood was particularly thirsty, so I applied several coats of mineral oil, giving it plenty of time to soak in, in between coats.
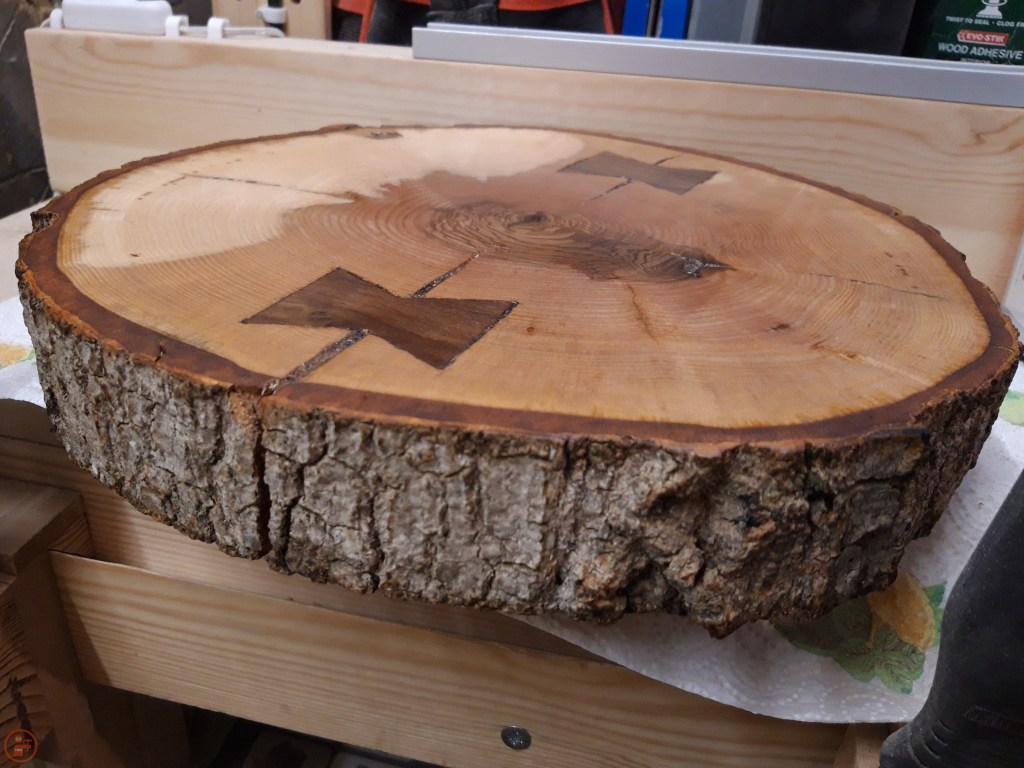
Once the oil was fully soaked in, I gave the slab a thorough wipe to remove any excess oil and then left it to fully dry in the house before I gave it to my wife – the slab now lives on the dining table as a bit of a centre piece with candles and a plant! 🔨

2 thoughts on “Log cake platter/slab”