For Father’s Day last year, I wanted to make my Dad something fun and personalised – I decided on a holder for his tea and biscuits!
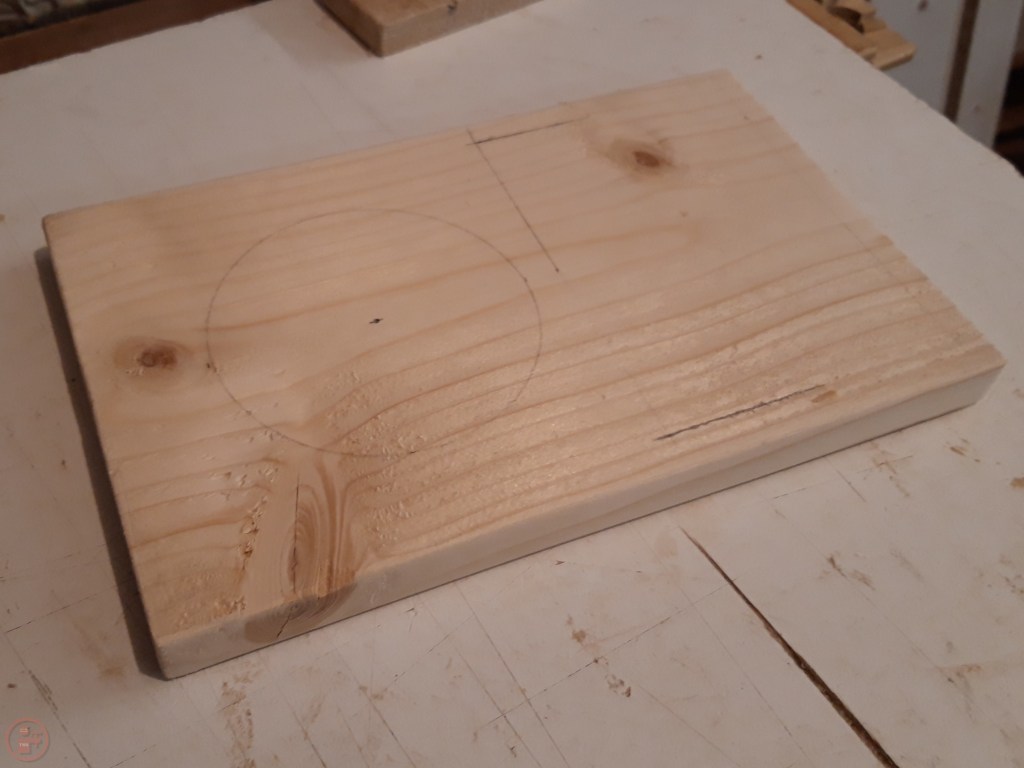
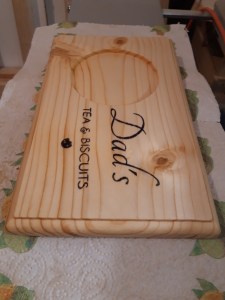
I started with a nice piece of pine that I really liked the grain on. It had a couple of knots which gave it a bit of interesting character. I drew out the outlines for the different sections and then found an offcut of mdf to create a template for the mug indent. I used a pair of compasses to draw a circle in the mdf, making it slightly larger than the diameter of my largest mug, so it should fit all the mugs my Dad has.
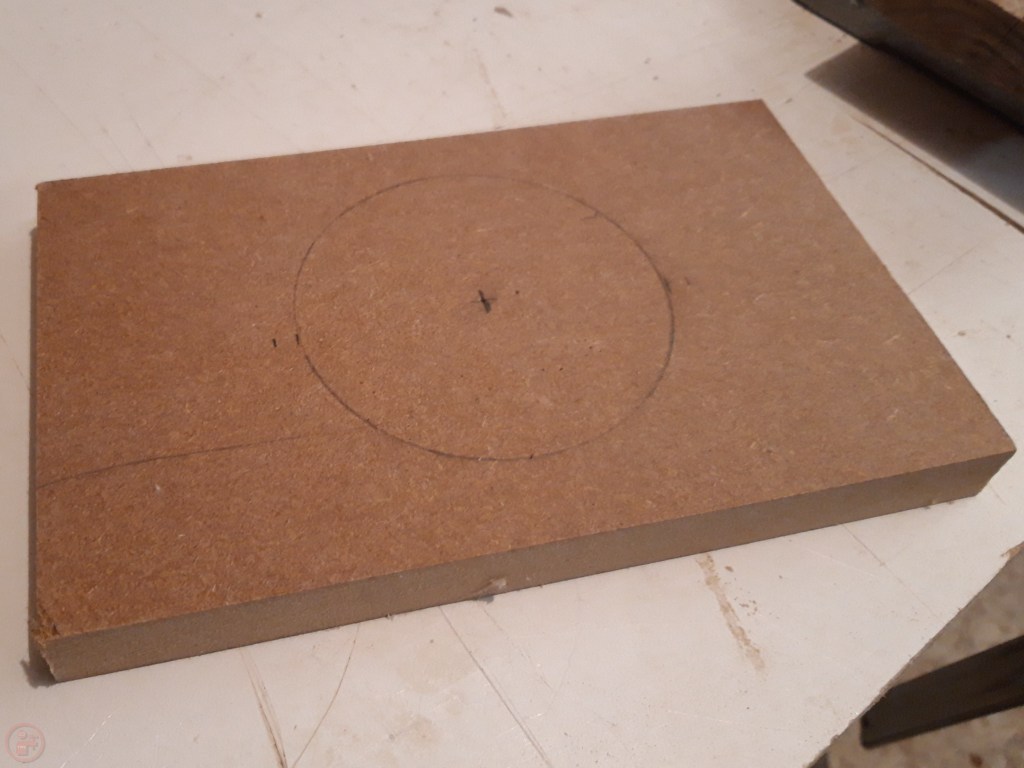
I used my largest Forstner bit to remove the bulk of the material from the middle of the mdf template and then refined the size using my jigsaw. Lastly I sanded flush with the line using some 40 grit sandpaper to leave me with a perfect template.
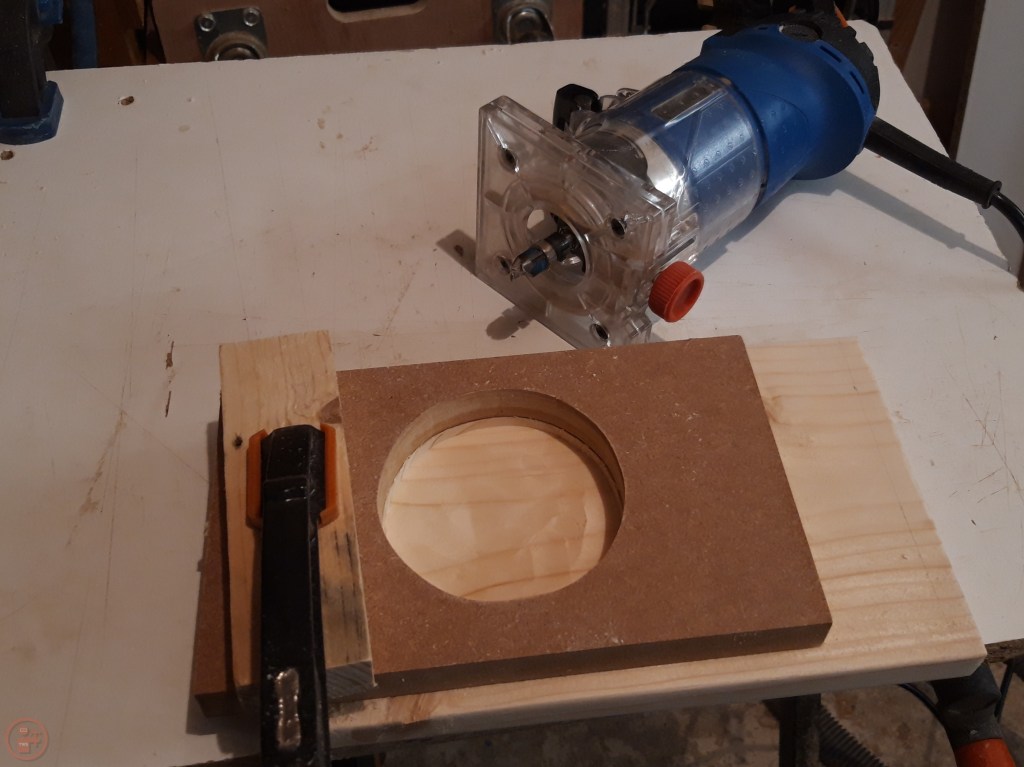
I secured the template to the pine in the right location and then used my palm router with a flat bottomed router bit with a bearing to remove material from the pine. I took my time, gradually reducing the depth and allowing the bearing to run along the inside of the mdf template to provide me with a perfect replica of the right diameter hole.
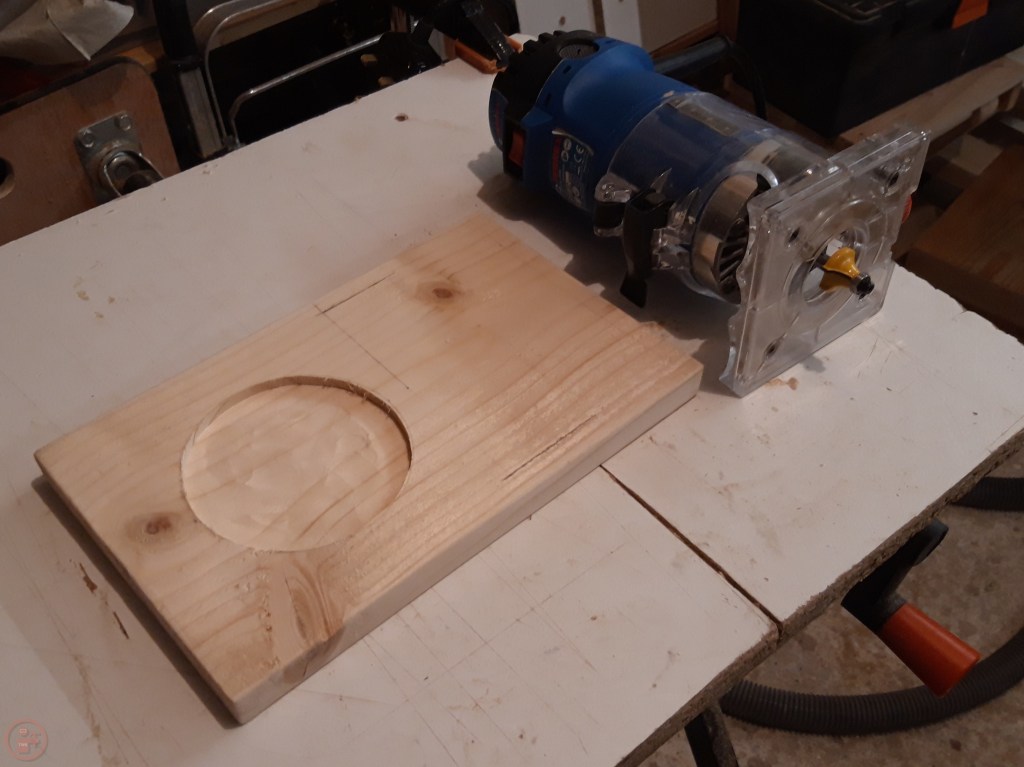
Once I had completed the mug holder to the required depth, I switched to a round over bit and used it to put a decorative edge all around the workpiece. I dropped the router bit a little lower than the top of the pine, so I had a clean straight edge still as a neat border all around the outside.


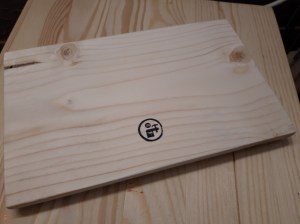
I gave the workpiece a thorough sanding using my random orbit sander, increasing the grits to remove the marks from the previous sanding up to 180 grit. I then applied my logo to the back using my TWS stamp.
I wanted to put some text on the righthand side of the workpiece so I explored different options for transferring printed text onto wood. I settled on the method of using baking paper and a print mode that deposited a lot of ink. This took a couple of attempts to work out how to secure the baking paper to the A4 paper going through the printer, but I finally had a reverse printout to transfer onto the wood. I lined up the words as best as I could and then pressed the baking paper down firmly, rubbing over the surface multiple times before lifting the baking paper up again.
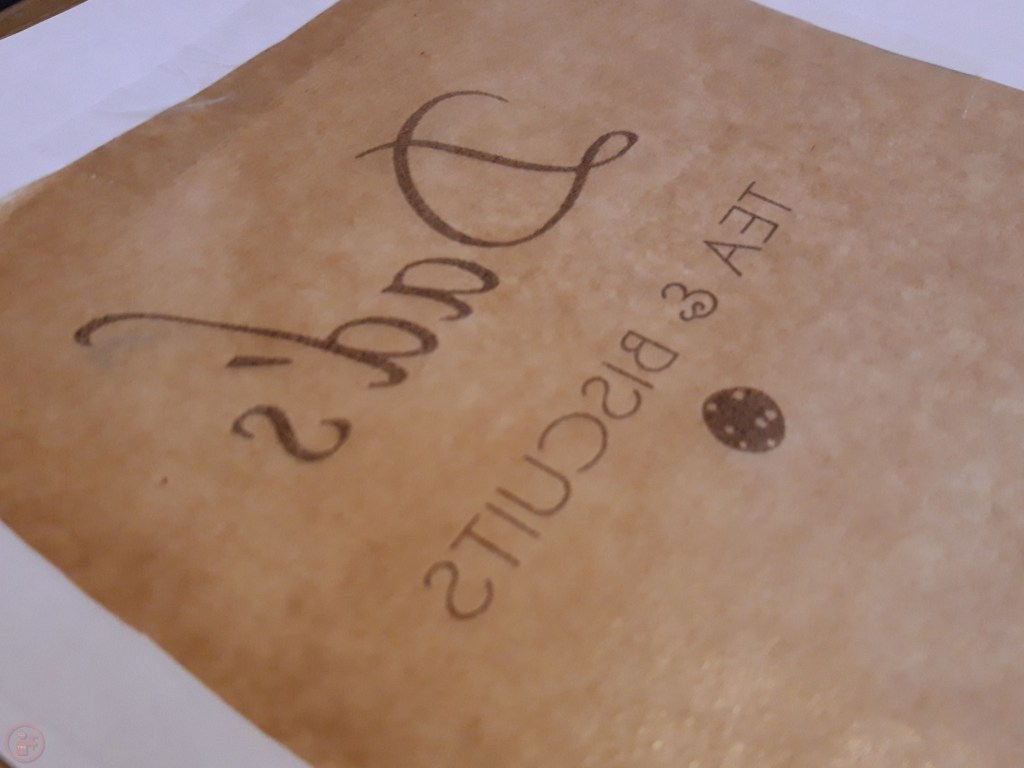
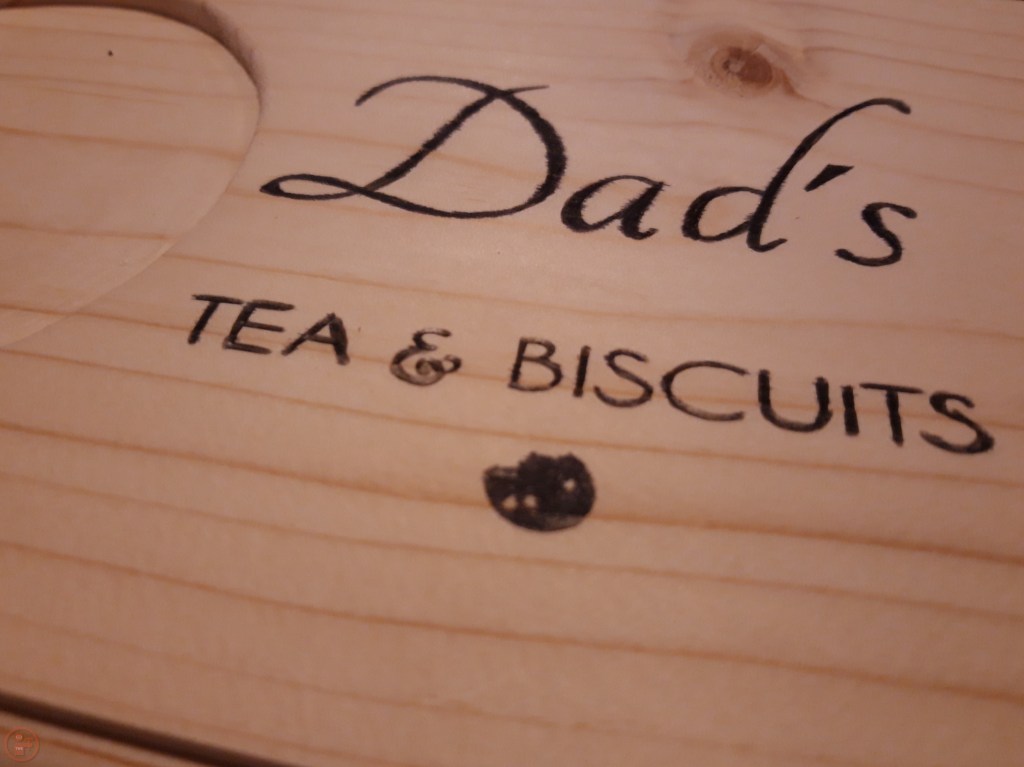
The ink transfer worked really well, aside from a small amount of the little cookie image, which lost a little bit of ink at the top just below the text. However, this just makes it look like someone has taken a couple of bites out of the cookie, so it is just a fun quirk!
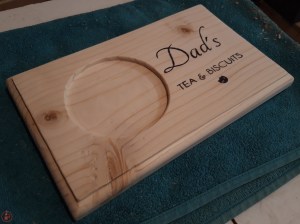
I left the ink to dry thoroughly for several hours as I had turned up the settings on the printer to make sure the transfer worked well and it meant I had deposited quite a bit of ink onto the wood. Once the ink was dry, I applied food-safe mineral oil to the workpiece to add some protection and highlight the grain and other features within the wood.
I left the workpiece to dry for an hour before applying a second coat of mineral oil and leaving it overnight to soak in.
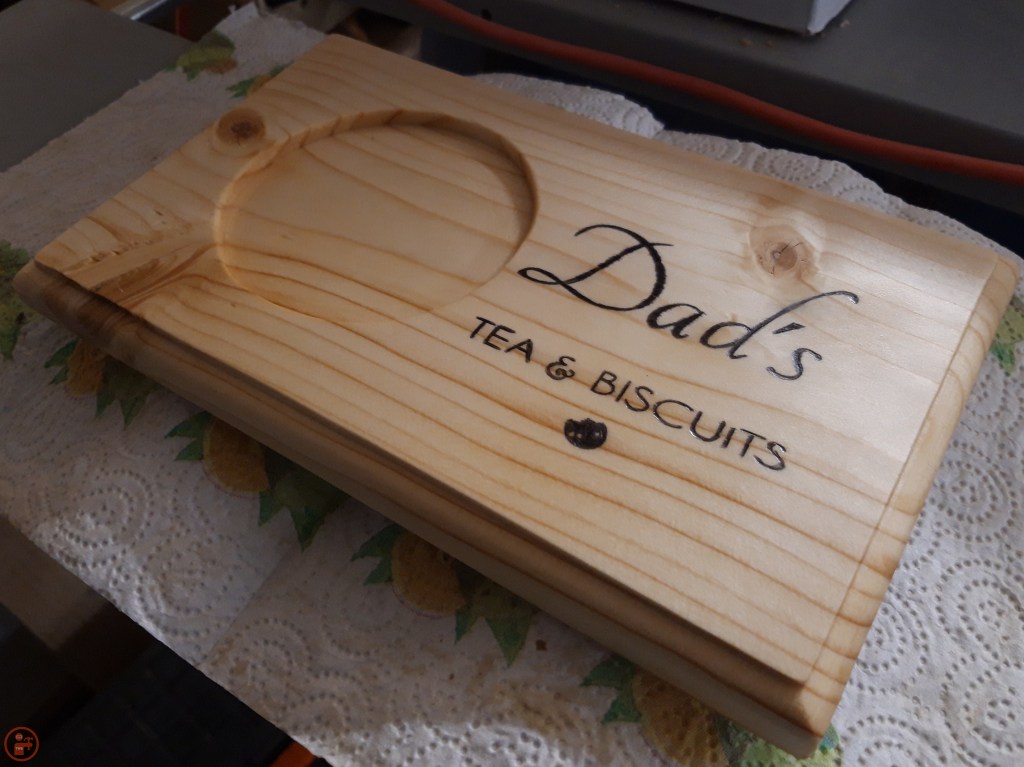
Once the workpiece was fully dry, I wrapped it up and gave it to my Dad for Father’s Day – he really loved it and now uses it as his coaster for every cup of tea in the living room! 🔨
