One of the challenges of living in a rented house, is the requirement for a lack of permanence in anything we wish to do to the garden to make it feel more homely and a nicer place to enjoy. Our front garden had only a few bushes under the front window and a boring area of lawn, which was often used as a cut through due to use living on the corner of the road. A solution for a physical barrier and for something decorative was some movable garden planters!
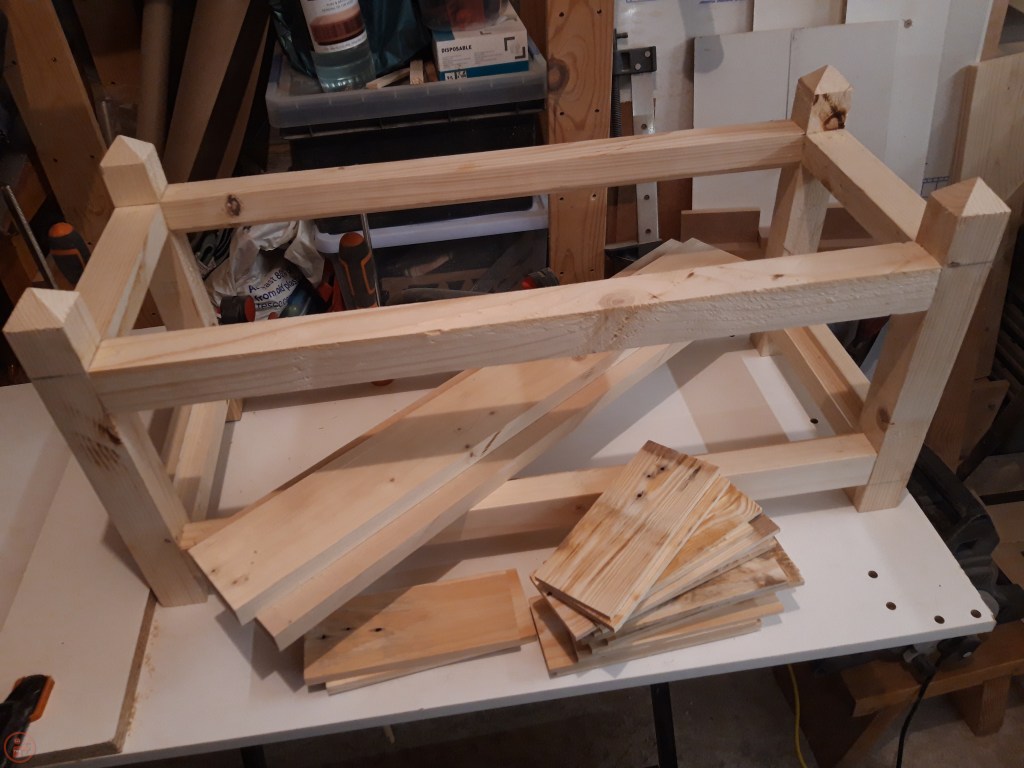
The project started with a lot of planning and discussion, working out the size we wanted for the planters as well as how many and how we would arrange them in the front garden. Once we had agreed on a size and that we wanted four to arch around the front garden, I started on the first one as a prototype, so we could be sure the dimensions and scale were right before I produced three more!
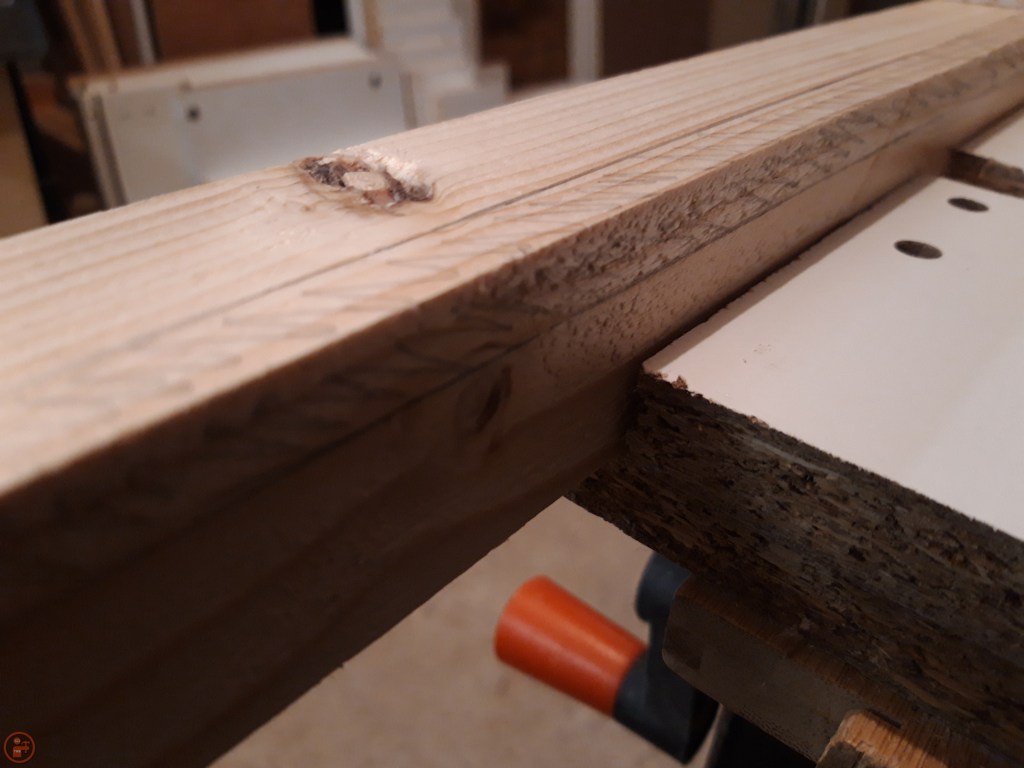
As the planters need to be nice and sturdy to handle the weight of the soil, I selected some construction lumber to make the frame. I didn’t go for treated timber for a number of reasons – it is a lot more expensive where we live, it means I can’t use any scrap pieces for anything else that isn’t an outdoor project and finally, we are planning on painting the planters with an outdoor paint anyway, which will give them a load of protection.
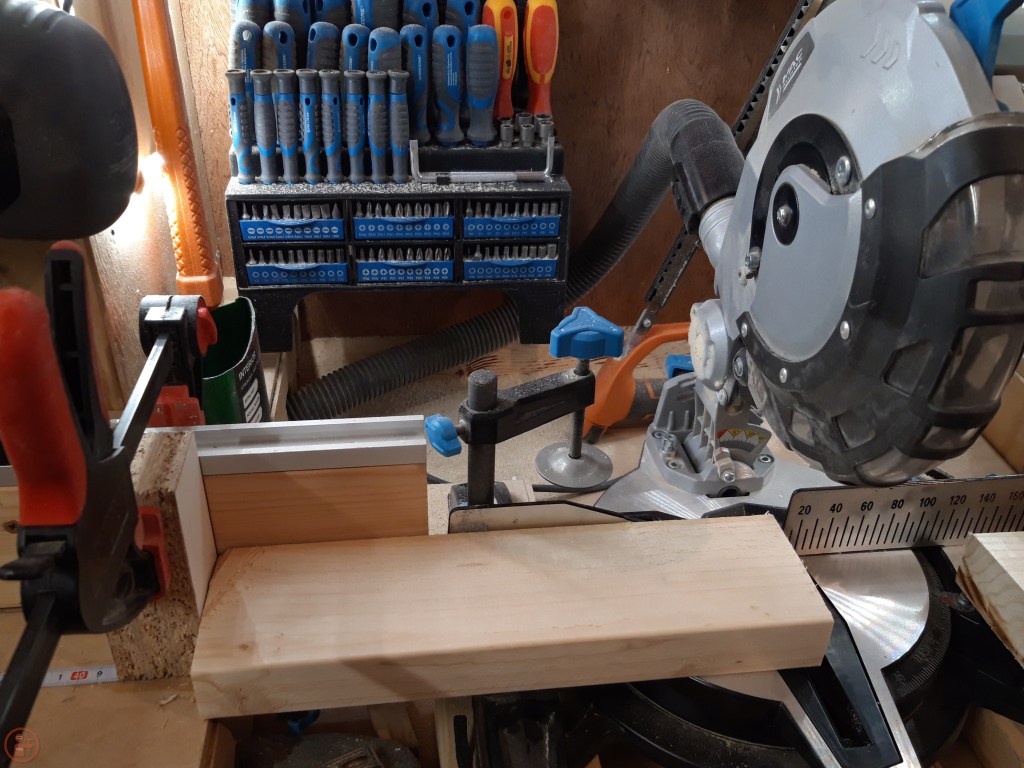
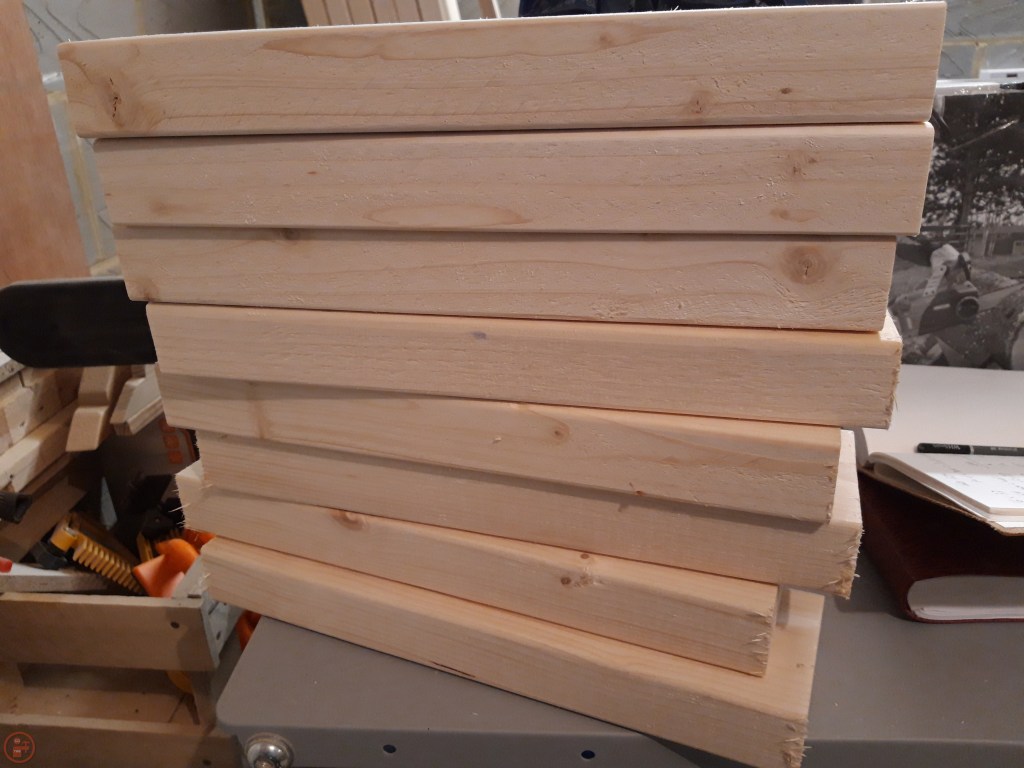
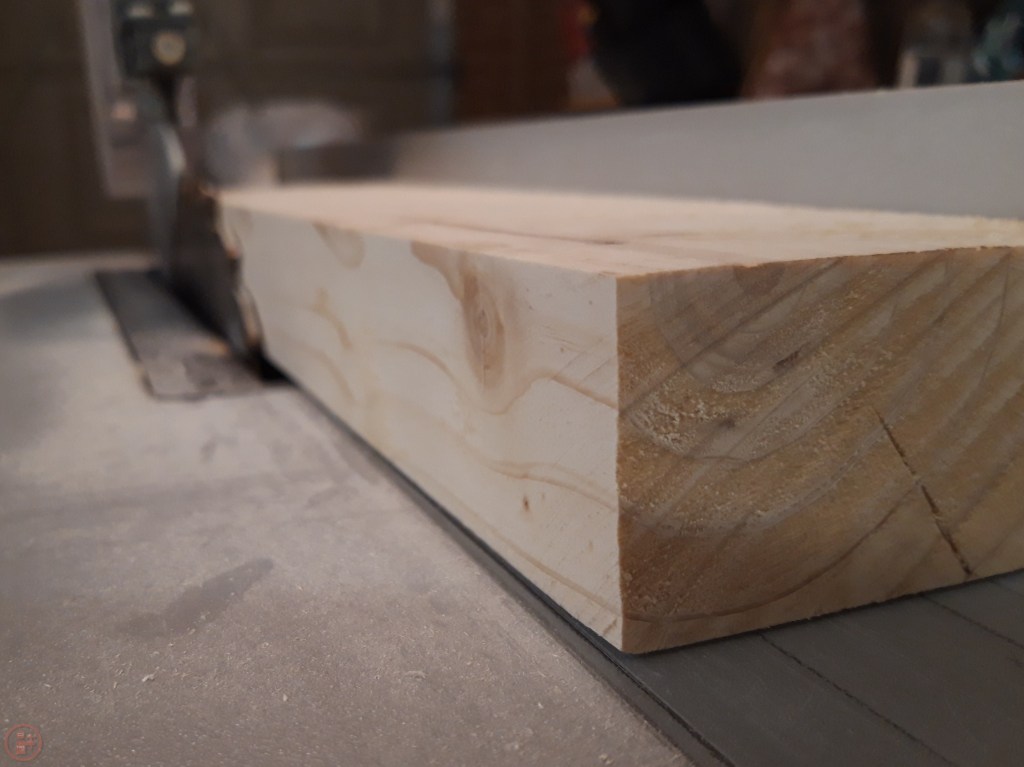
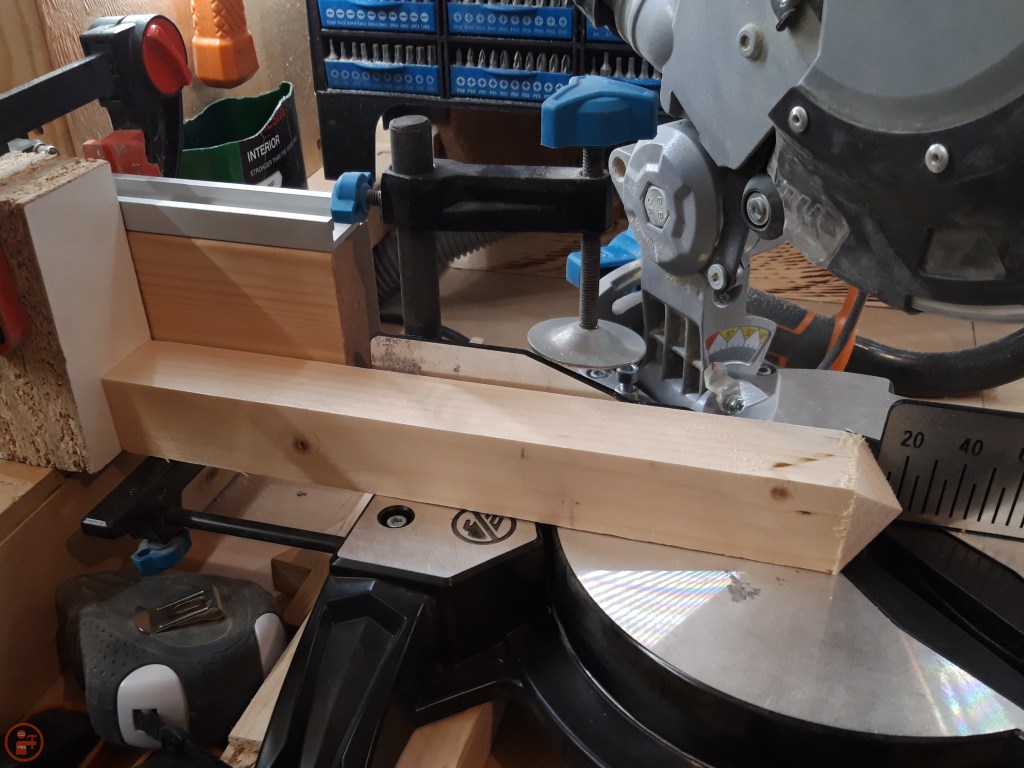
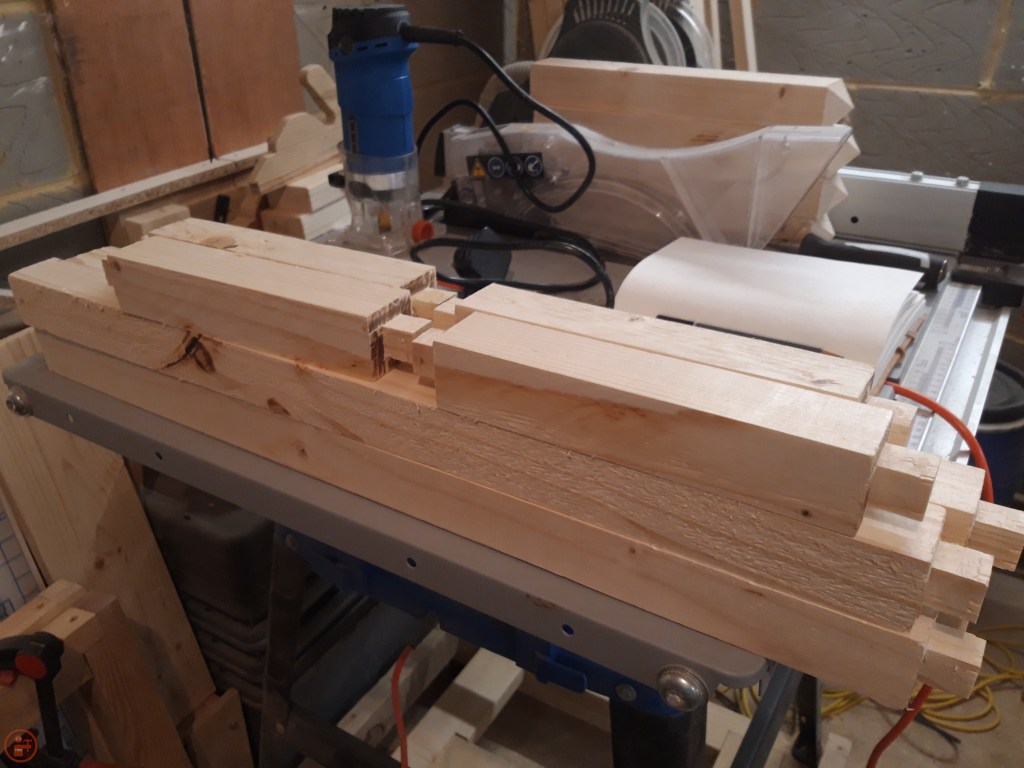
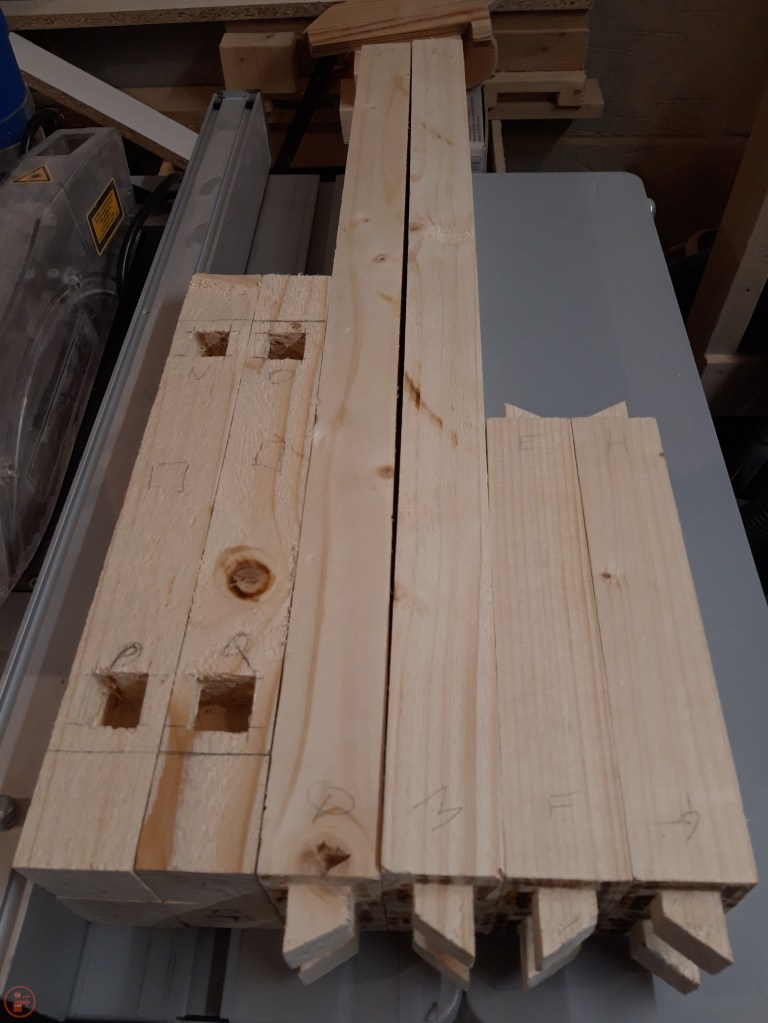
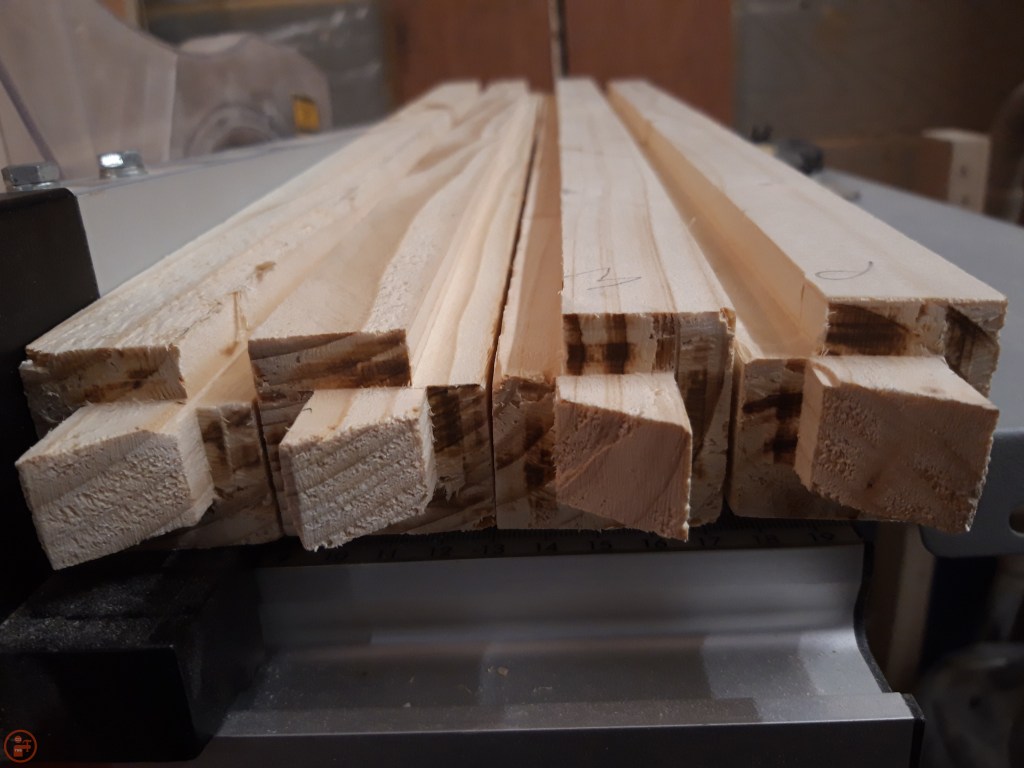
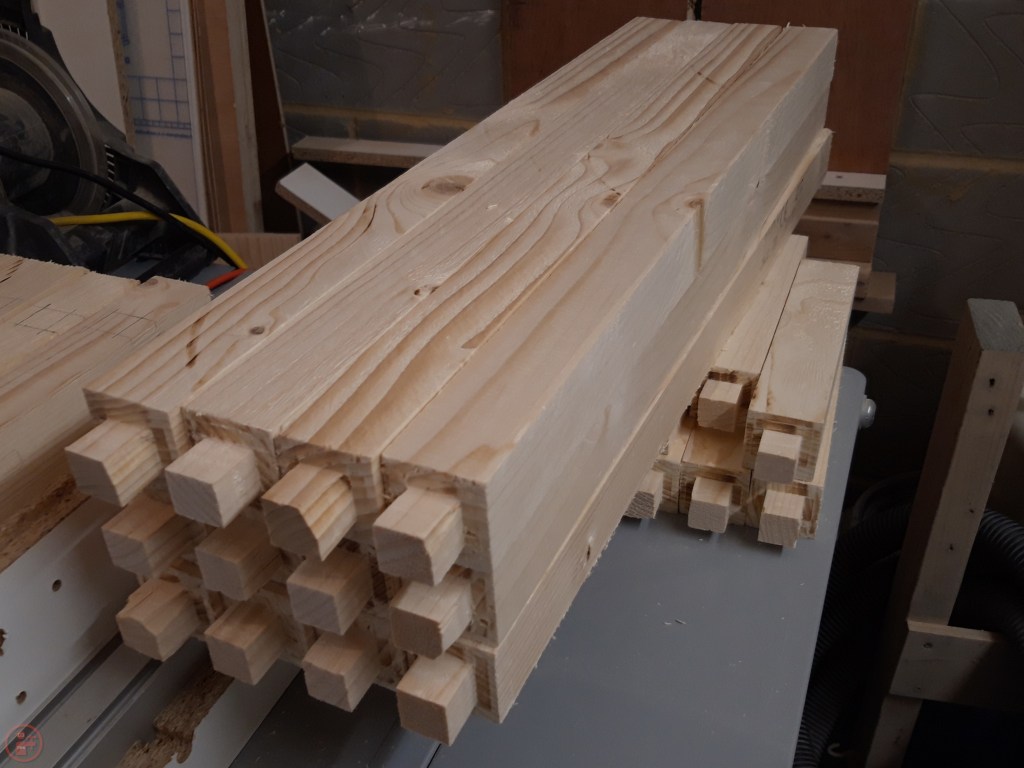
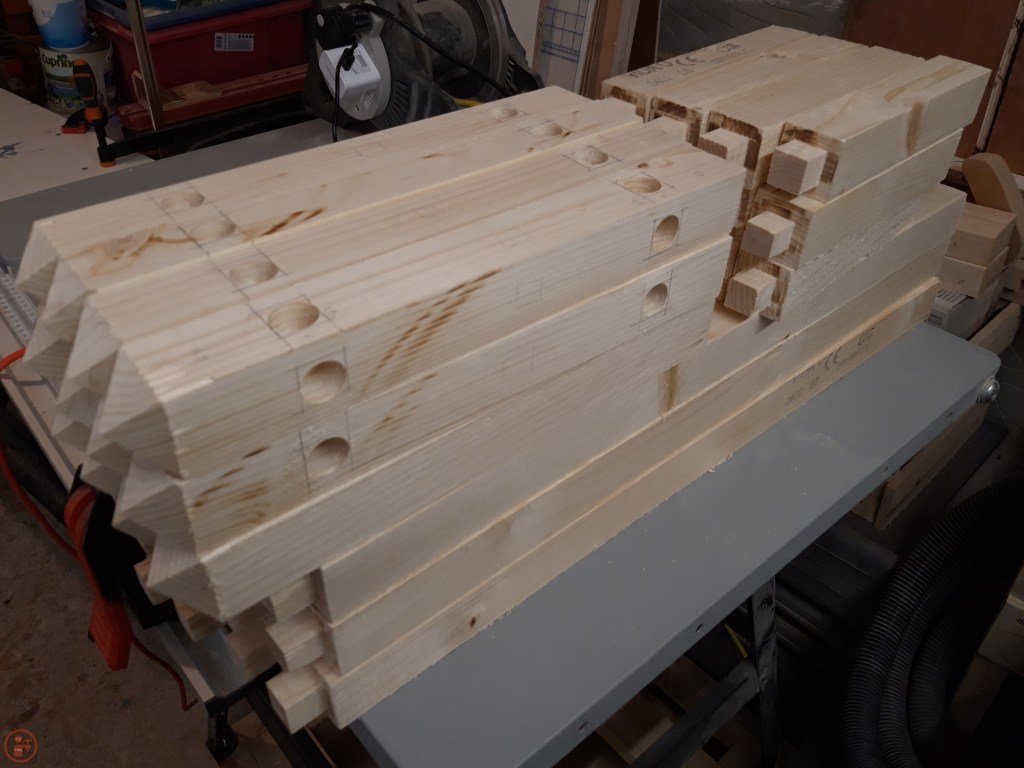
I measured the pieces I needed and cut them to length on the mitre saw. As 2x4s have a rounded edge, I then ran them through the table saw to leave me with perfect square lumber to use to make the frames. Although I was doing the assembly of the first planter initially as the prototype, I batch cut all the pieces for all four, to save time in the long run.
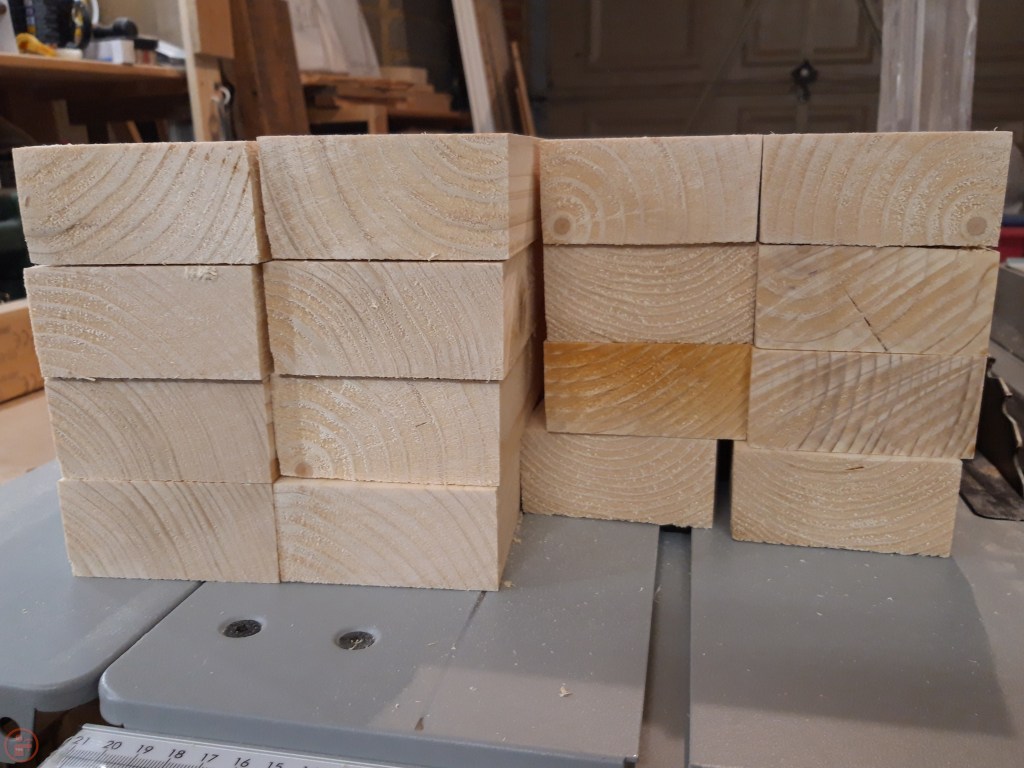
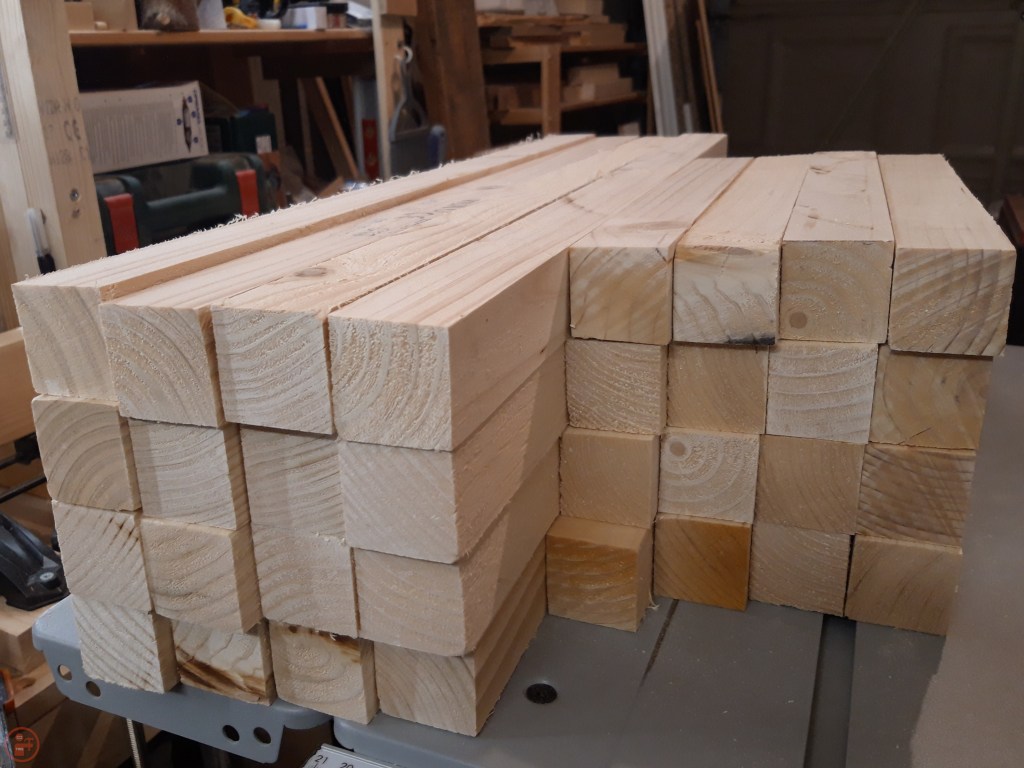
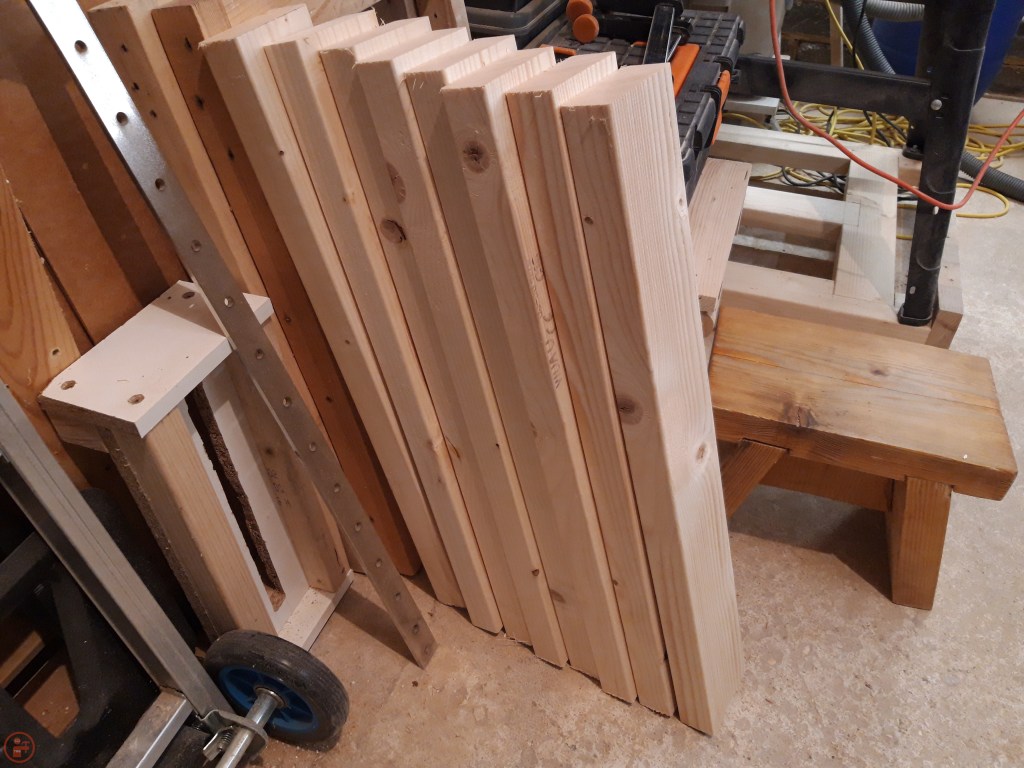
I ripped each 2×4 into 2×2 posts, resulting in four long and four short for each planter for the short and long horizontal stretchers on both the short and long sides.

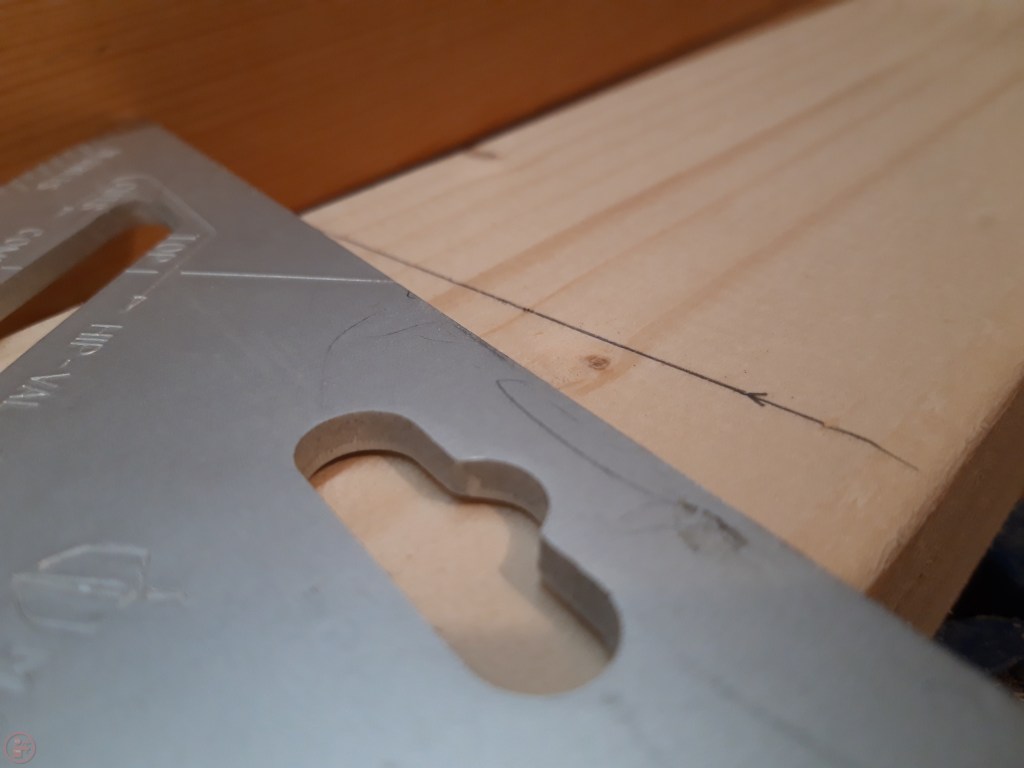
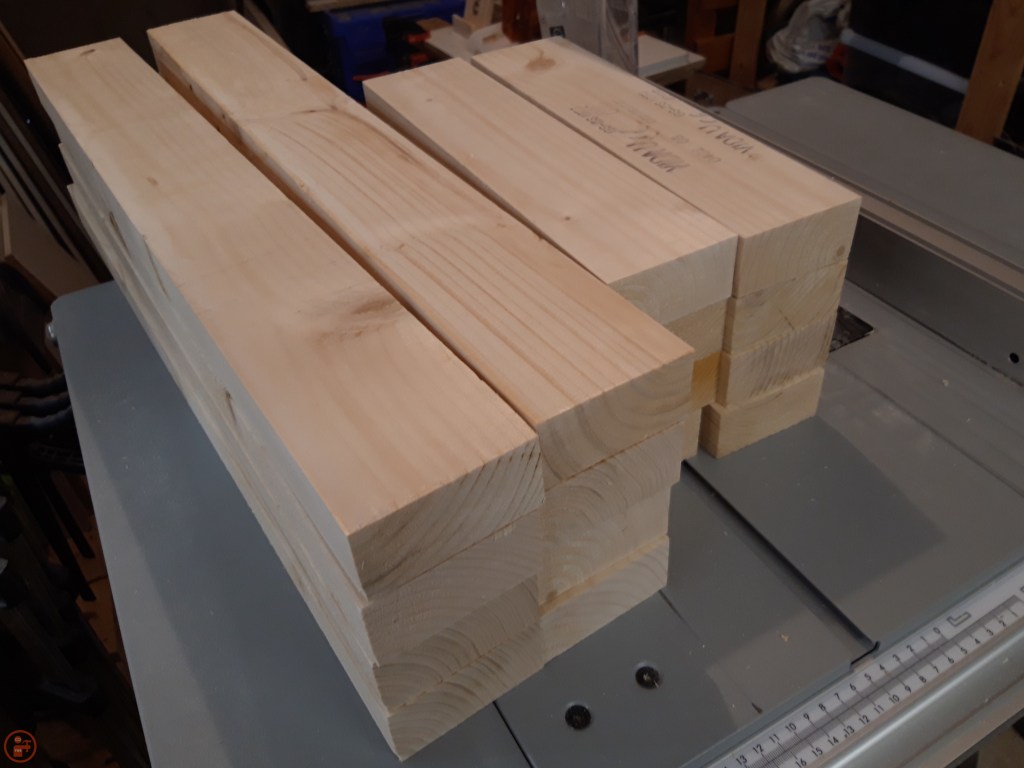
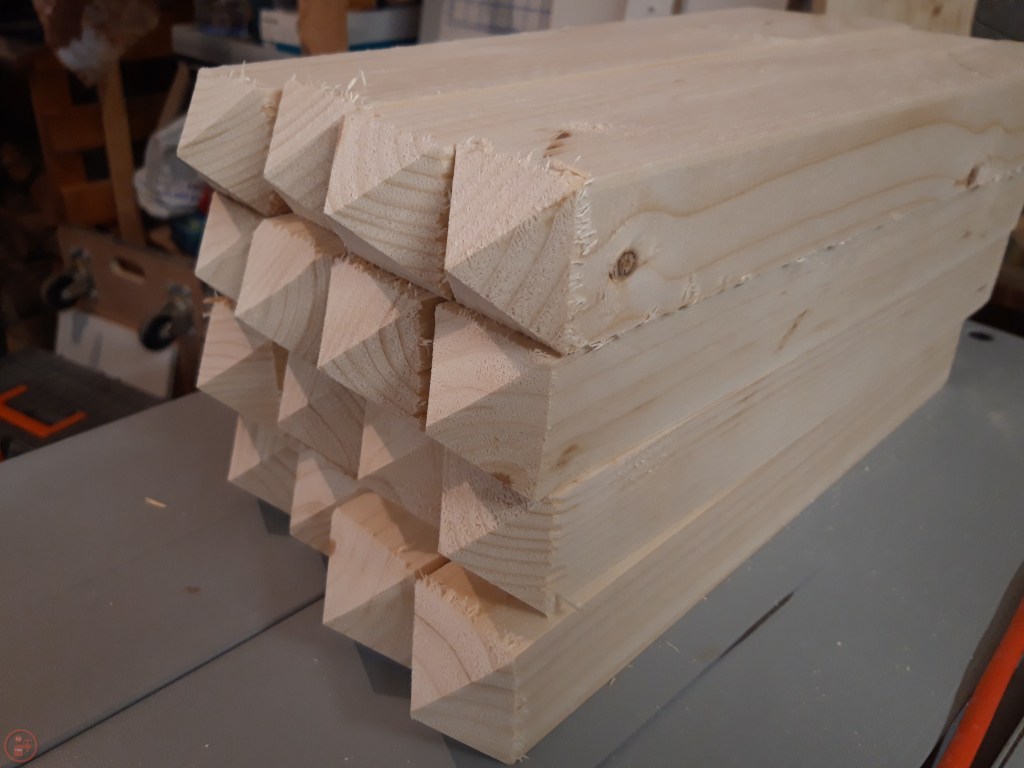
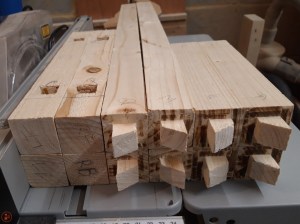
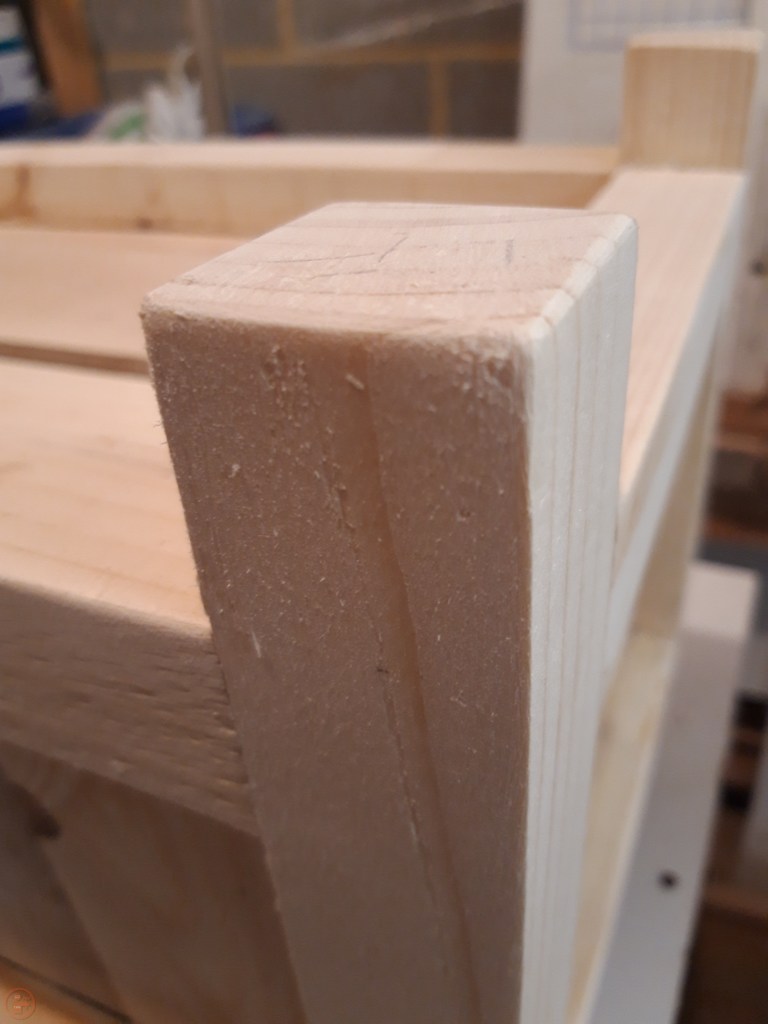
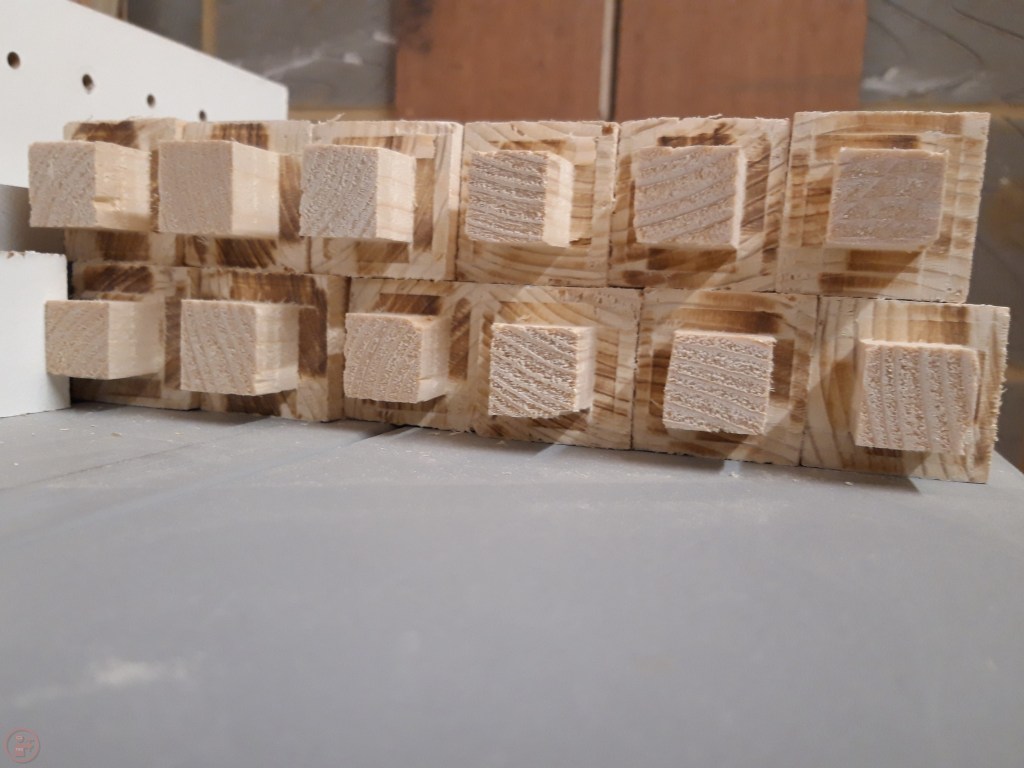
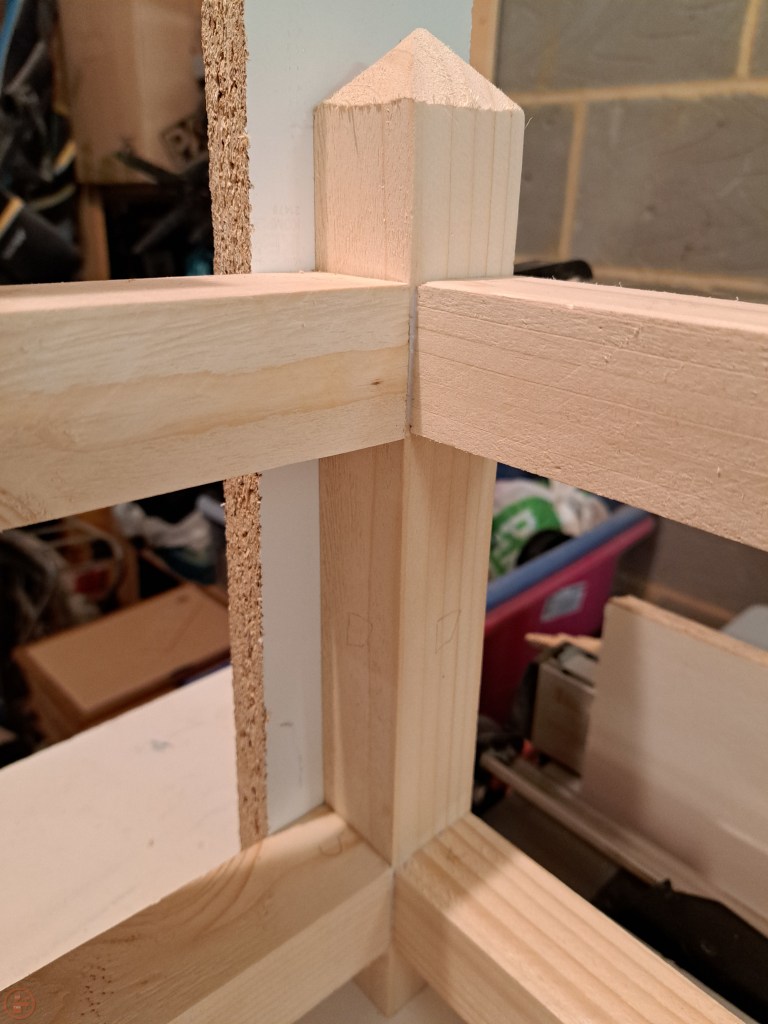
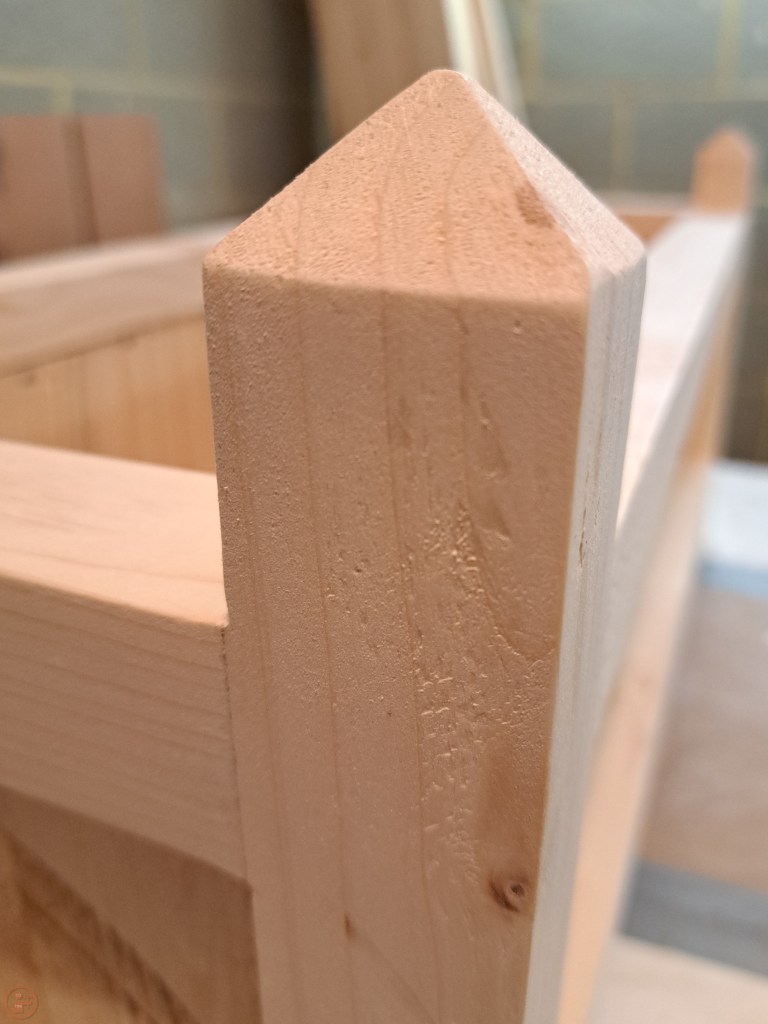
I also cut more posts for the legs – I wanted these to be more interesting than just a flat top, plus an angled top allows the rain to fall off and not be drawn into the end grain. I used my mitre saw at a 45 degree angle to cut a section off the top of the post on all four sides of each piece. This resulted in a square-based pyramid with nicely sloped sides at the top of each post. As each post required four cuts, and each planter had four posts (16 cuts) AND I had four planters to do (64 cuts total!), this took me quite a while and generated a huge amount of sawdust!

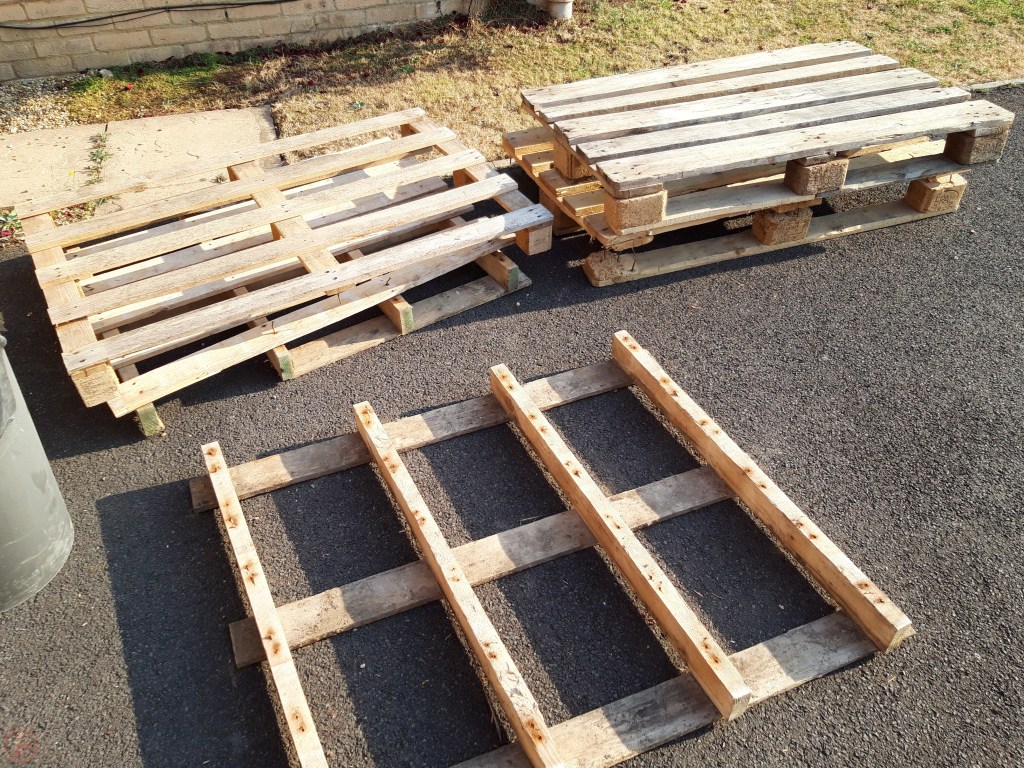
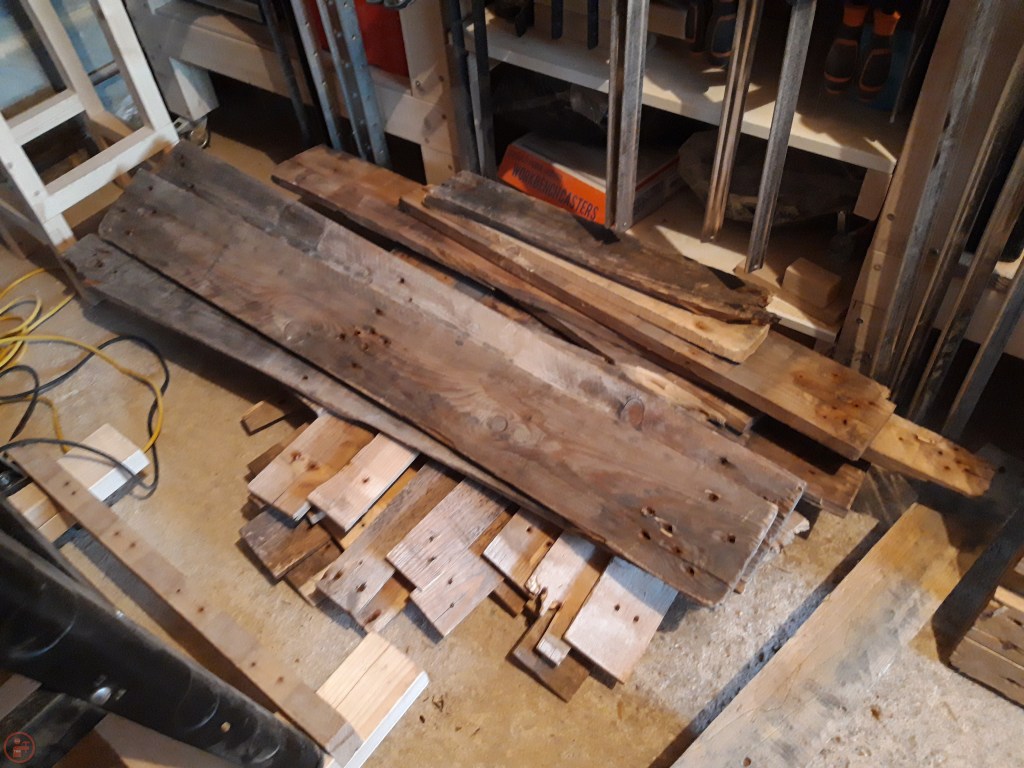
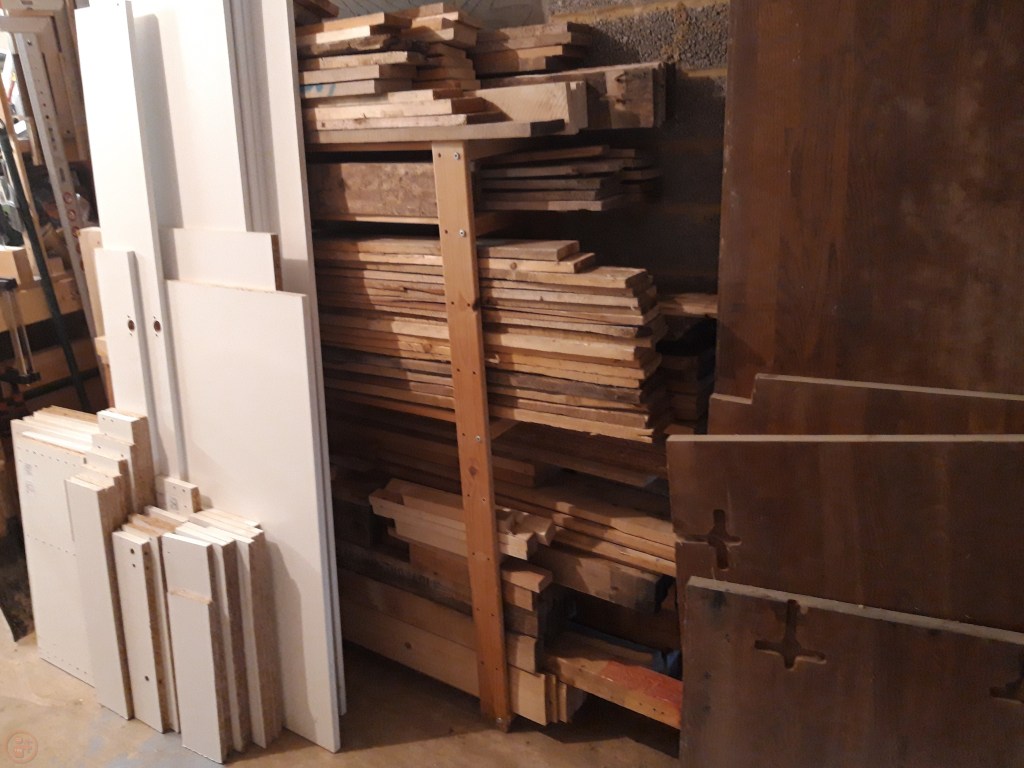
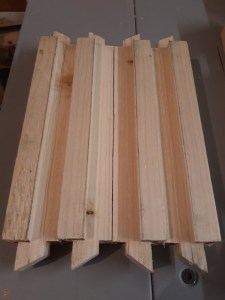
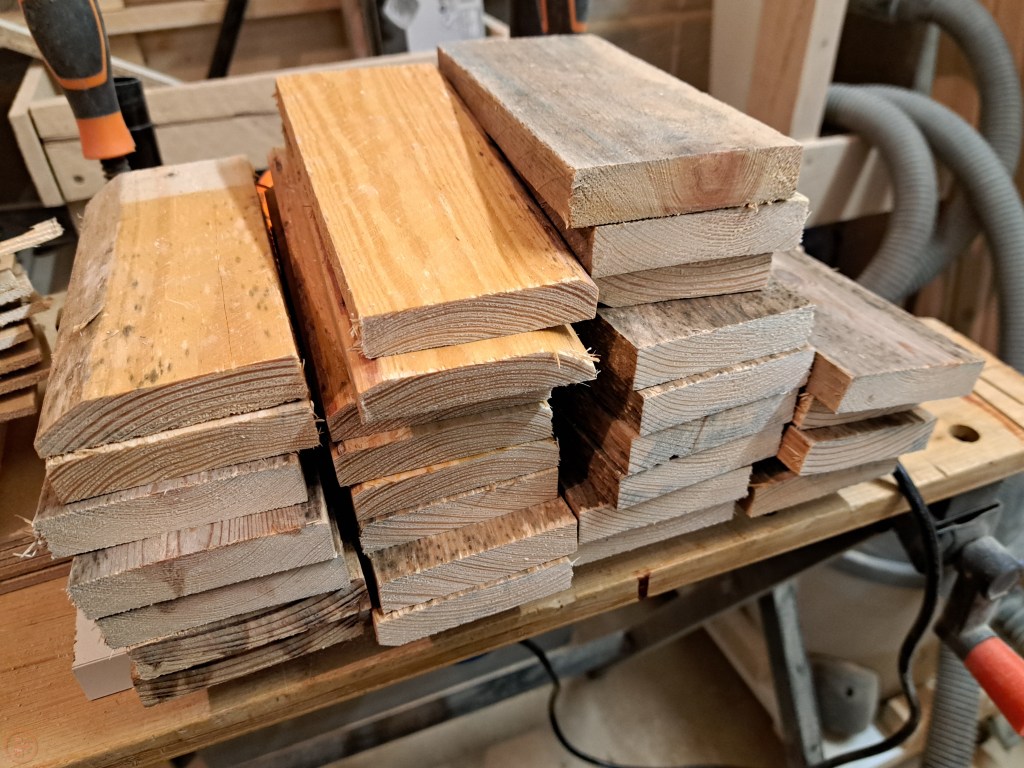
With the posts finished, I now had all the frame pieces completed and turned my attention to what I would use to fill in the base and side panels of the planters. I decided on using some pallet slats, as recycling existing material is always good, and as the planters are going to be painted anyway, the wood does not need to be of a high quality. I used my various tools, including my Pallet Buster, to disassemble a number of pallets and salvaged as much of the wood as possible, which I added to my lumber shelving.
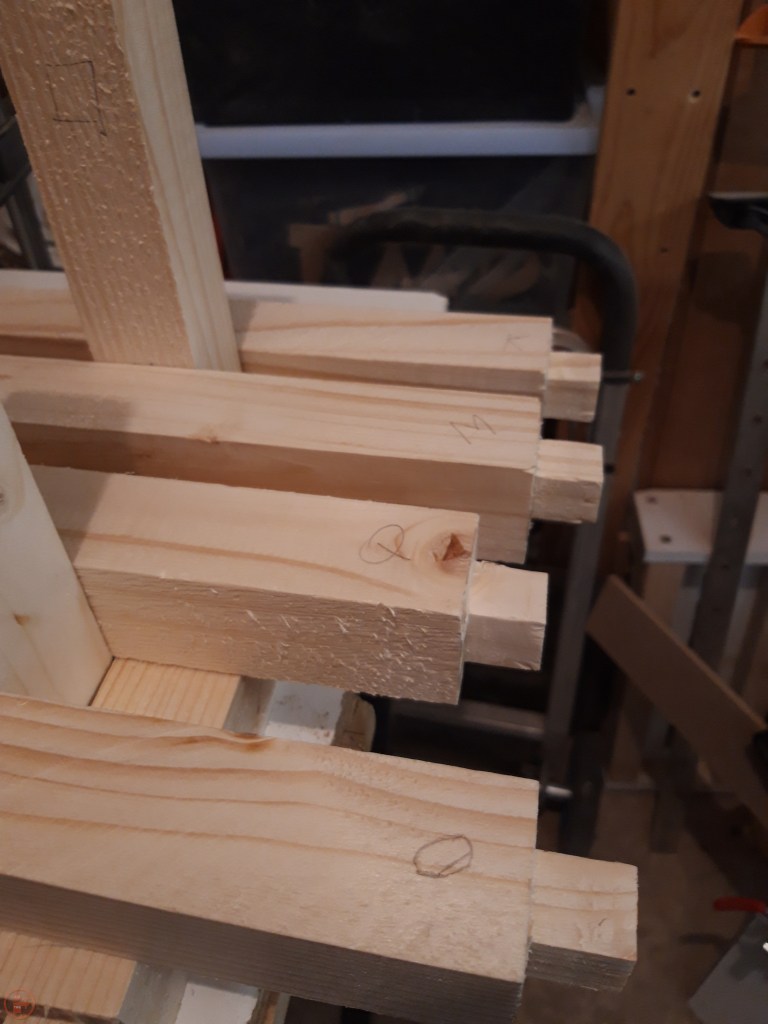
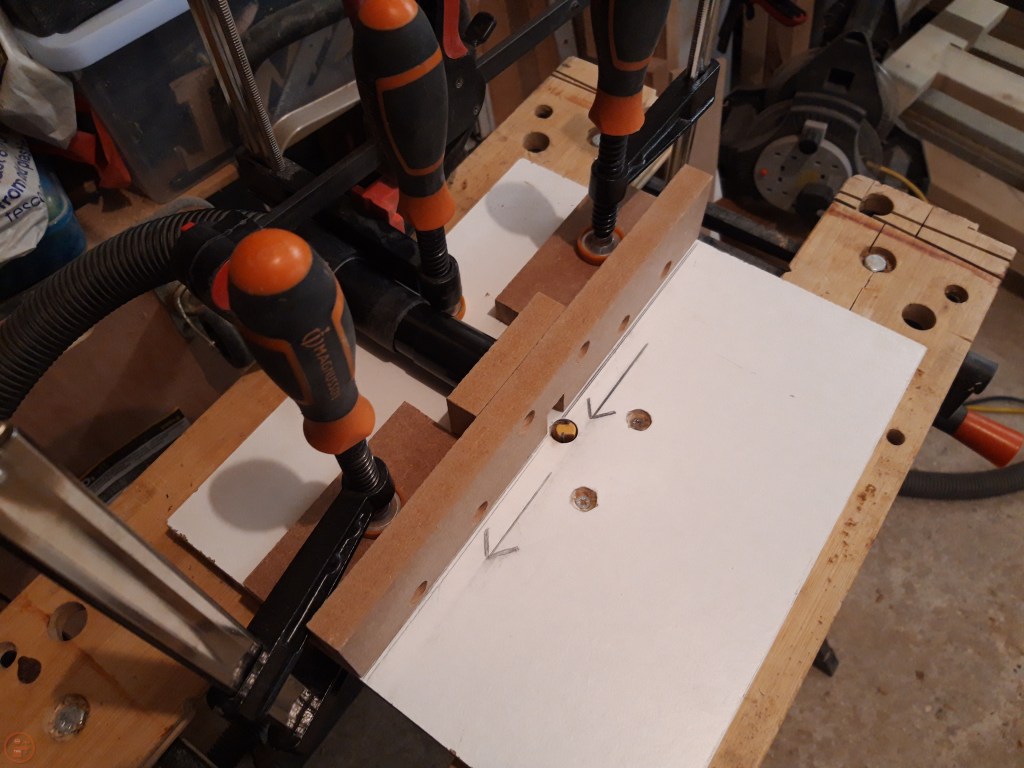
Now I had all the material I needed, it was time to start assembling this project! I decided to use mortice and tenon joinery for the joints to provide a nice solid and stable construction, with plenty of surface area for the glue up. I used my router and a dedicated router jig (separate post to follow) to take off material on the end of each stretcher. Where a large number of repeated cuts are required, I always find it beneficial to make some kind of a jig – it makes it much easier to achieve repeatable results and also reduces the complexity involved in such a cut, allowing me to focus on keeping safe, something especially important when making a lot of the same cut, as it’s easy to switch off!

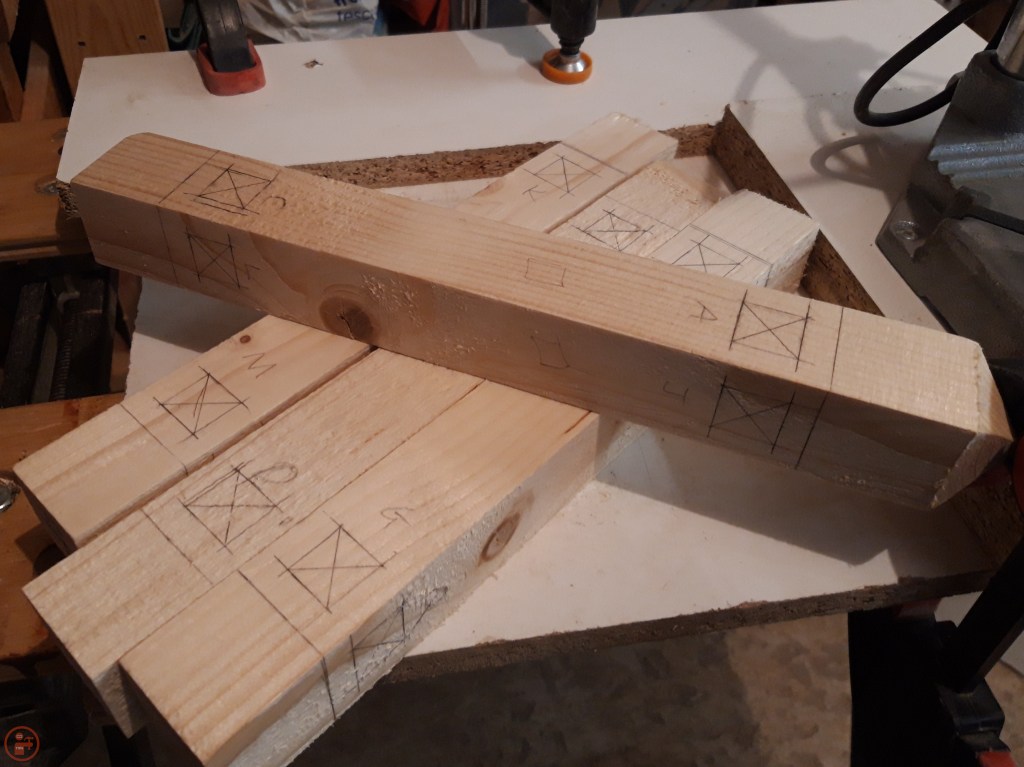
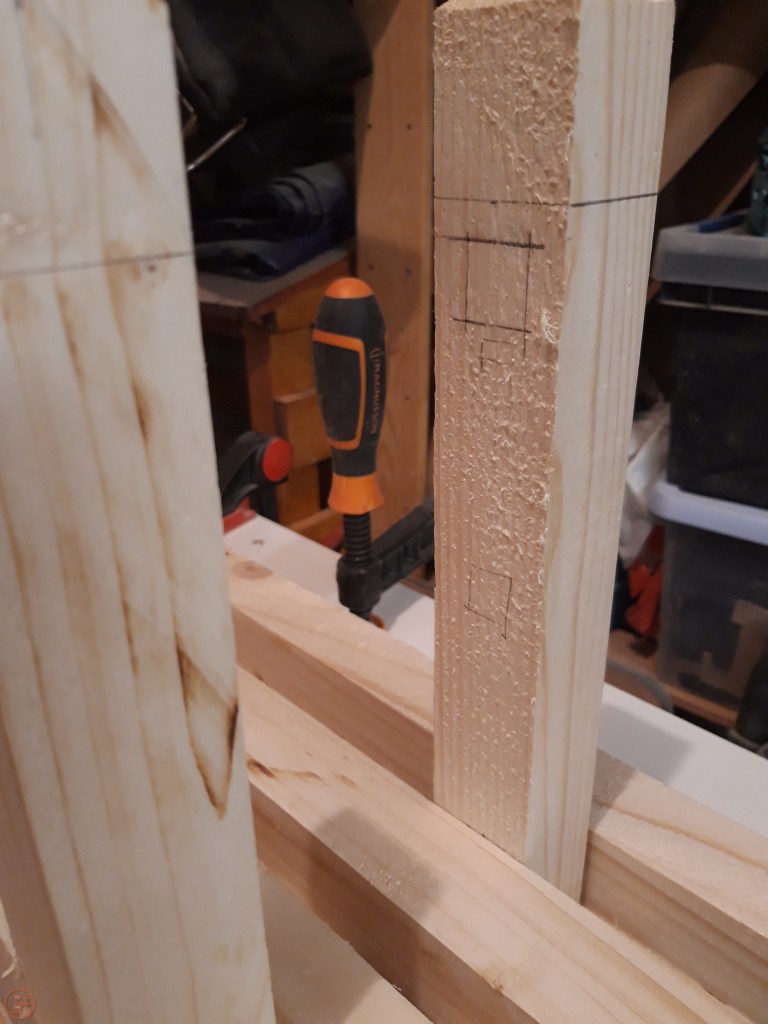
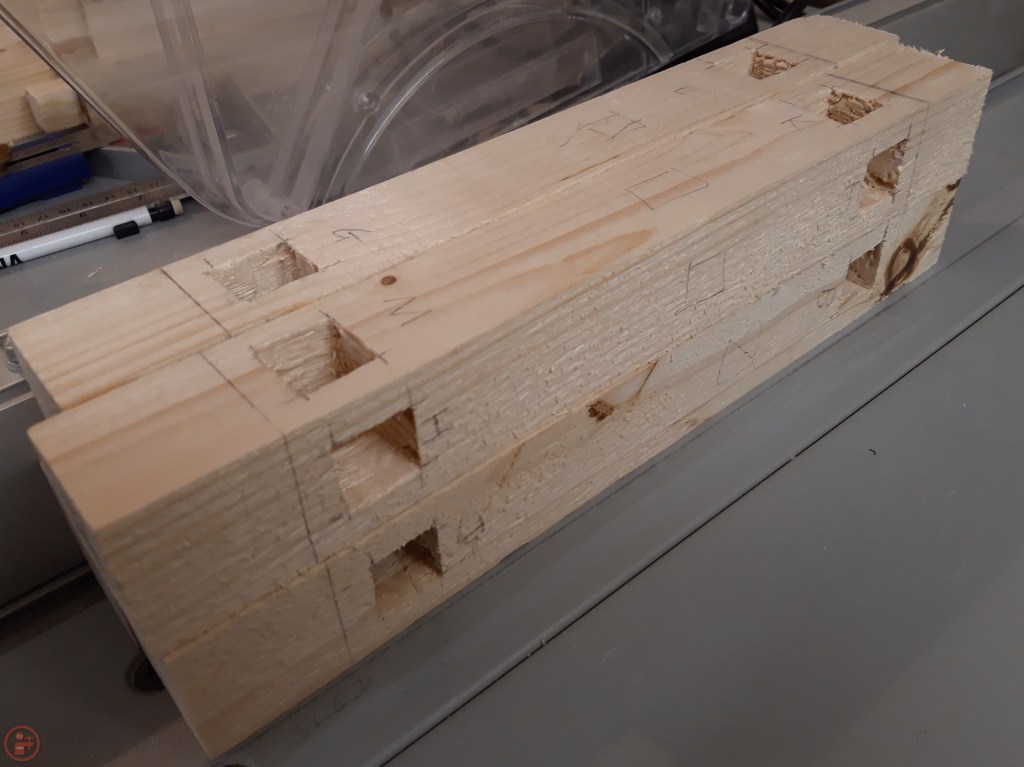
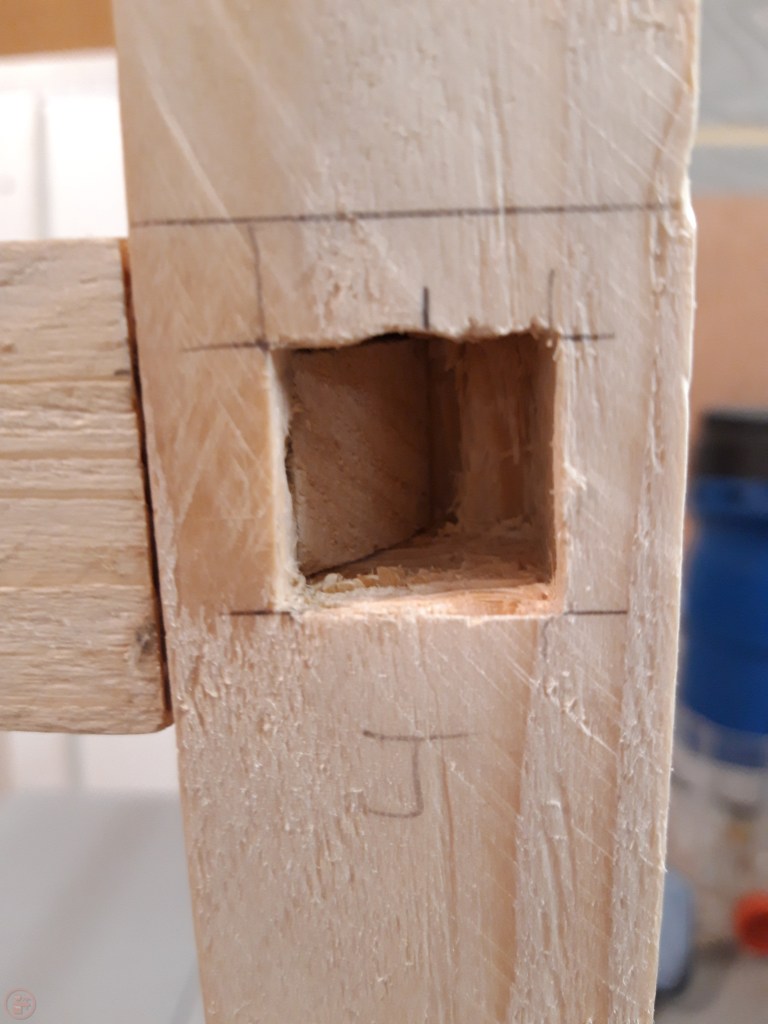
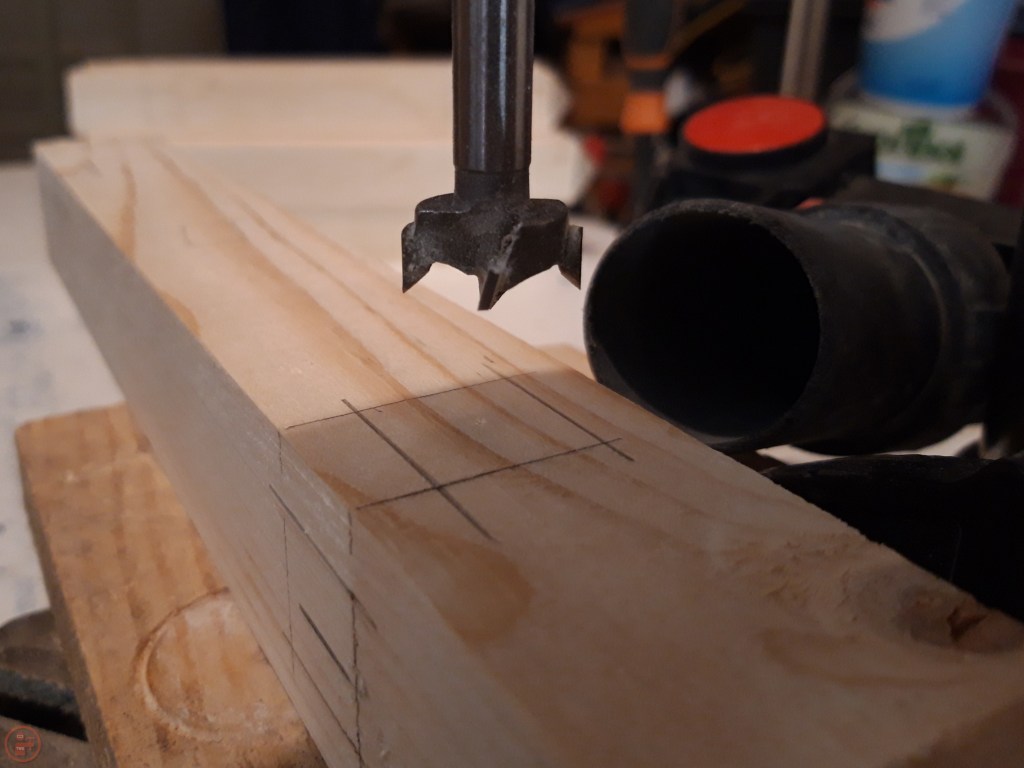
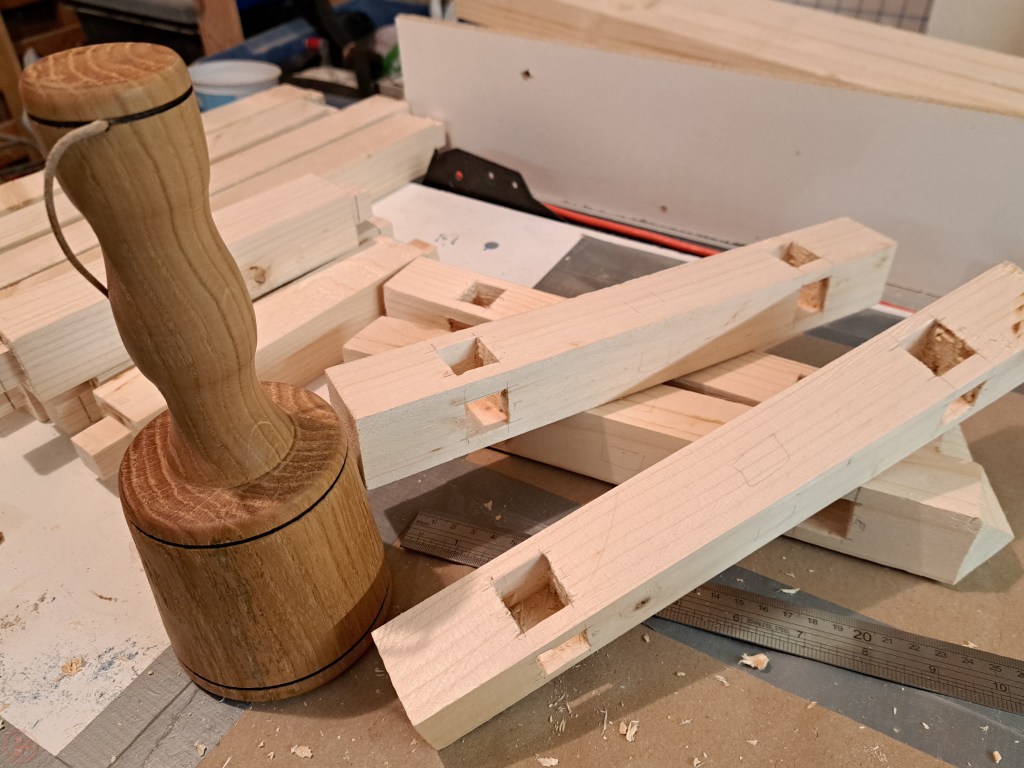
With all the tenons prepared, I used them to mark out the mortice sizes required on the posts. As each tenon varied a little bit, I labelled every mortice and tenon with a corresponding letter so I could ensure I was exactly matching the size accordingly.
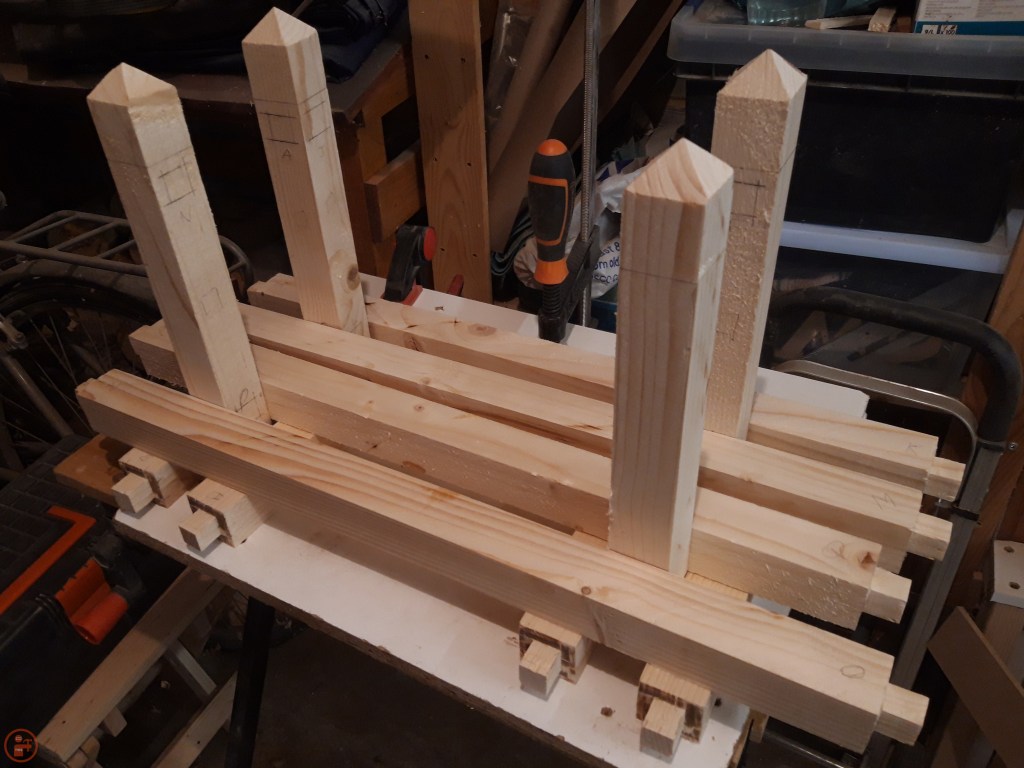
Once everything was labelled up and I made sure I had marked the correct sides of each of the corner posts.
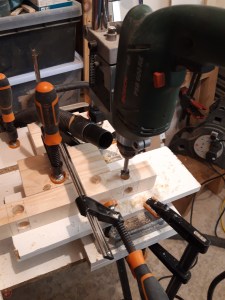
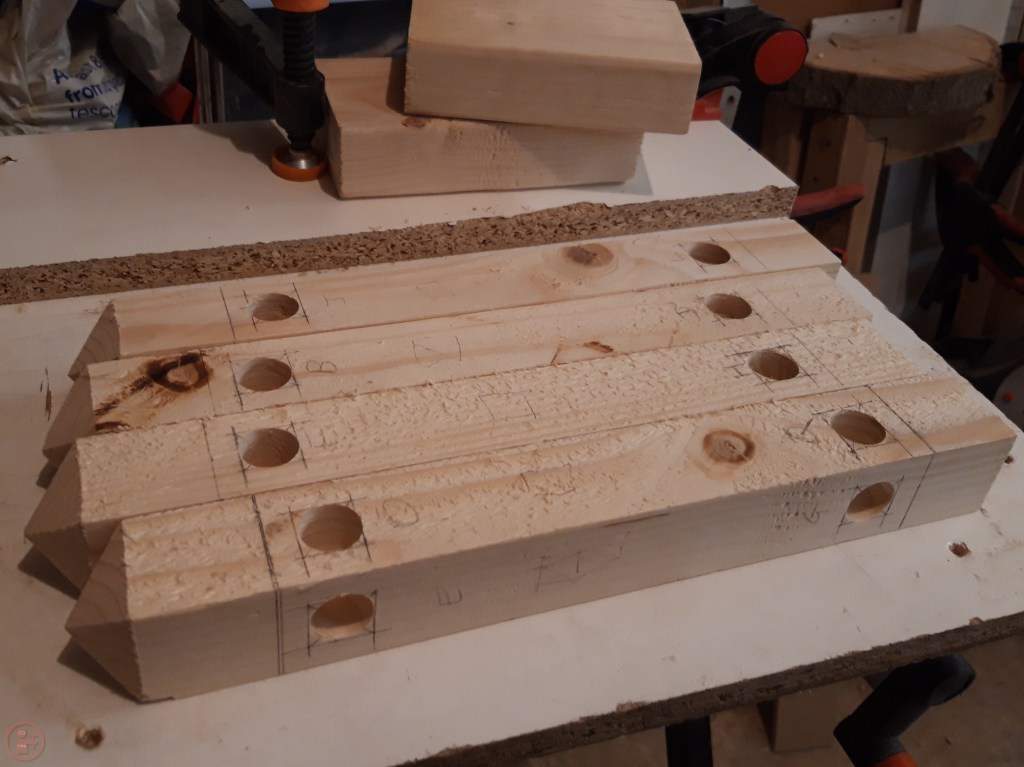
I used my drill press stand to remove the bulk of the waste from each mortice using a Forstner bit slightly smaller than the width of the required mortice. This was much quicker than chiselling every single mortice out fully by hand and ensured I achieved a consistent depth in each mortice through the application of the depth stop. This meant I didn’t remove more material than was needed, which may have weakened the joint by removing surface area for glue unnecessarily.
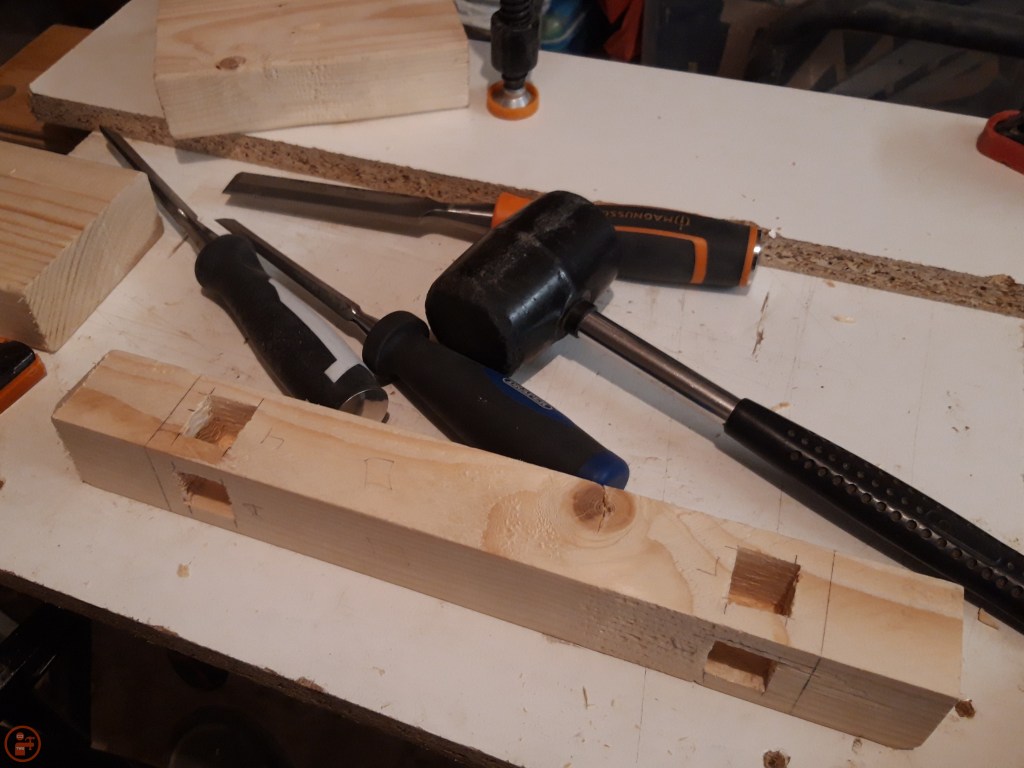
Again this was a very time consuming process, but I took my time to ensure a solid fit with each tenon and corresponding mortice. I only did this for the first planter at this point so I could be sure the joinery was going to work as planned and provide a solid construction – before I repeated this another three times.

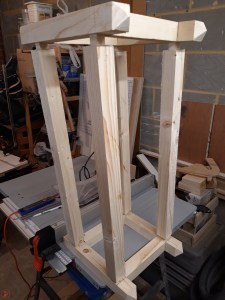
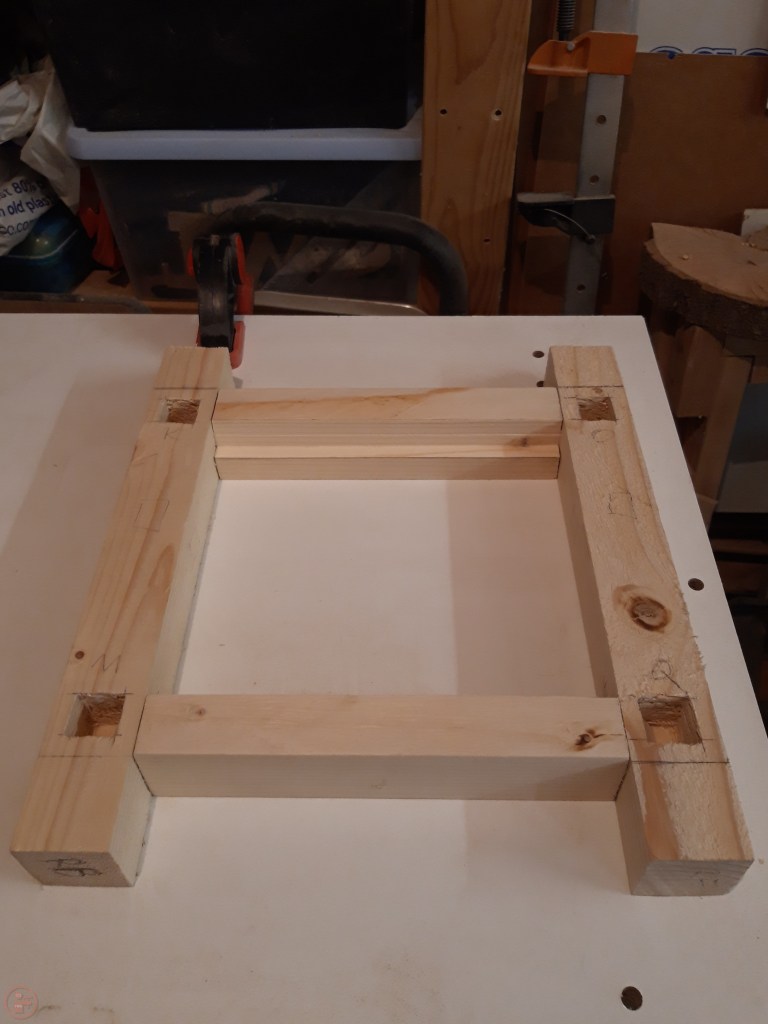
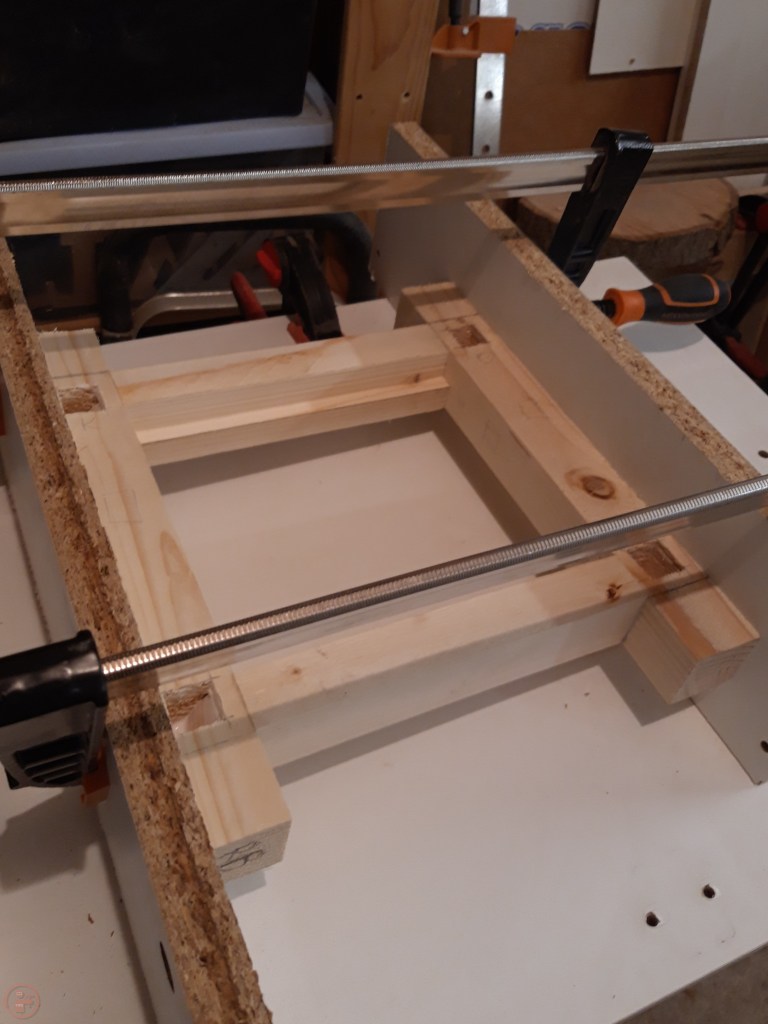
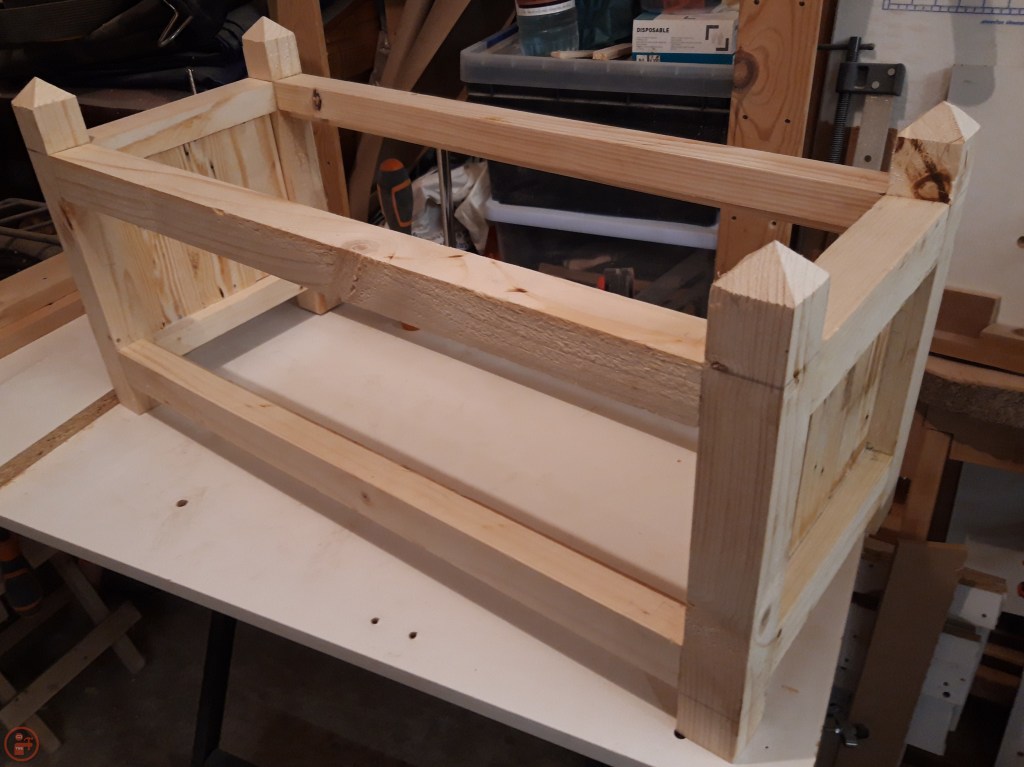
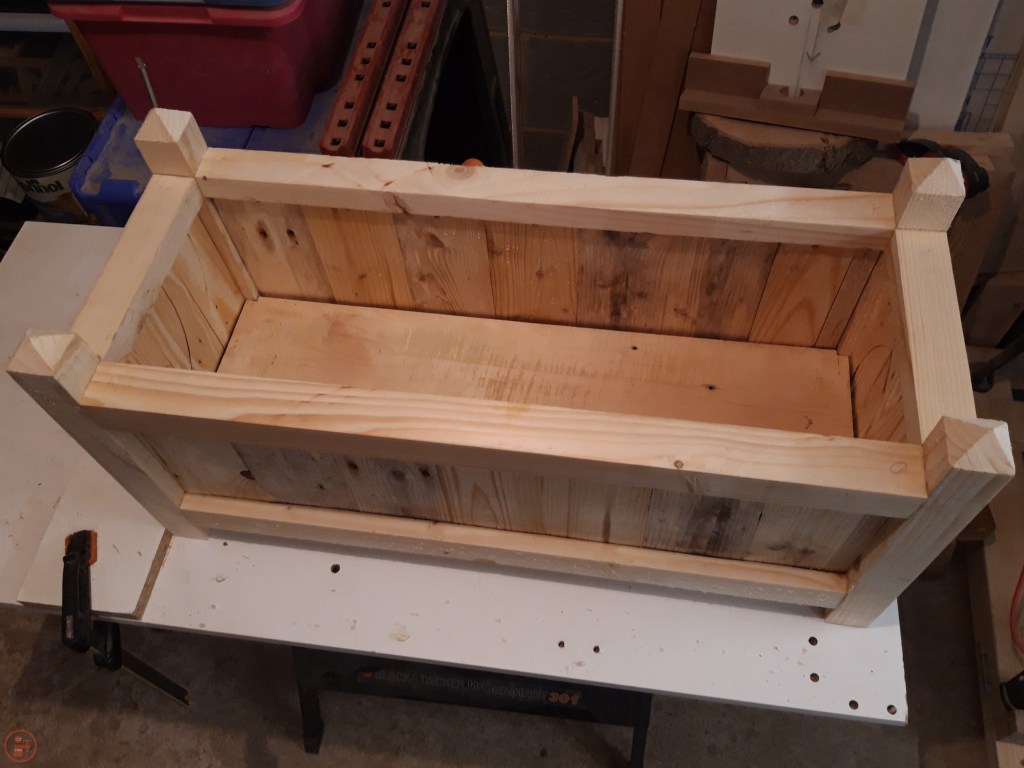
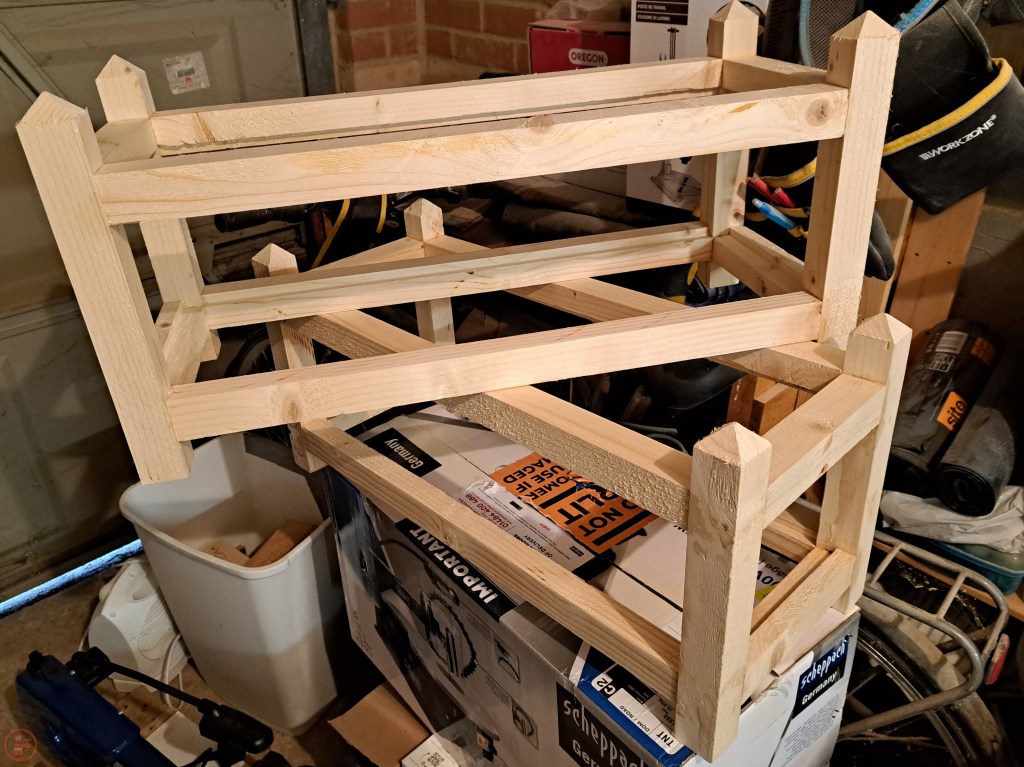
With every joint now completed, I did a test dry fit to make sure the planter was the scale I expected. Pleasingly I had managed to visualise the project correctly so was happy to proceed!
The short and long stretchers meet inside the mortices in each leg, providing additional gluing surface. However, this meant I had to remove a small section of each of the tenons to allow them to intersect with the perpendicular stretcher. I measured and cut each one by hand, making sure to follow the angle accurately to ensure a good fit in the joint.
Once I had finished adjusting all the tenons, I did another test dry fit to check all the joints could slot together snugly.
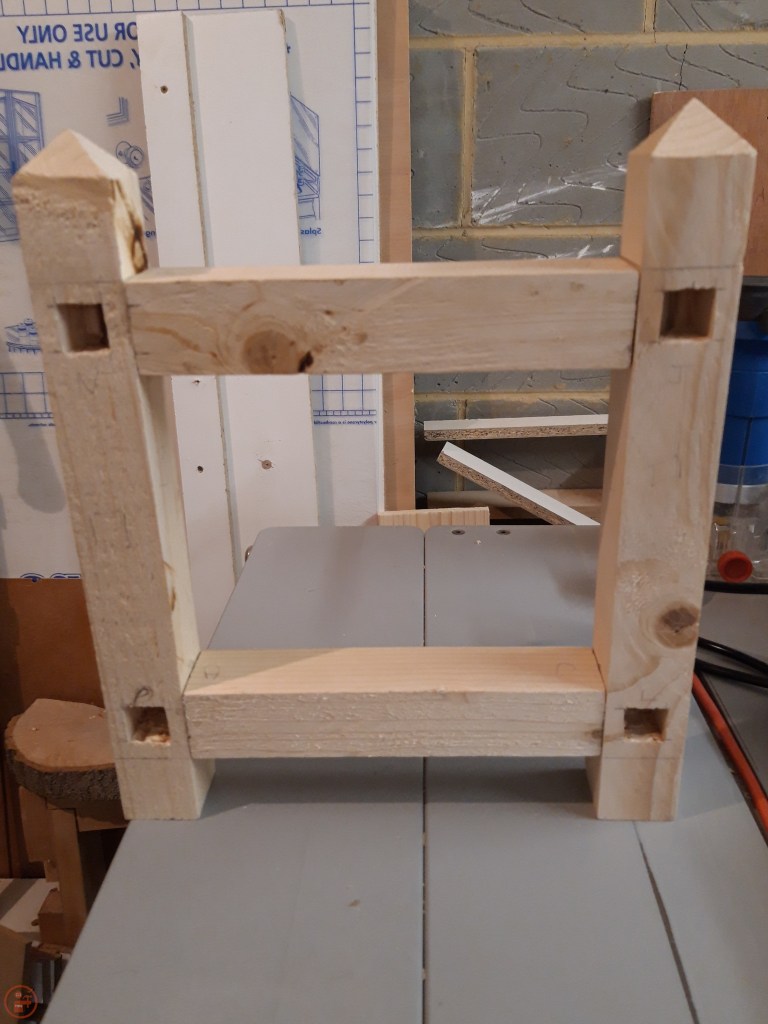
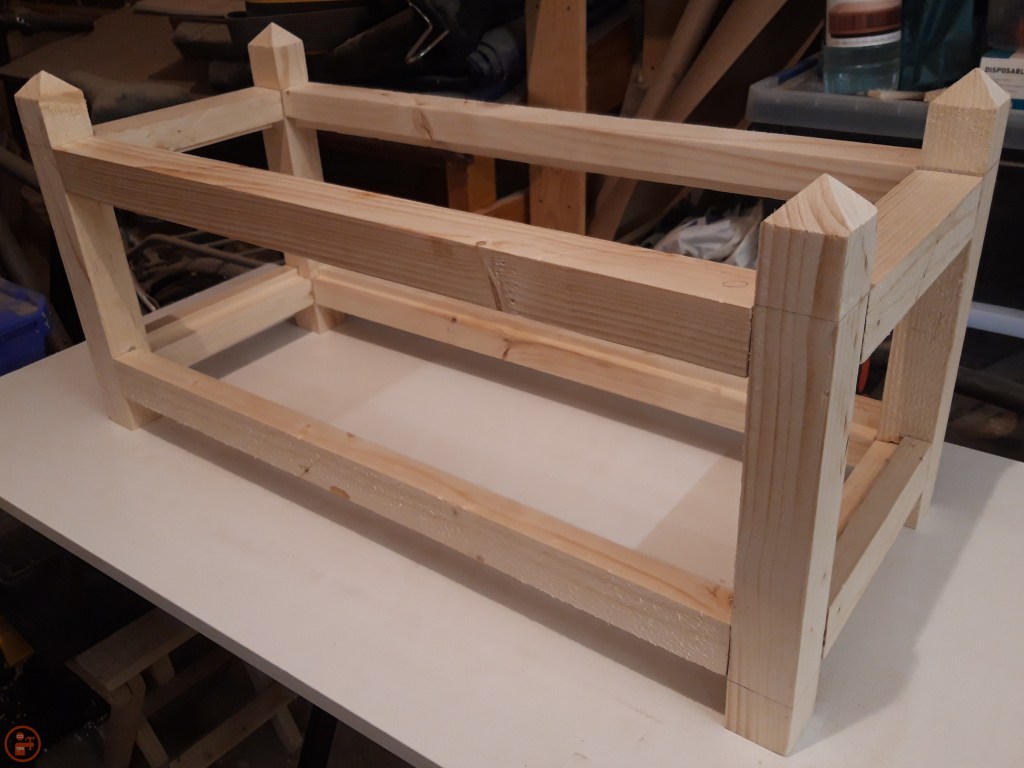
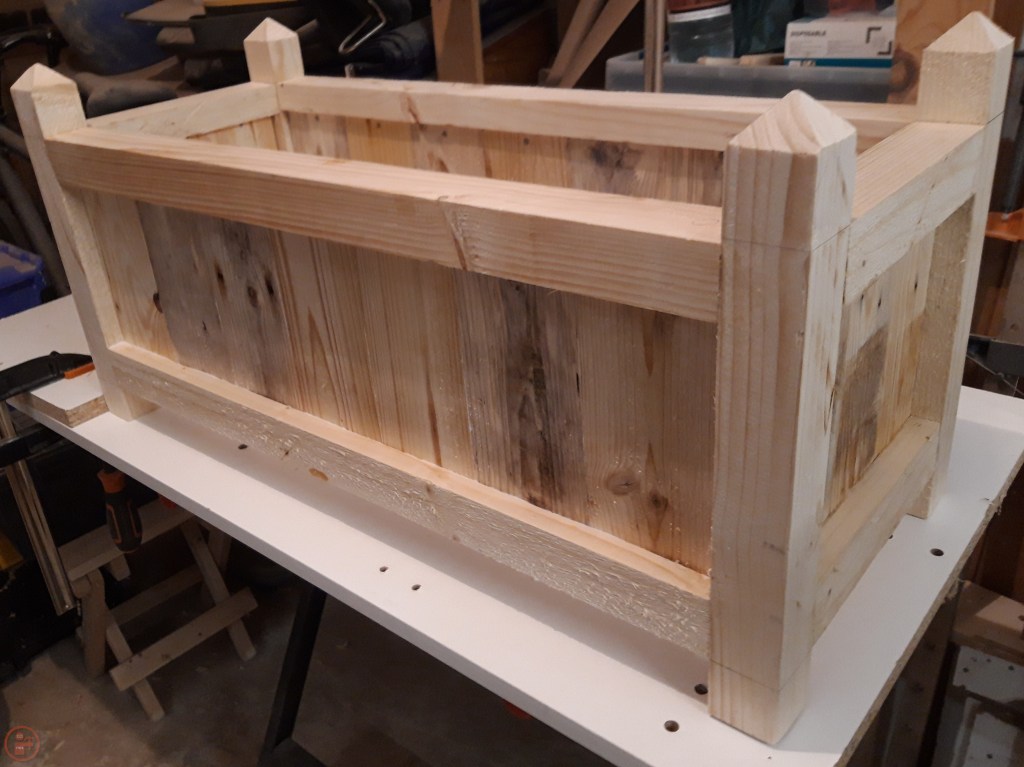
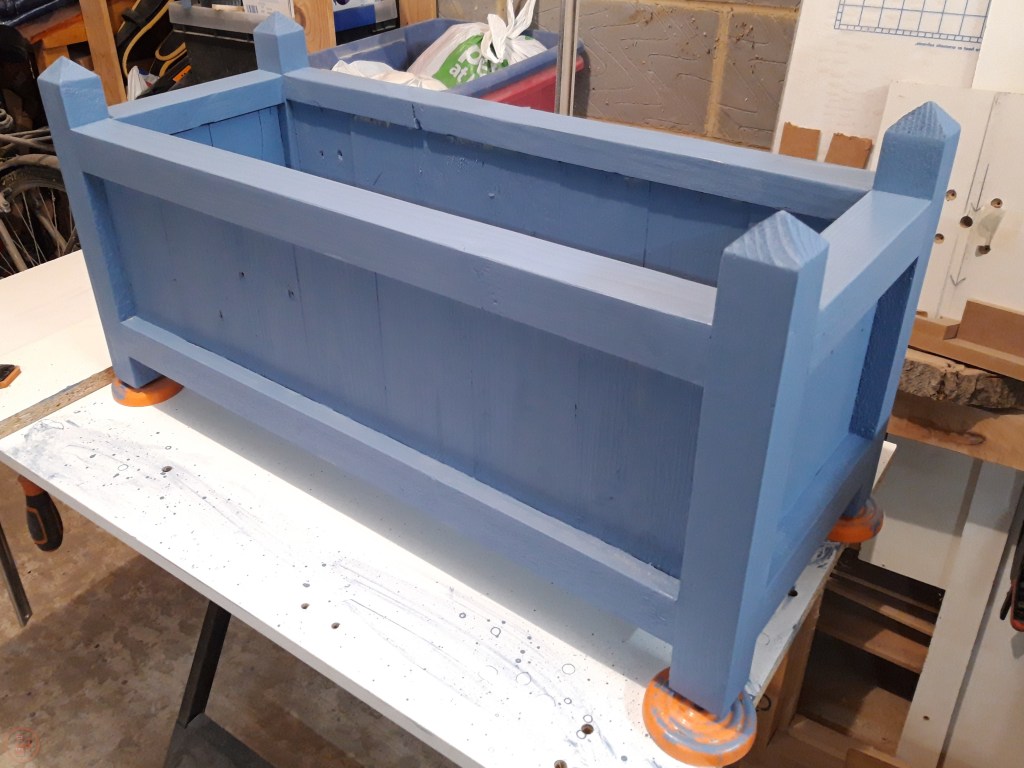
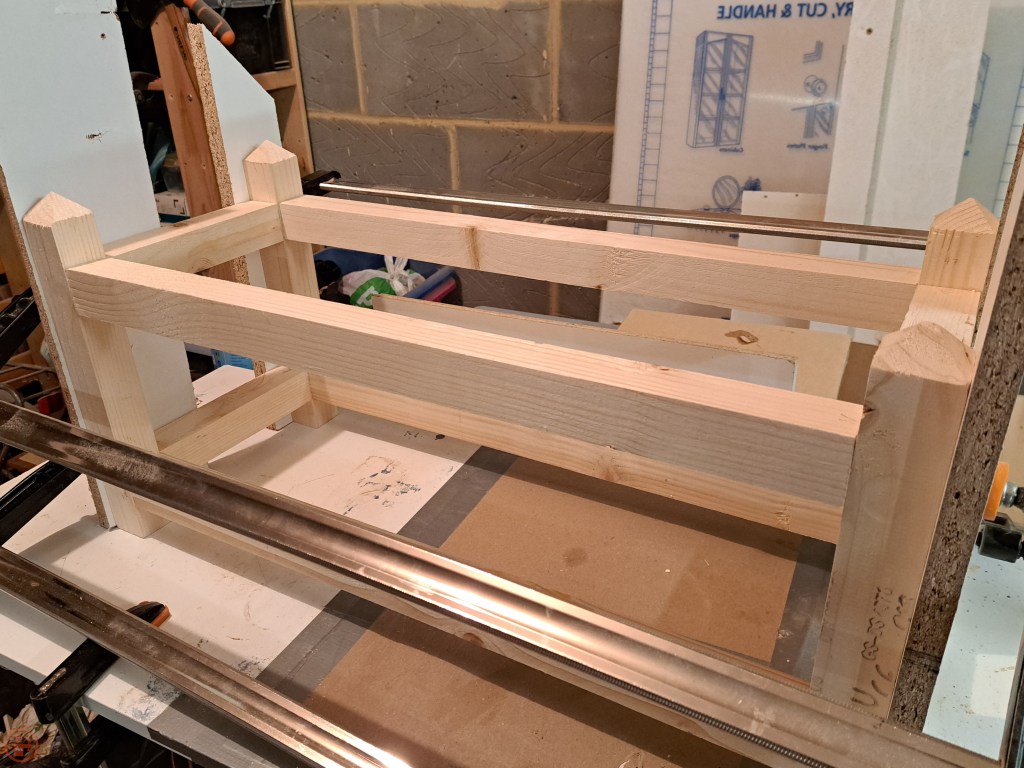
I was very pleased with how the frame came together and the tenons fit well within the mortices, with the ends also acting as a mitre joint between the stretchers in the mortice.
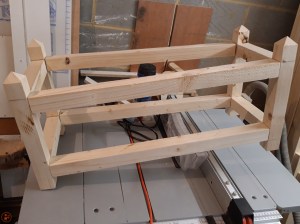
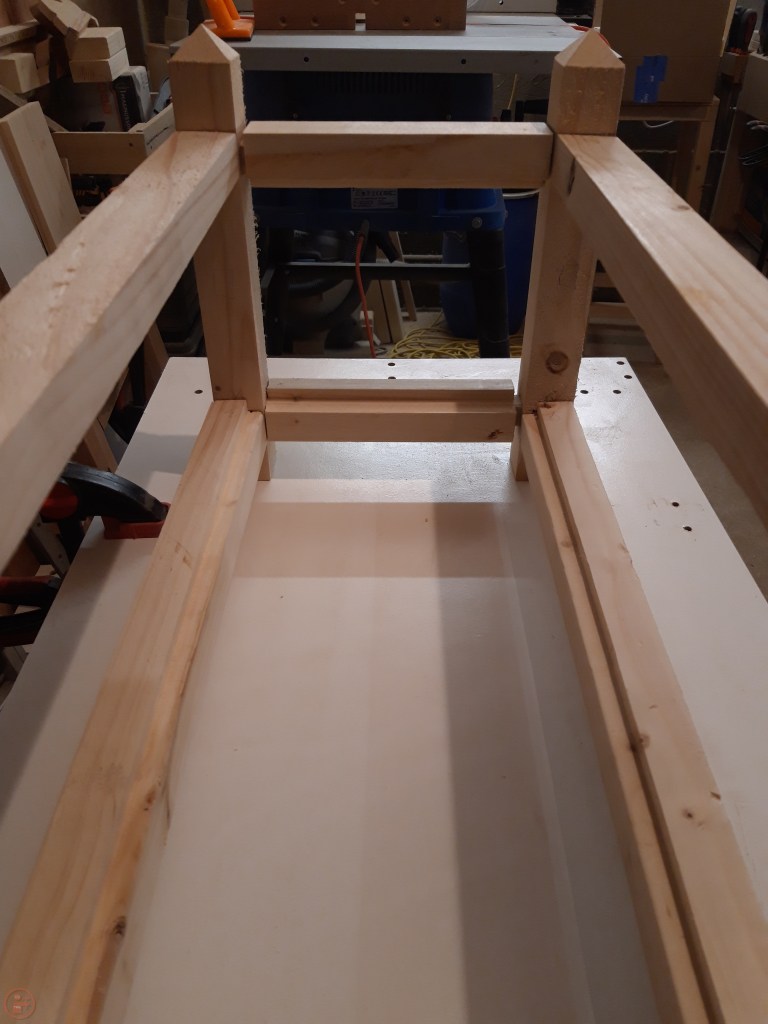
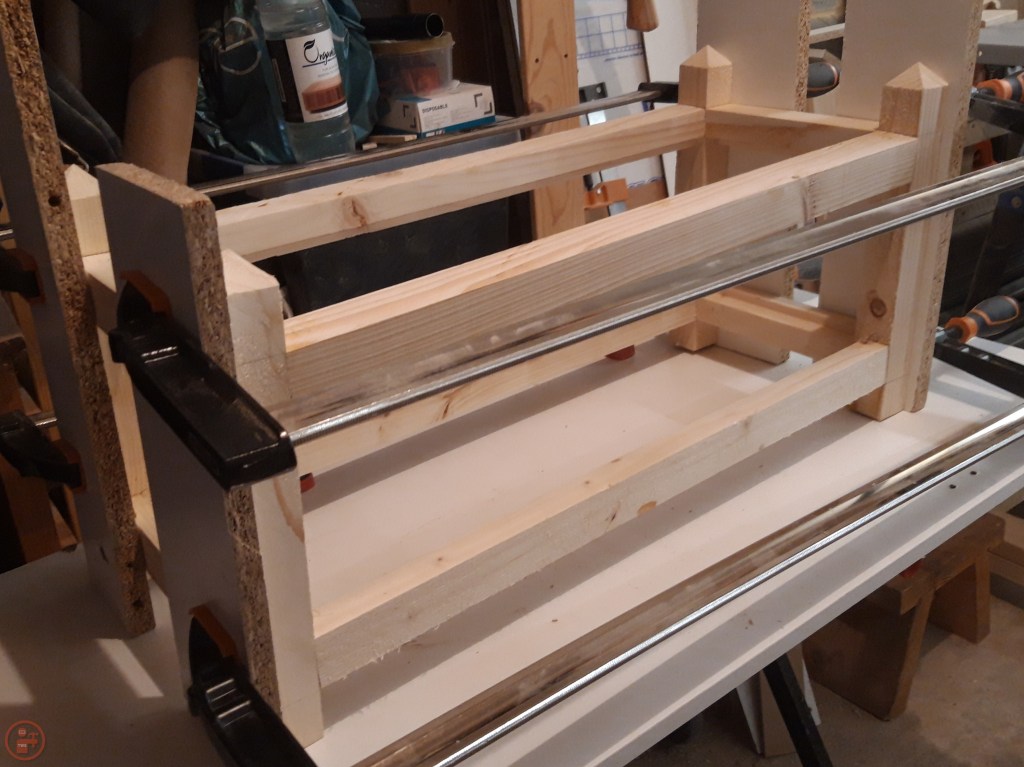
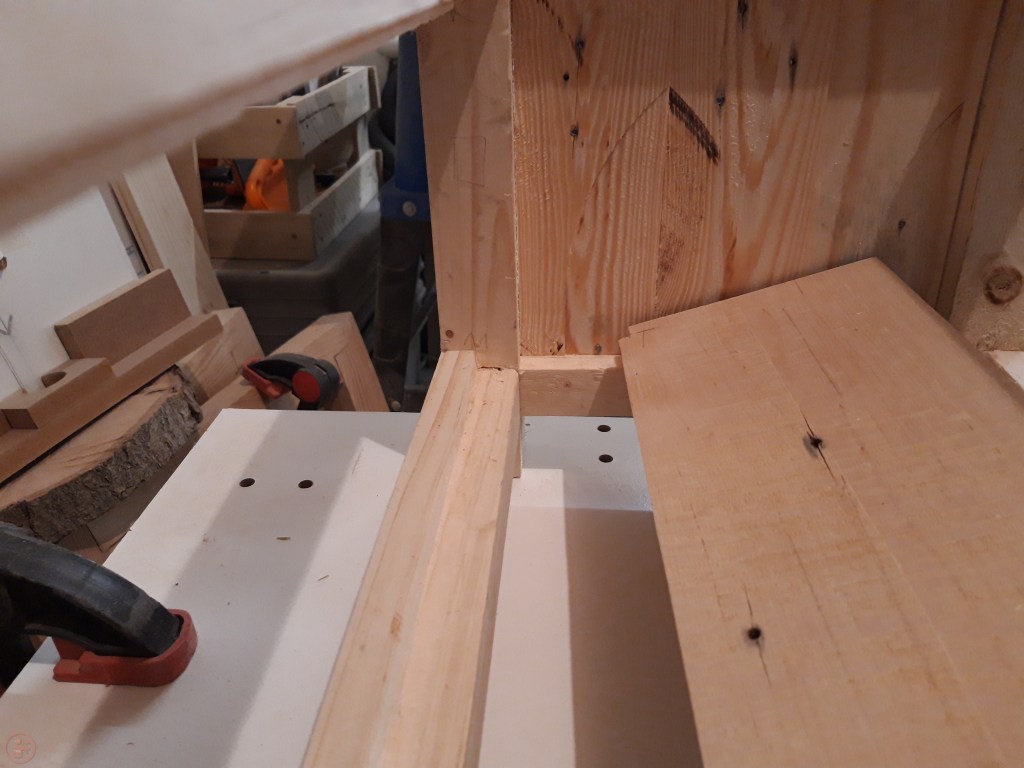
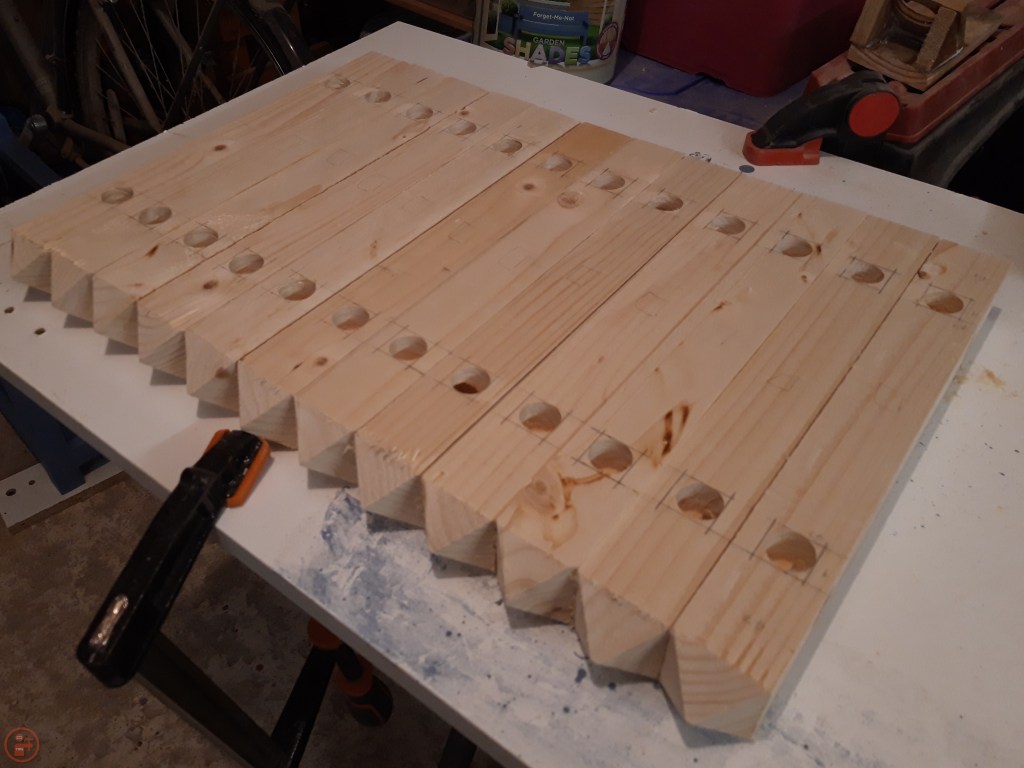
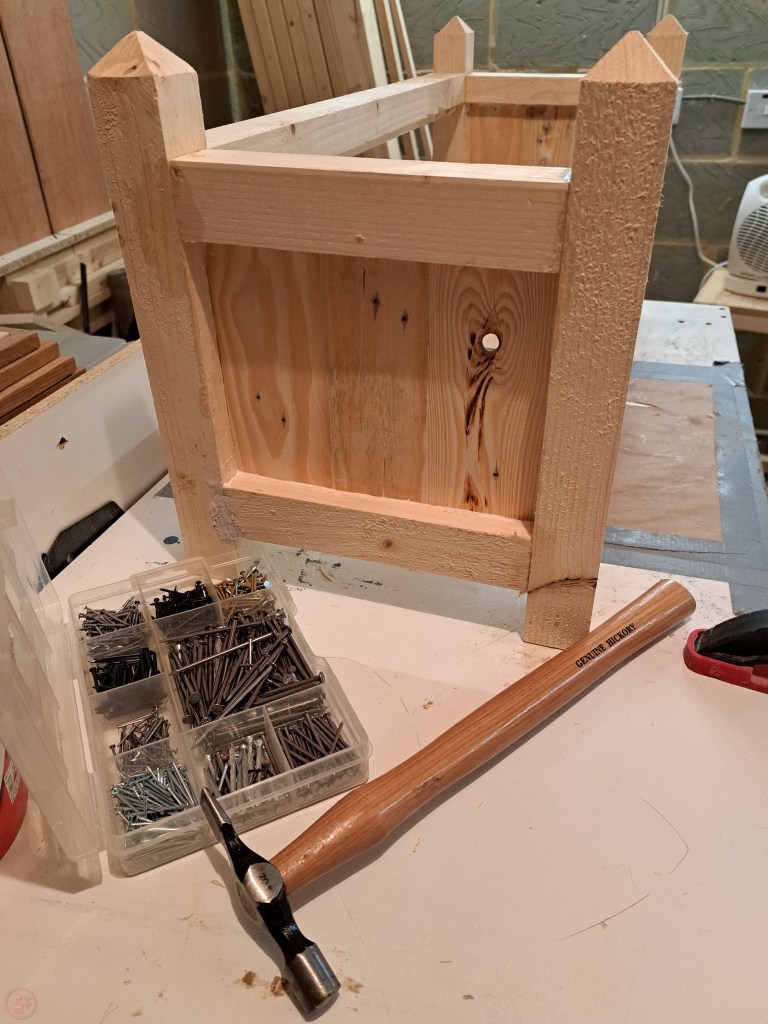
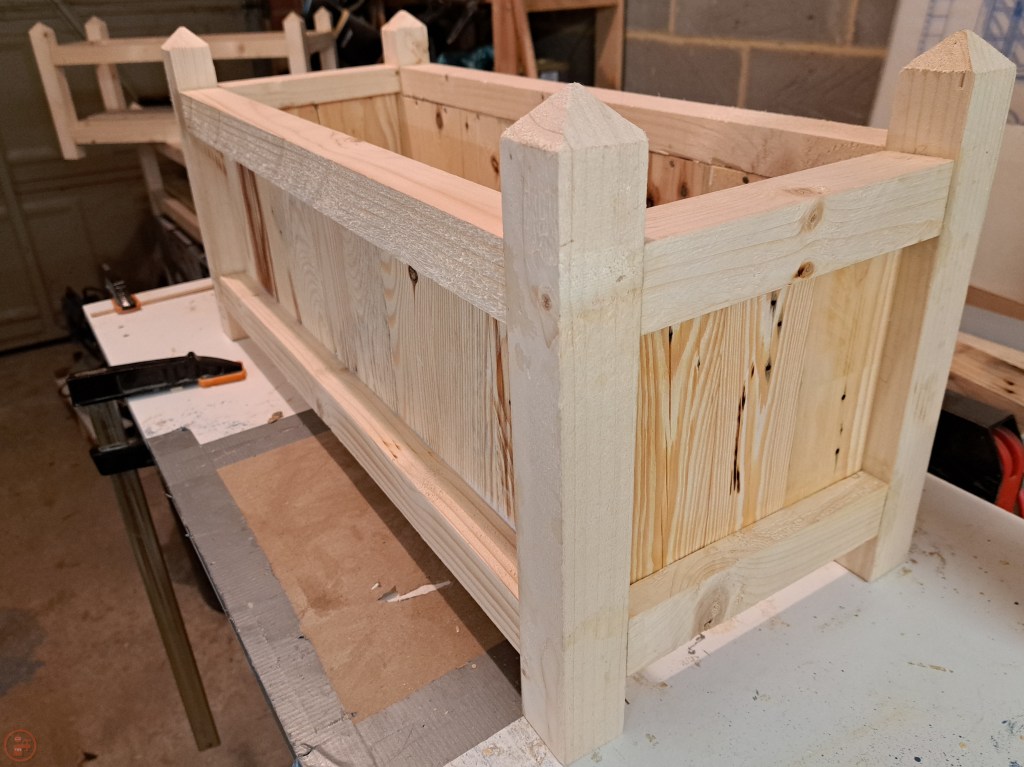
Following the final dry fit, I progressed to figuring out how the base and side panels would connect with the rest of the frame. I could have kept it simple and just nailed panels to the inside of the frame, but I wanted to maximise the inside space as well as provide a solid base to take the weight of the soil. I therefore made a rudimentary Router table and suspended my palm router upside down (separate post to follow). This allowed me to better control a narrow workpiece and through the use of push sticks and guides, I successfully routed a groove along the length of each stretcher.
I doubled the width of the groove on the short stretchers to give me space for both side panels as well as the base to have a solid surface to sit on.
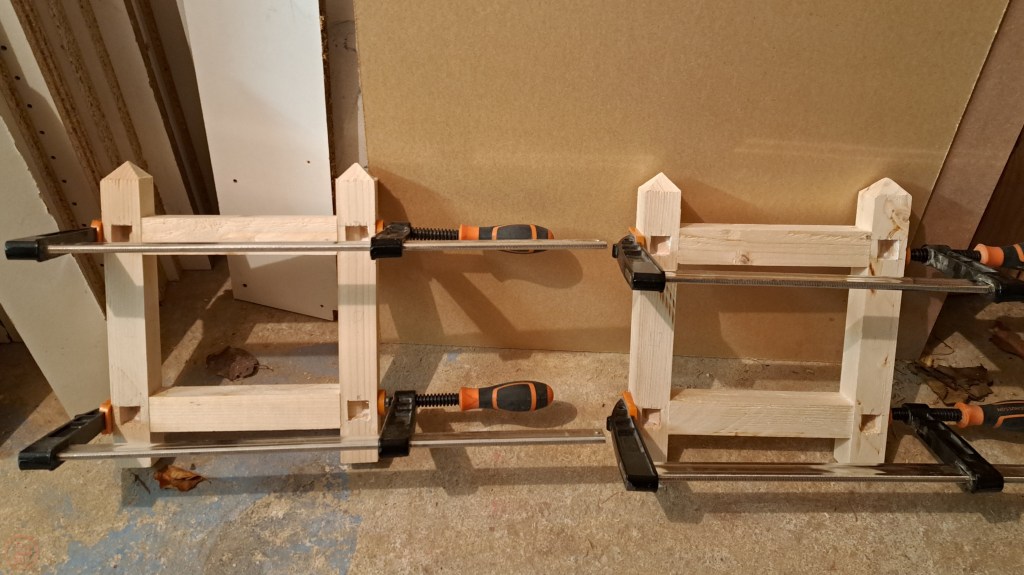
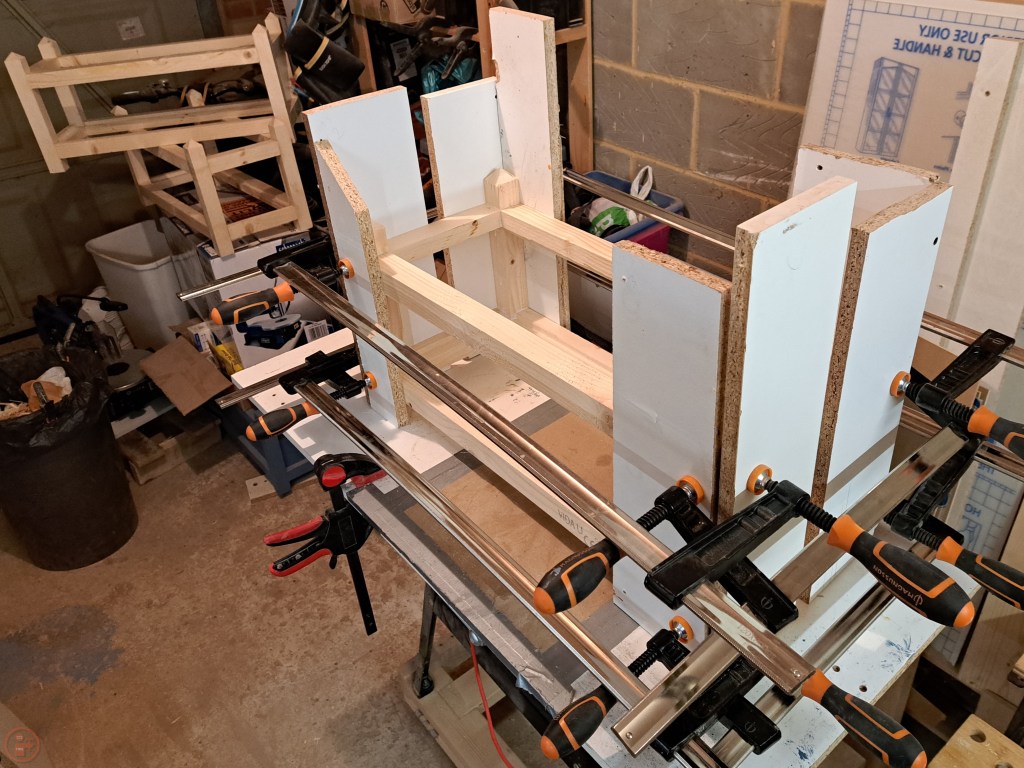
A final test dry fit and it was ready for final assembly! I used a large sheet of white melamine coated chipboard on top of my saw horses to give me a stable surface for gluing.
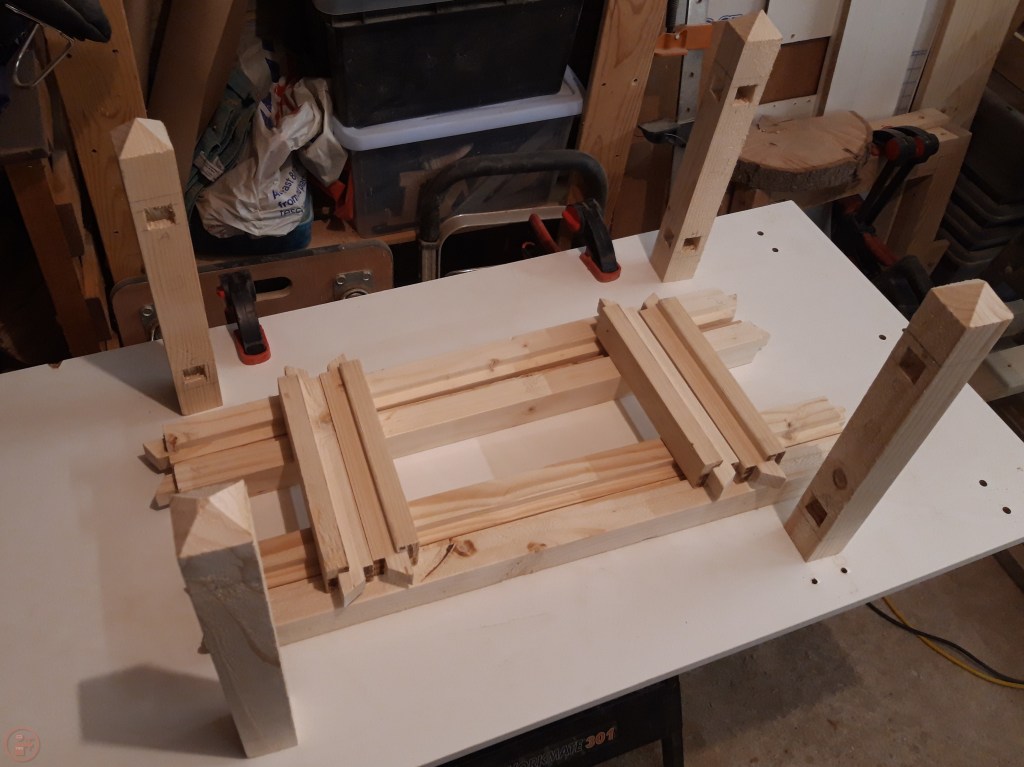
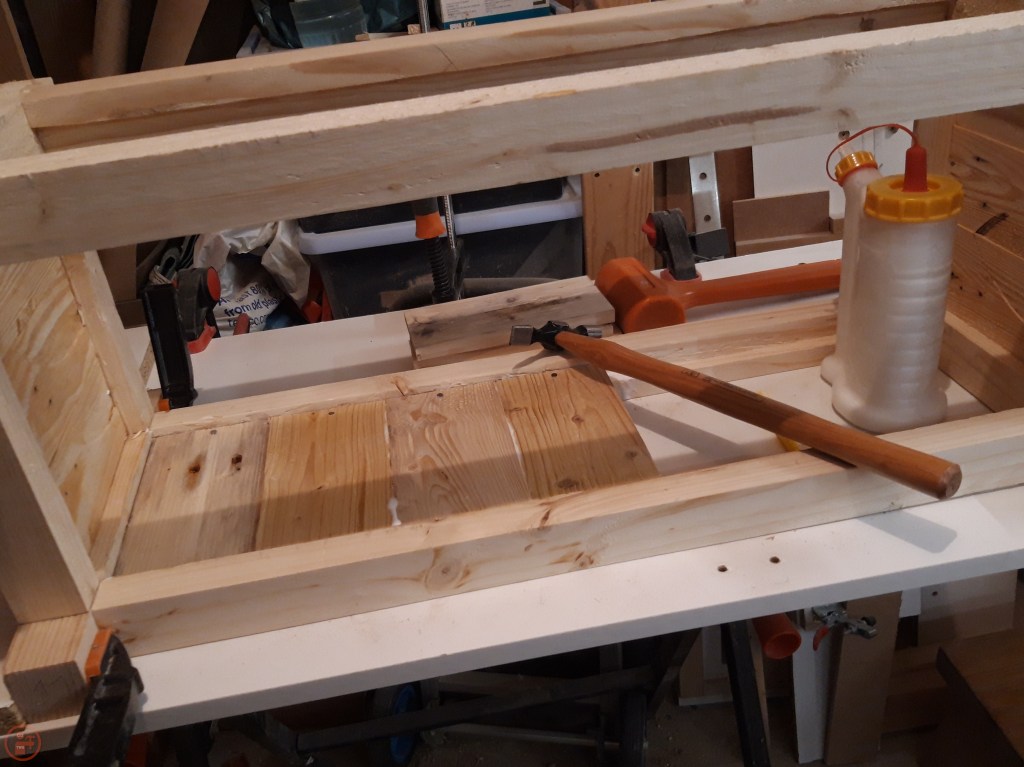
I removed each piece and applied glue to the joints, ensuring a good coverage on all the faces of the tenon as well as the shoulder of the joint. I used additional scrap material to ensure I was providing even pressure along the workpiece in the clamps and then left the end frame to dry overnight.
Once the end frame was dry, I repeated the process with the long stretchers, using longer clamps to secure the workpiece and provide even pressure through each joint. Glue ups can often be quite nerve racking, but as I made sure I had all the scrap material and clamps I needed before I started applying glue, this surprisingly went rather well!
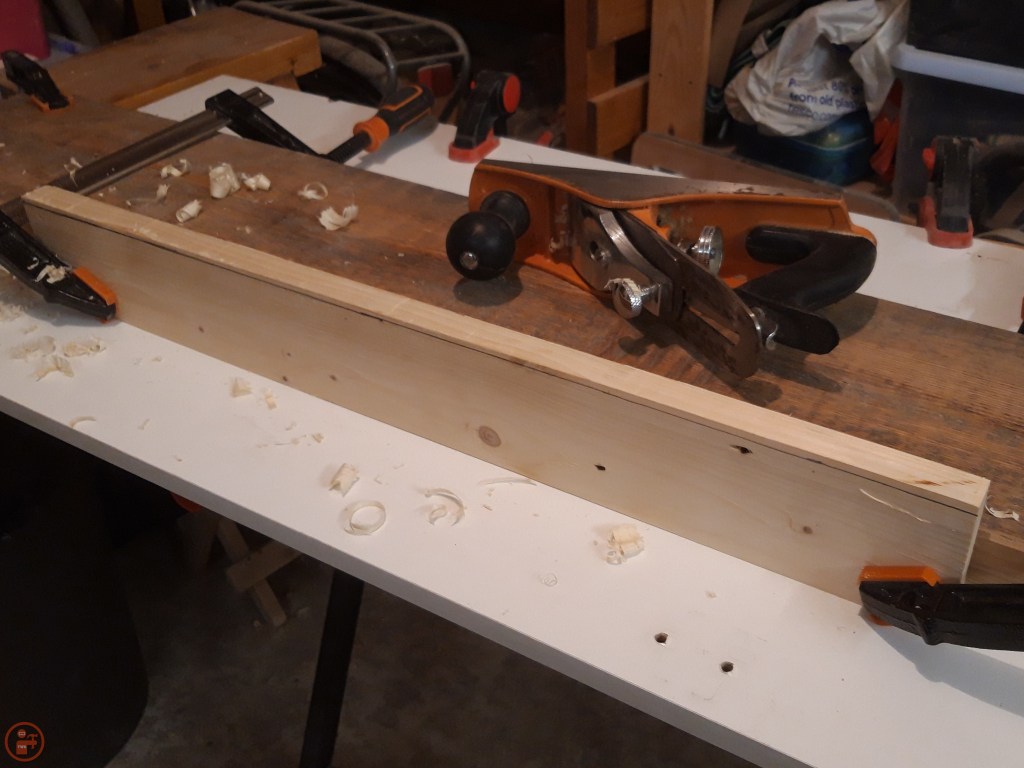
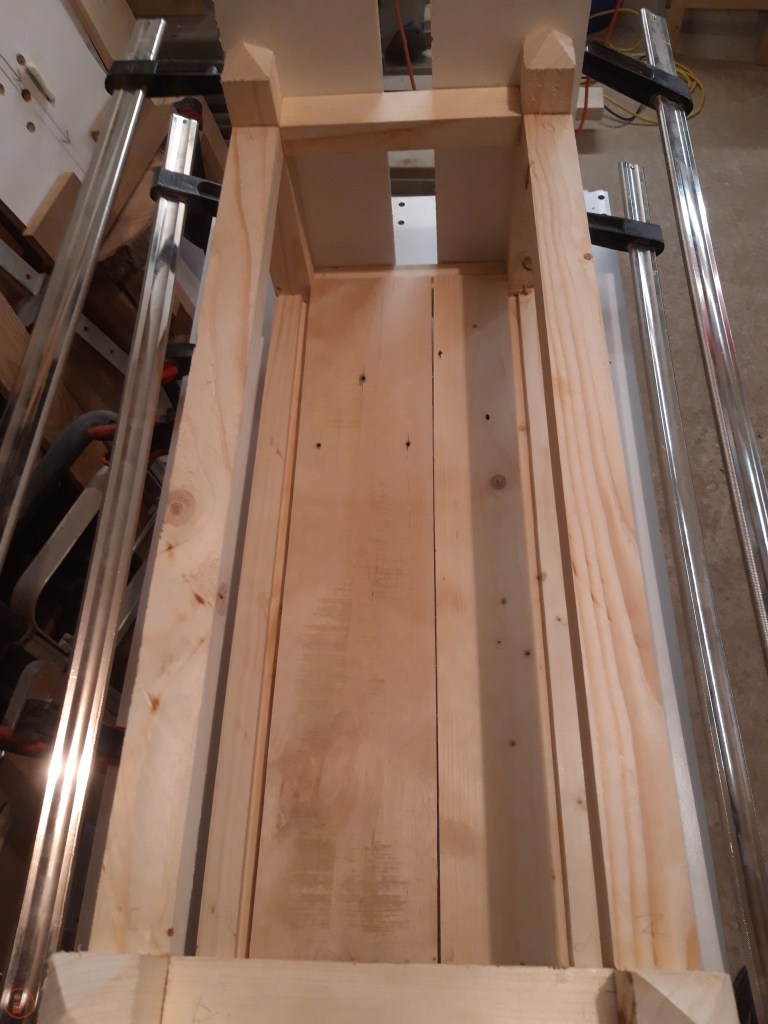
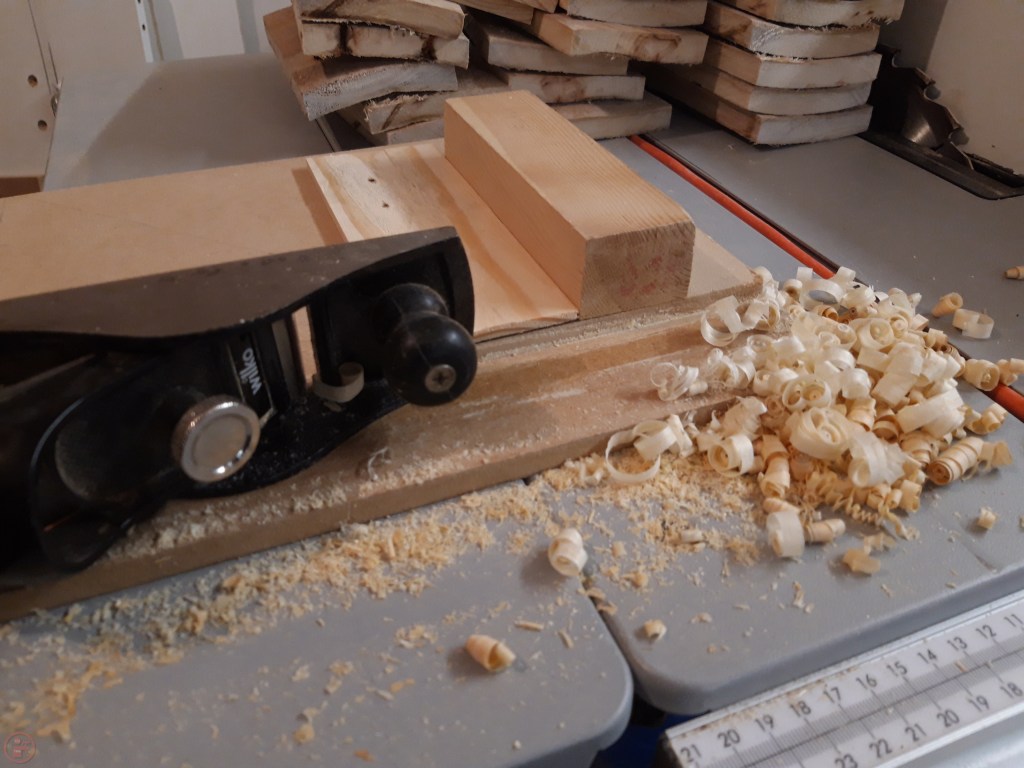

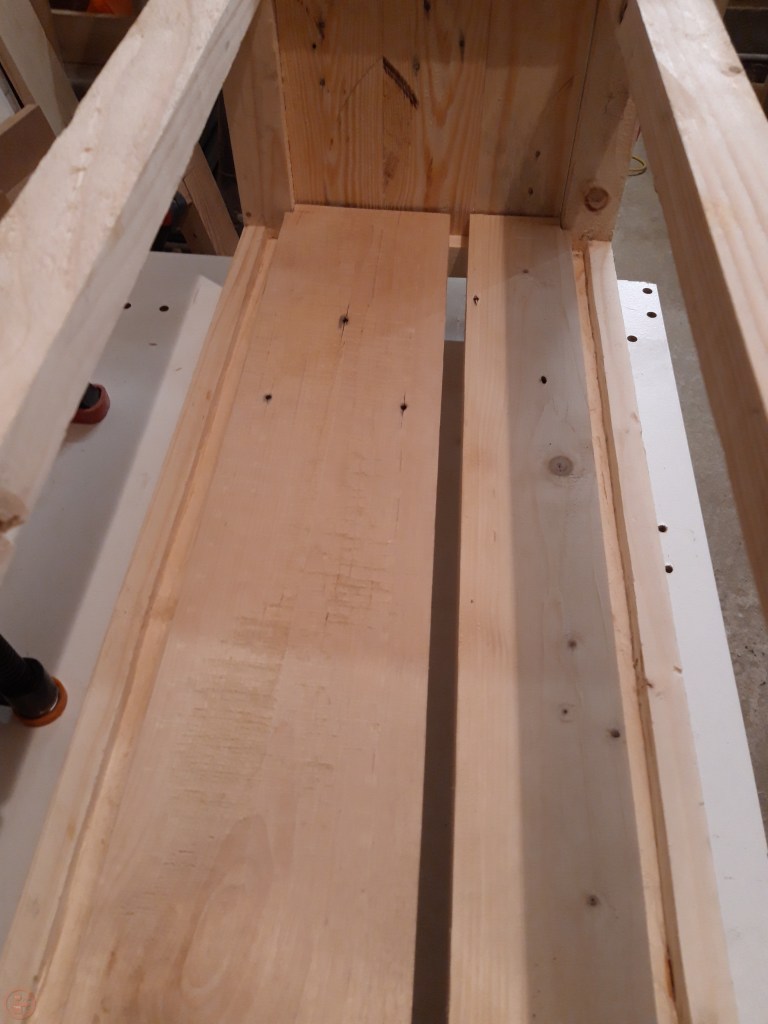
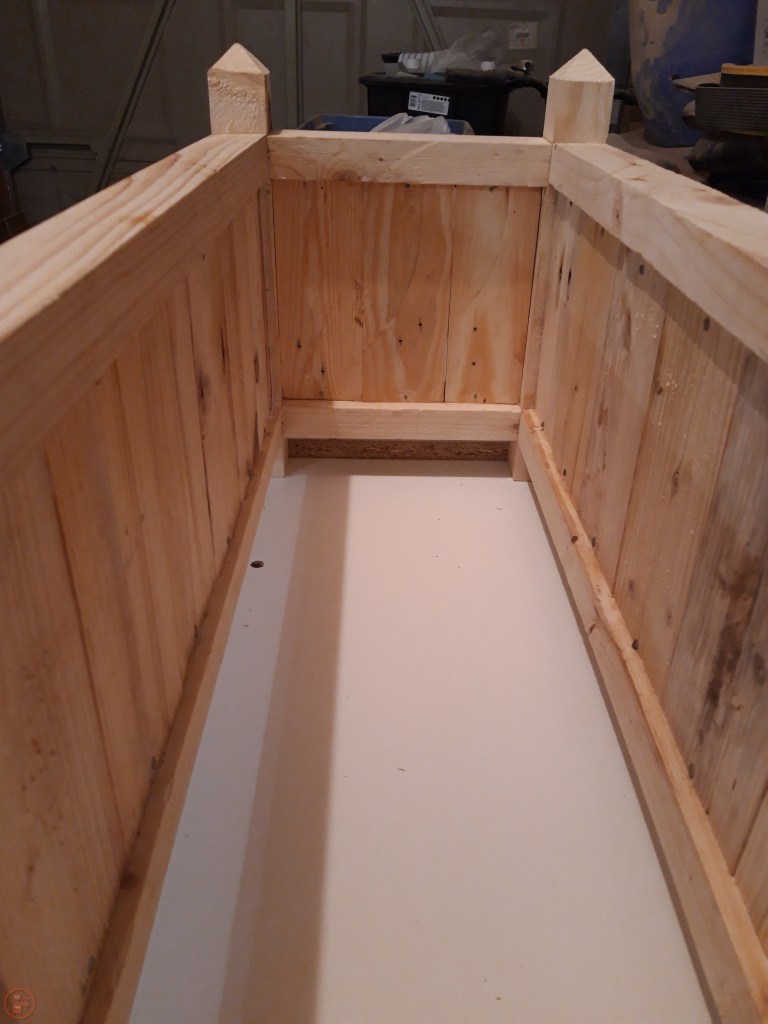
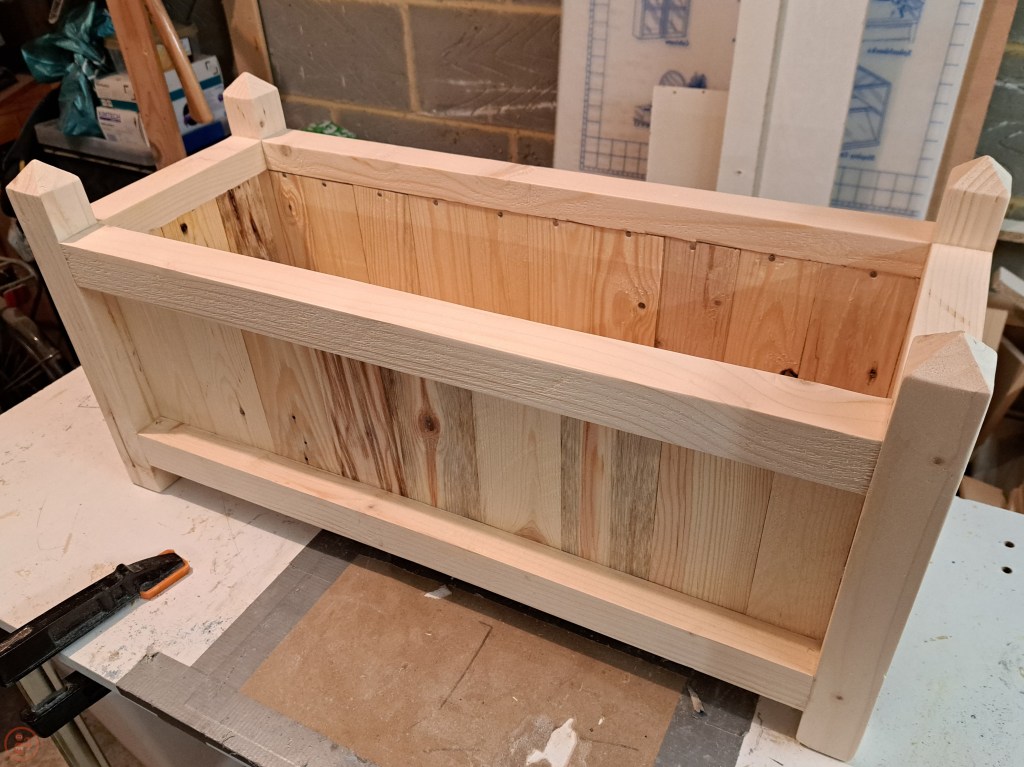
Once the frame was dry, it was simply a case of slotting in pallet wood slats for the base and gluing and nailing them into place. I used my hand plane to create a gap between the boards of the base to allow for drainage and prevent the planter becoming waterlogged in our seemingly constant British weather!
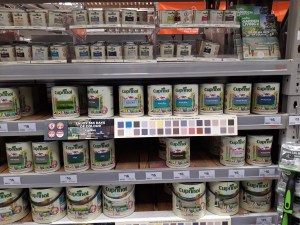
I did a trip to our local big hardware store at this point to assess our colour options for outdoor paint – we settled on a Forget-Me-Not blue paint specifically designed for wood in the garden. Amusingly the tin has a picture of a very similar garden planter to my design on it!
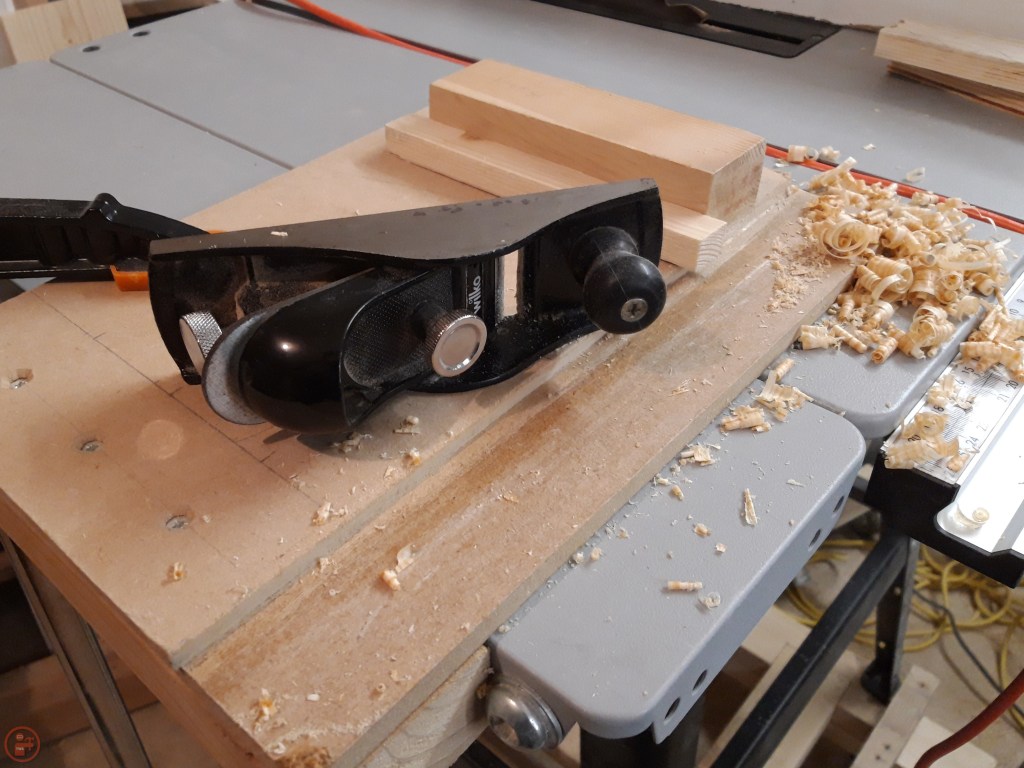
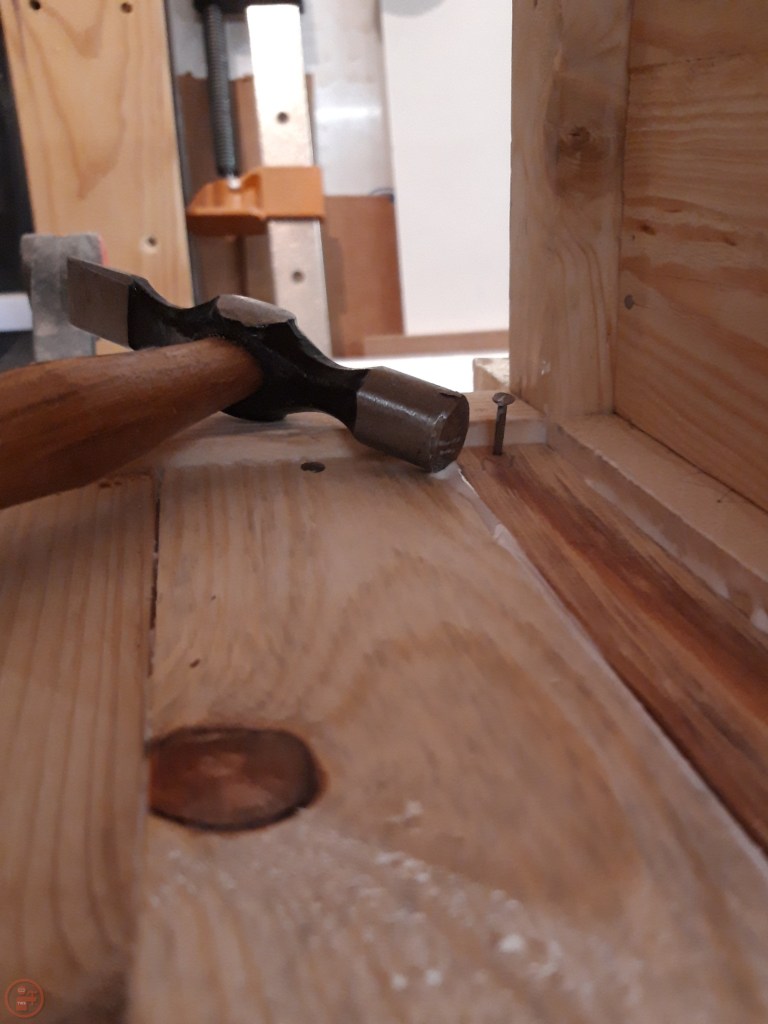
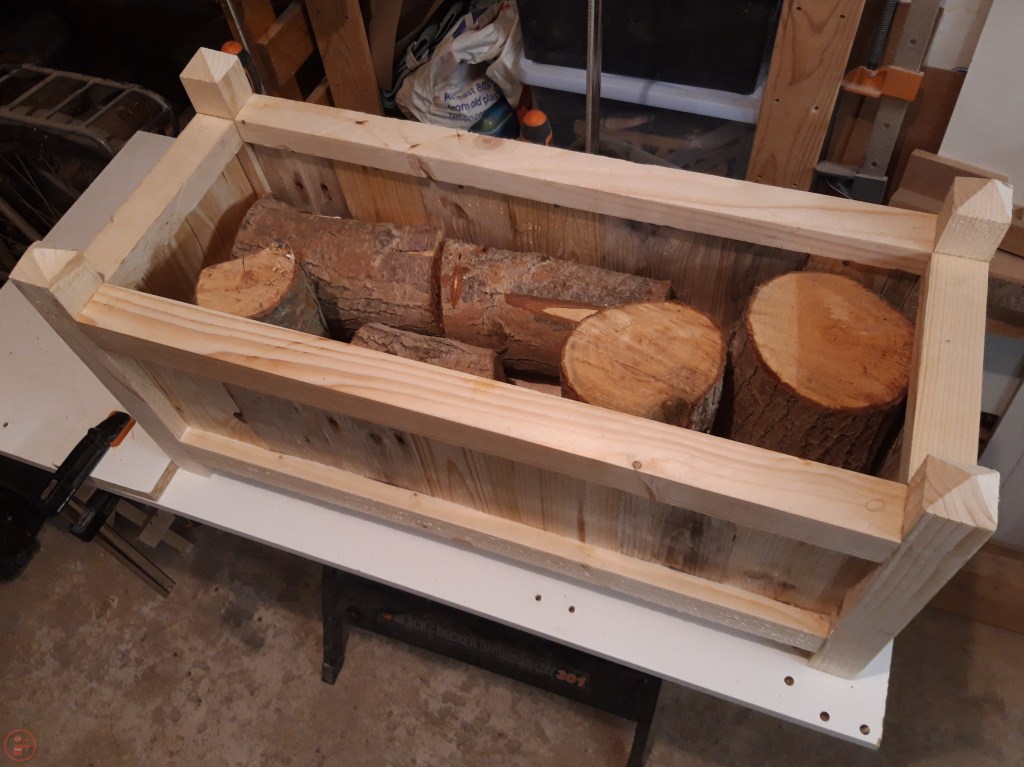
With the paint purchased and a few power tools inspected (and not bought!), I returned to the workshop to continue adding the pallet wood side panels. I worked my way along each side, gluing and nailing each board into place. I used my hand plane to get a snug fit for the final piece on each side. Once each of the sides were complete, I slotted the base slats into place and used some logs from our log store to weigh the base down while the glue dried.
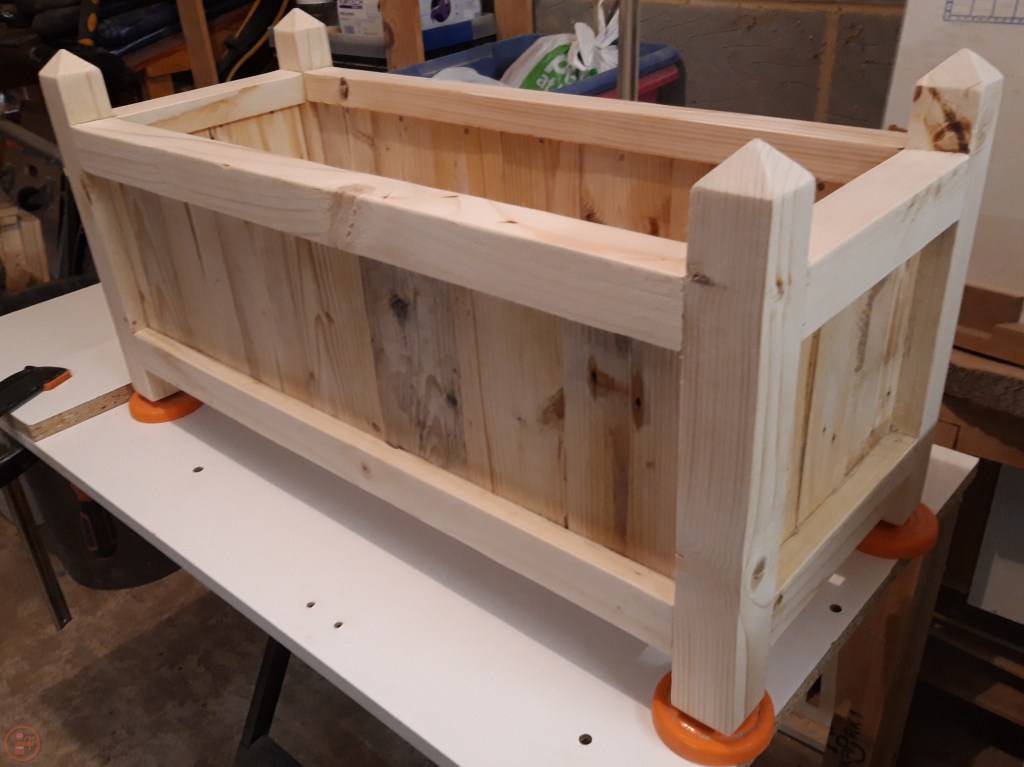
As these were going to be outside and painted, I didn’t see the need to sand the planter to a super high grit. I sanded up to 80 grit to remove any sharp edges and minimise the risk of splinters when moving the planters about! I also added a slight bevel to the bottom of the legs to reduce the likelihood of splitting when the planter is moved.

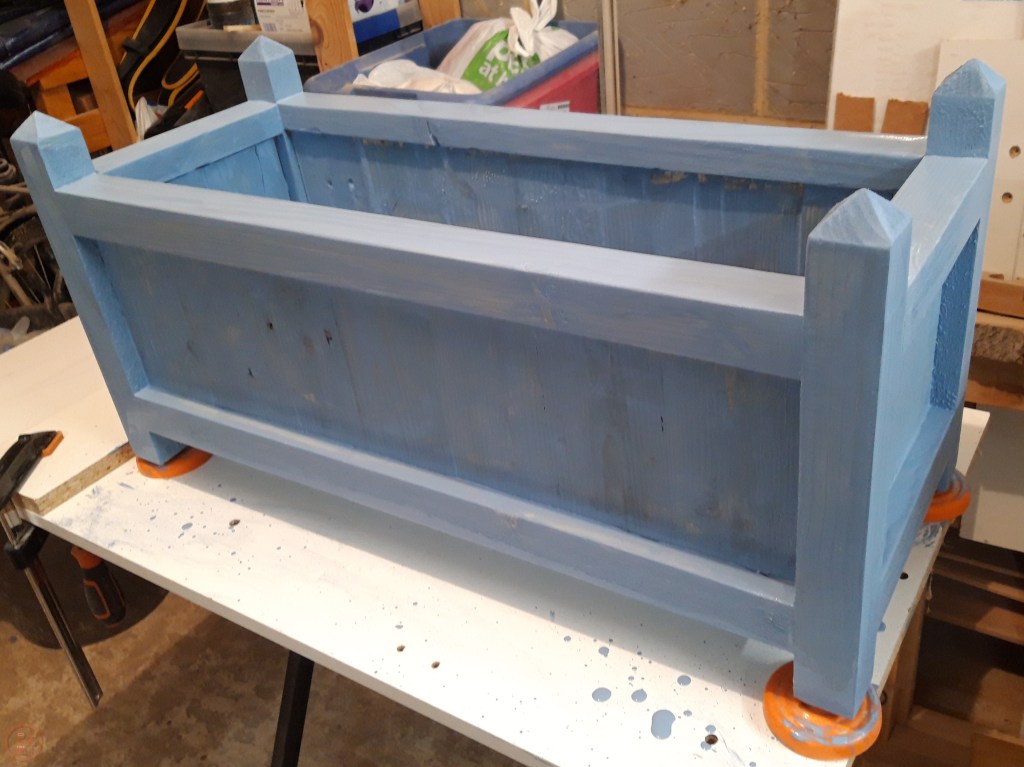

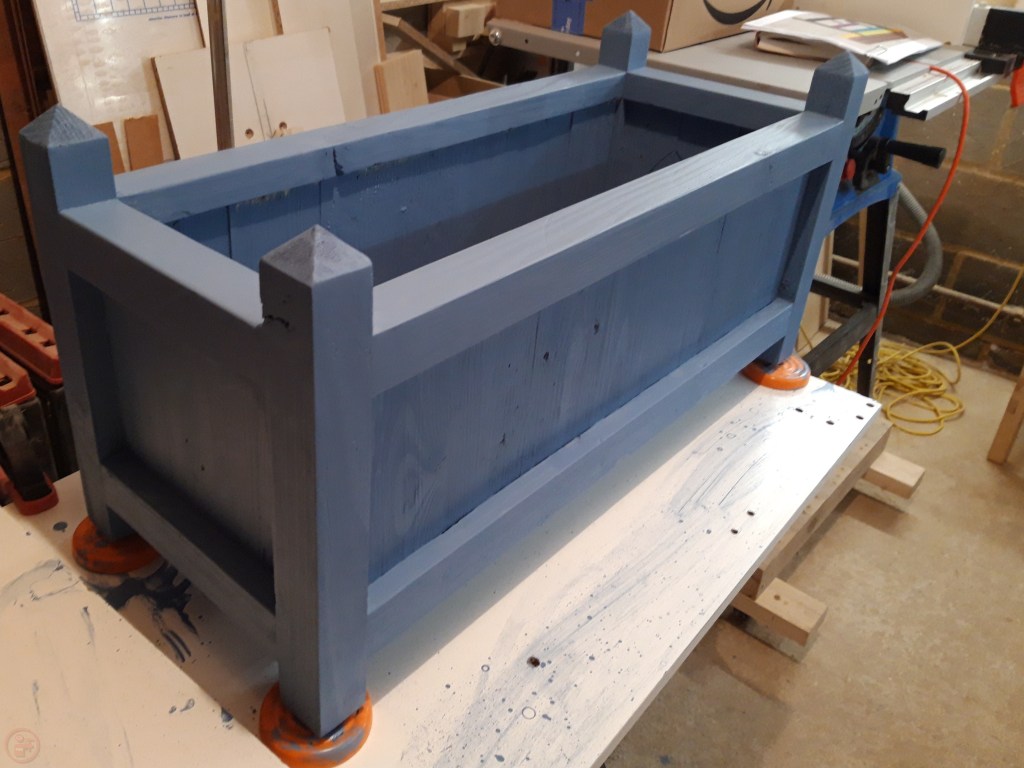
I painted the planter inside and out with three coats of the Forget-Me-Not blue outdoor paint, resulting in me having blue flecks on my arms for a few days!
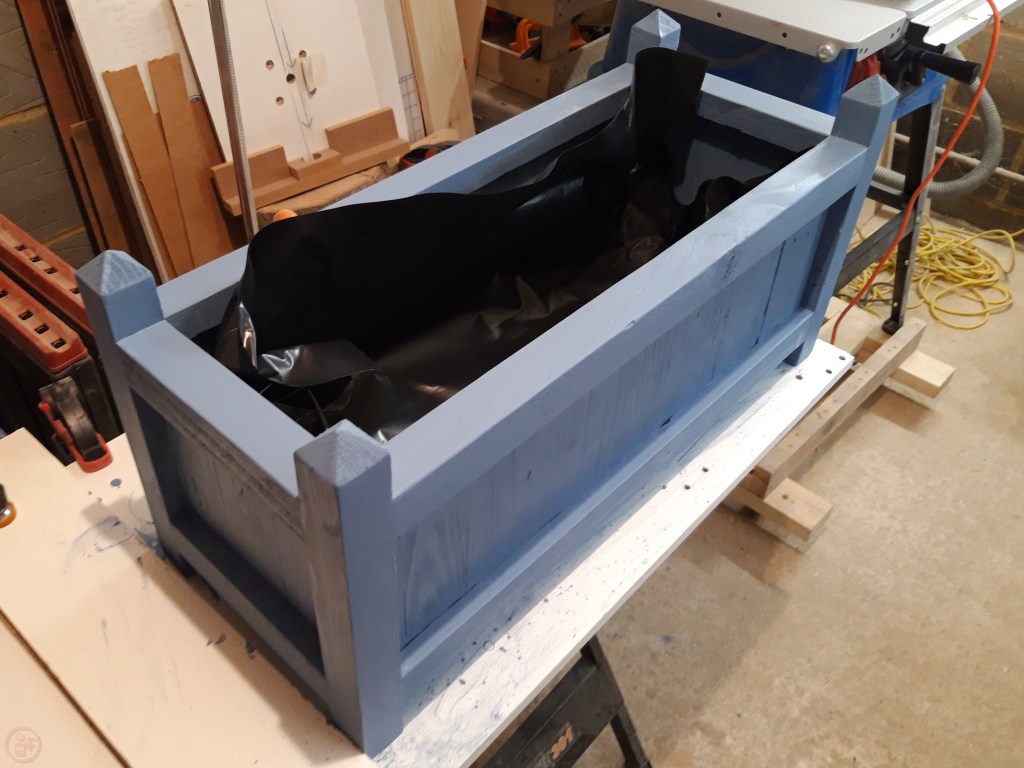
Once the paint was fully dry, I added a heavy duty plastic bag to hold the compost and stapled it into place. I used some small tacks when I ran out of staples and then spiked several holes along the length of the planter to allow for drainage and prevent the roots from getting overly soggy and rotting in bad weather.
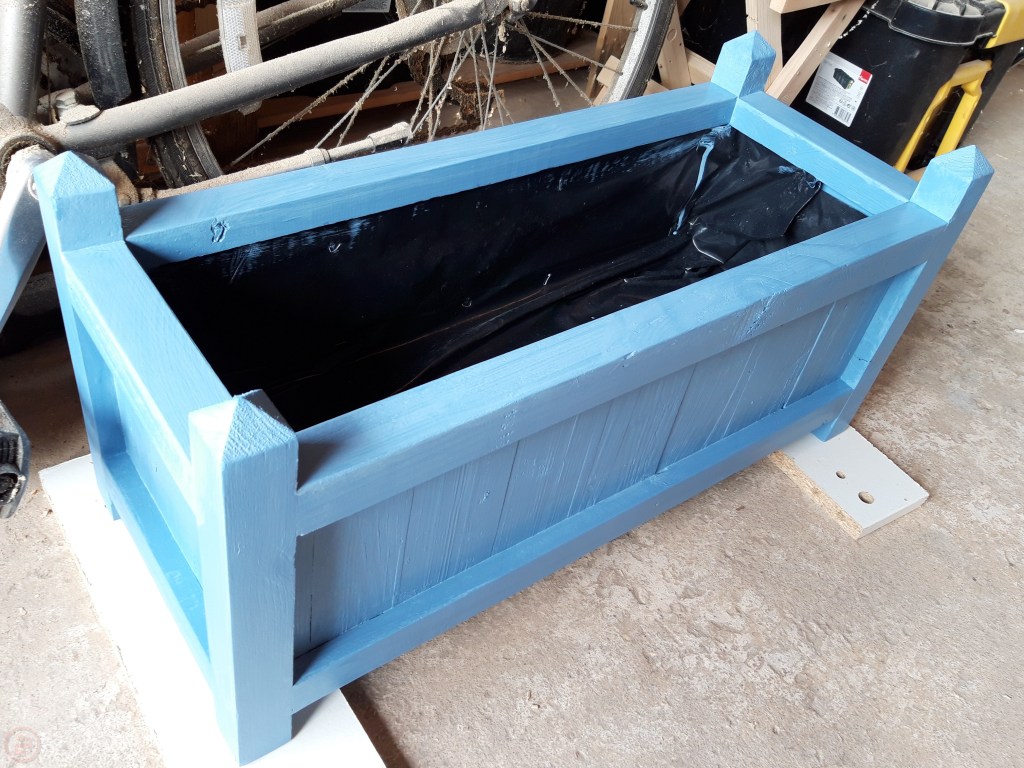
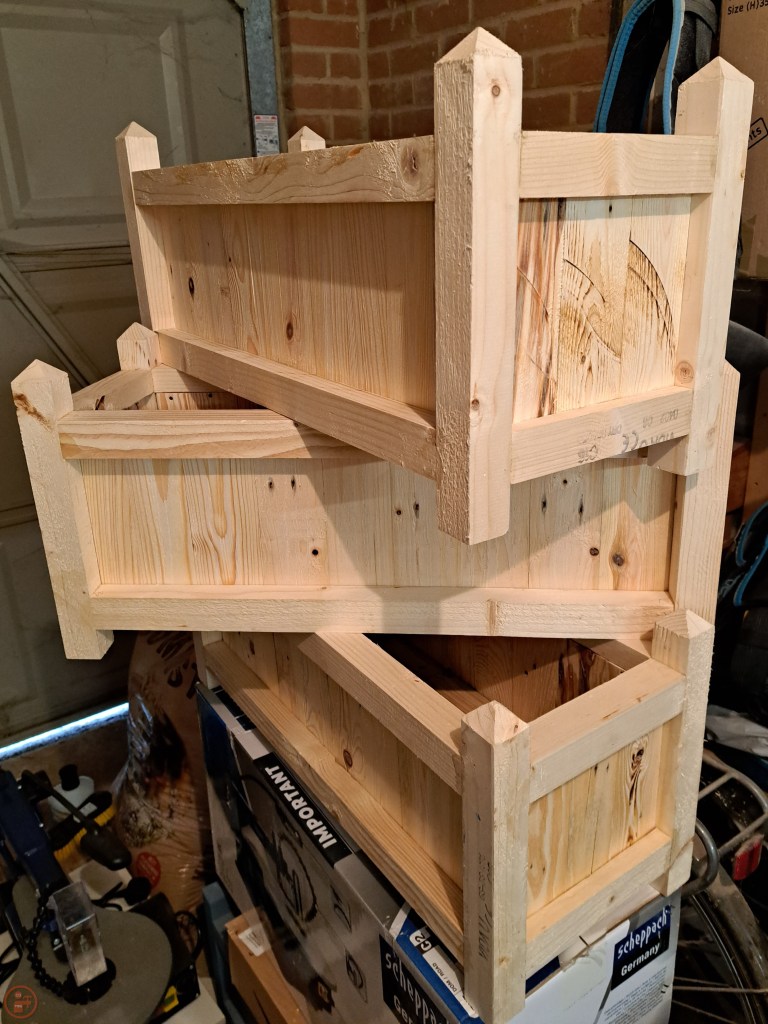
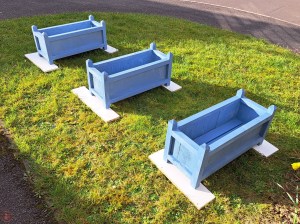
I was very happy with the resulting finished planter, so it was time to repeat the whole process another three times!

Once I had the three additional planters assembled, I painted them each with three coats and left them outside to dry in the sunshine (you can tell this was done last year!).
I also repeated the step of add a plastic bag to each planter and made sure to poke multiple holes for drainage in each one.


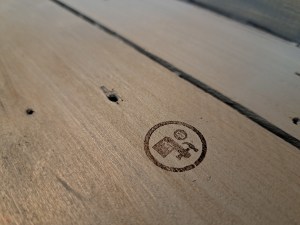
I used my TWS stamp to add my logo to the bottom of each planter and then they were ready to be used!
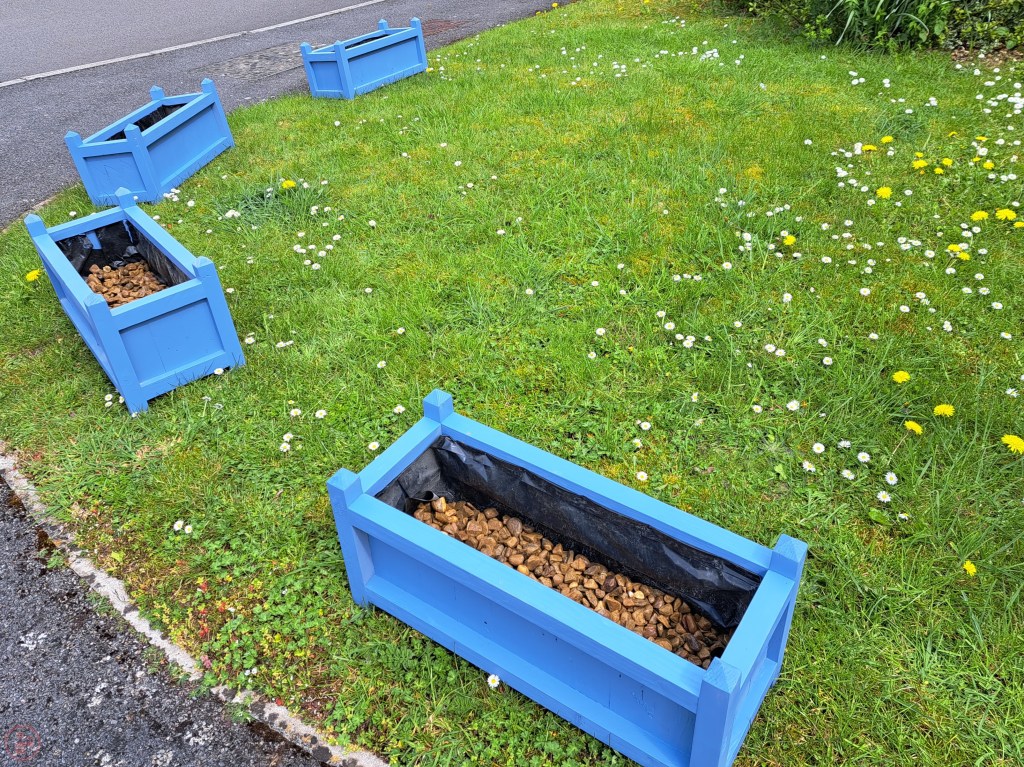
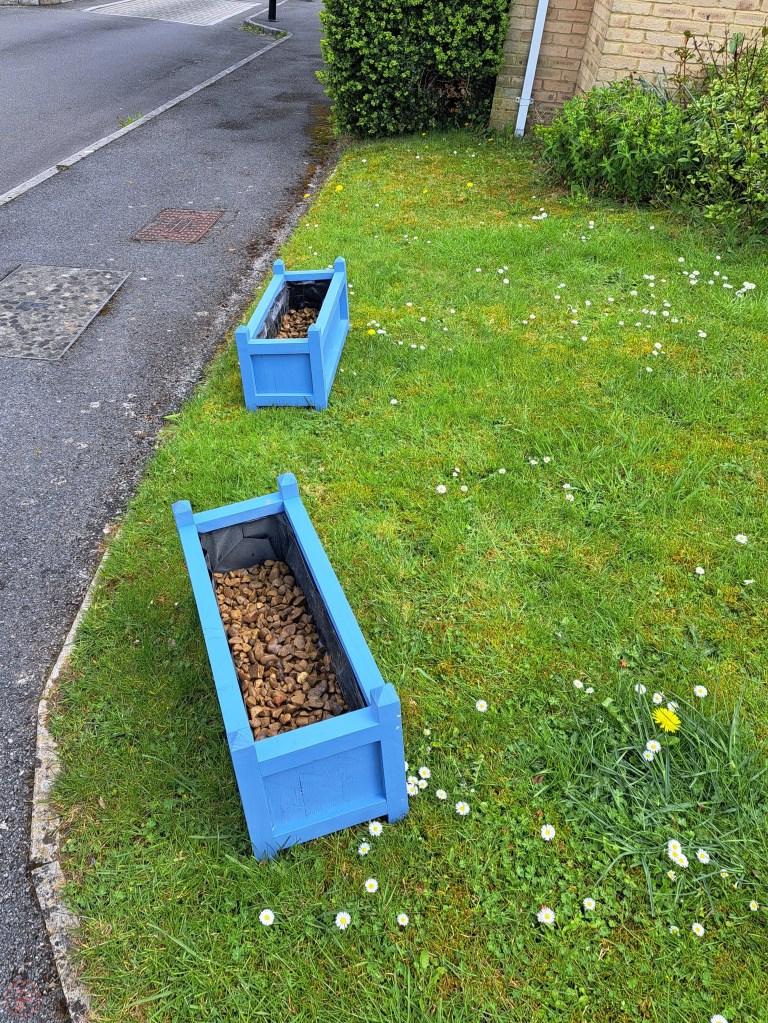
We added some gravel to the base of each planter to assist with drainage and stability.
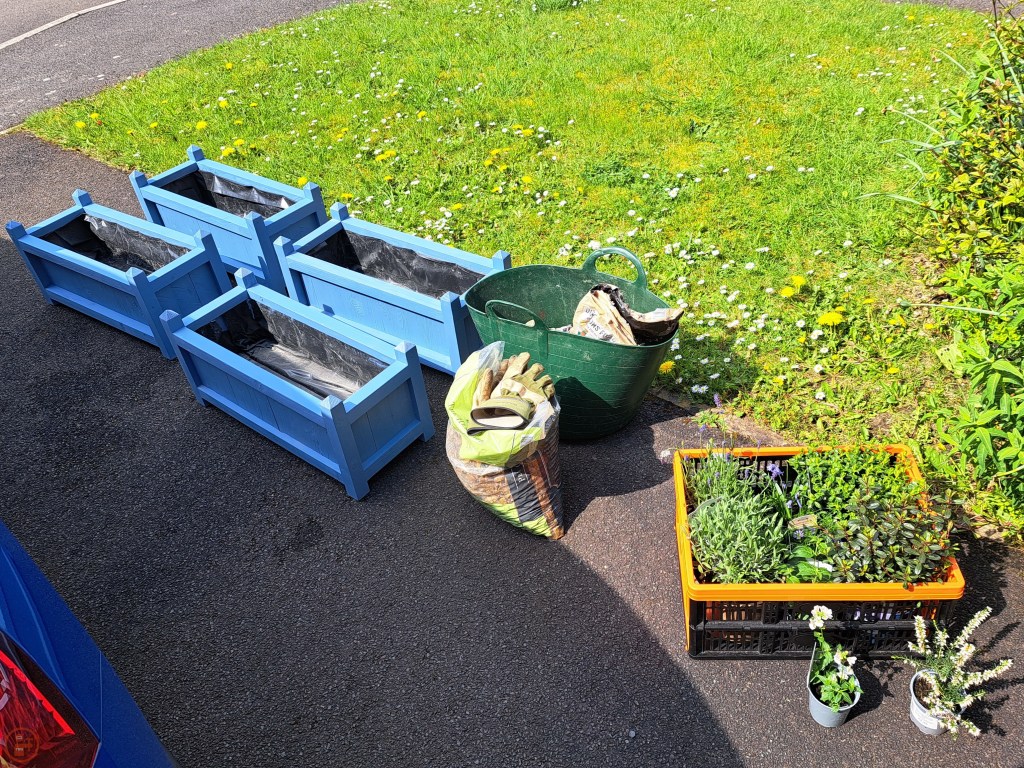
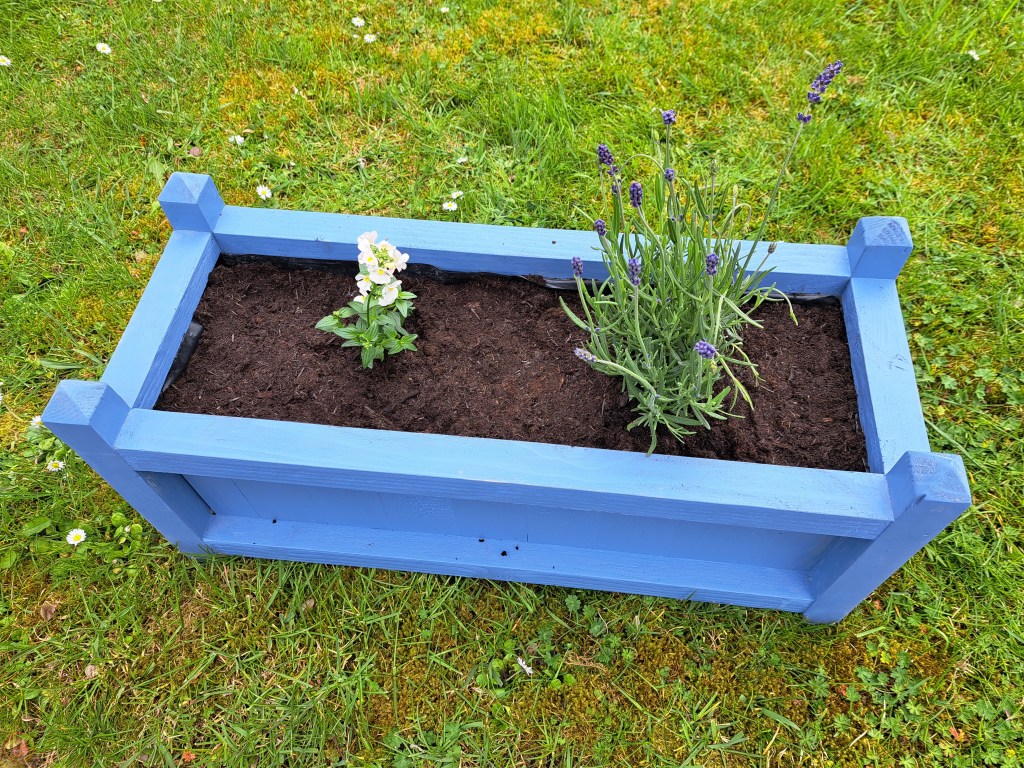
We added a good amount of compost and bedded the plants in well, adding more compost on top as it will compress over time with the rain (plus cat for scale!).
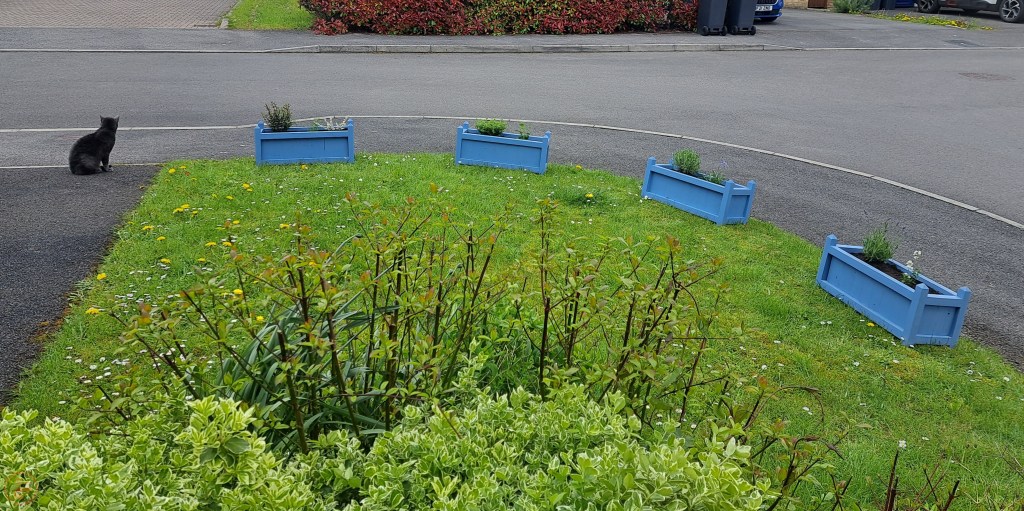
Once all the plants were in the respective planters, I moved them into position around the edge of the lawn.
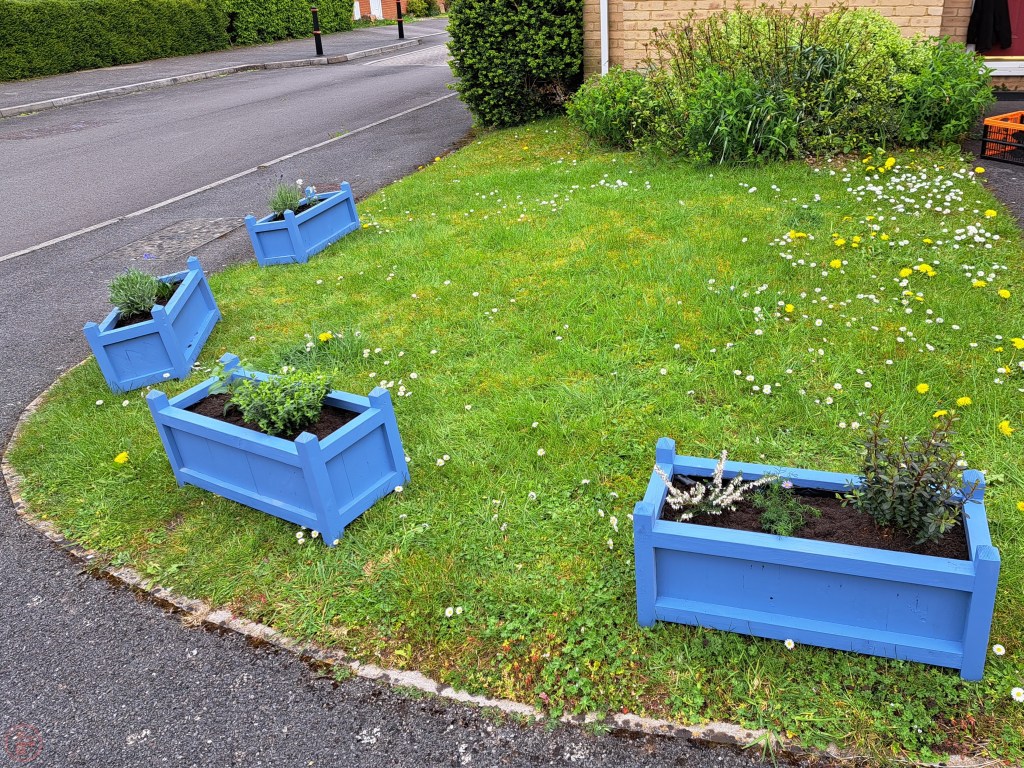
The plants have all grown considerably since I finished, the below images are after only a couple of weeks, so they definitely seem happy!

I am really pleased with how these have turned out – it was a lot of repeated cuts and keeping all the pieces organised and working out which posts matched with which stretchers was a bit of a logic puzzle! These should last us a nice long time with additional periodic coats of paint and occasional weeding to keep the plants healthy! 🔨

2 thoughts on “Garden planters”