My first commission! My sister’s husband requested a fun way to store loo roll in the bathroom of their new house in the form of a noughts and crosses loo roll holder – only too happy to take such a challenge!
Planning
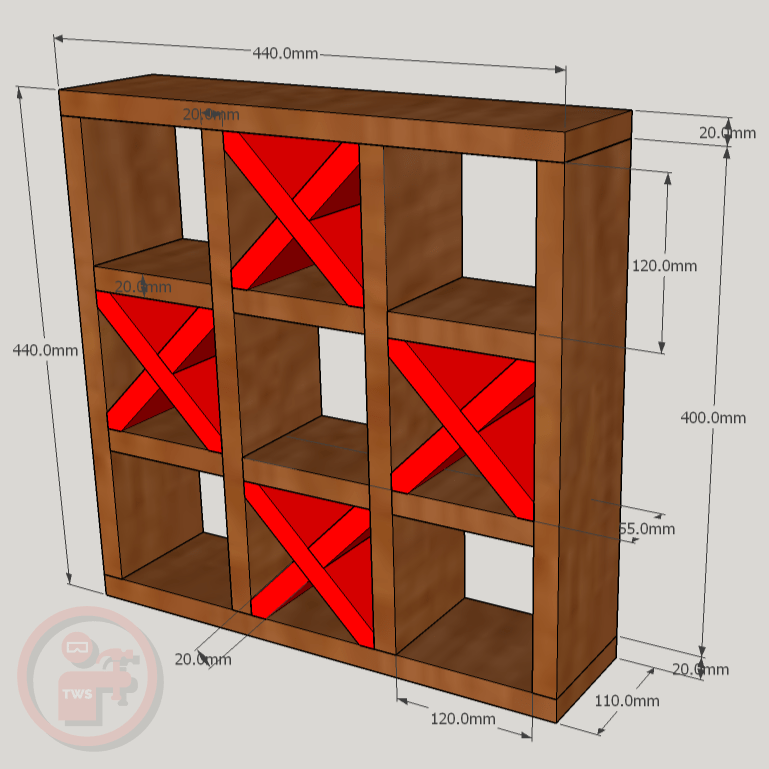
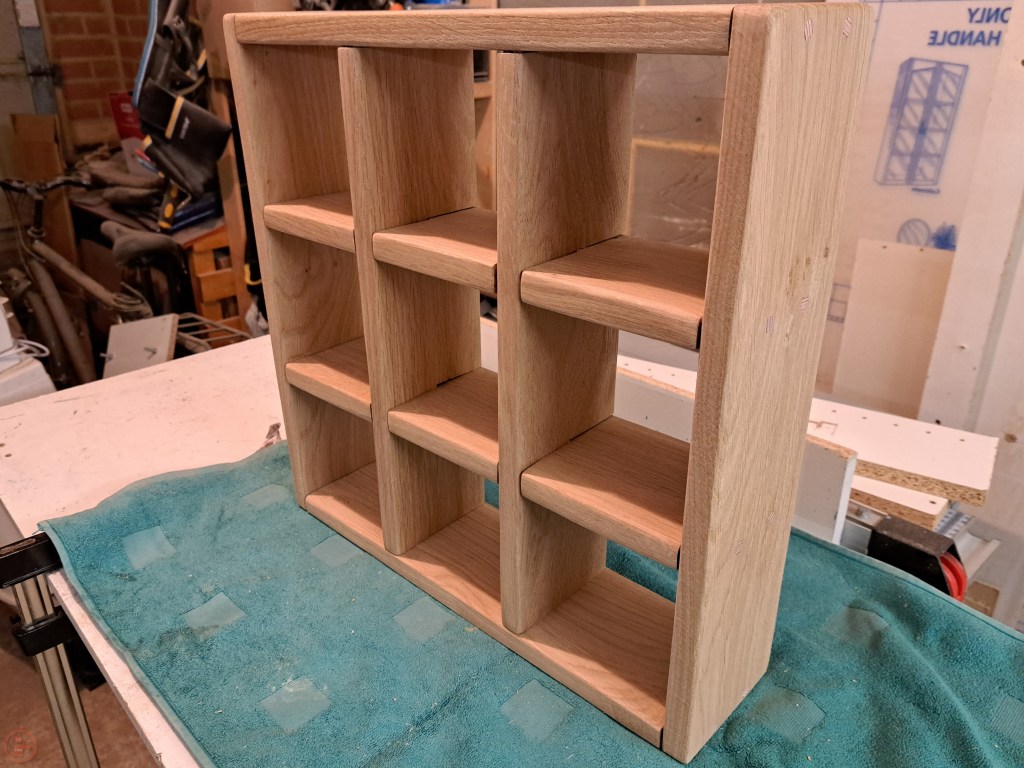
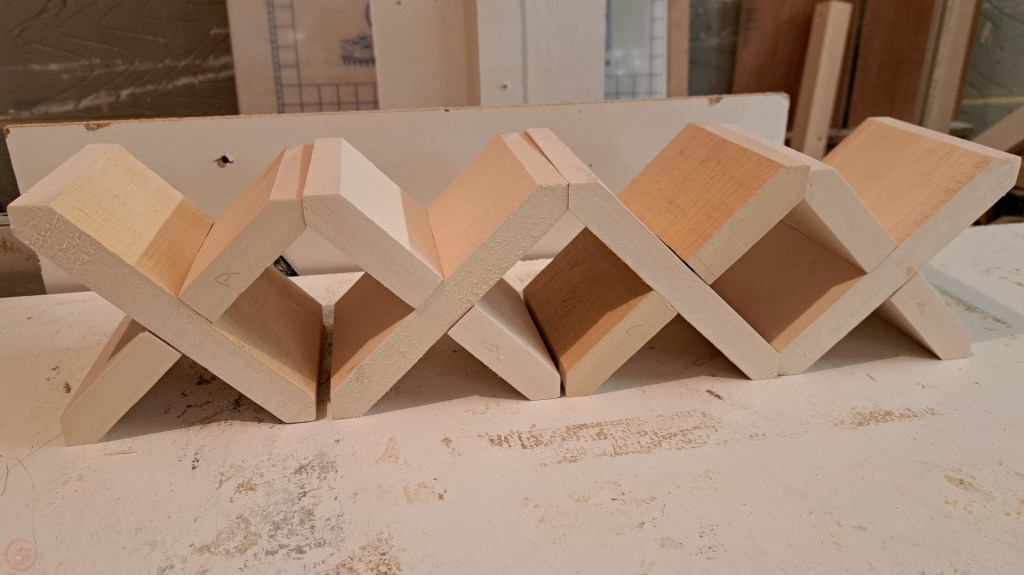
The first step was to determine dimensions to ensure a selection of loo roll sizes would fit, as to ensure whatever brand they buy in future will continue to fit easily and not require squashing! After some measuring, I worked out appropriate dimensions and drew a few sketches in my woodworking planning journal, before modelling it in SketchUp (not sponsored). The idea is for the loo roll to make the noughts and then to have wooden crosses for the other pieces.
I then used the plans to work out how much lumber I would need so I could make sure I was buying the right amount from my cut-list and could plan out the steps needed to create the workpiece.
Sourcing lumber
My customer requested a hardwood, like oak, for the frame, so provide a darker colour to match the aesthetics of their existing bathroom furniture. And for the crosses, I selected some cheaper basswood that would allow me to easily cut it to the cross shapes as well as dye it a red colour using red wood dye, so the crosses would stand out against the darker oak frame.

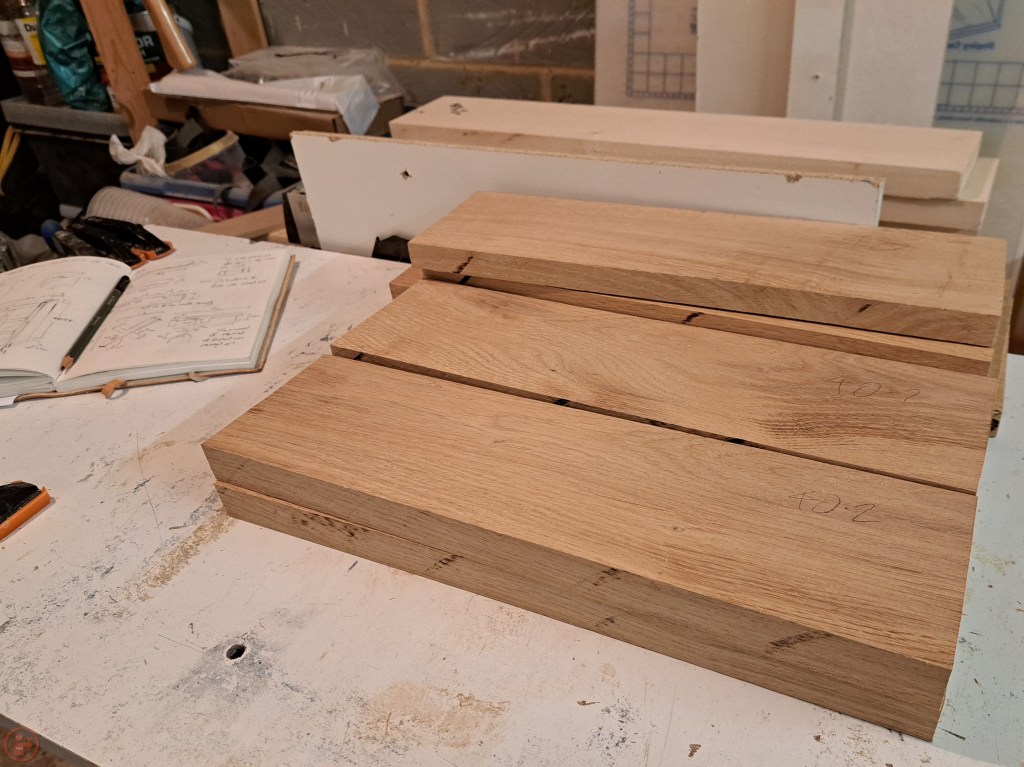
To source the pieces needed, I made the trip to a local(-ish) sawmill and woodworking centre called Yandles (not sponsored) which has a massive selection of hard and soft woods, as well as a wide range of exotics too! It was very easy to get distracted, so I’m pleased I went with a specific list of what I needed!
Cutting and milling
Once I had the oak and basswood safely home again, I cut the various pieces I needed to length and width, and then used my electric hand plane to thin the various pieces down to the required thicknesses. This removed some of the rougher areas of the oak and left a really nice smooth surface.
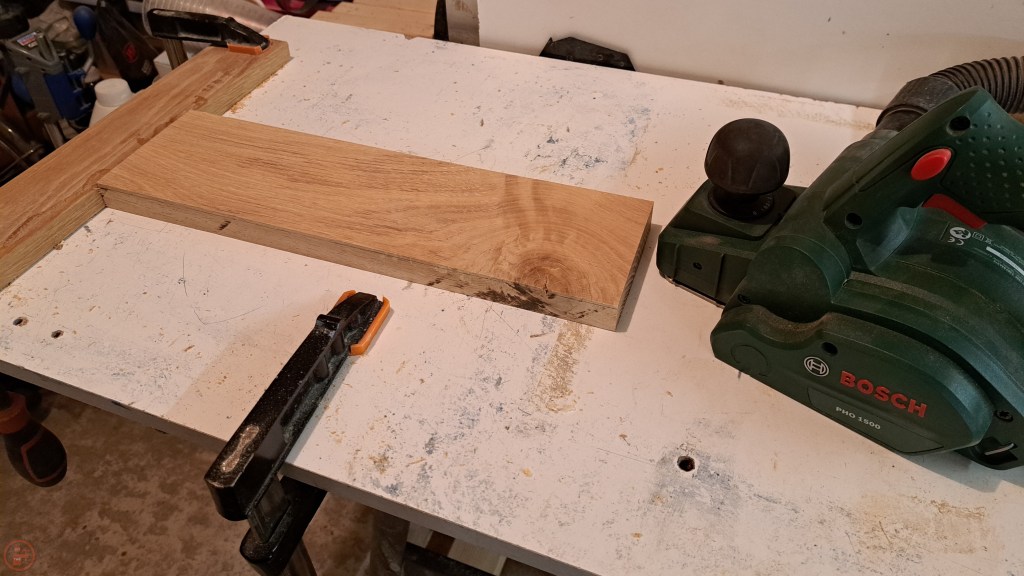


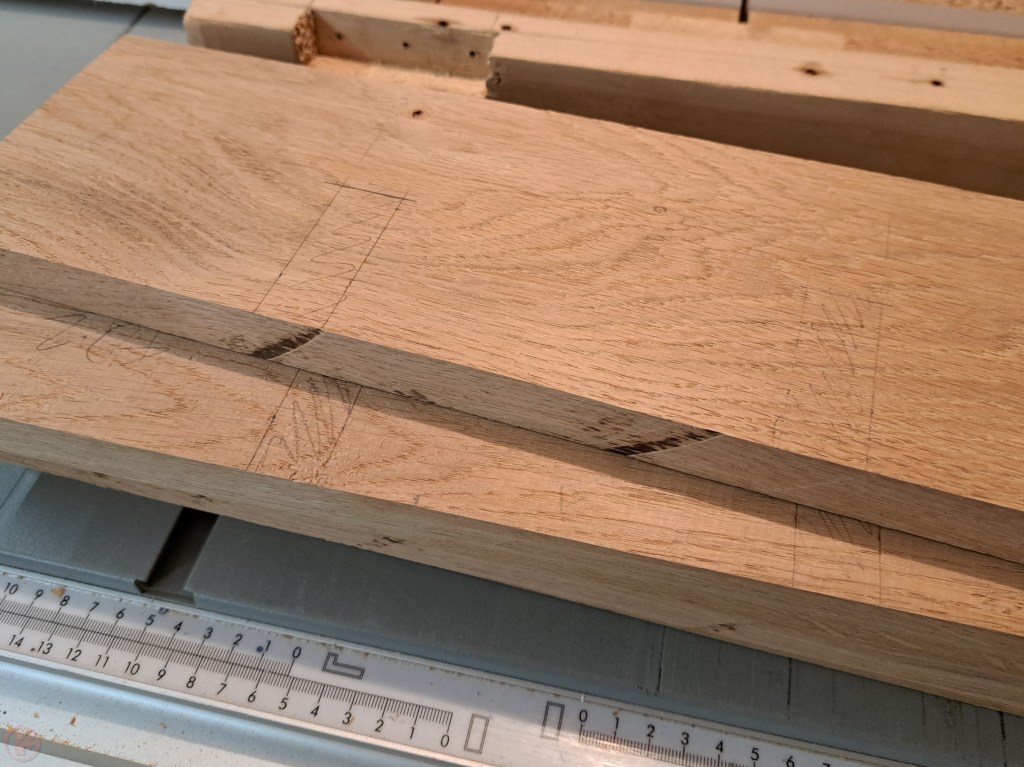
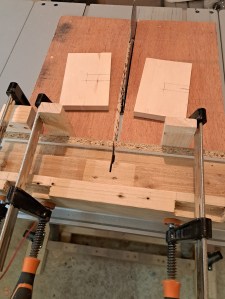
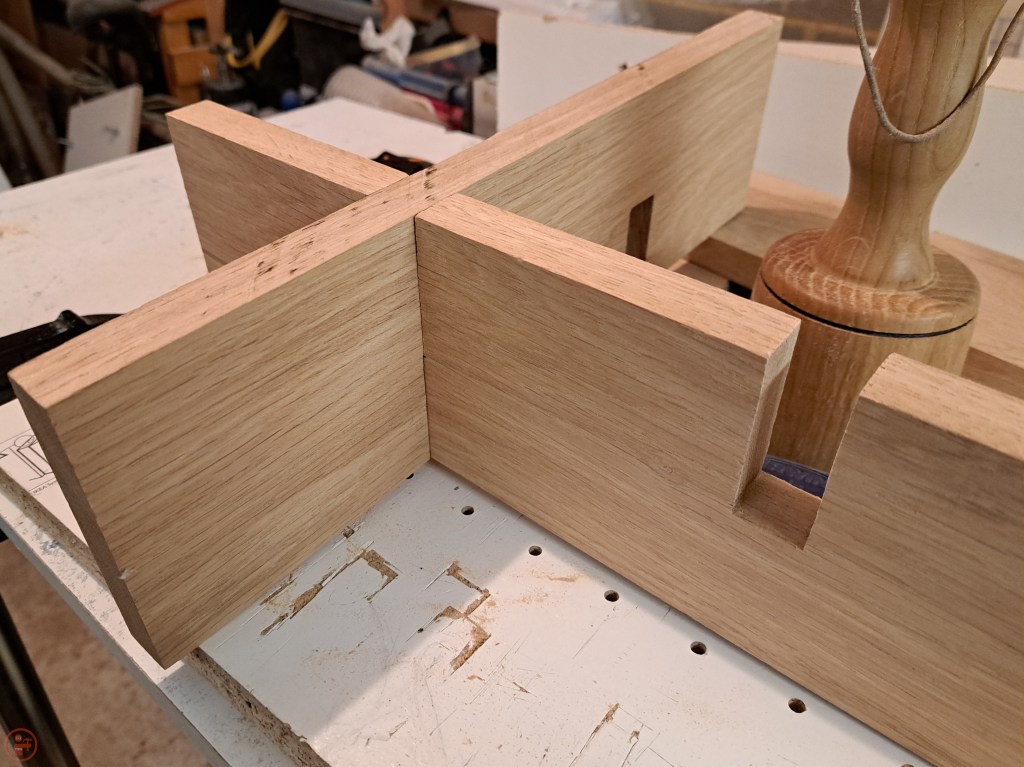
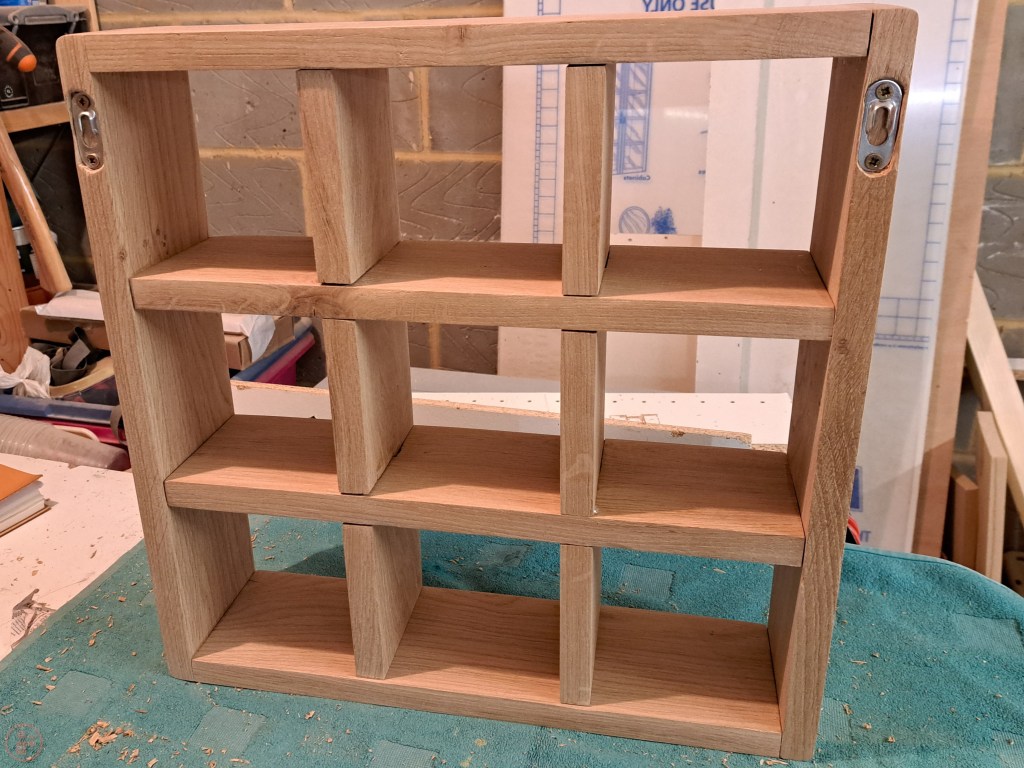
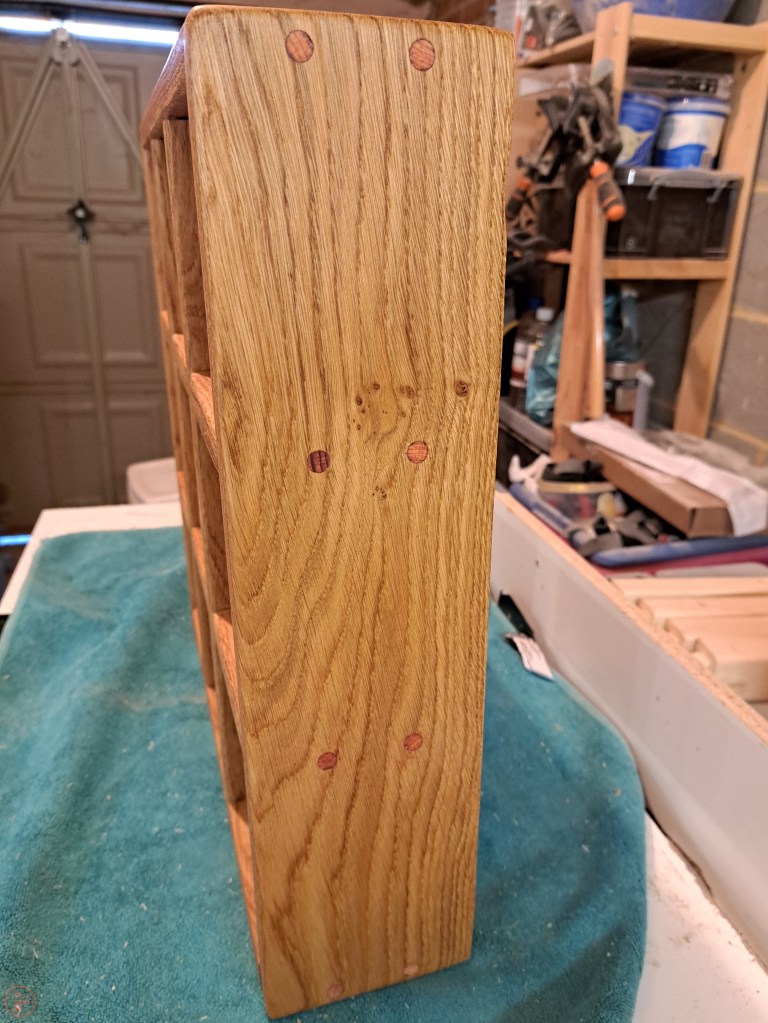
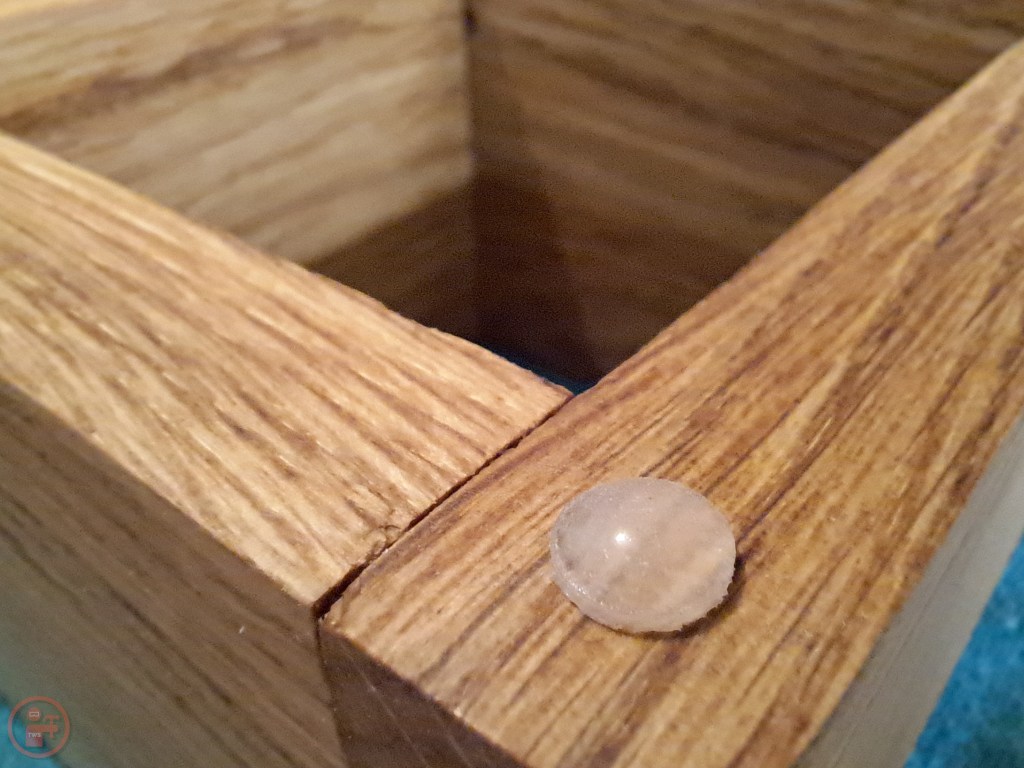
I cut the notches for where the pieces interlock using my table saw and carefully moved the pieces across on my mitre sled to remove material a bit at a time with each cut, to ensure a snug fit between the sections. I gave the pieces a thorough sanding at this point up to 180 grit, as it would be a challenge to get the sander into the inside surfaces once the interlocking sections are assembled. I also added a roundover to the front surfaces of the frame, to make it more gentle to touch when putting in and removing the loo roll and the crosses.


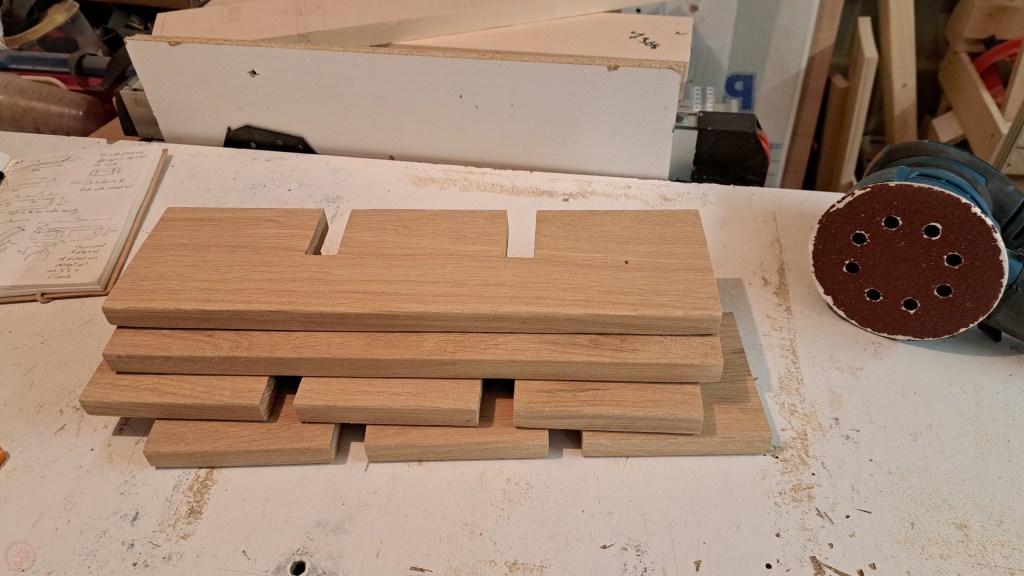
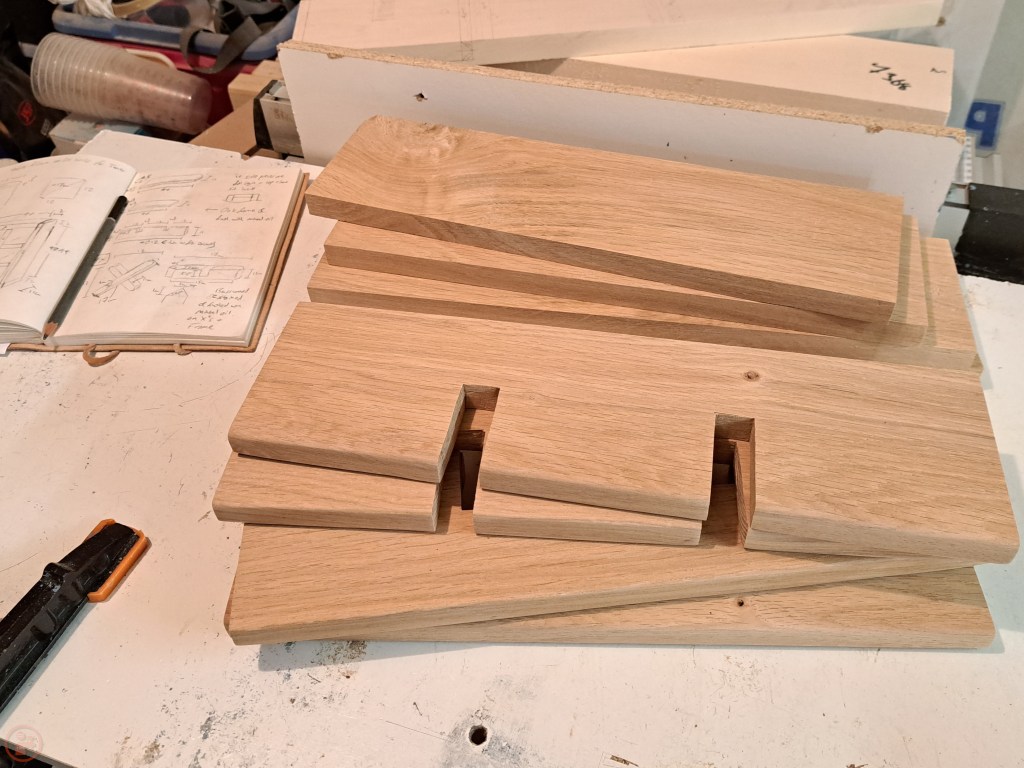

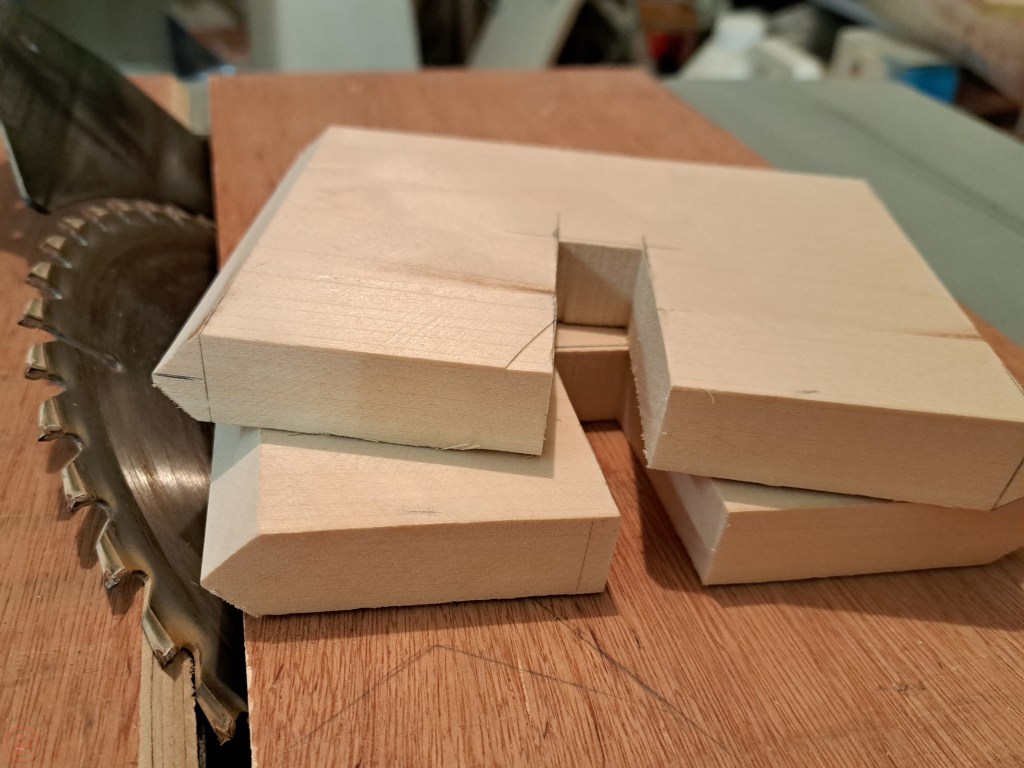
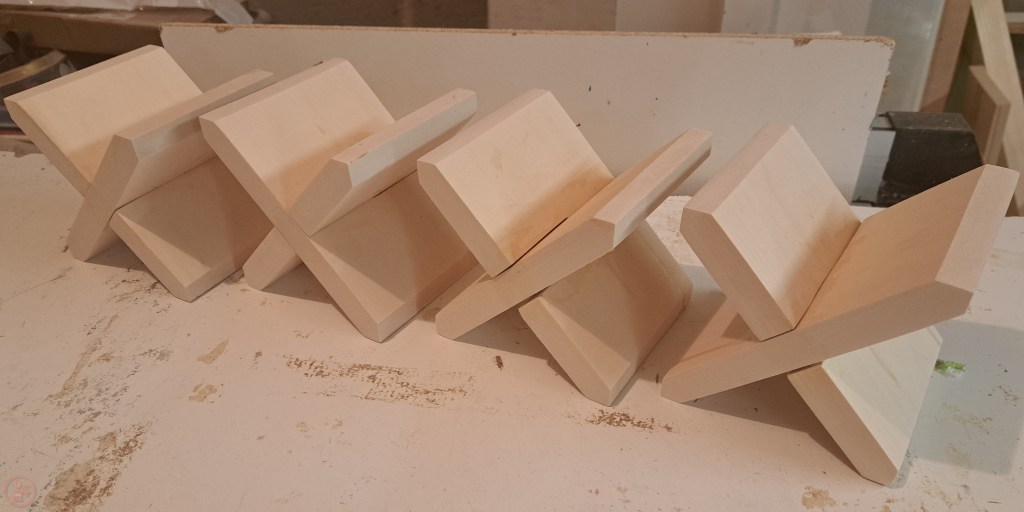
I then turned my attention to the crosses – I measured out the dimensions onto the basswood and then cut out the various pieces, using my table saw to cut the pieces to size, add the notches (using a stop block at each side to aid getting the cuts the right width) and then cut the 45 degree angles on each end by tilting the table saw blade, aligning each piece and carefully cutting each side on each end.


After a whole load of cutting and some more sanding, I was ready for putting it all together!
Assembly
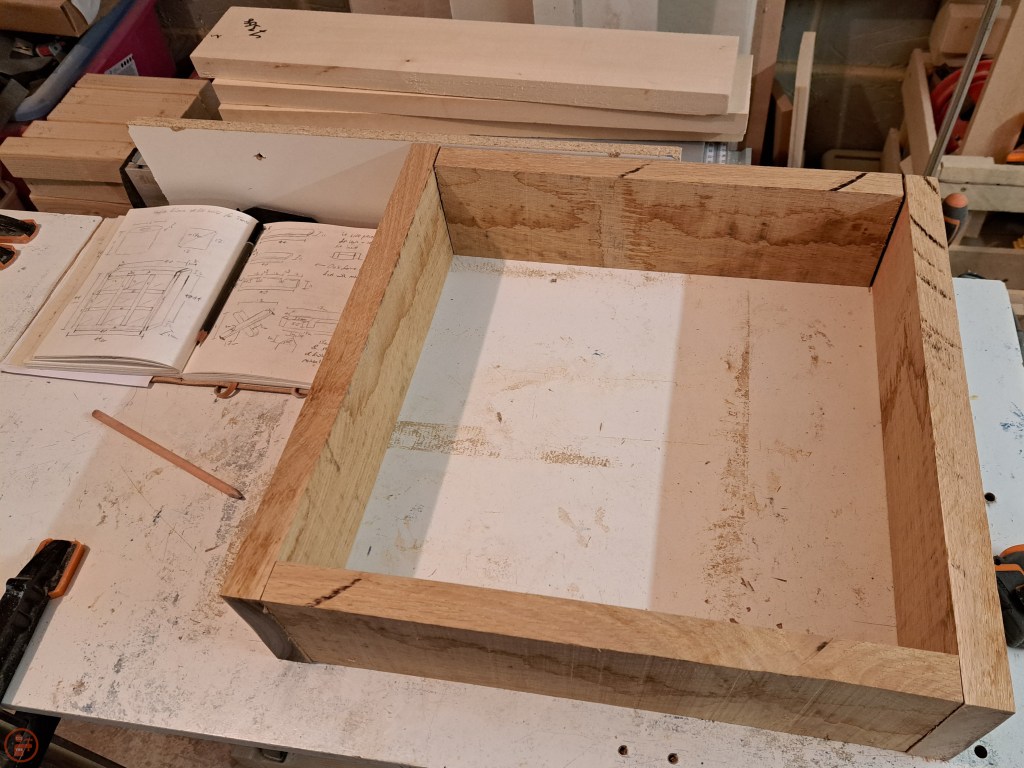
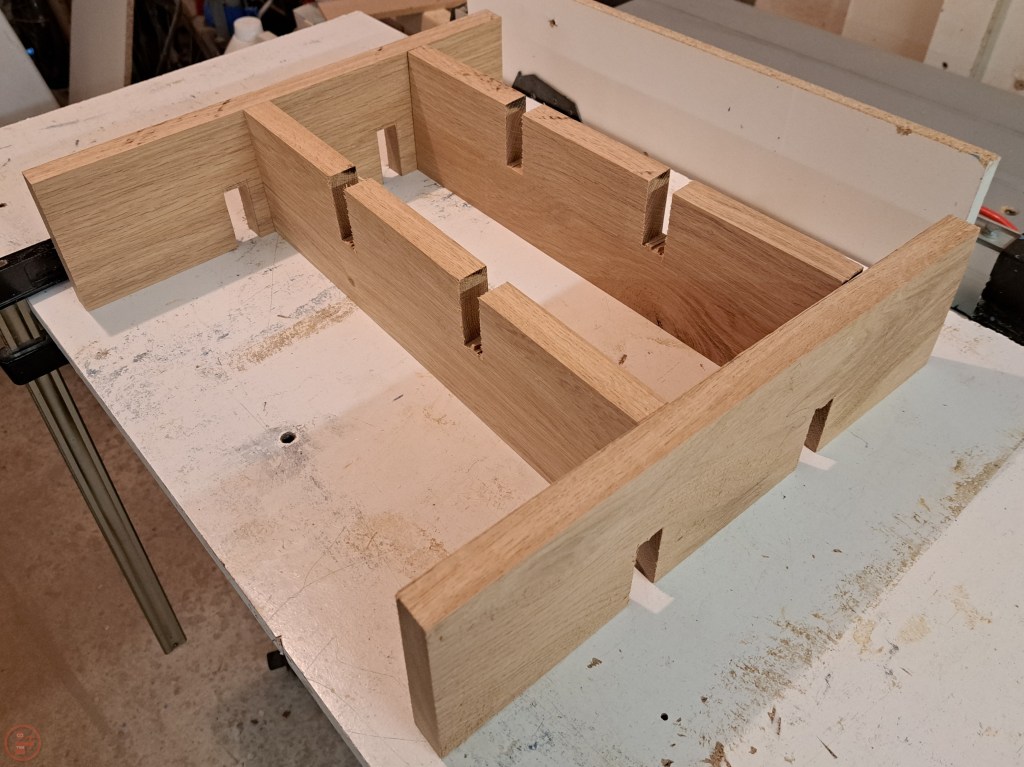
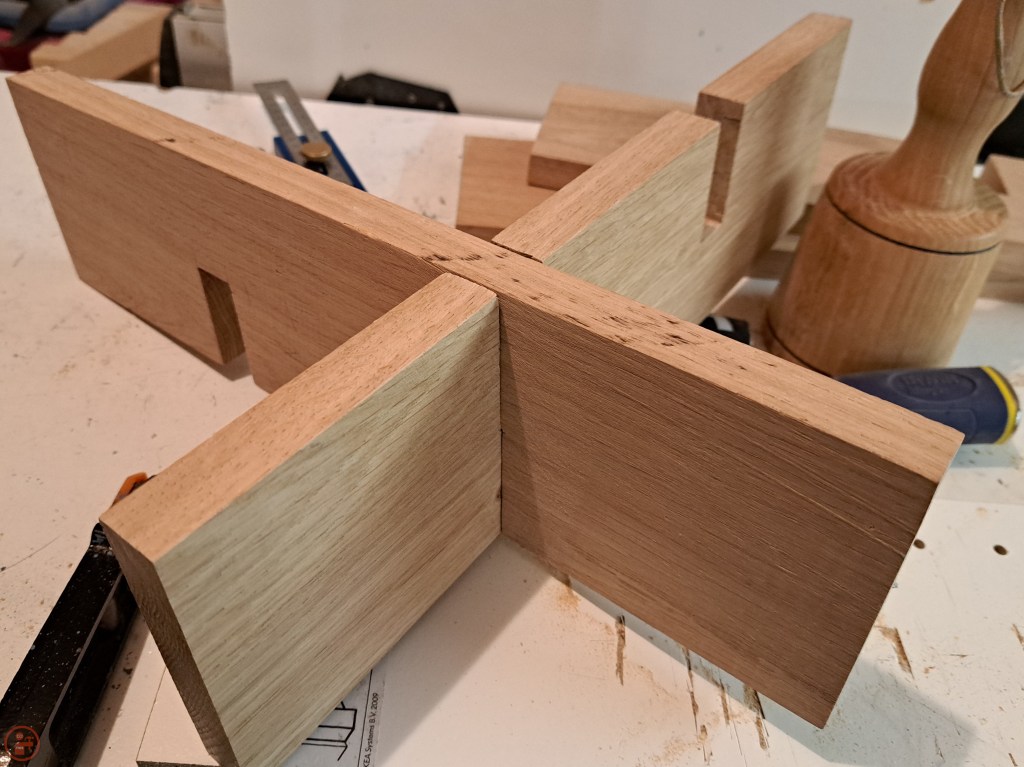
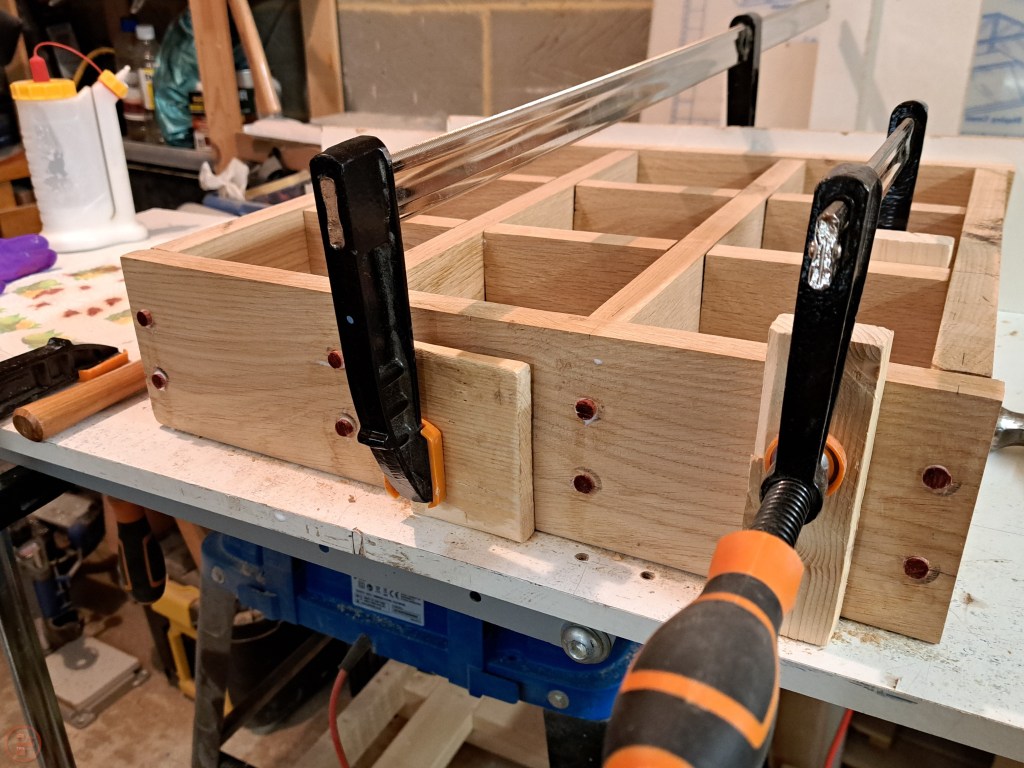
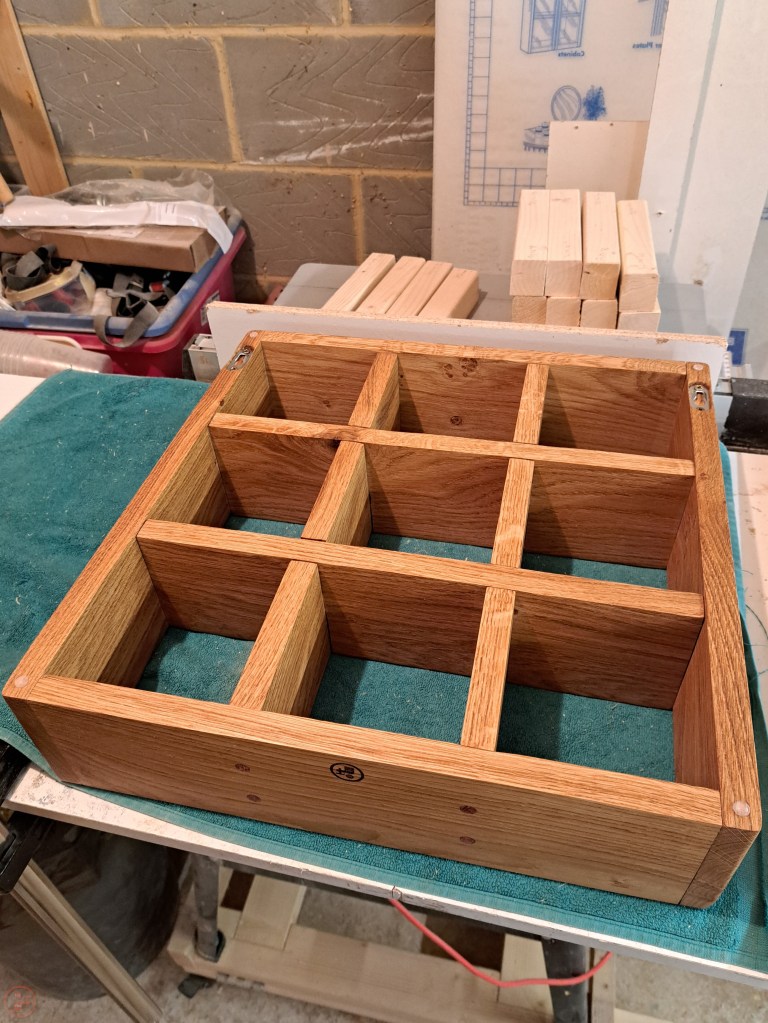
I did a full dry-fit before applying any glue, so I could make sure the whole frame and interlocking sections went together smoothly. I designed the centre frame to interlock to the vertical and horizontal shelves, and then that to be secured to the outer frame using dowels.
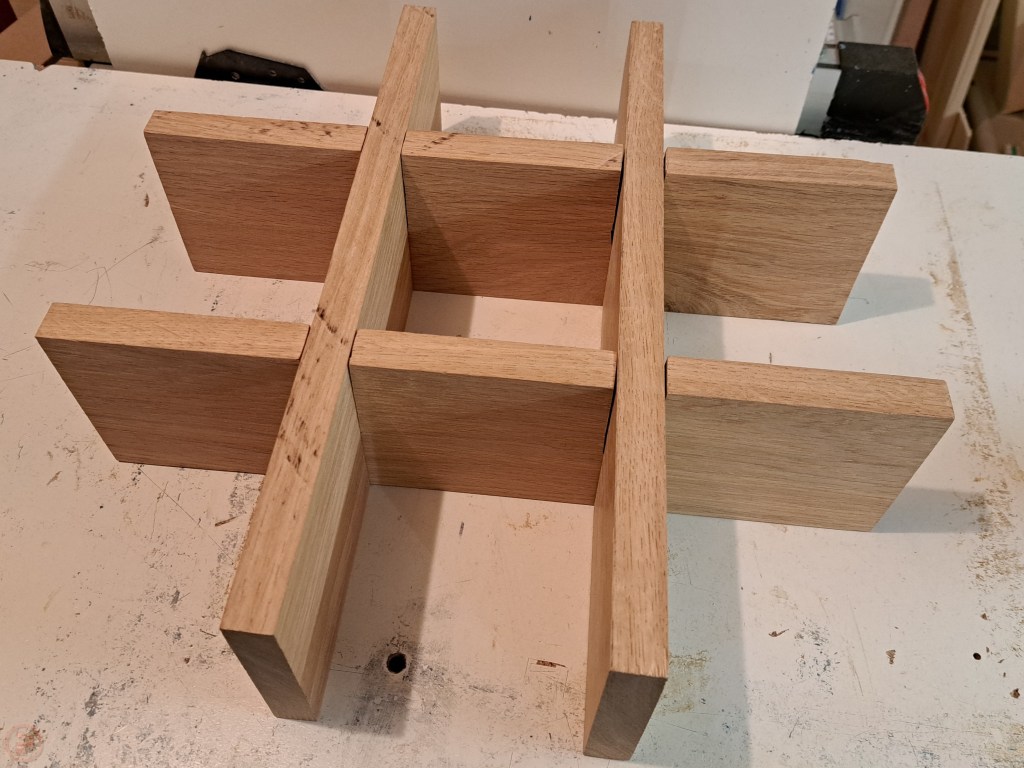
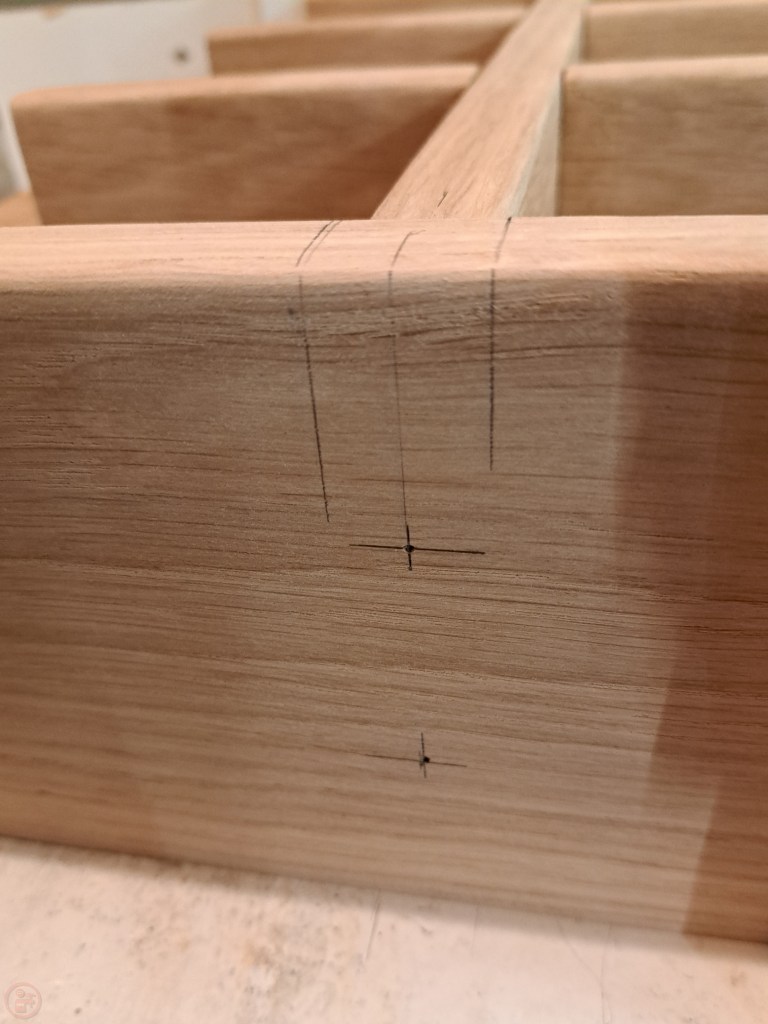
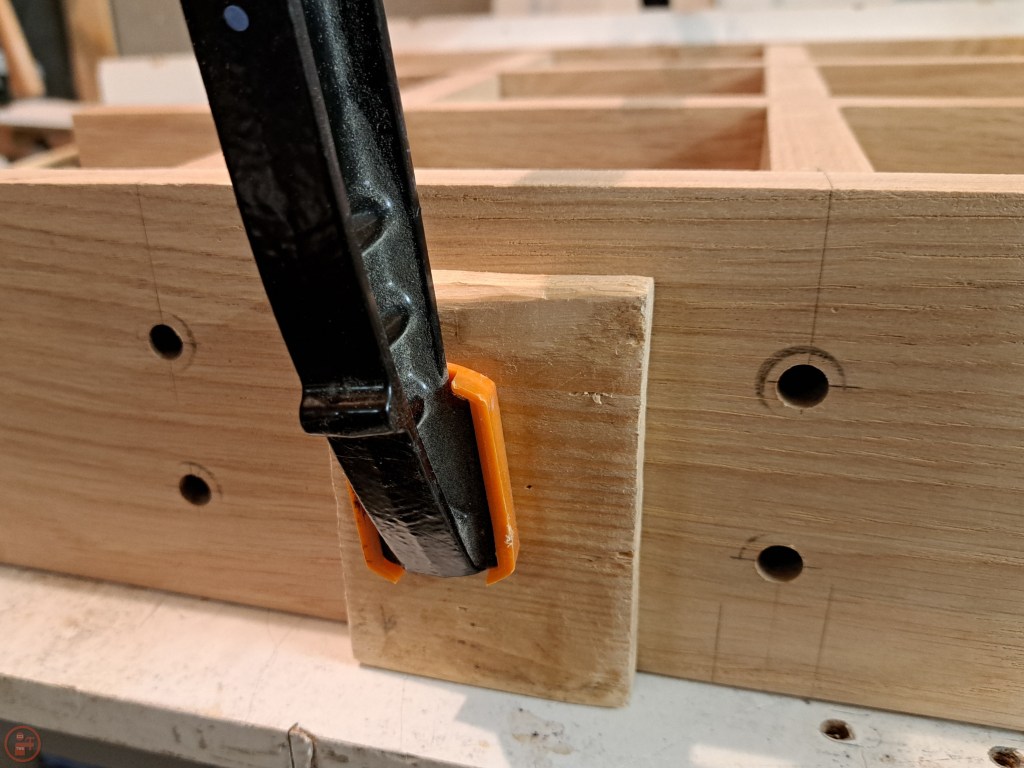
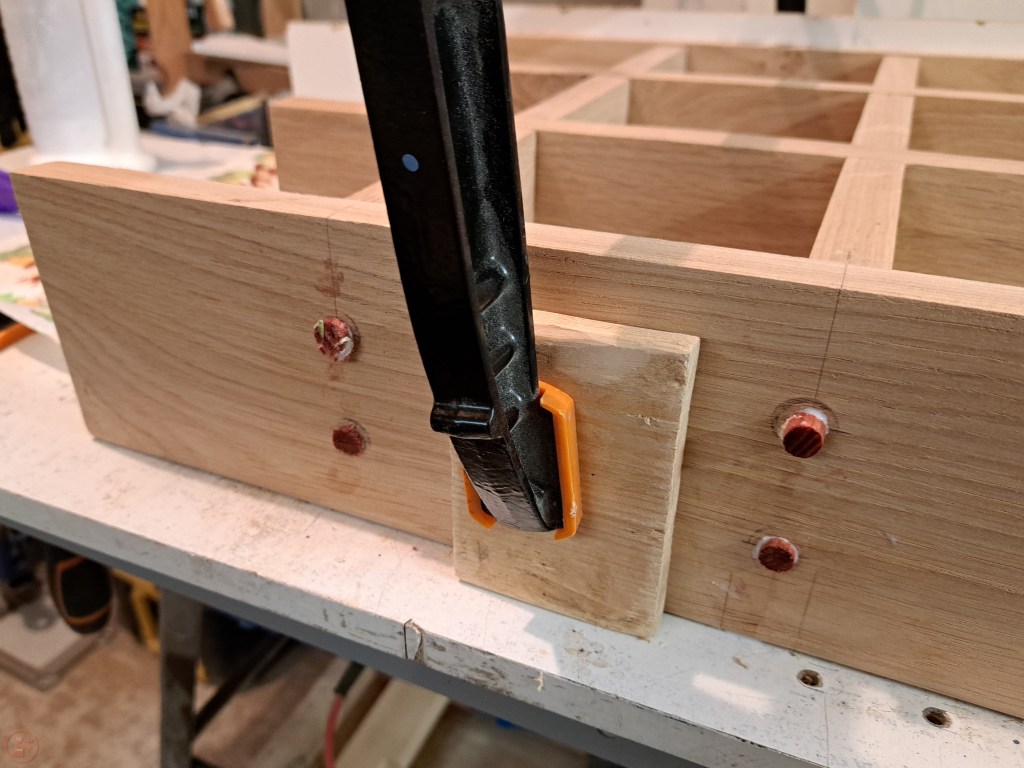
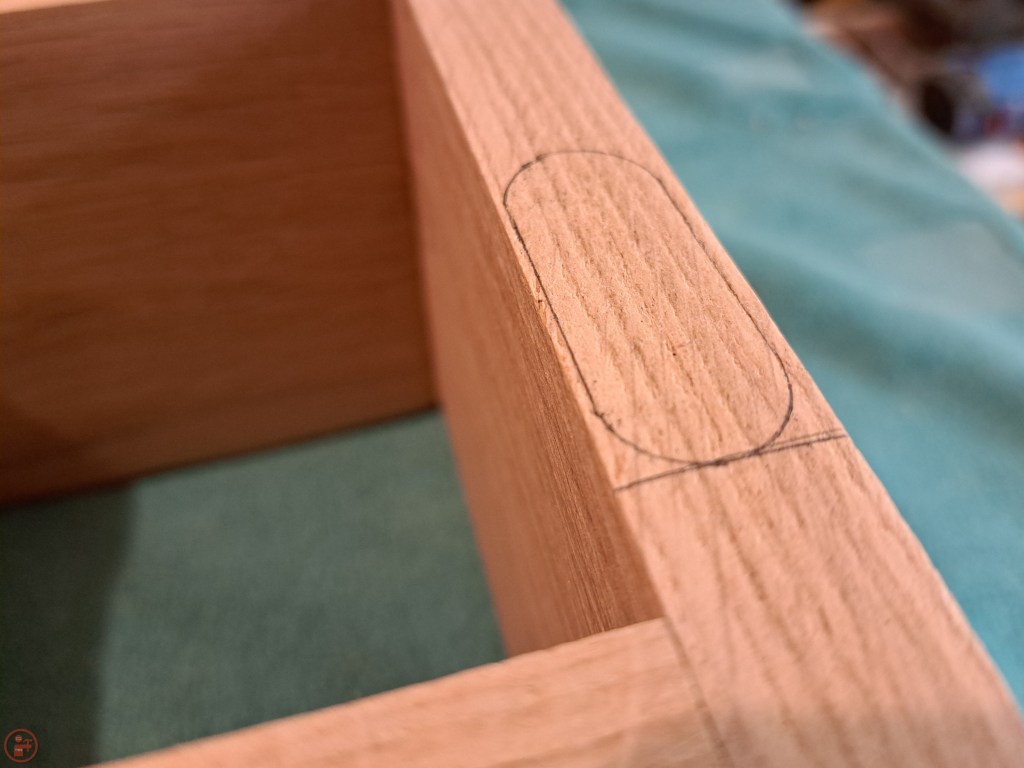
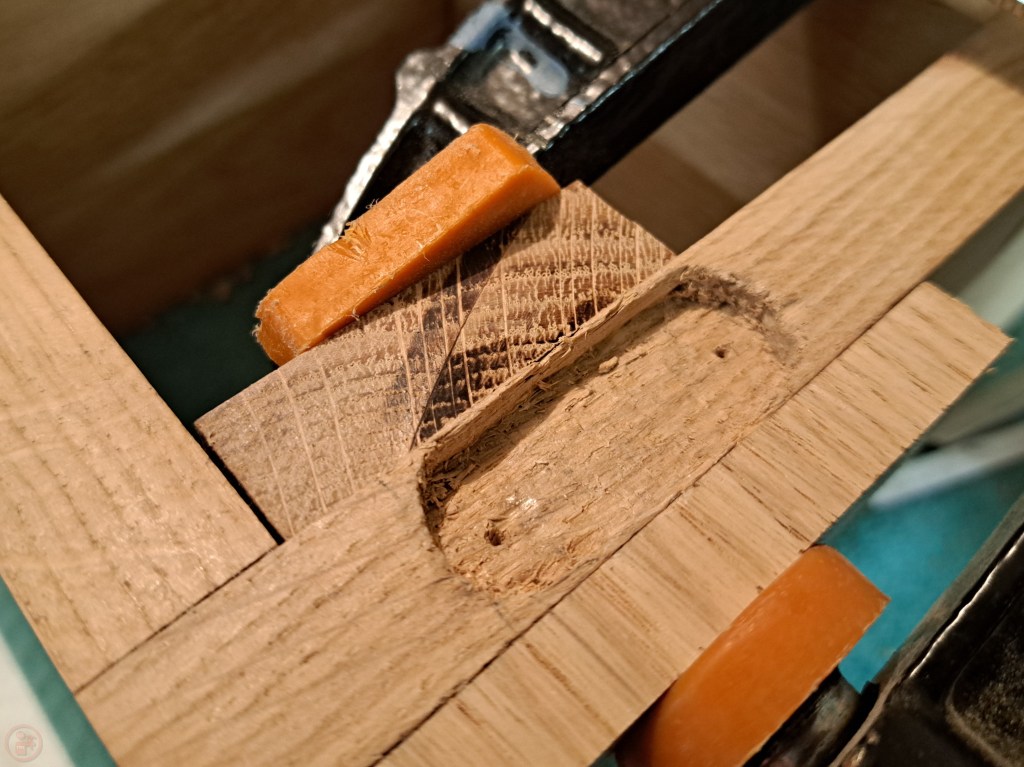
Once I was happy with the test fit, I moved to the glue up stage, using clamps and protective blocks to apply pressure while the glue dried. I marked the locations for and drilled holes in the outer frame to fit dowels through to hold the centre interlocking frame in place.
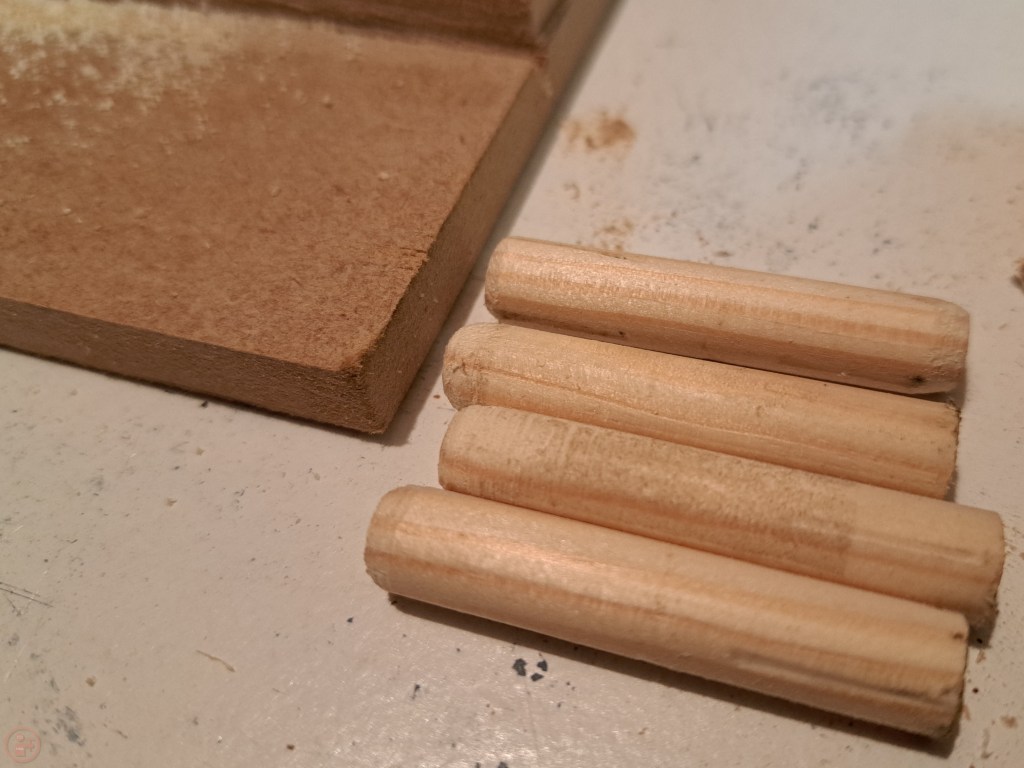
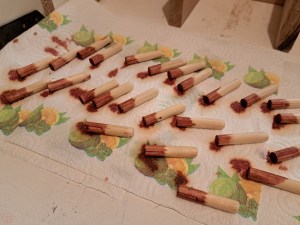
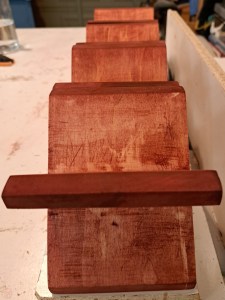
To match the colour of the crosses, I stained the end of the dowels red, but left the rest stain free so the glue could grab securely, as I wasn’t sure how the red dye might affect the permeability of the wood glue into the dowels. It did look a little odd to have a few red tipped dowels drying for a while though!
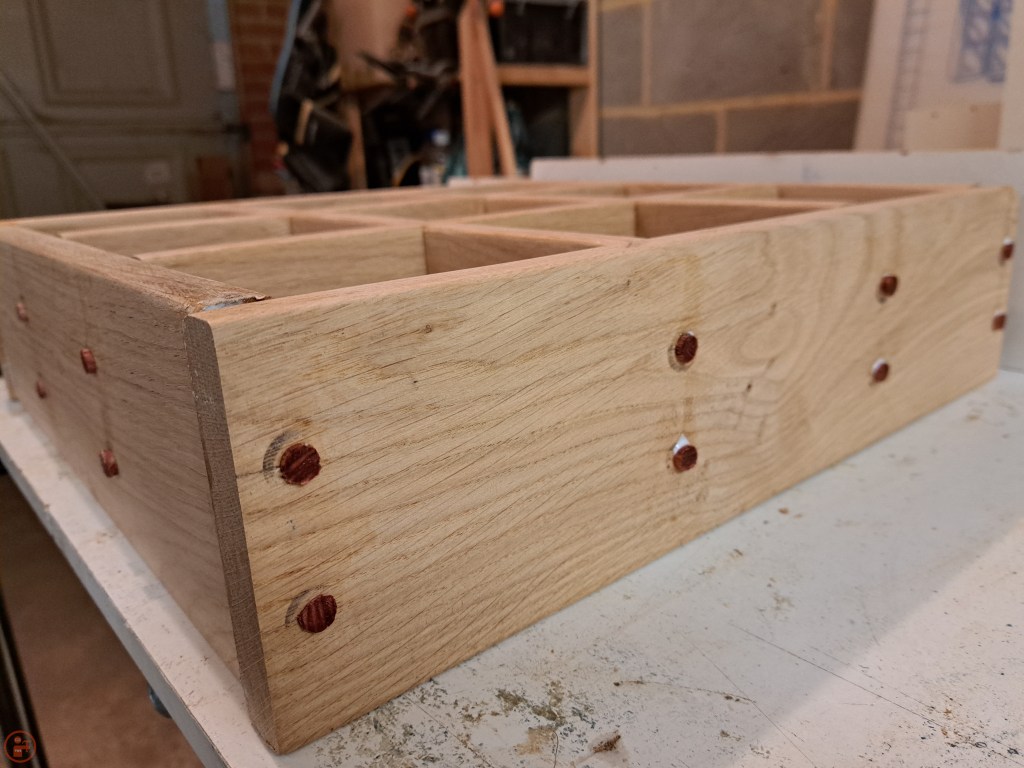
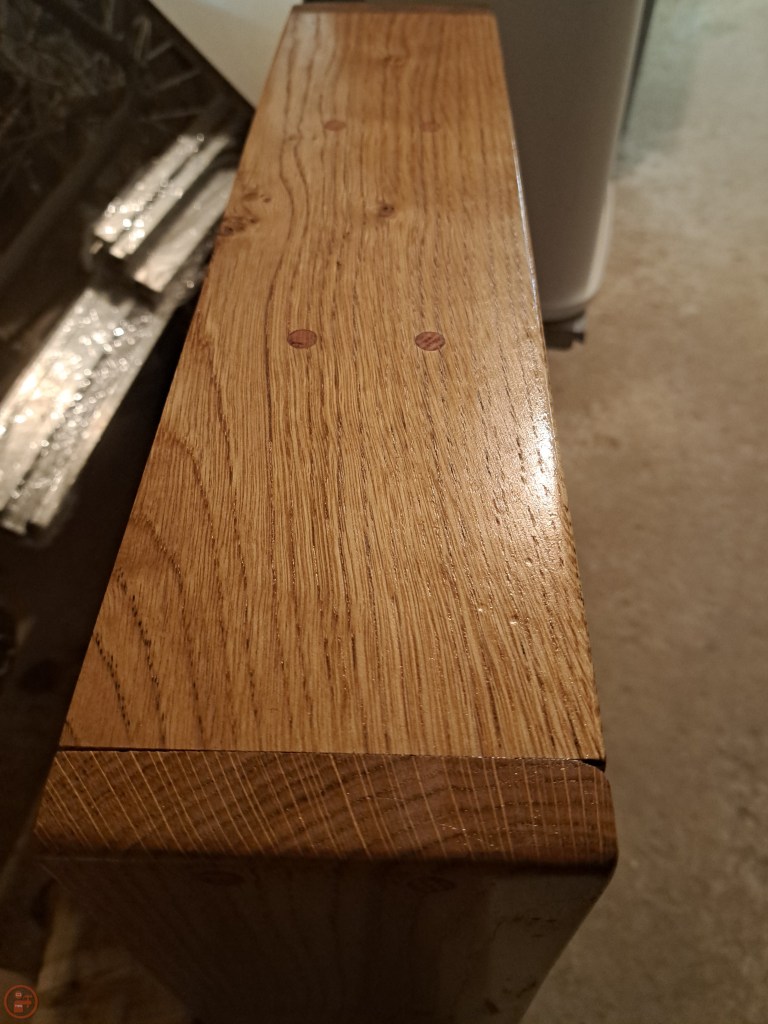
When the dowels were dry, I glued them into the frame and then cut them short, sanding them flush with my random orbit sander.
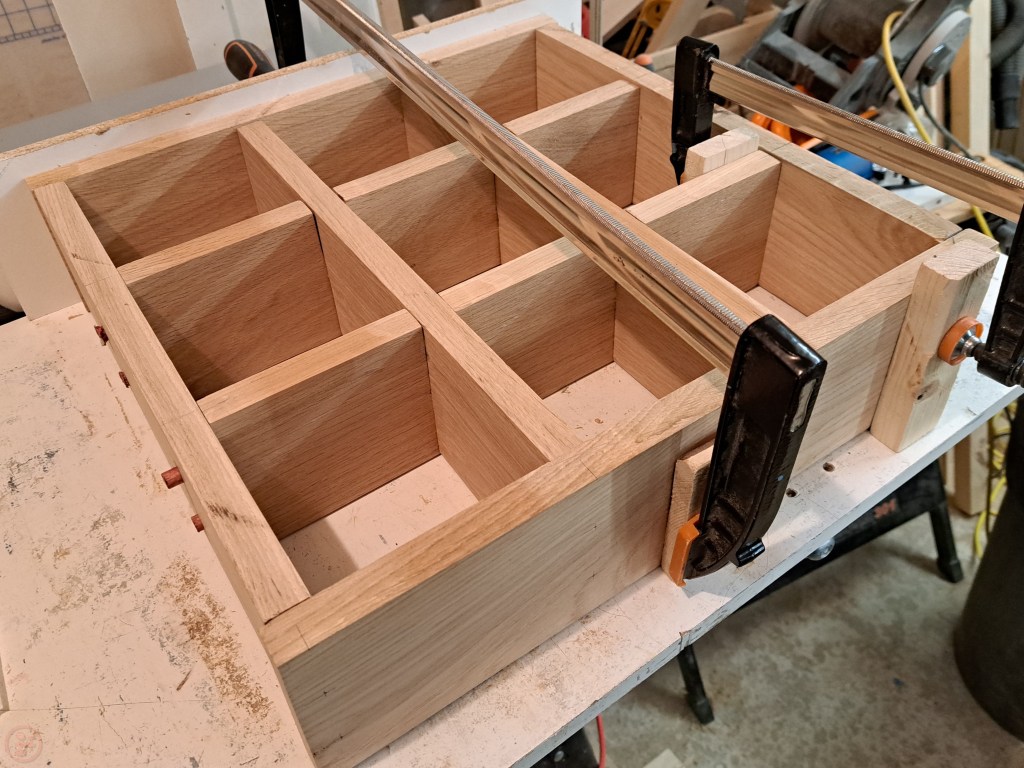
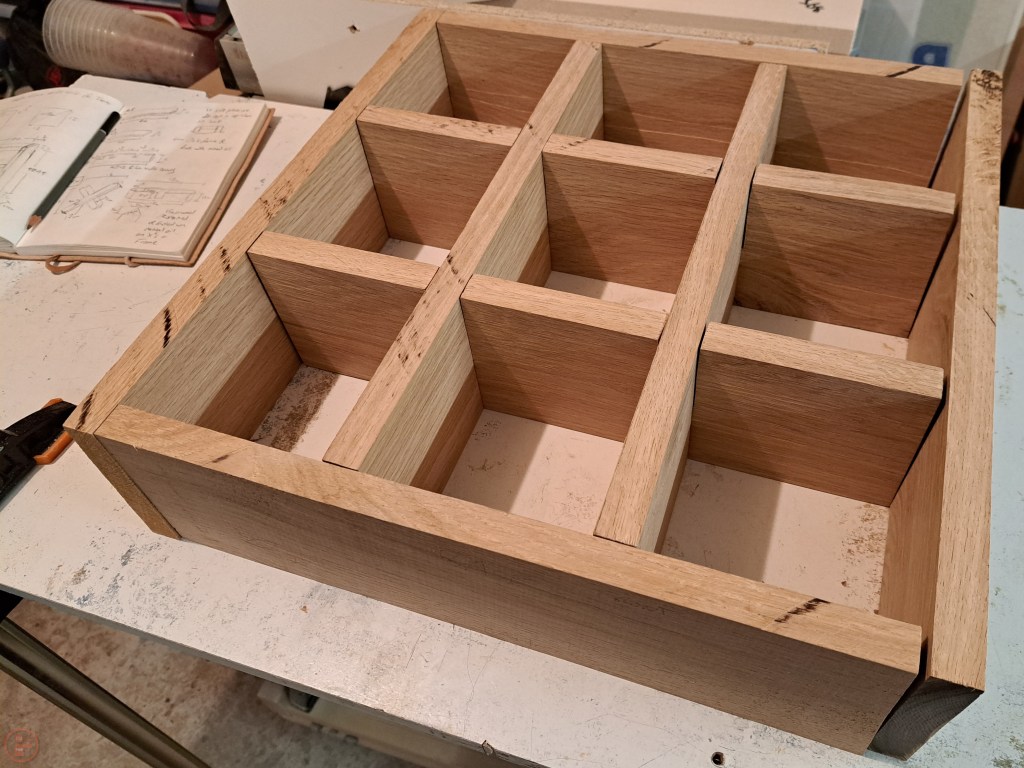
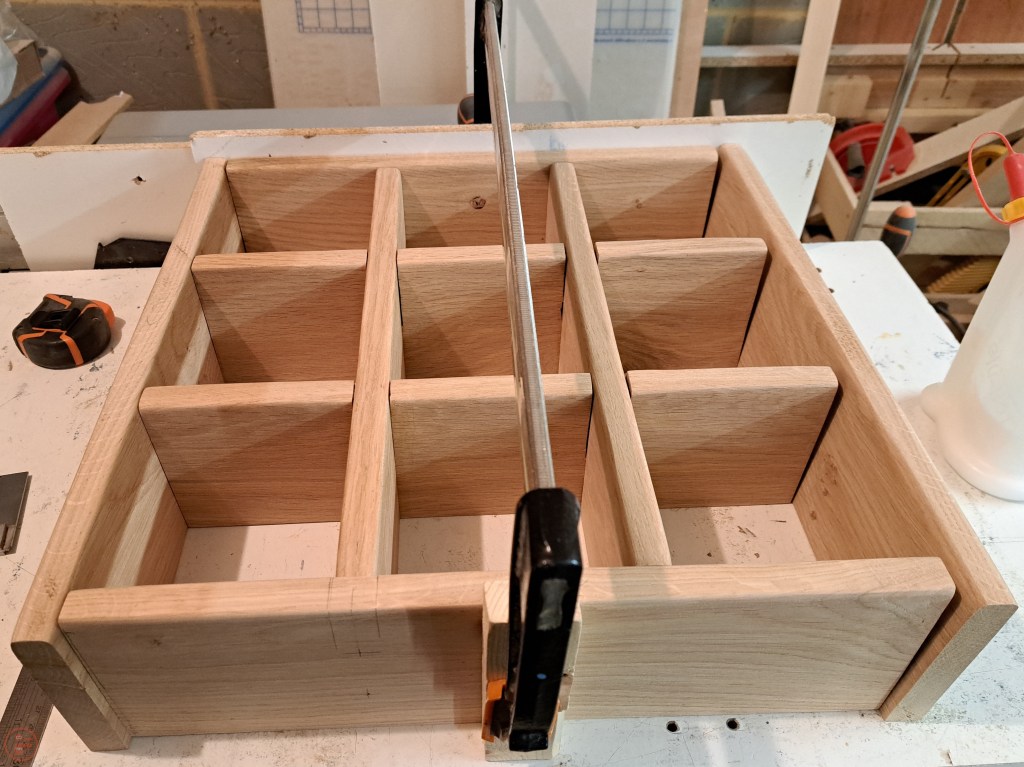
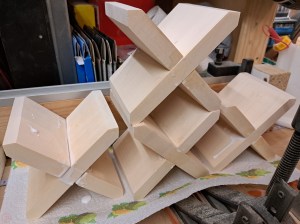
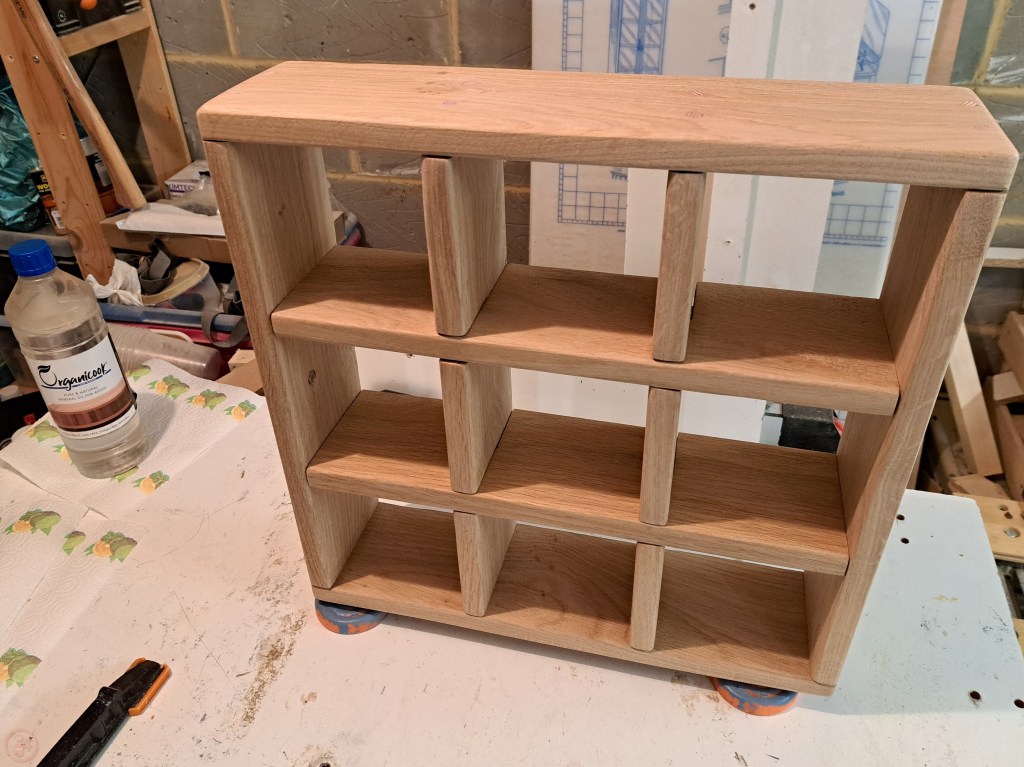
I also did a dry fit with the crosses before applying glue, so I could check the notches and also so I still had the option of refining the size if needed, following assembly of the frame.
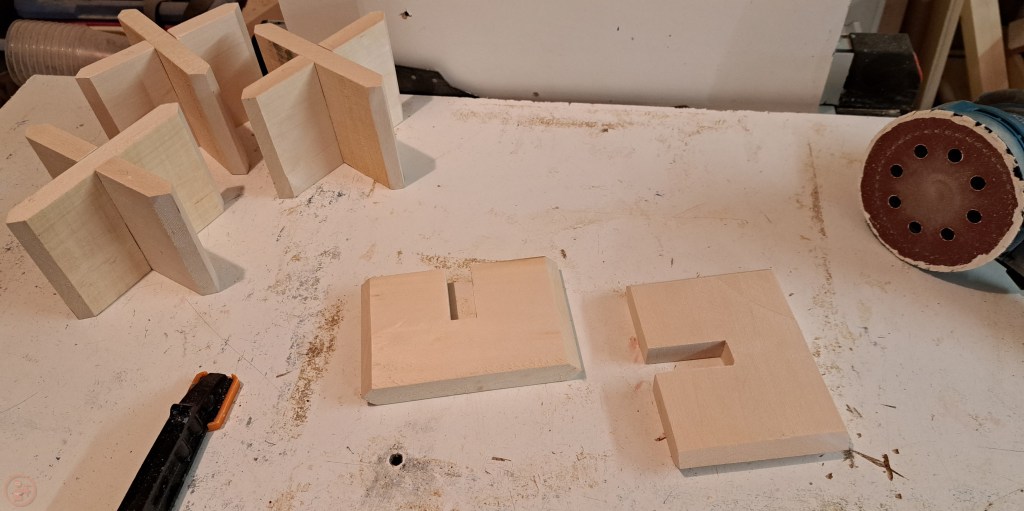
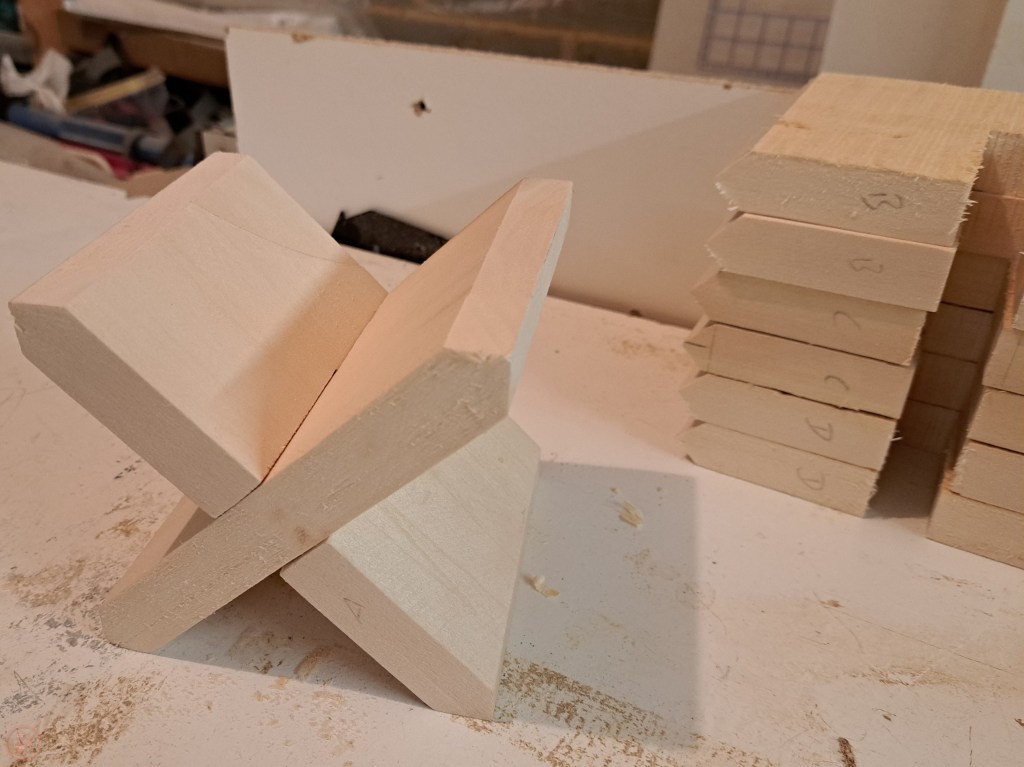
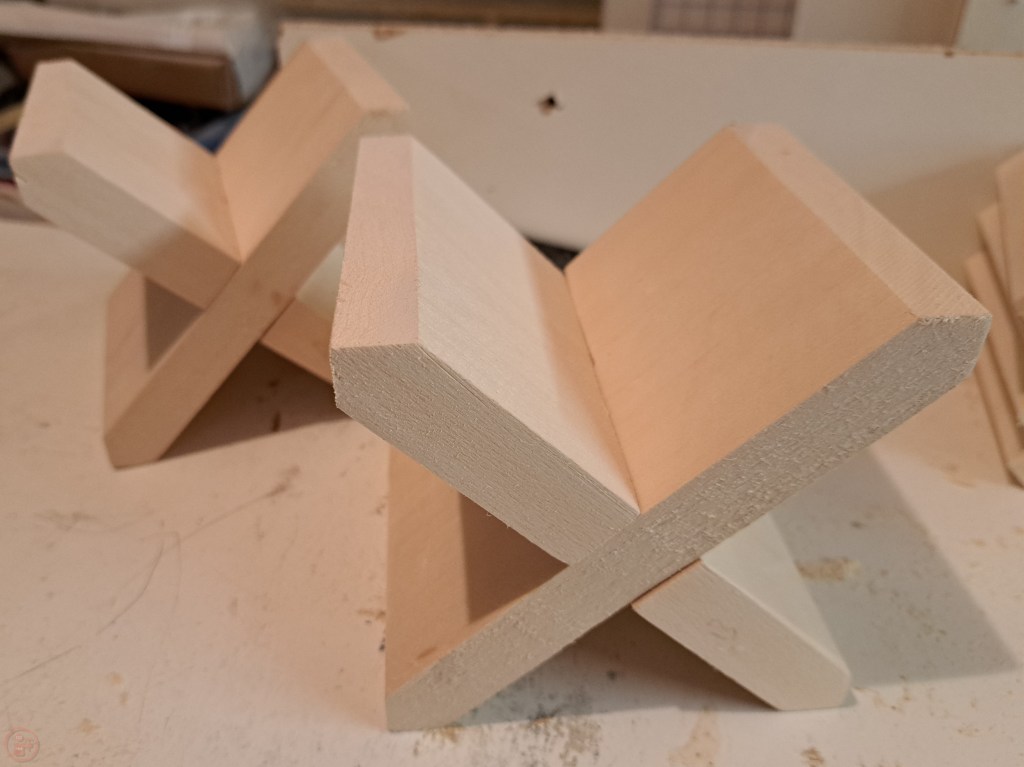
Pleasingly, everything was as planned, and the crosses fitted inside the frame well, with a little wiggle-room to slide them in and out easily. I applied glue to the crosses and moved onto the next stage – staining and finishing!
Finishing and Staining
To provide options as to how the loo roll holder could be mounted, I fitted some keyhole hanging plates to the back, so it could be mounted to the wall or stood on a surface.
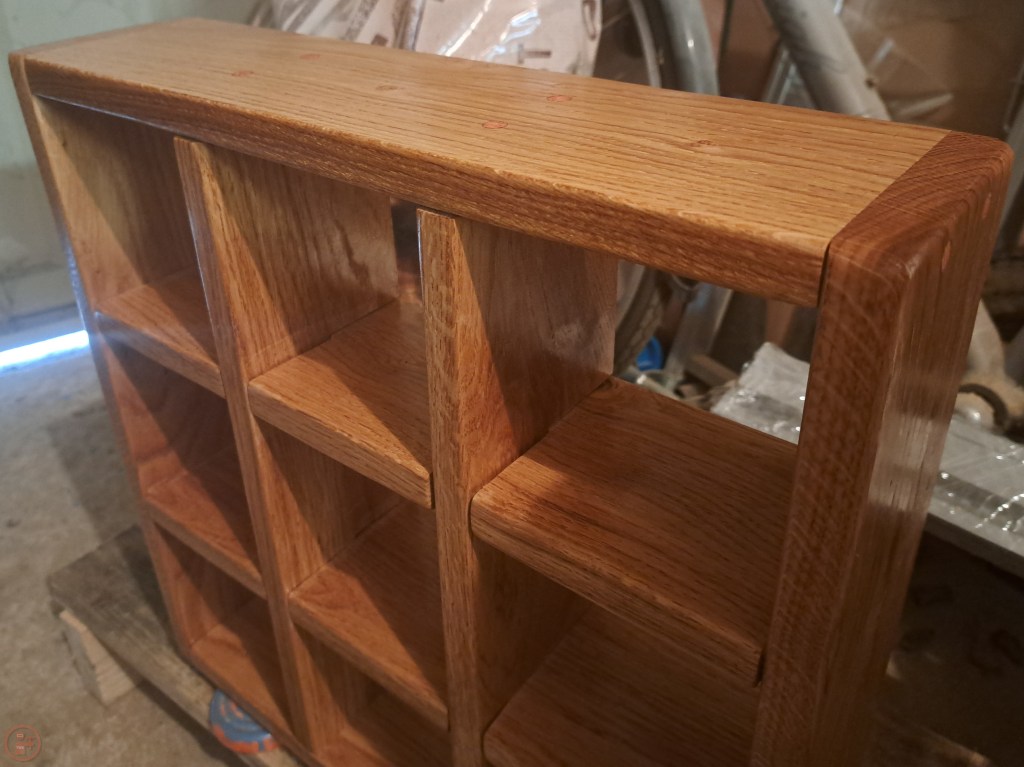
I finished the oak using mineral oil to give it protection, while also being food safe – I didn’t want to use a finish that might be absorbed by the loo roll over time and potentially cause some painful irritation! The mineral oil was very easy to apply and really brought out the colour of the oak grain, as well as the colour of the dowels too.

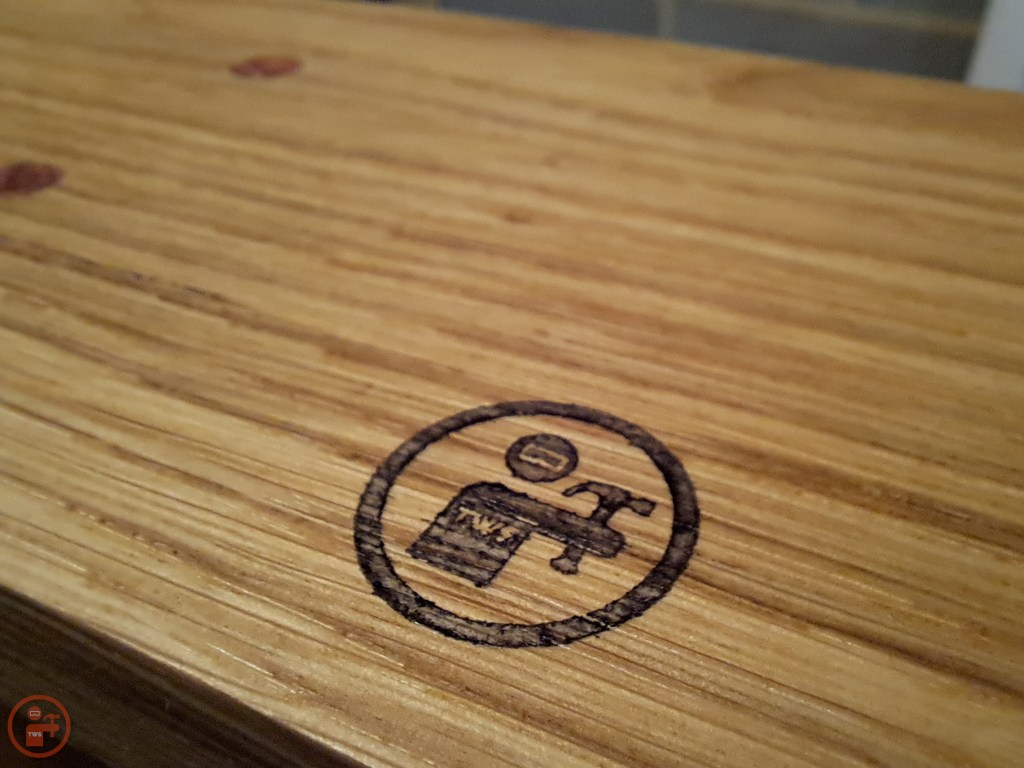
I also added some rubber feet on the base and back – this way the loo roll holder can be stood on a surface or mounted on the wall, depending on preference. I also added my logo to the bottom of the loo roll holder.
I finished the crosses using a red wood dye, which was absorbed really well by the basswood. This was my first time using a wood dye, rather than a wood stain or oil finish and I was pleasantly surprised with the result. It did take a while to dry, but that may have been due to the temperature of my workshop.
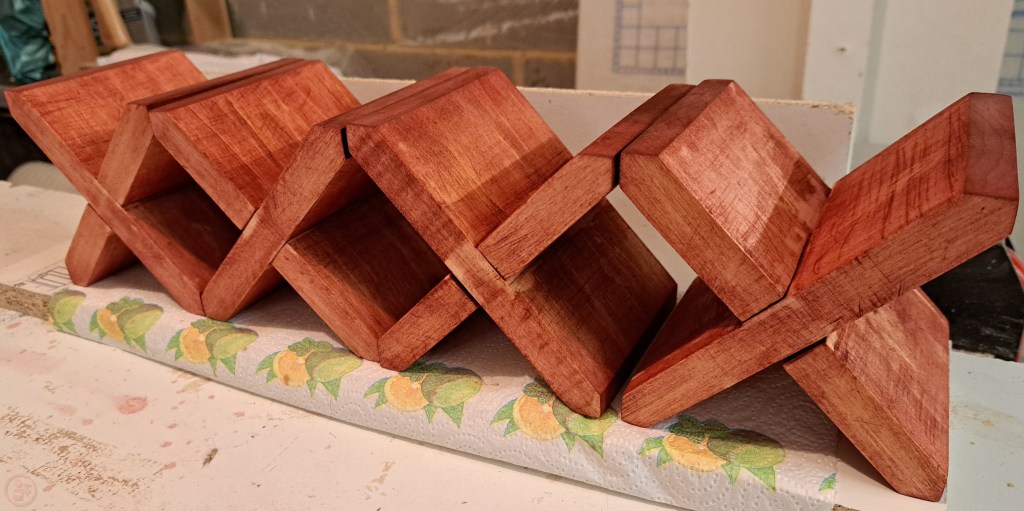
I also noticed that any glue residue affects the dye’s ability to permeate the wood, so can lead to a little blotchiness in places if there was significant glue squeeze-out. Fortunately, this was not a major issue in this case, and I was pleased with how the crosses looked after the dye had dried – red but not too lurid!
Delivery
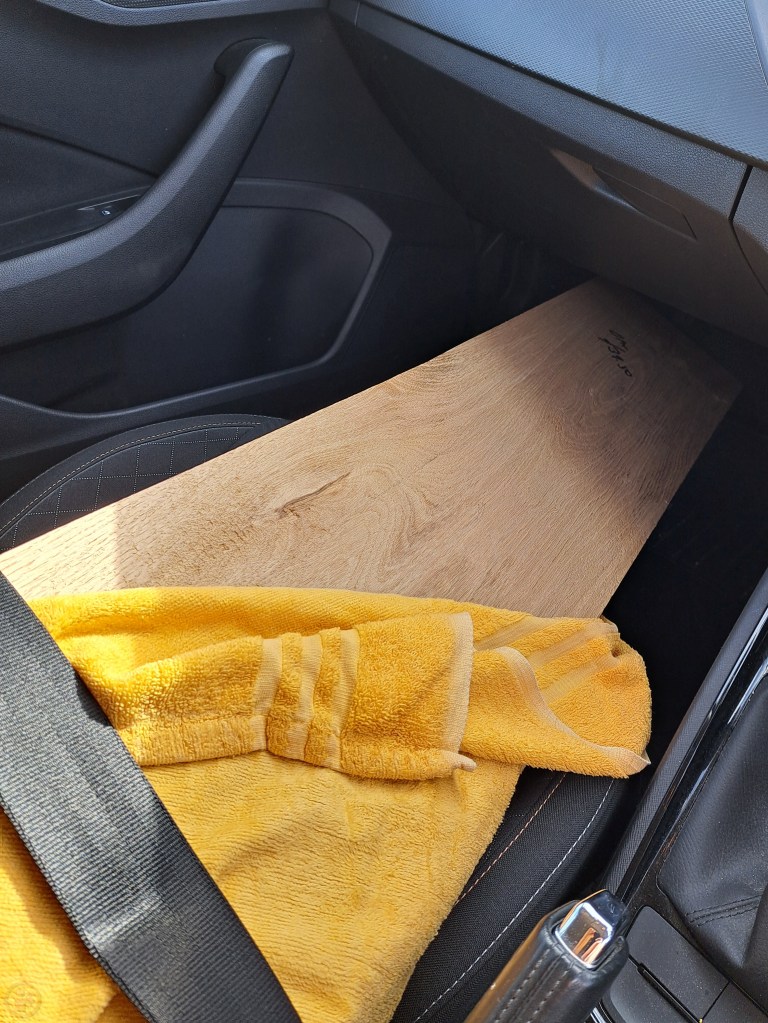
Once the mineral oil and red wood dye were fully dry, I brought the finished holder into the house ready for transport.

I wrapped the holder in a blanket and it was secured on the backseat of our car for the journey to my sister’s house. My sister’s husband was really happy with the result and installed it in their downstairs bathroom on top of an existing storage unit with brown wicker drawers. The loo roll holder fitted in really well with their aesthetic and the red dyed crosses were sufficiently subtle to not standout.
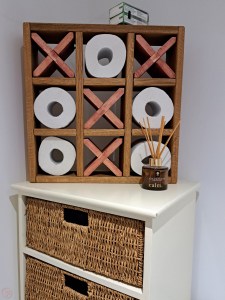
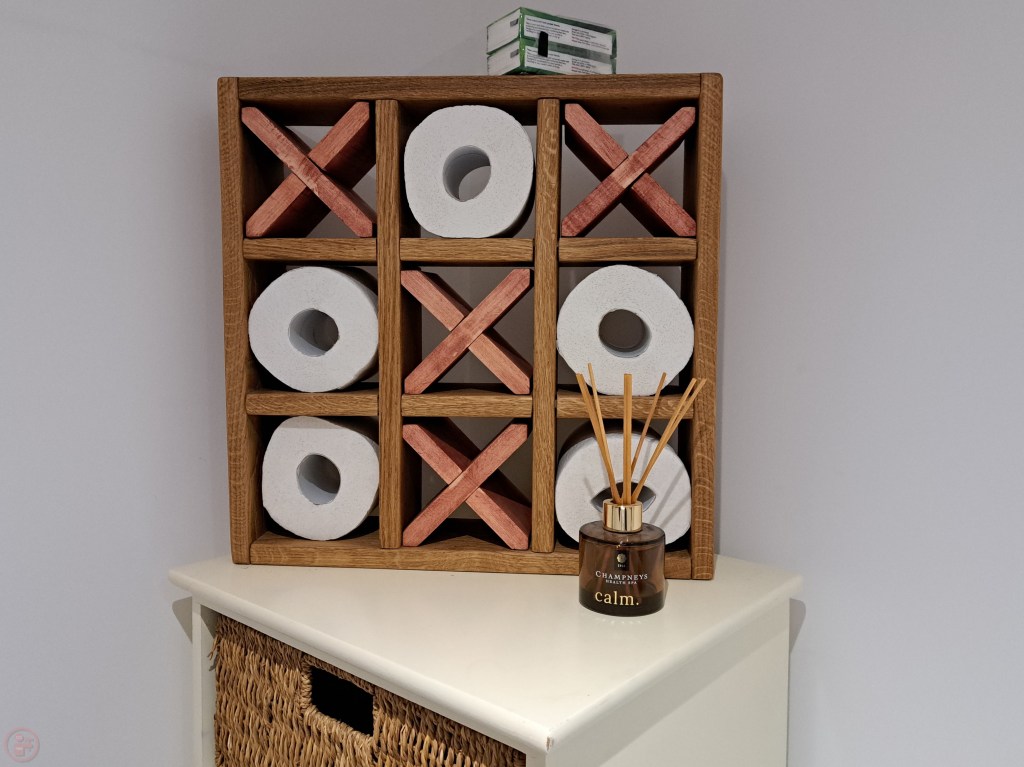
I am very pleased with how this turned out. My first commission seems to have been a great success, both in terms of my woodworking skills to plan and create this, as well as for customer satisfaction. The holder continues to be in use in subsequent visits I’ve had to their house, with the various crosses and loo roll in slightly different places each time I’ve been there! 🔨

1 thought on “Noughts and crosses loo roll holder”