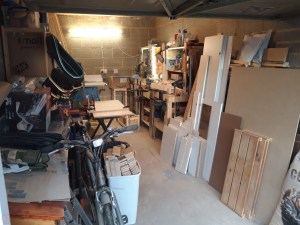
As my workshop has grown and the types of projects I have been working on has evolved, so has the type and amount of lumber I have been storing. Time to review my lumber storage and come up with a new design for a lumber cart!
When I first started woodworking, I had minimal space and therefore minimal lumber storage options. I made a small crate-type container back in 2018 to hold some dismantled pallets and then upgraded to some simple shelving in 2021 when I had a bit more space. I now have an entire garage workshop, so need a better solution that can hold all my lumber and actually give me space to make things!
I have split the process into two blog posts:
- Planning and making the skeleton frame (this blog post)
- Making the shelves, dividers and panels, as well as loading up the finished lumber cart (post coming soon!)
I sat down and thought through the sort of wood I use regularly and the type of storage that would need. I identified several key requirements:
- The ability to store both flat sheet material and planks
- Separate bin-type storage for shorter planks
- Longer storage options for planks and beams of a longer length
- Movable, so would definitely need casters
- More storage than I currently need so can be future proof as my workshop grows
- Sturdy and stable so can move to a new workshop (at some point!) while still full
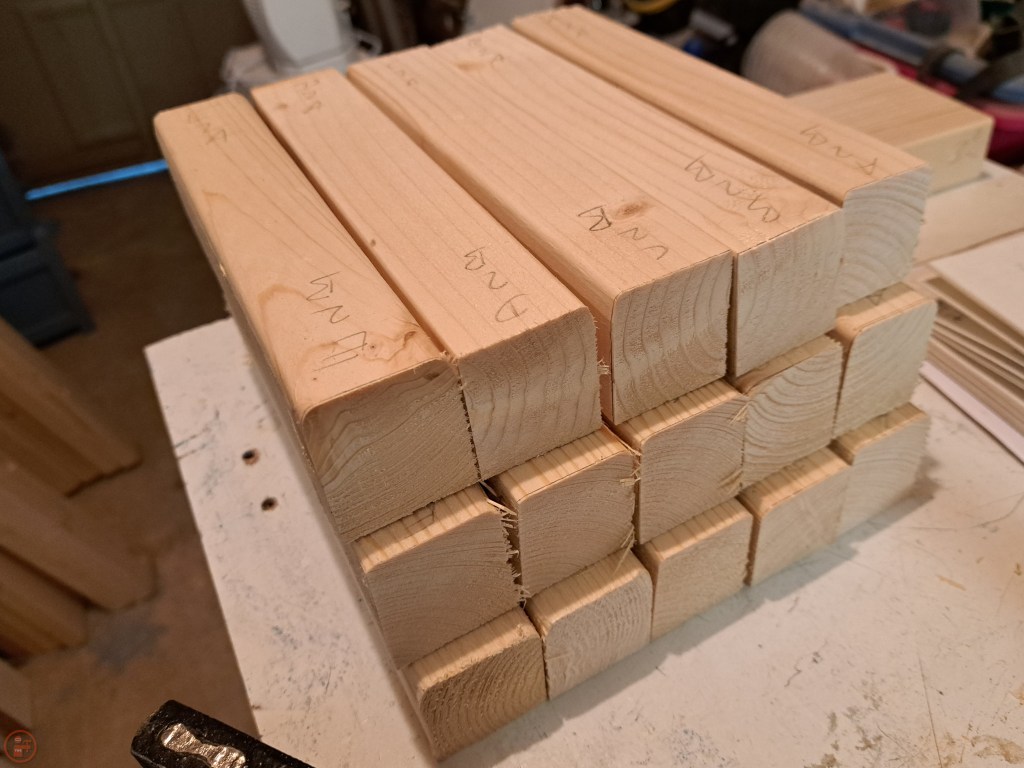
- Not too expensive to make and using some of the lumber I already have
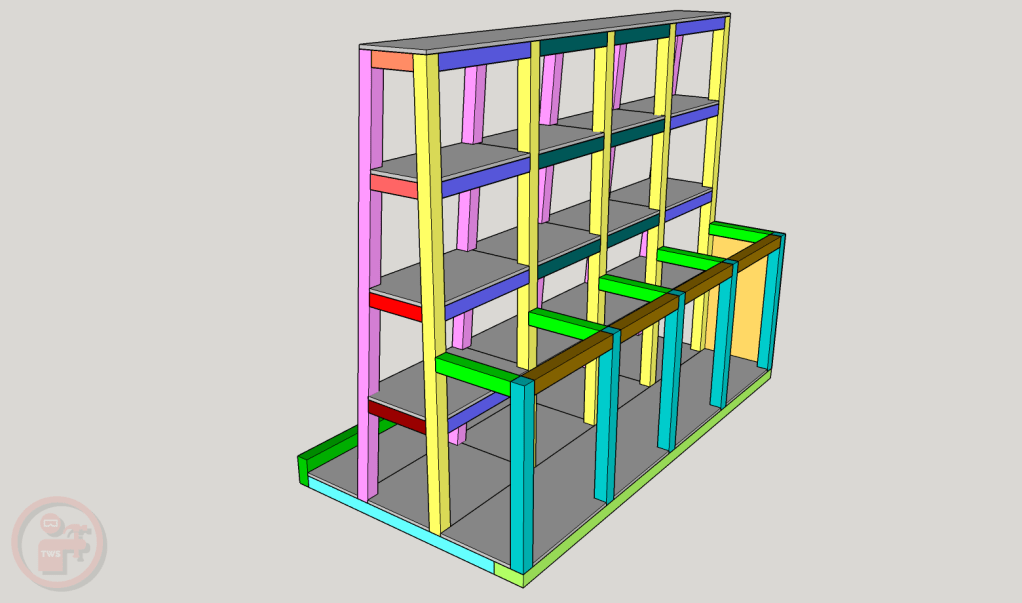
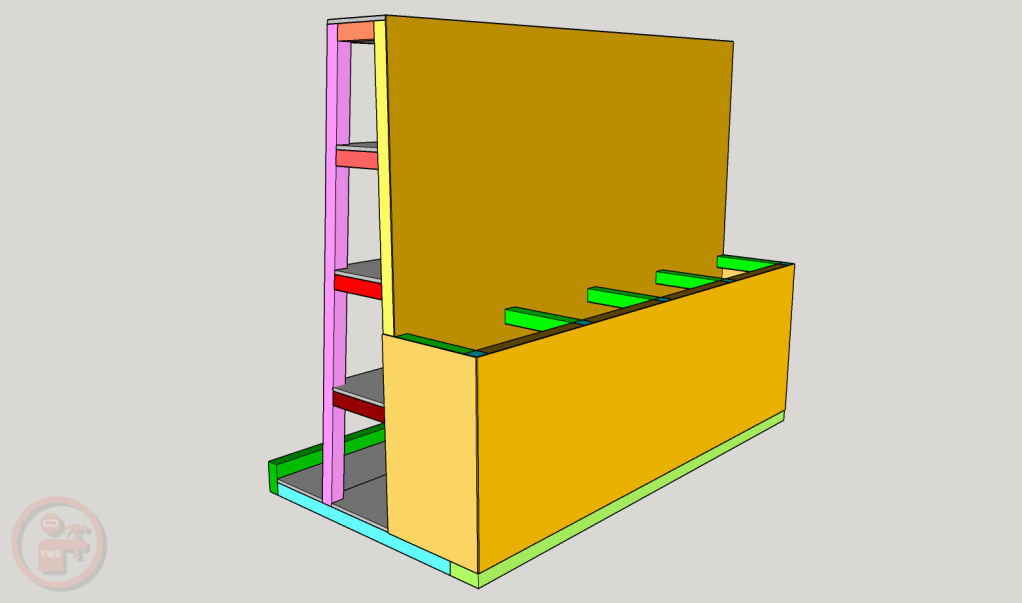
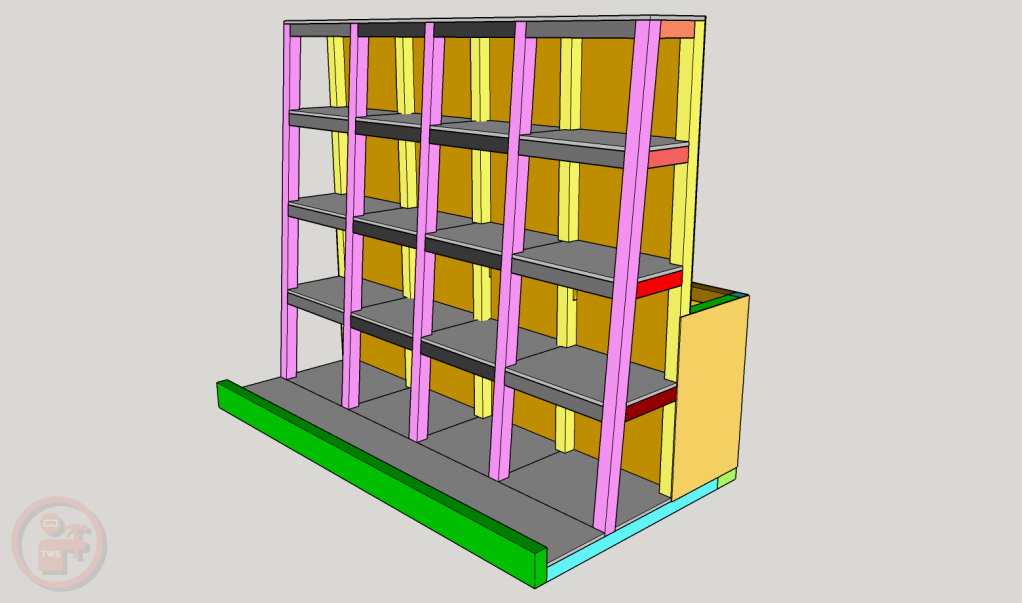
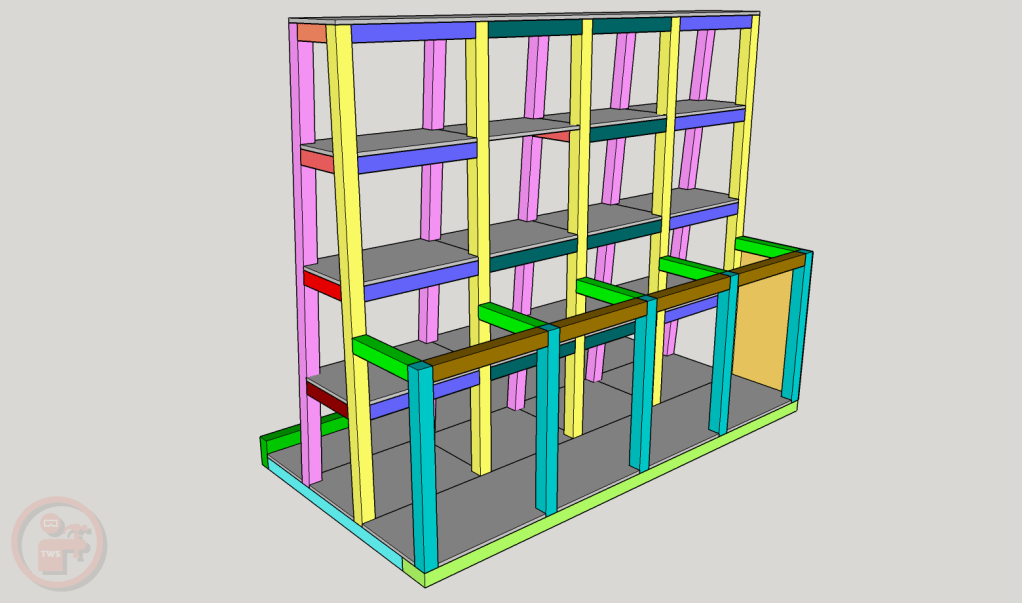
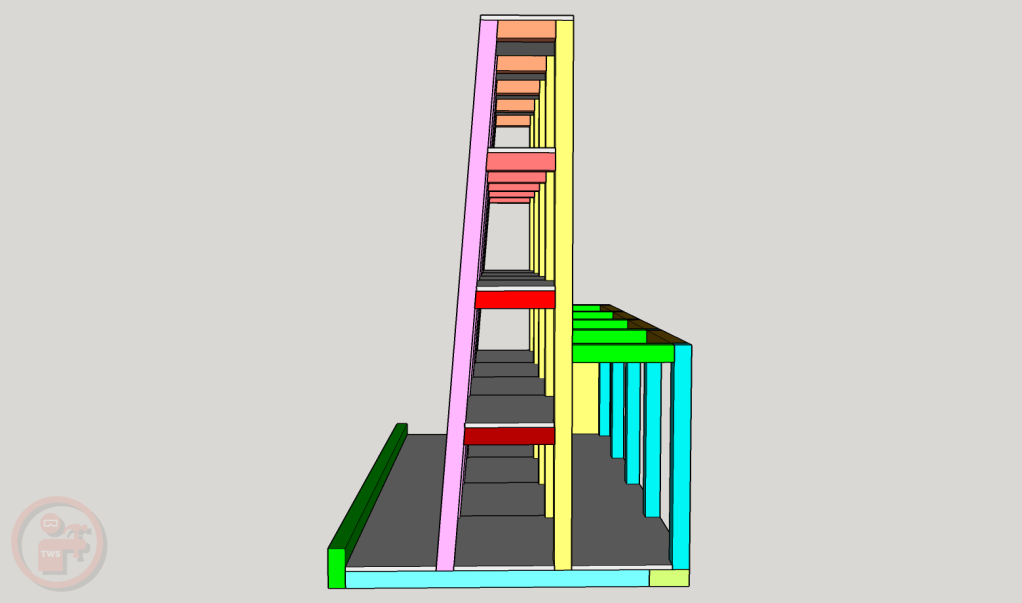
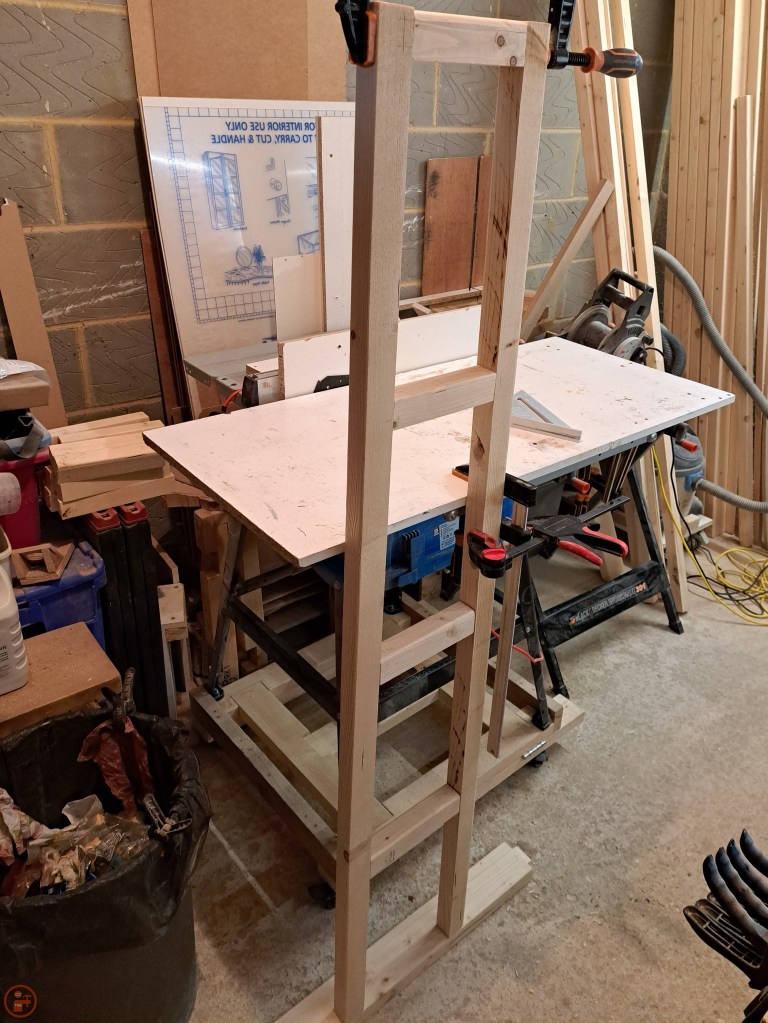
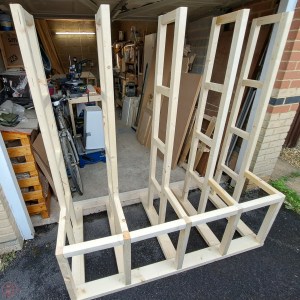
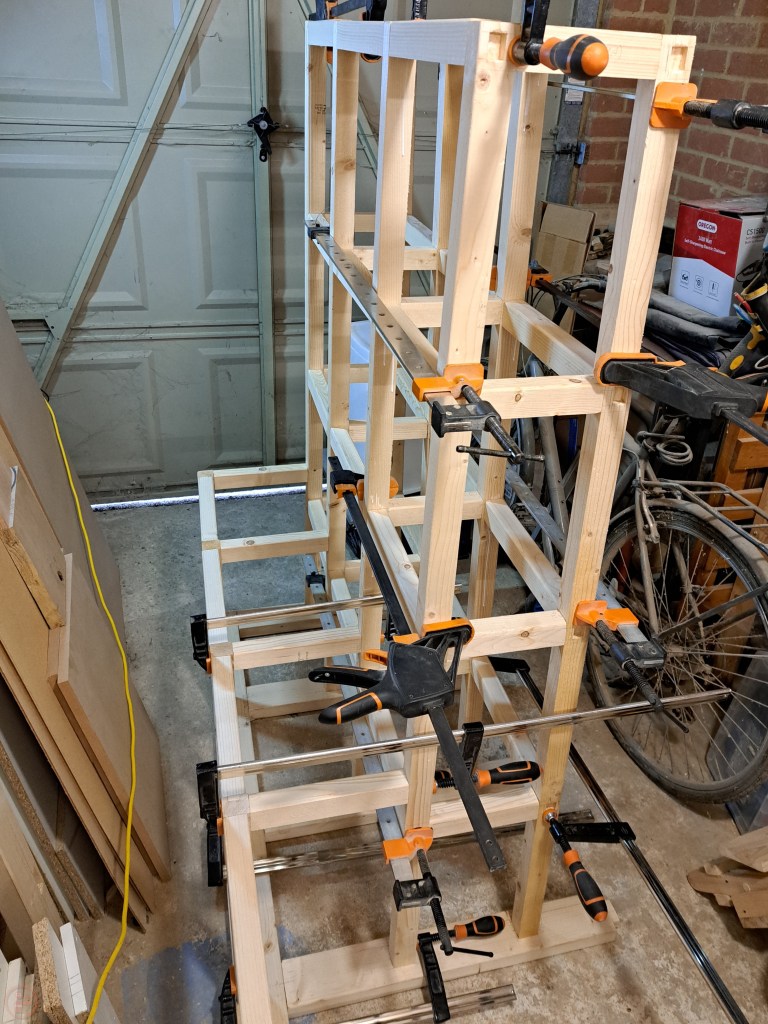
I took all these points and spent a while coming up with different designs, eventually settling on a two-sided movable lumber cart. This design has one side at a slight angle, with a lip at the bottom to hold sheet materials of varying lengths and heights, without it sliding off. The other side has divided bins to allow me to easily store shorter planks and beams and sort them to find what I need. And the centre shelving section between the two sides allows me to slide in longer planks and beams to span the full length of the cart, while also being sorted by widths and thicknesses on different shelves.

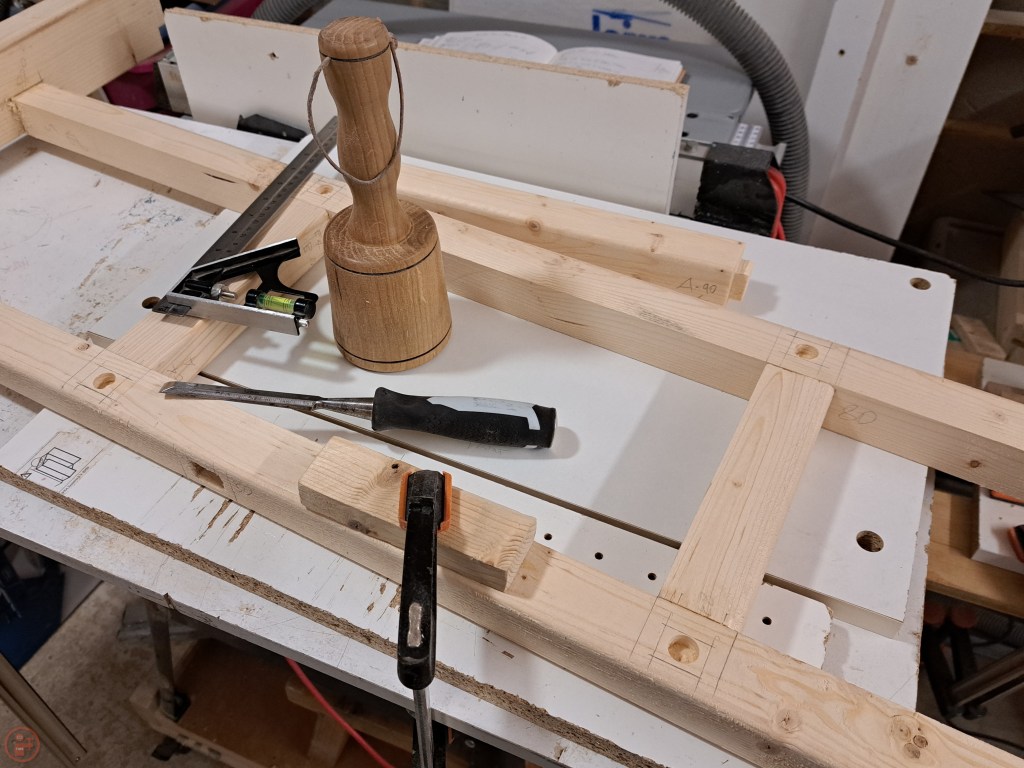
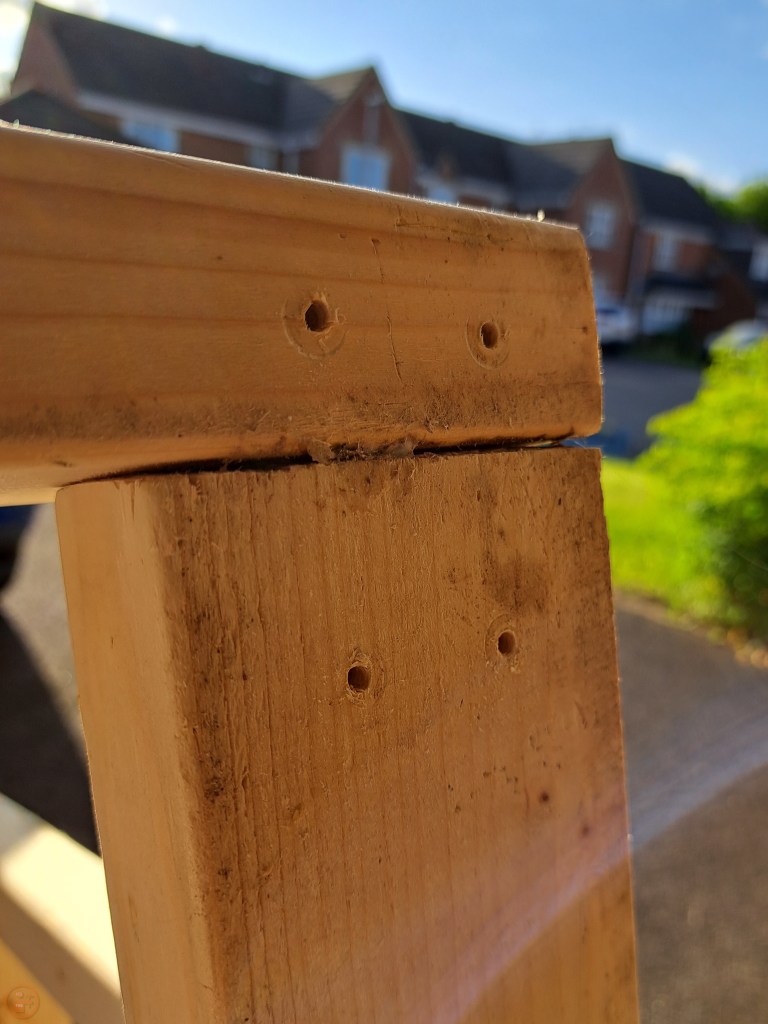
Once I had worked out the design, I set about making the frame, working from the base upwards. As I wanted the lumber cart to be very sturdy, I decided to use mortise and tenon joinery and it gave me a good opportunity to practise and improve my chisel skills on a shop project, which wouldn’t really matter if it wasn’t perfect!
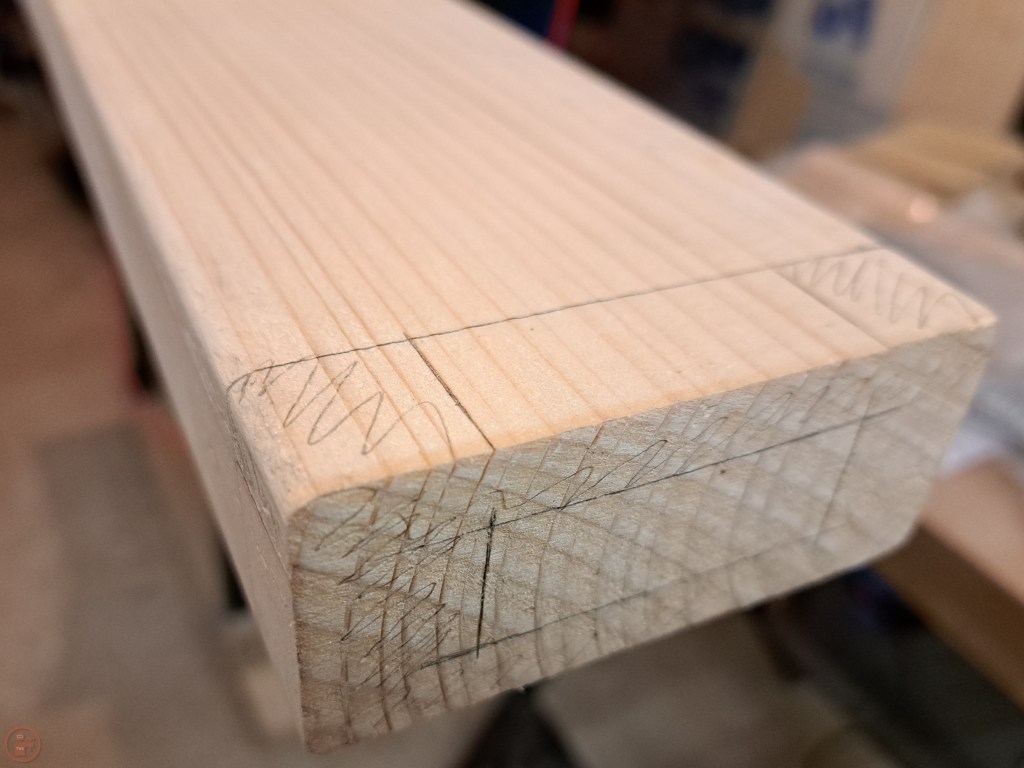

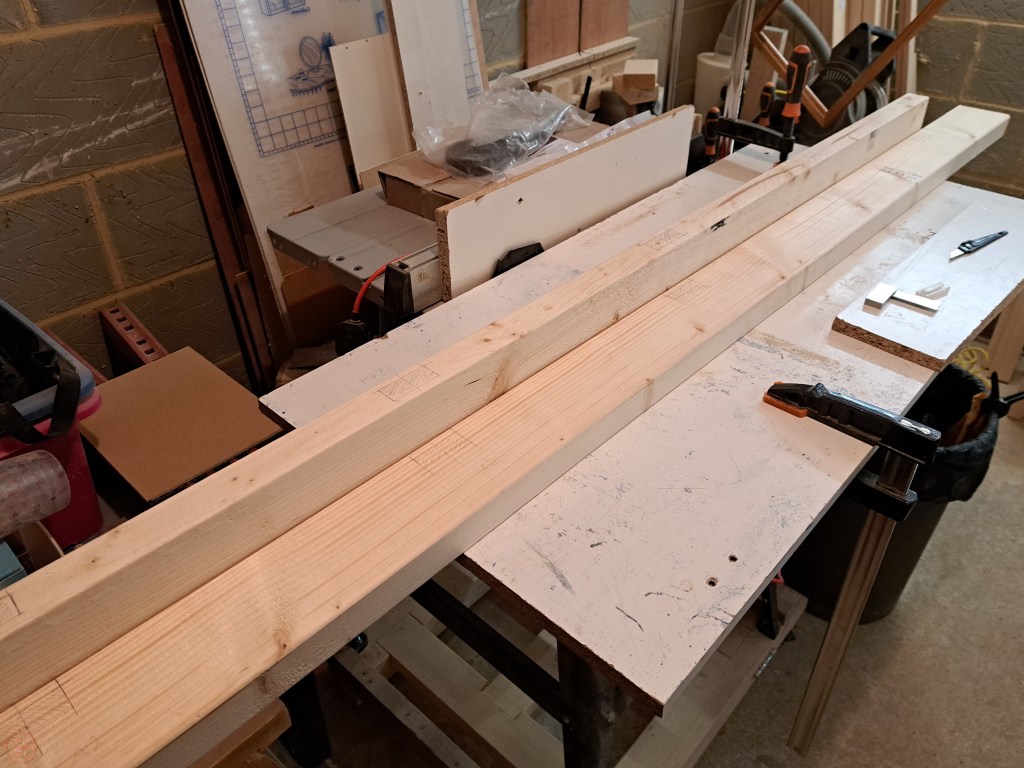
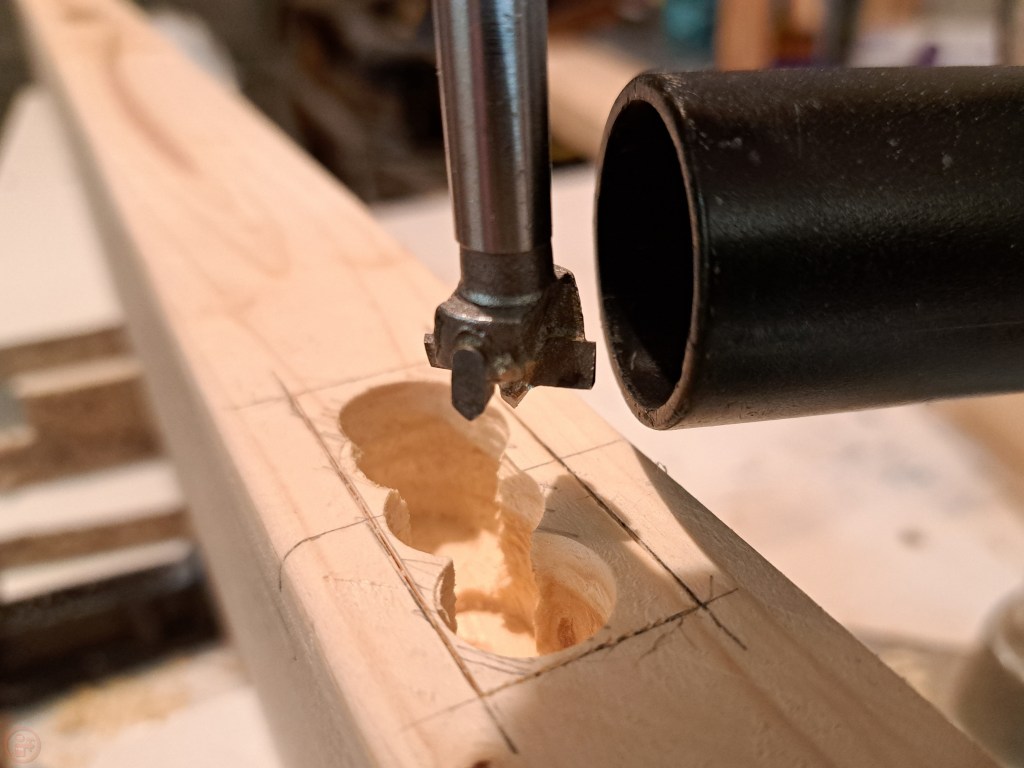
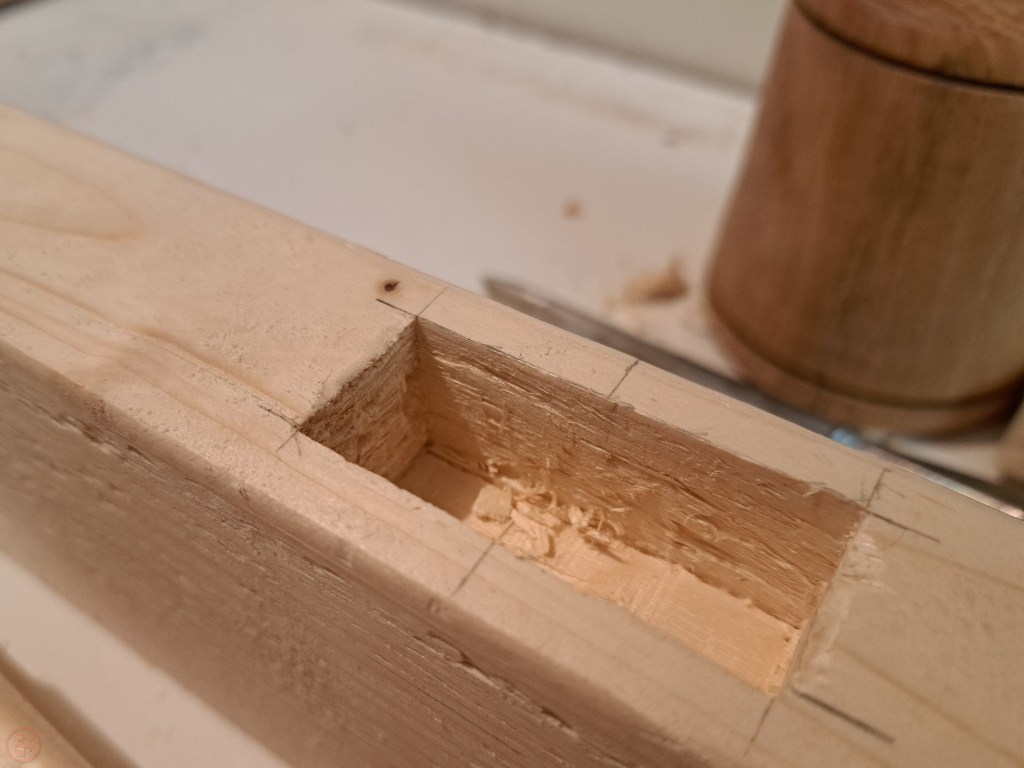
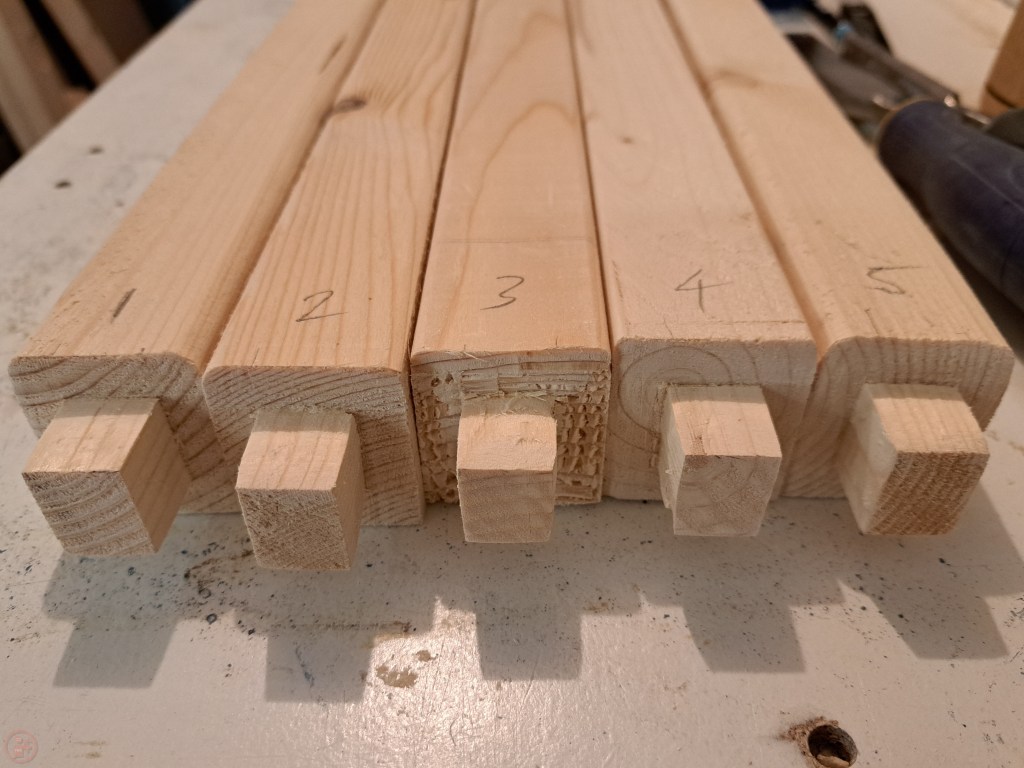
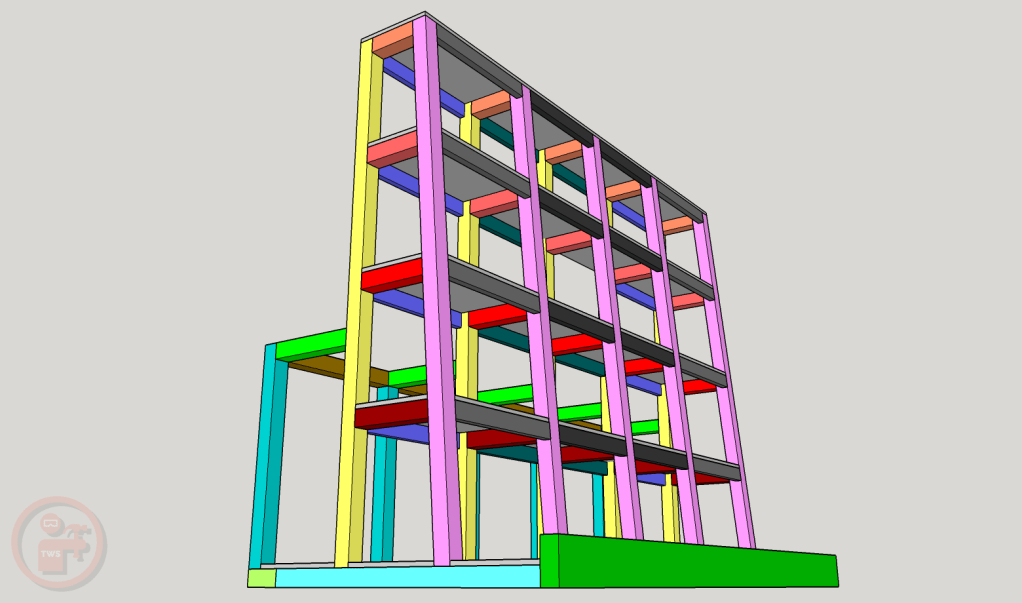
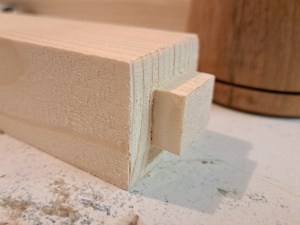
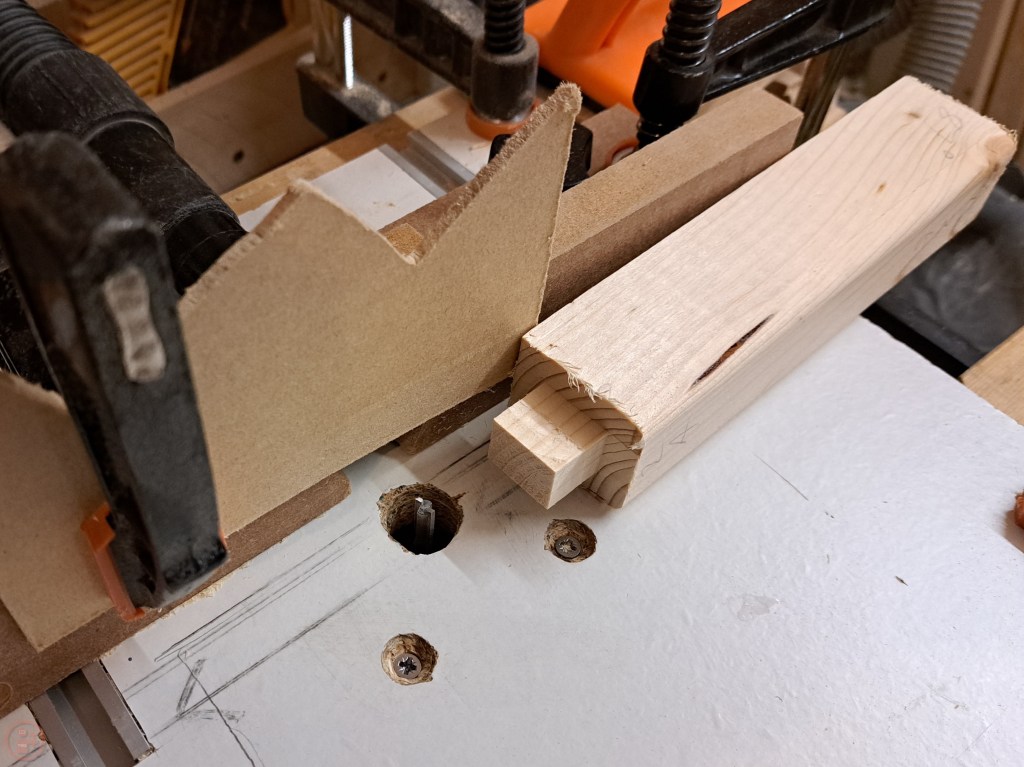
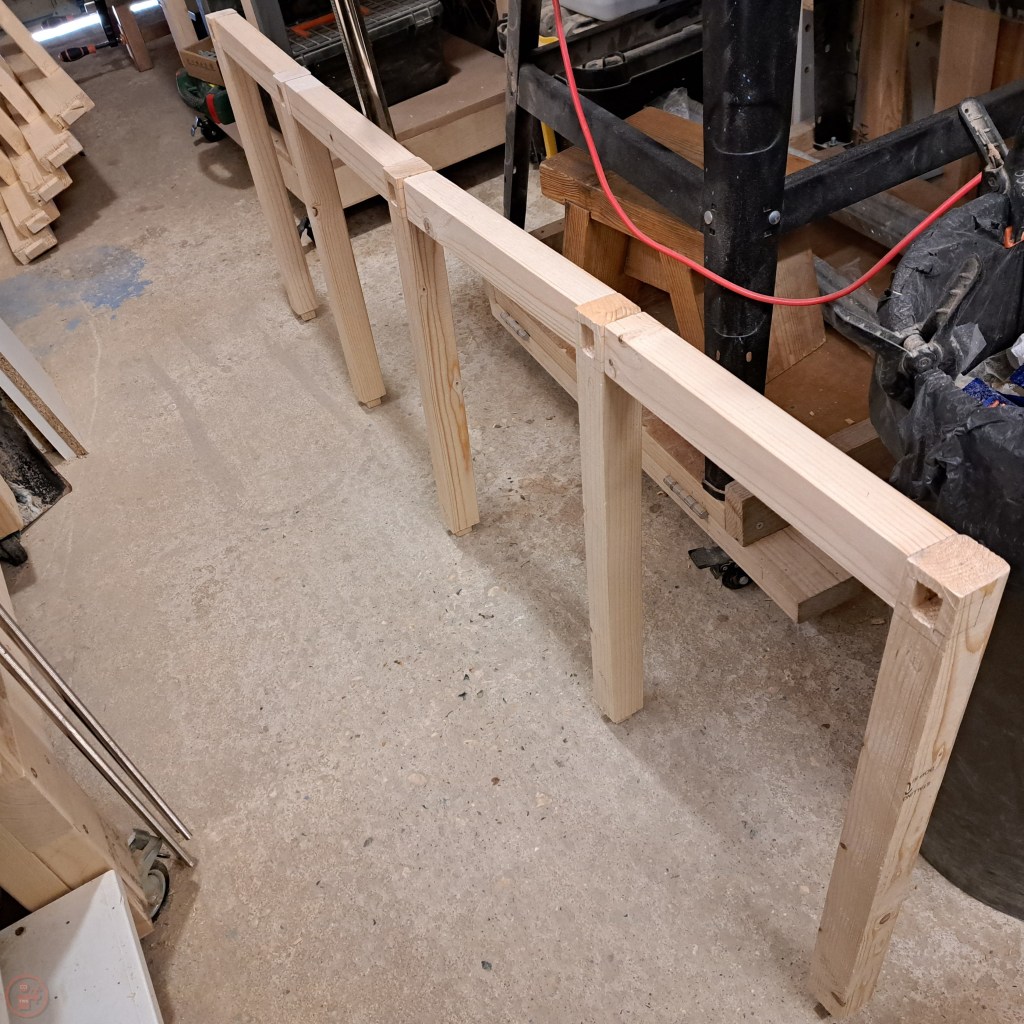
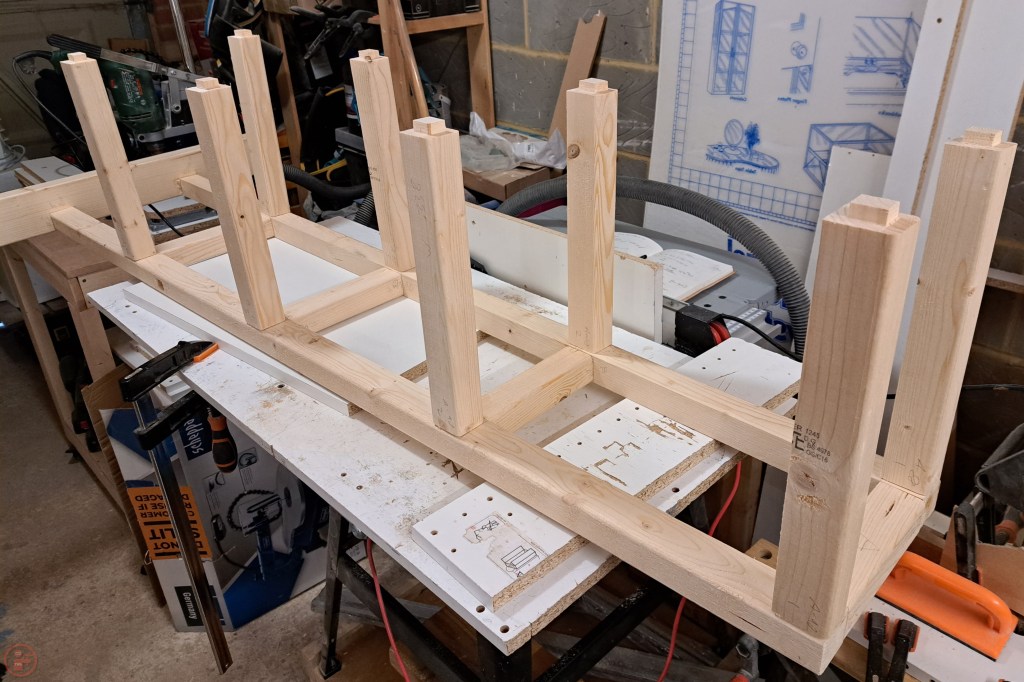
I started with the base and used a Forstner bit to quickly remove the majority of the material from the various holes, squaring up the mortices using my chisels. It was very important to keep everything labelled throughout, as I was sizing each mortice and tenon to fit each other snuggly. Once I had the side of the base fitted, I turned my attention to the centre section. The frame has five central “A” frames, which in turn are joined together as well as being mounted into the 2×4 base beams.
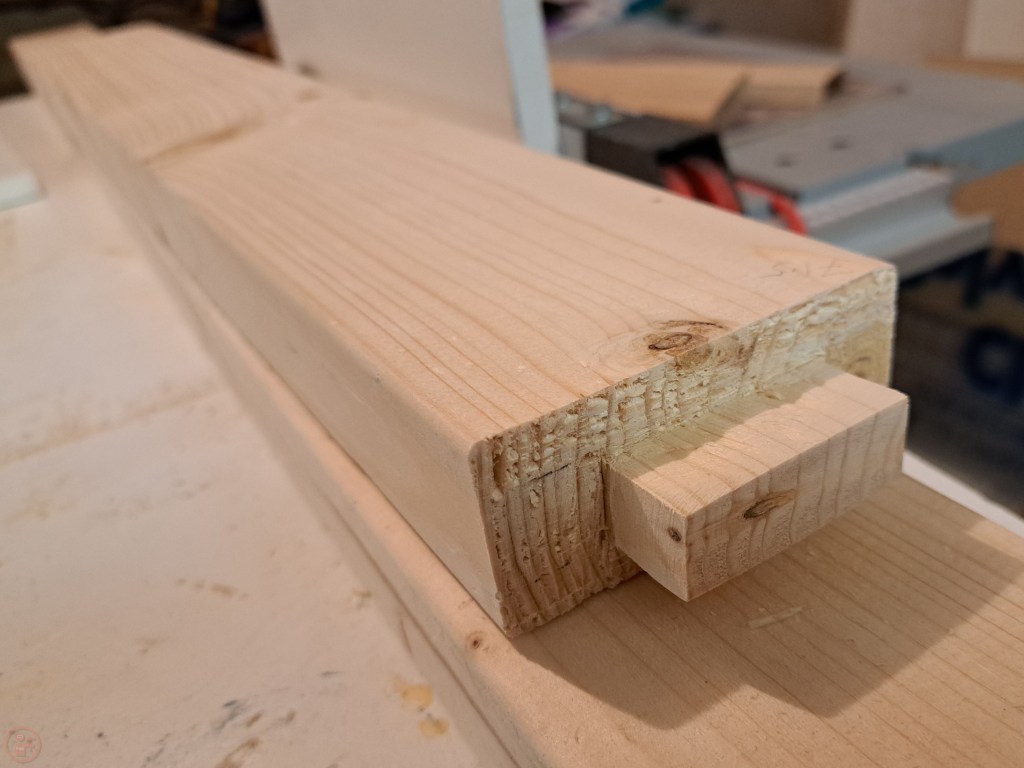
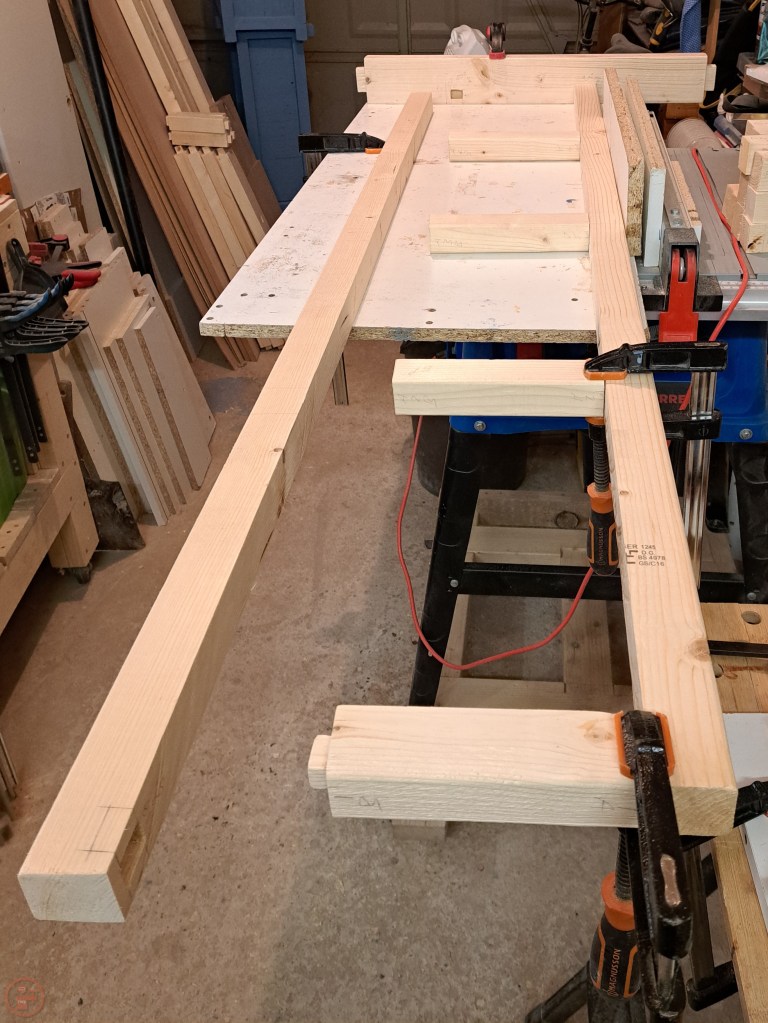
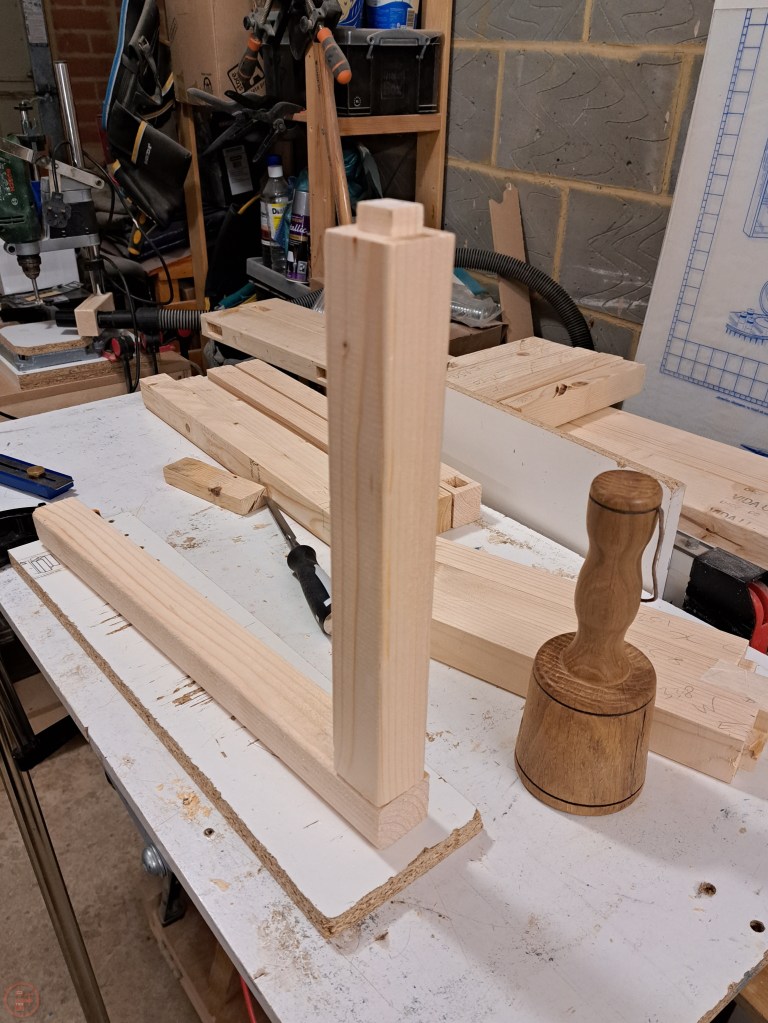
I worked from one end making the tenons on the long uprights and the corresponding mortices in the base frame.
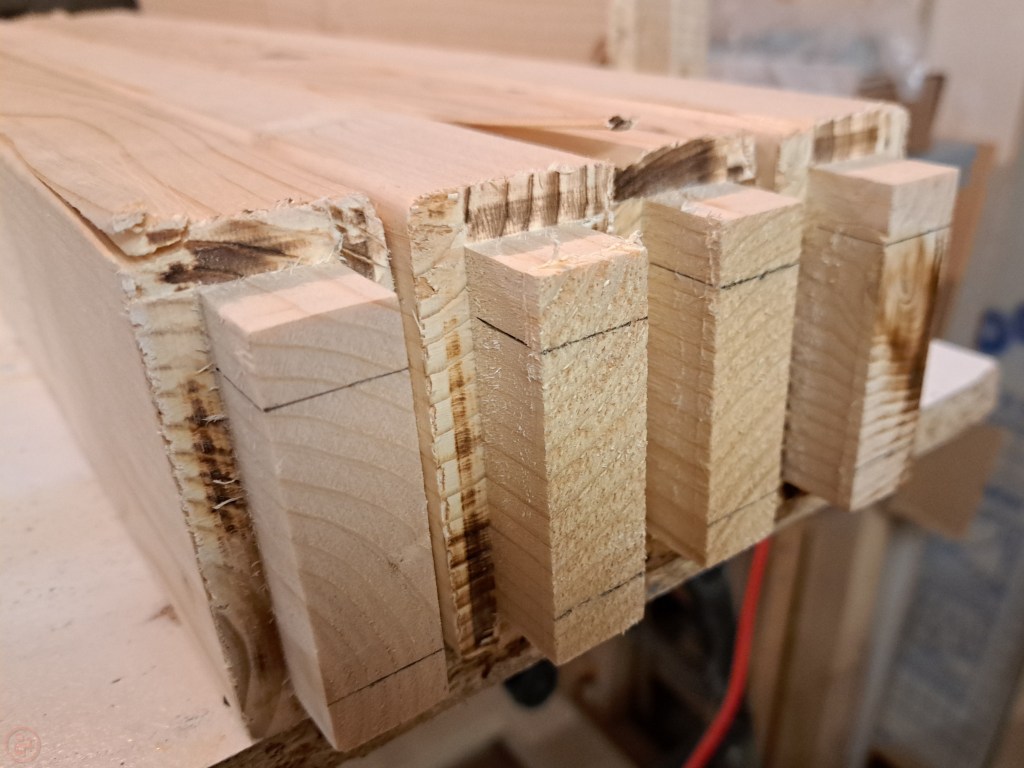
I used my router table to make the tenons fairly quickly and then cleaned them up with a chisel – they came out pretty well and it worked very effectively for the sheer number I had to make for the frame!
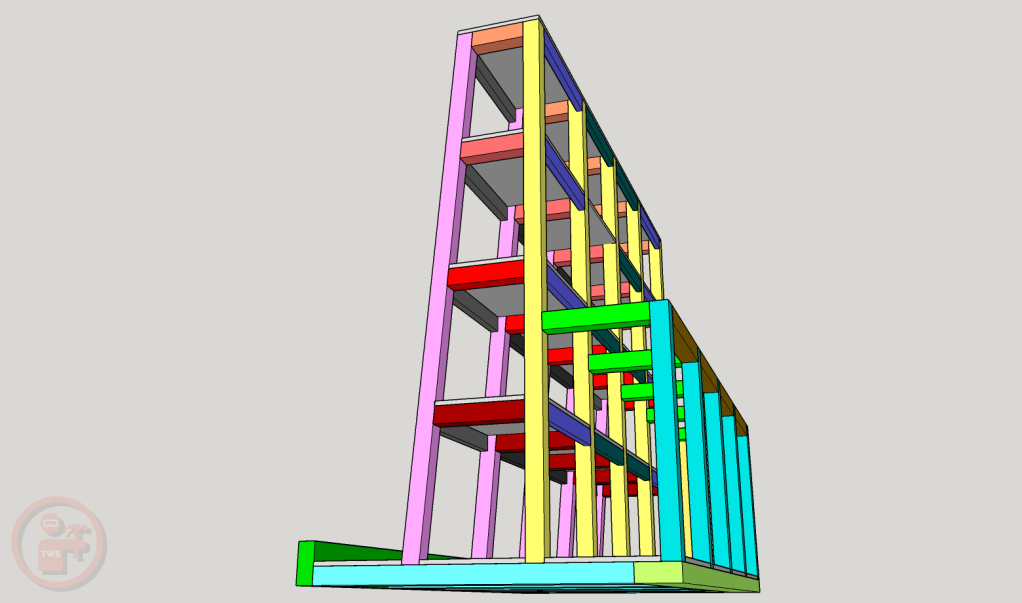
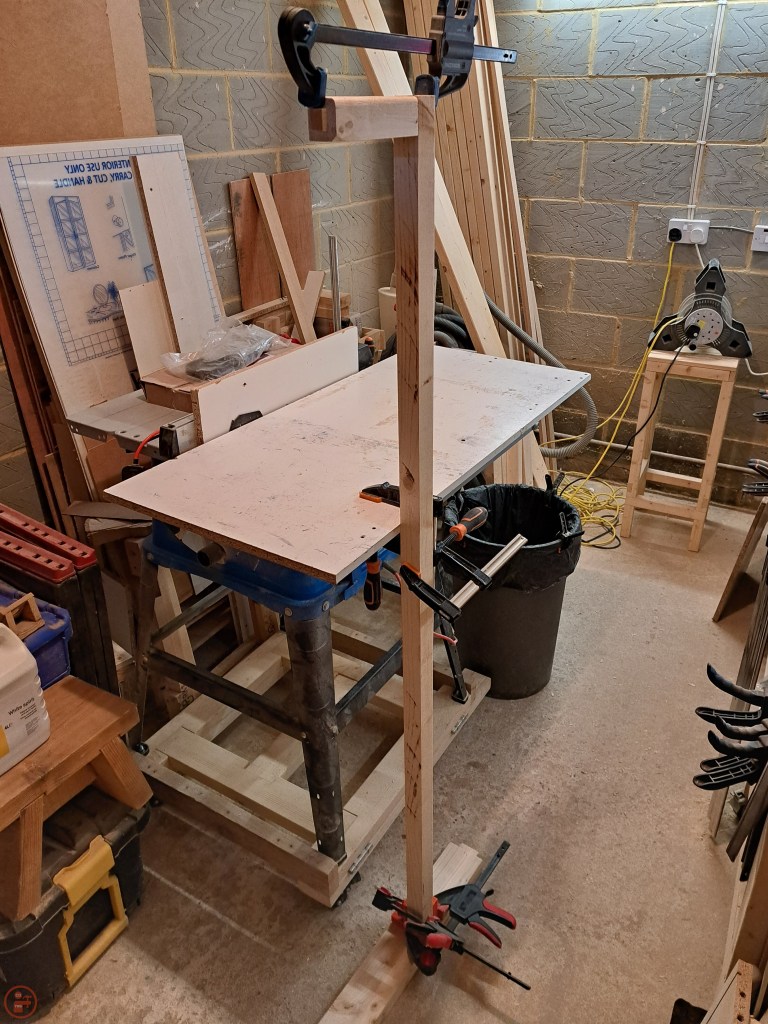
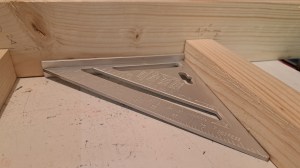
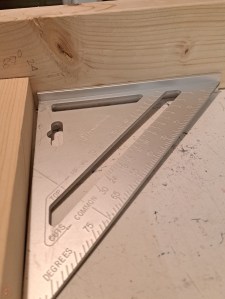
One side of the frame with the dividing boxes is at exactly 90 degrees, while the other side has a slight lean to it, with an internal angle of 87 degrees. This was selected after some maths to determine the dimensions needed to stop sheet materials sliding off the lumber cart, as well as to assist with determining the width of the cross-pieces within the A-frame. Once I had the two uprights cut to length and the mortice and tenons completed in the base beam, I focused on the cross-pieces of the “A” frame, working from the top down, testing the fit with clamps as I went.
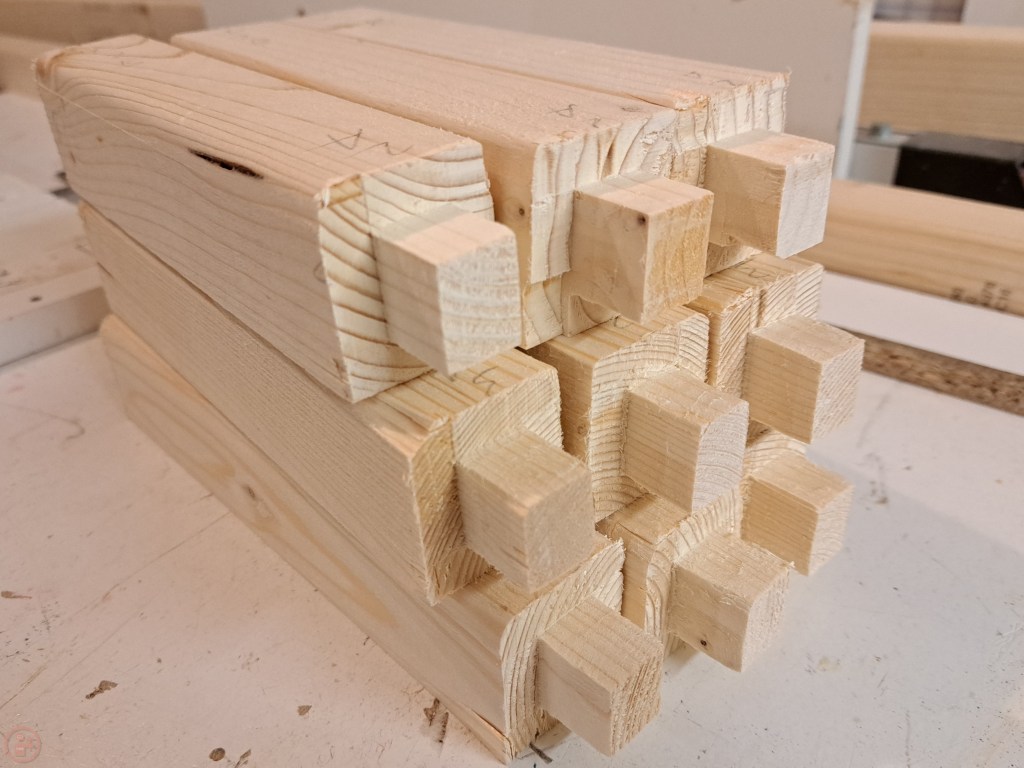
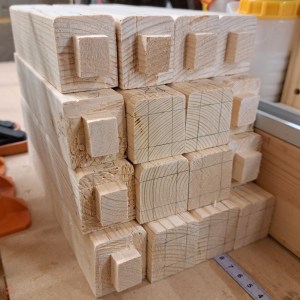
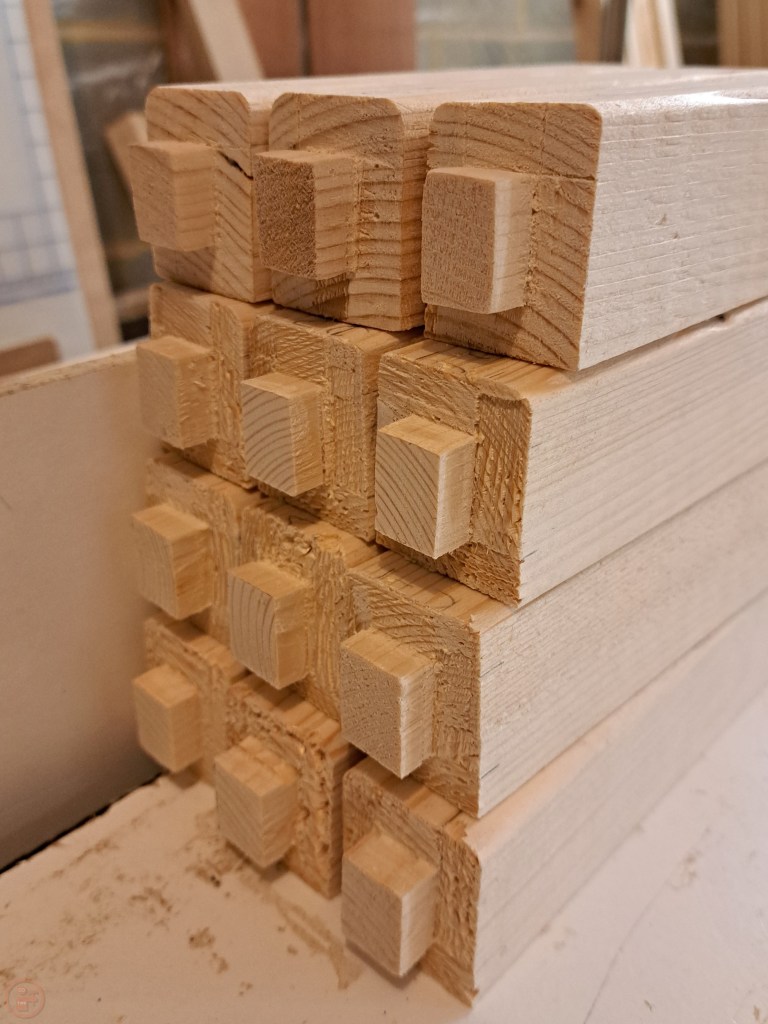
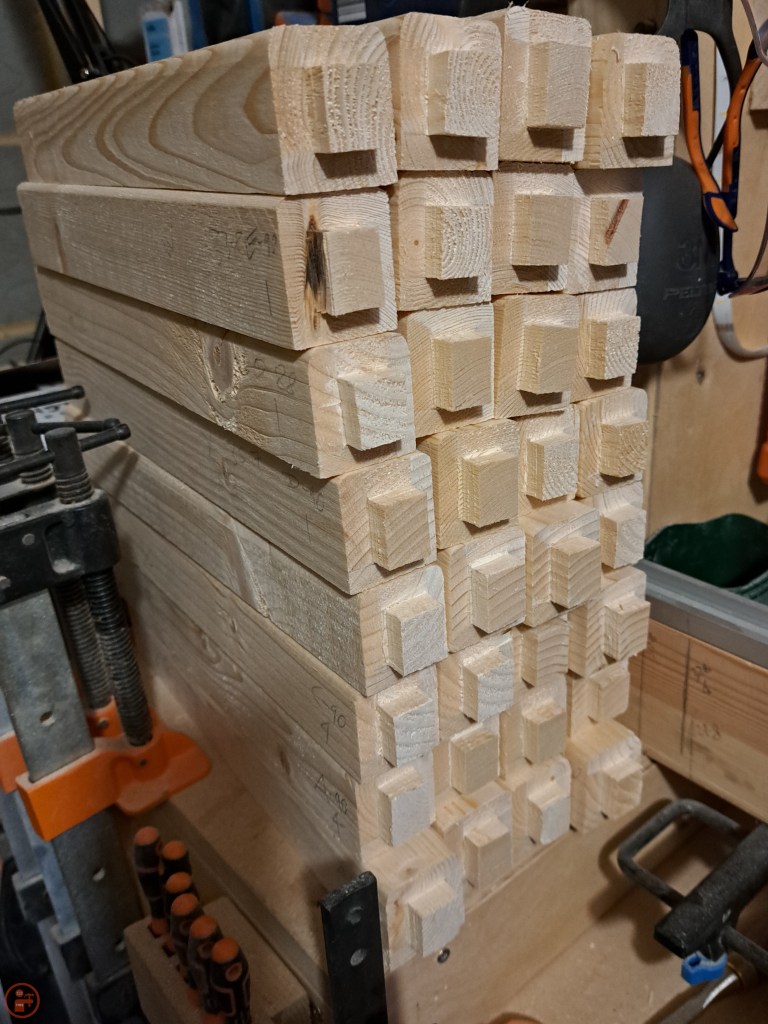
This was the point where I realised the sheer scale of the challenge I had set myself, as each individual piece needed a tenon on each end, plus a corresponding mortice in the joining section! For each A-frame, it had a mortice and tenon into the base beam, plus eight for the cross pieces, as well as another eight for the connecting pieces (coming up shortly) plus another three for the divider bins (also coming up below). So in short, the frame in total has somewhere in the region of 115 mortices and tenons – definitely good practice!
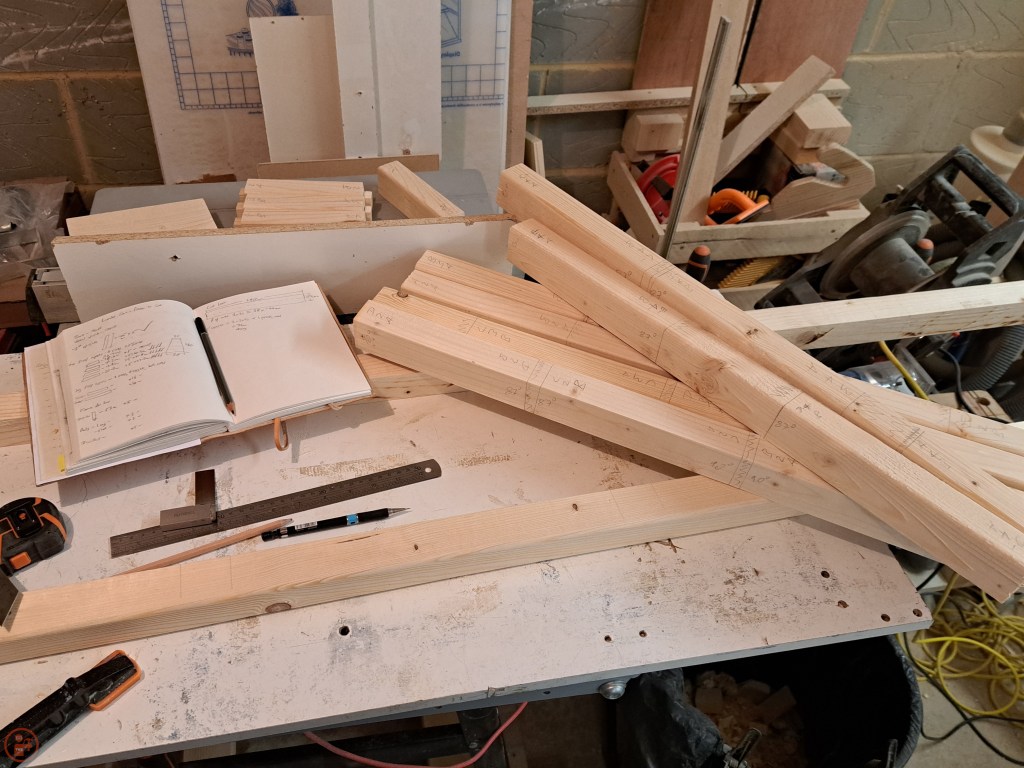
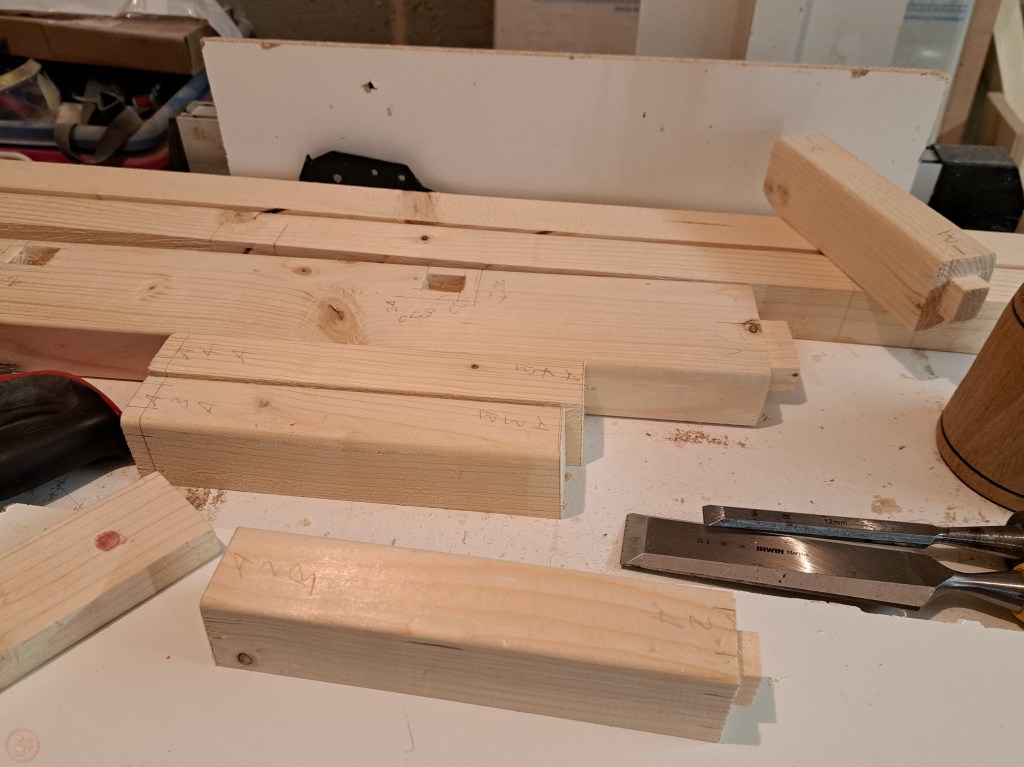
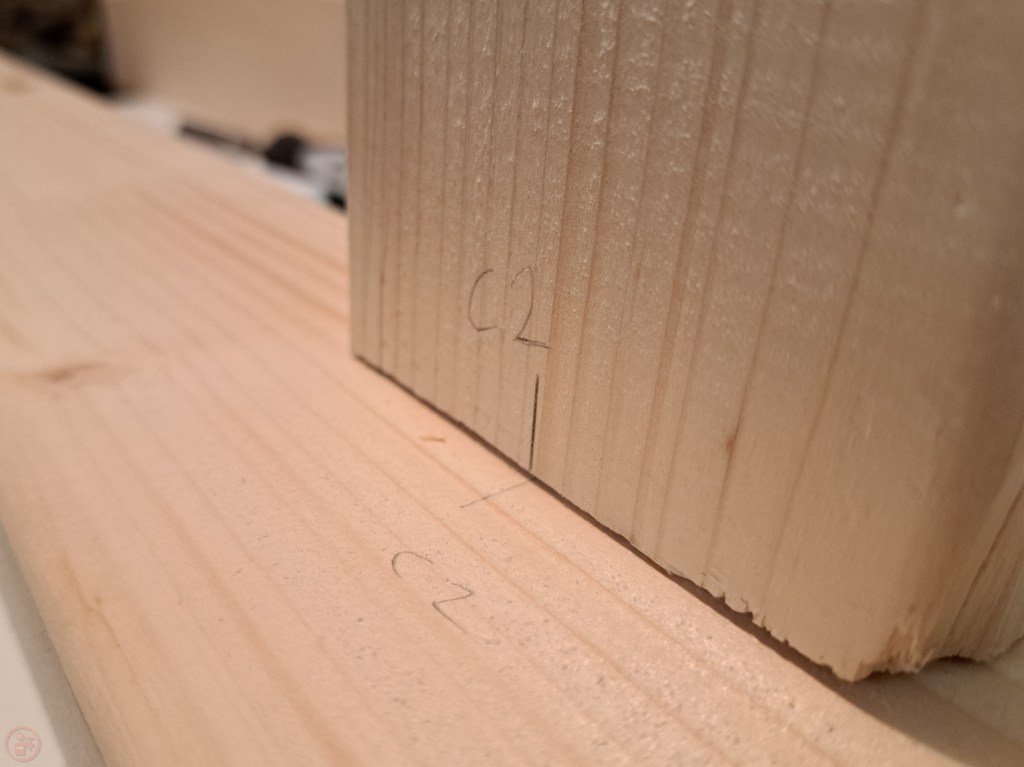
I made sure to label each piece I made with where it fitted within the A-frame, which end was which (into 90 degree or 87 degree upright) and which A-frame it corresponded to. This came a bit of a logistical challenge to keep track of all the various pieces, especially when pausing and coming back to the workshop after a couple of days at work.
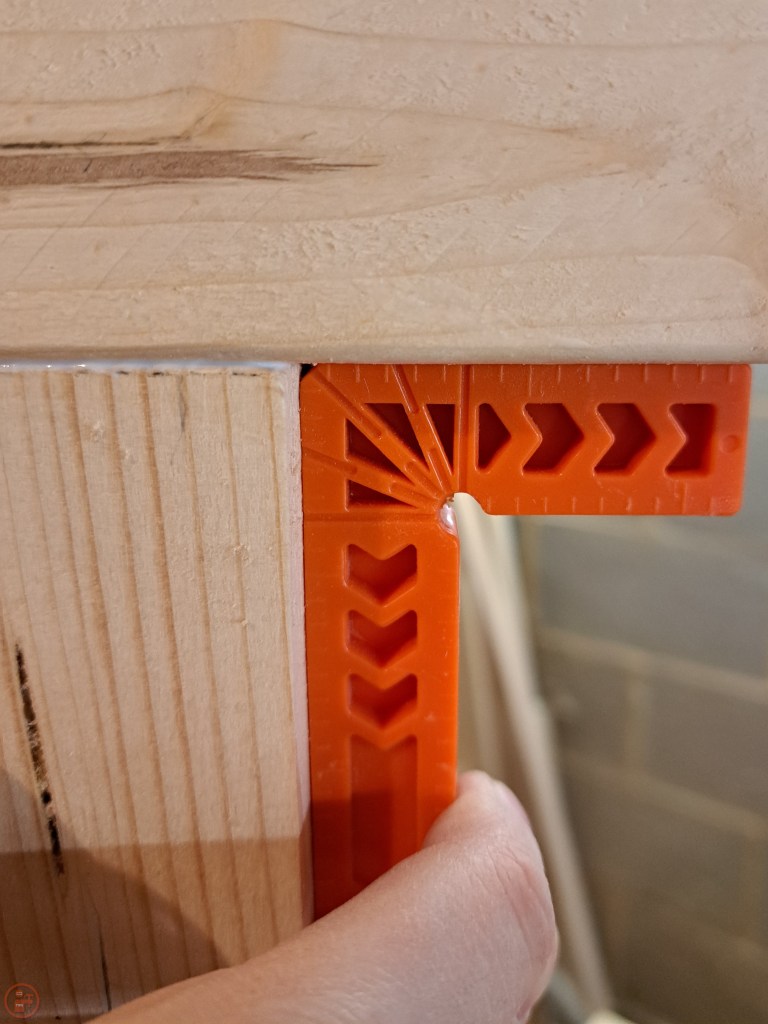
Once I had the pieces for the first A-frame completed, I did a dry-fit as a test. Pleasingly, the pieces all went together well and the angles into the base were as I had been hoping.
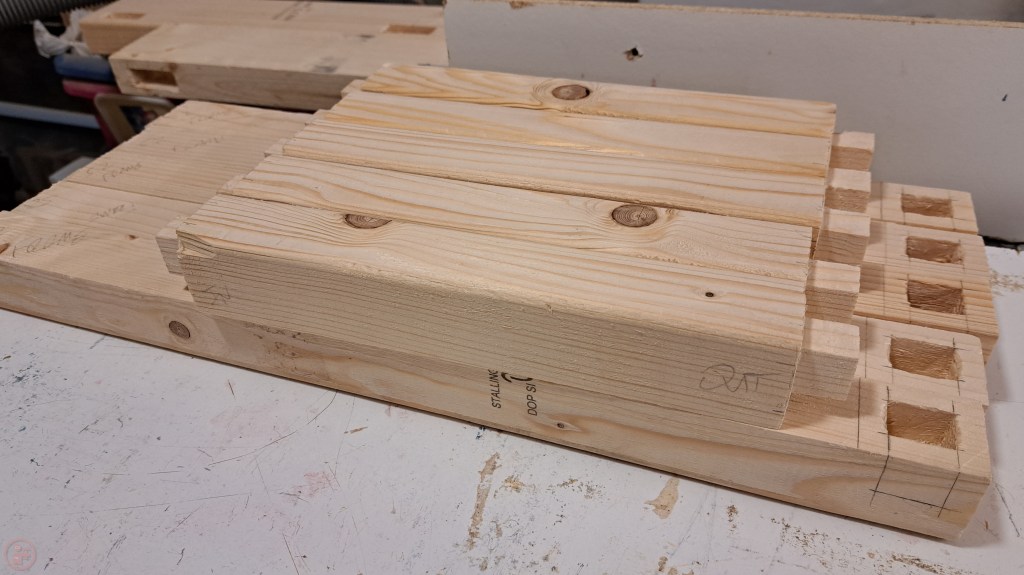
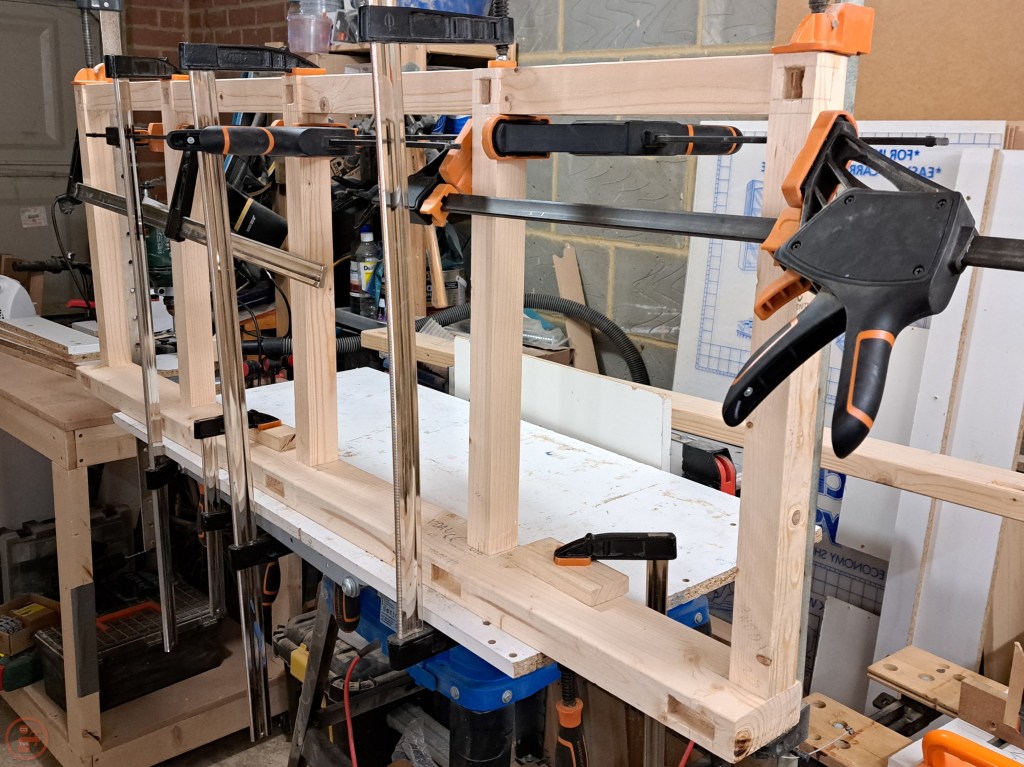
Once I was happy with the dry fit, glued up the first A-frame and set about batching out the sixteen pieces and 32 tenons for the other four A-frames. I used my router table to speed this up, cleaning up each tenon with my chisels.
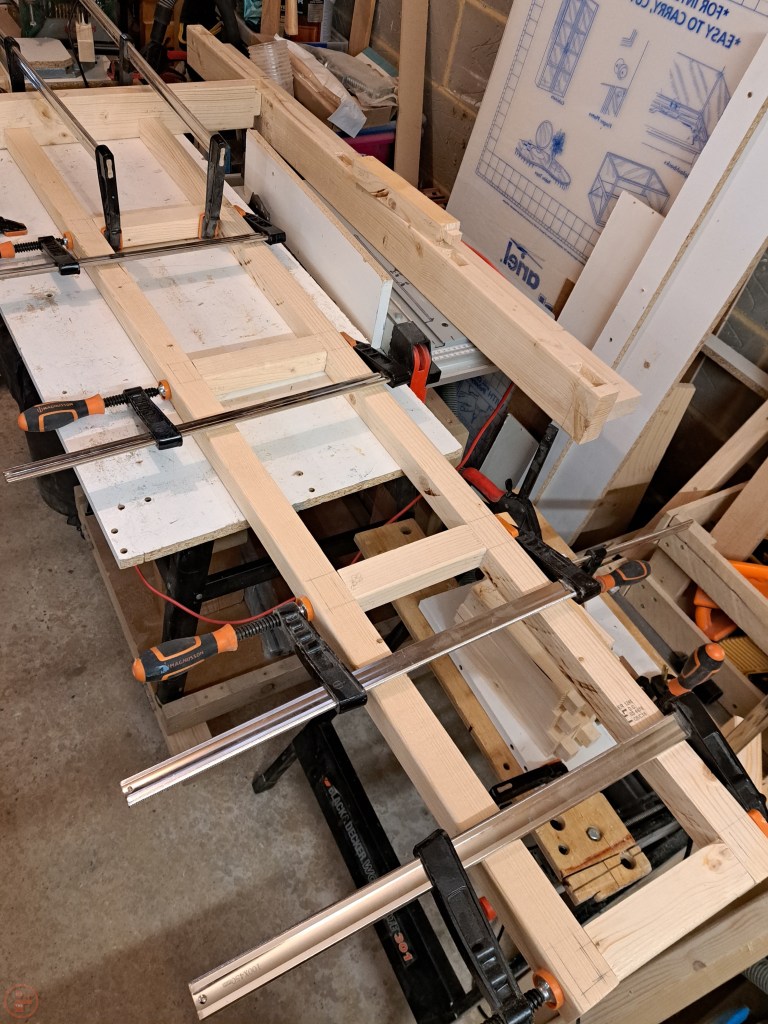
I used a lot of clamps to help pull the glue up tight, as the pieces needed to go flush with the uprights as well as be solidly secured into the base beam.
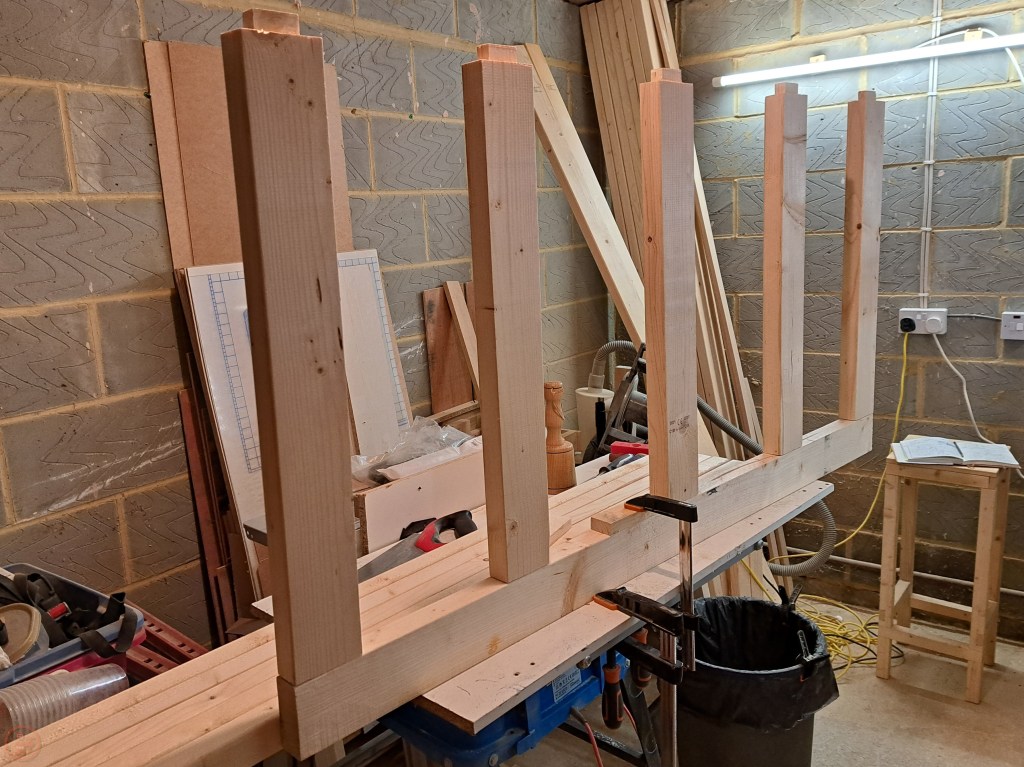
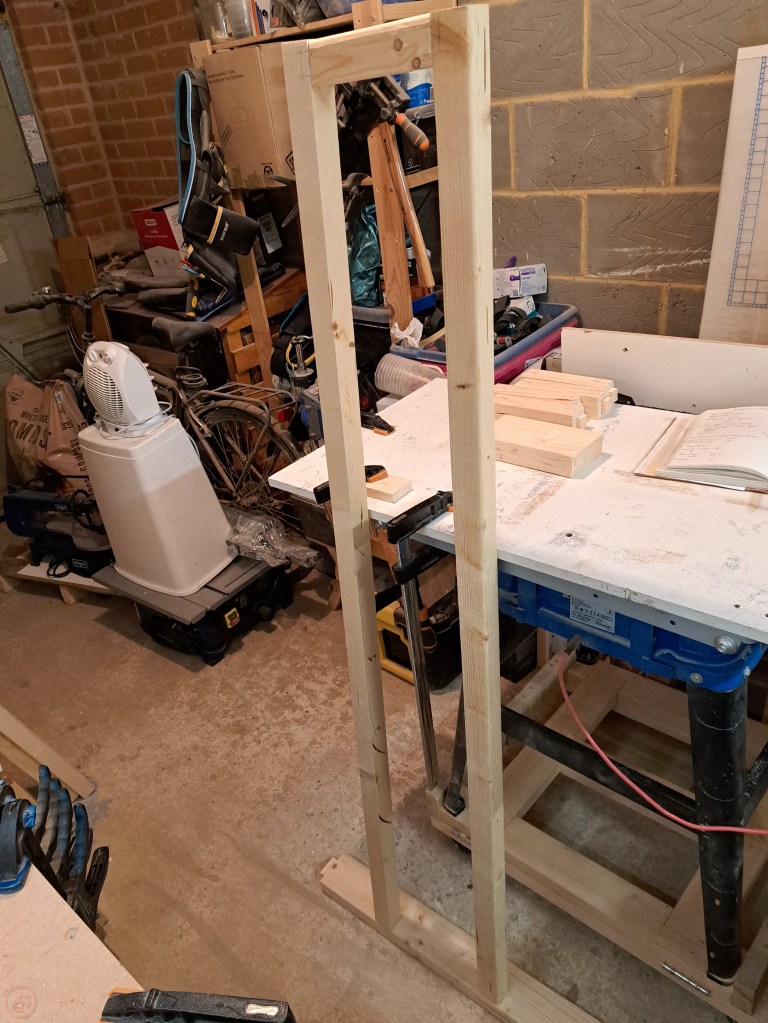
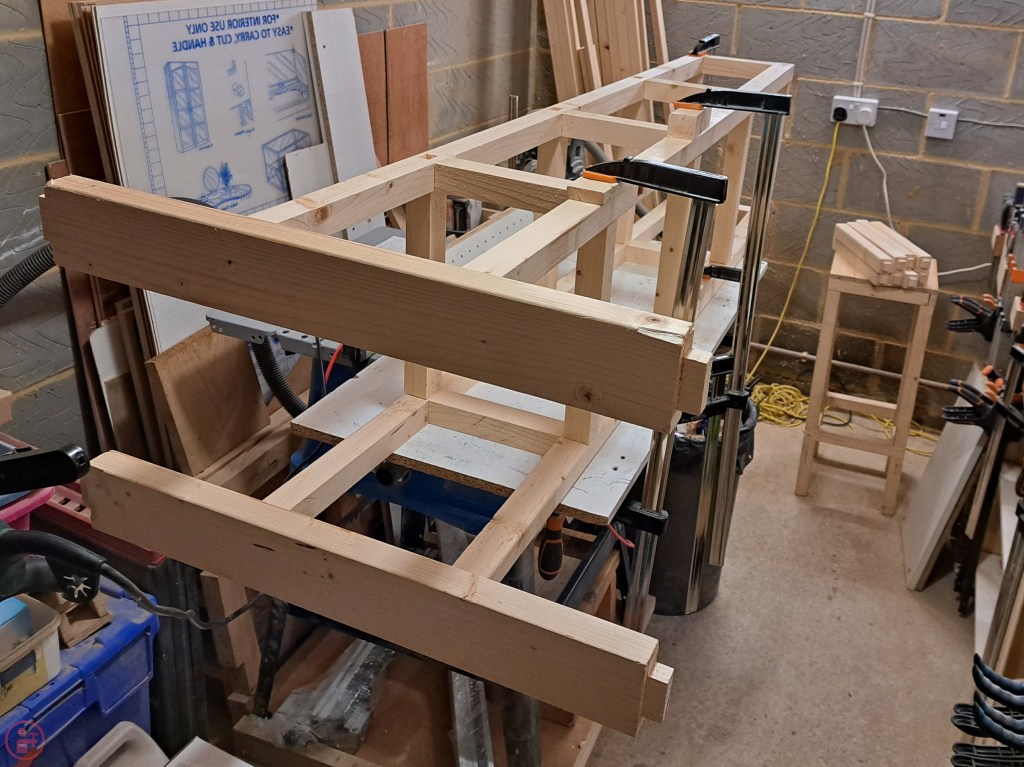
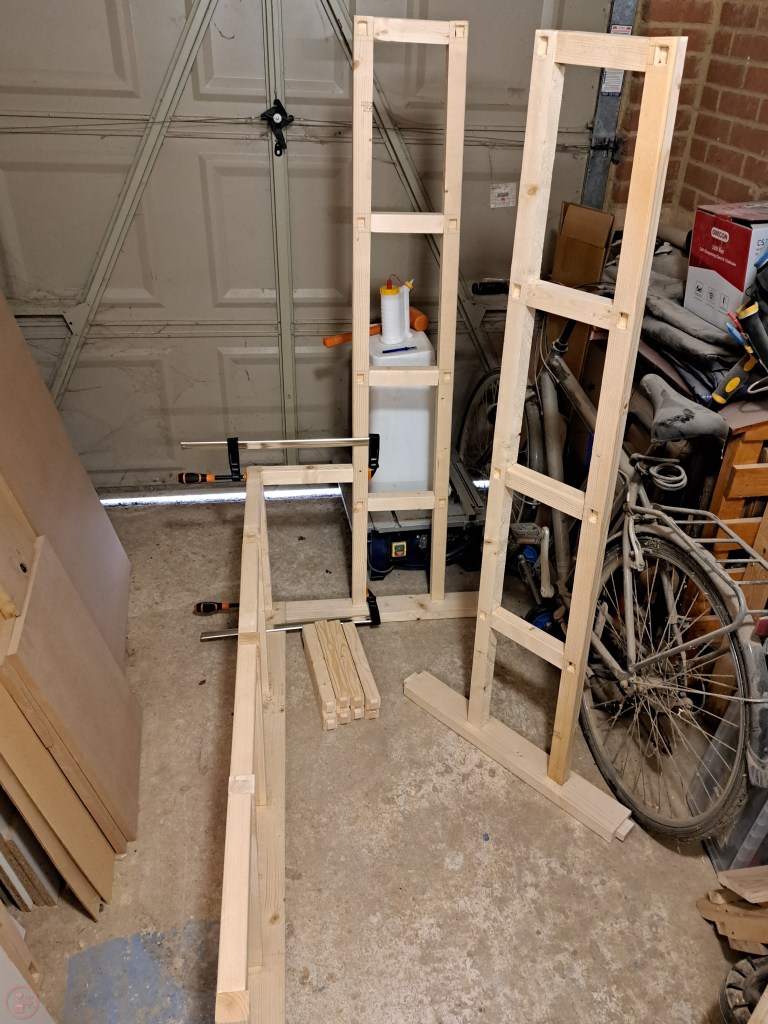
Once I had all the pieces for the next four A-frames completed, I worked through the glue ups for those, again clamping the frames securely as the glue dried. I ended up with five A-frames secured into solid base beams, ready for the next stage.

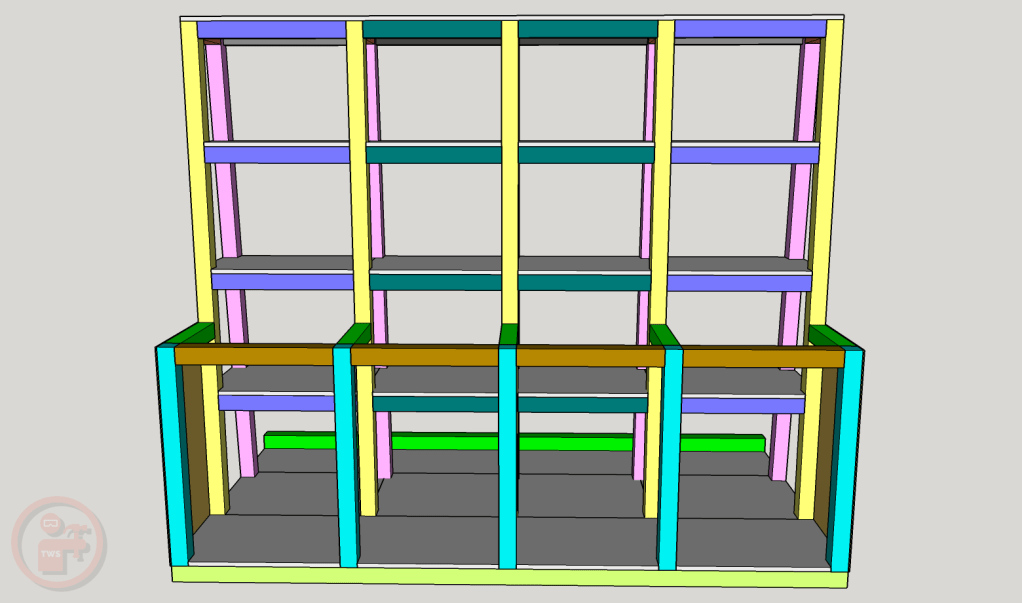
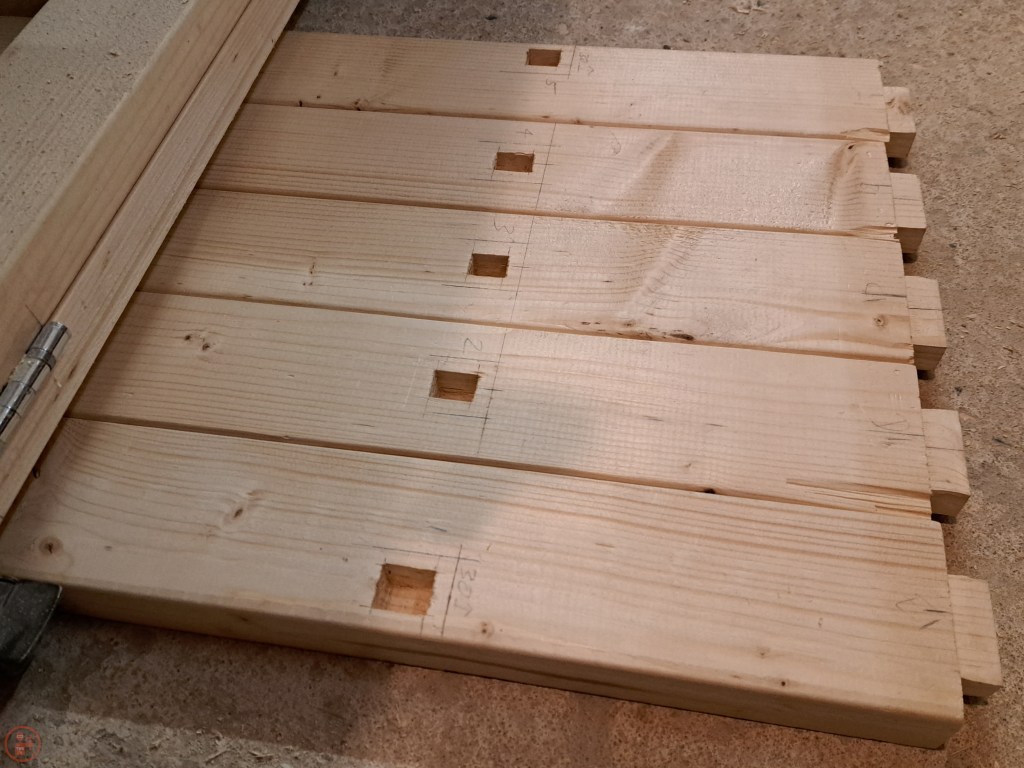
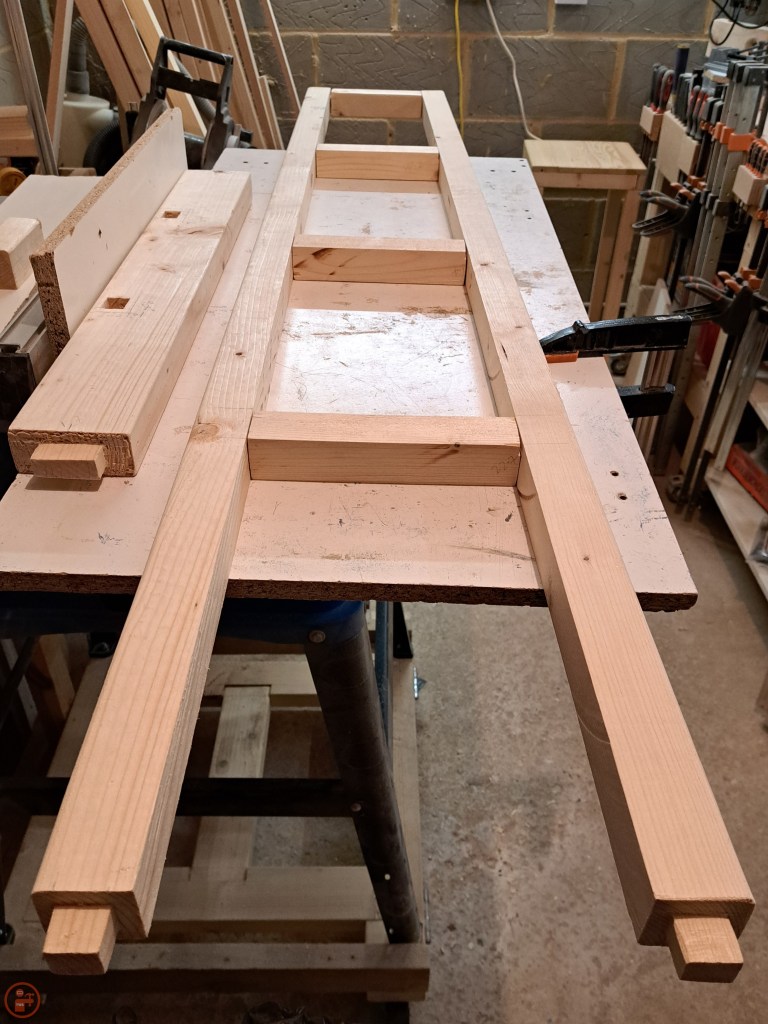
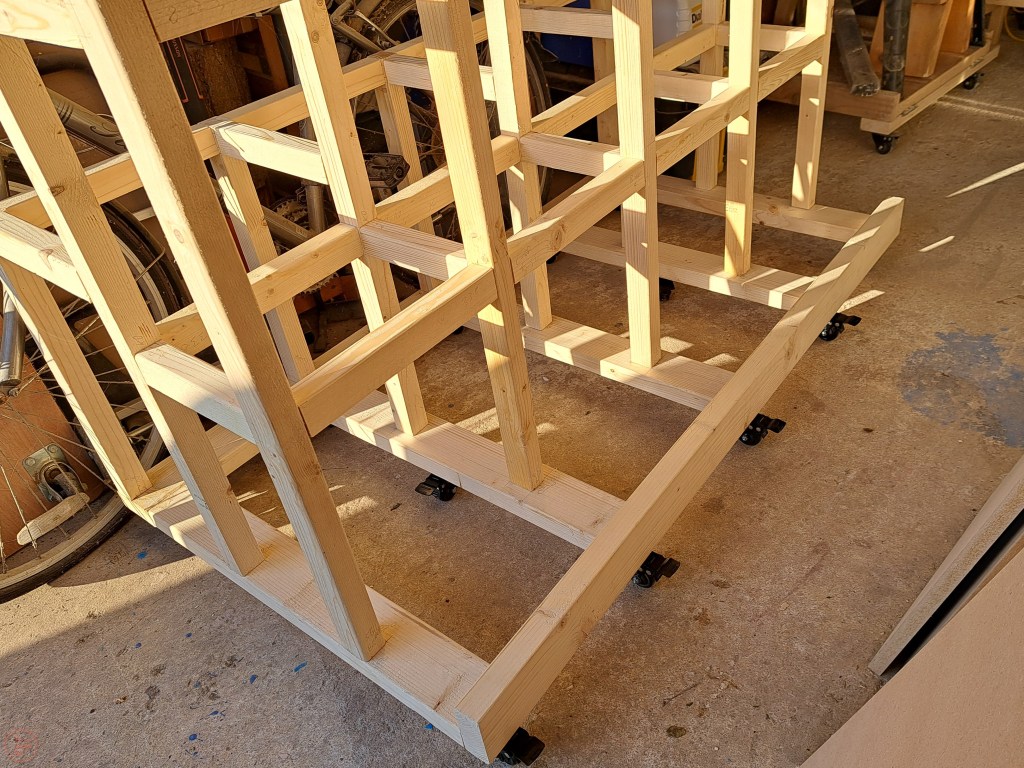
I moved onto the next phase of the construction, which was to make the frame for the dividing bins, as these would have to be assembled at the same time the A-frames are connected. After more measuring, marking, drilling and chiselling, I had the pieces ready for assembly.
I had to make the tenons have a 45 degree corner where they met from two different directions, so the tenons would not get in the way of each other where two pieces connected at a corner. This wasn’t difficult to do, but just required me to remember which pieces needed the alteration!

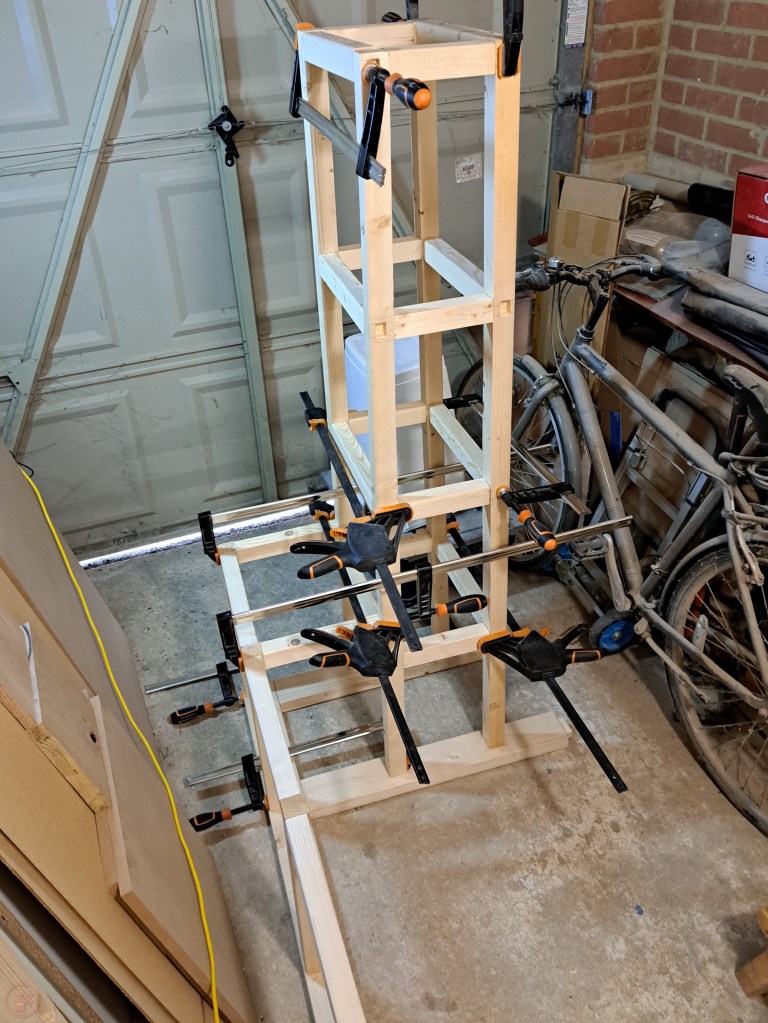
Once the dividers were done, I did a test fit and then started the glue up of the outer side into the lower beam. This, again, required clamping in multiple directions to pull everything flush – I do seem to have a good selection of clamps now, which made such an operation a lot easier!
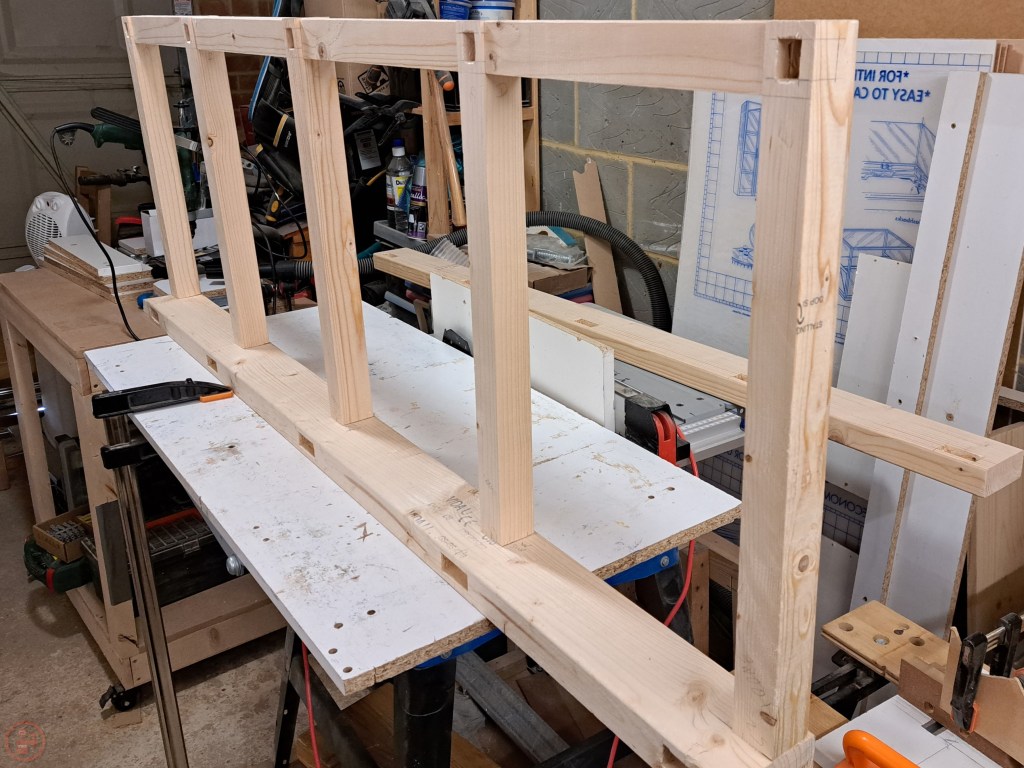
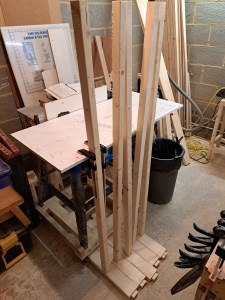
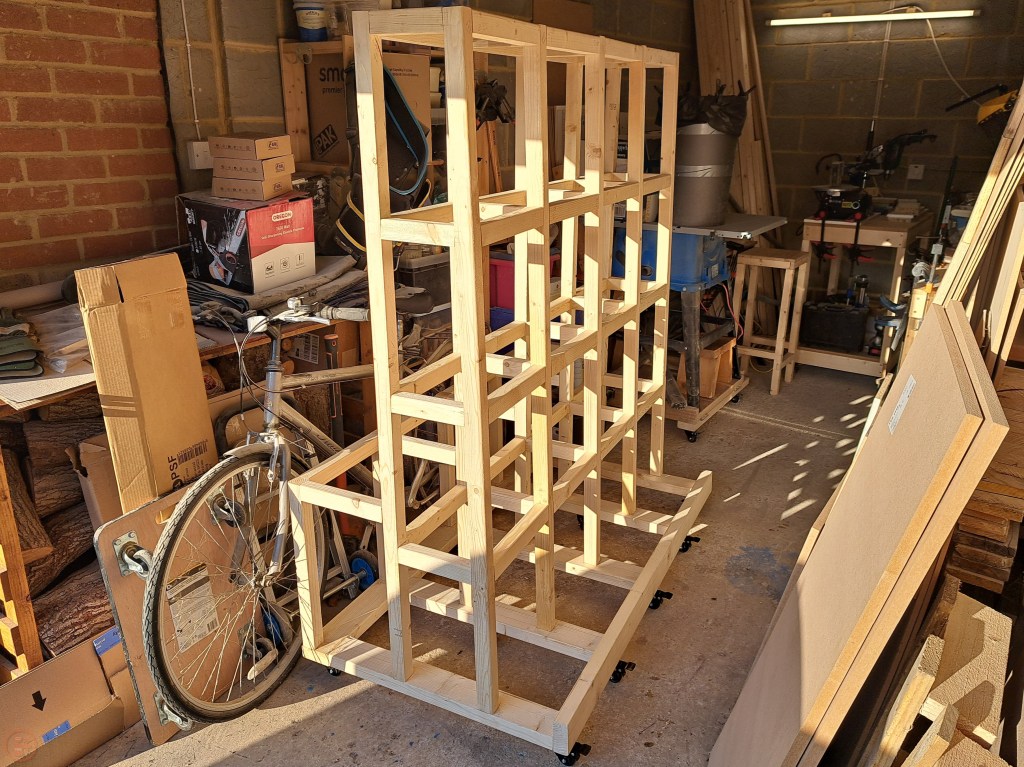
Once the side section was dry, I did a dry fit of all the pieces made so far to check it all worked as I had imagined in the designing phase.
I was really pleased with the progress to this point and it gave me a boost to see the lumber cart skeleton taking shape. There are still gaps between each of the A-frames to be completed with additional pieces on each side and at each height, but this is definitely over half-way done!
I returned to my measuring-marking-drilling-chiselling routine and after several more mortice and tenon processes, I had every single piece cut to length, the joinery completed and, most importantly, correctly labelled with where it goes within the lumber cart!

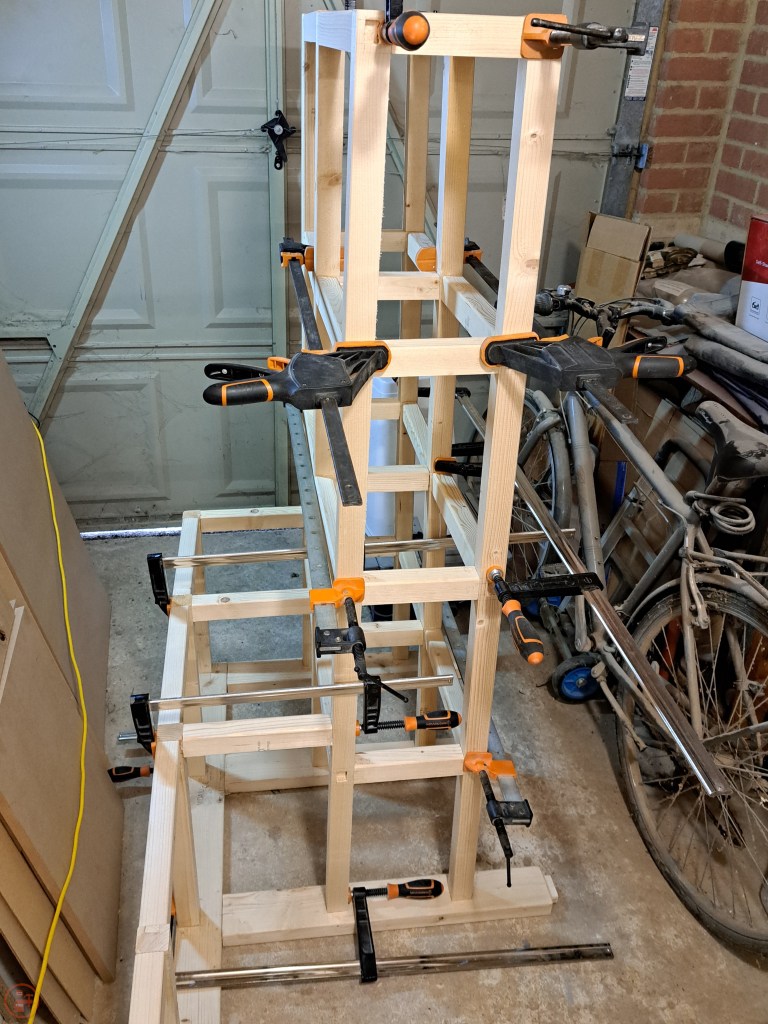
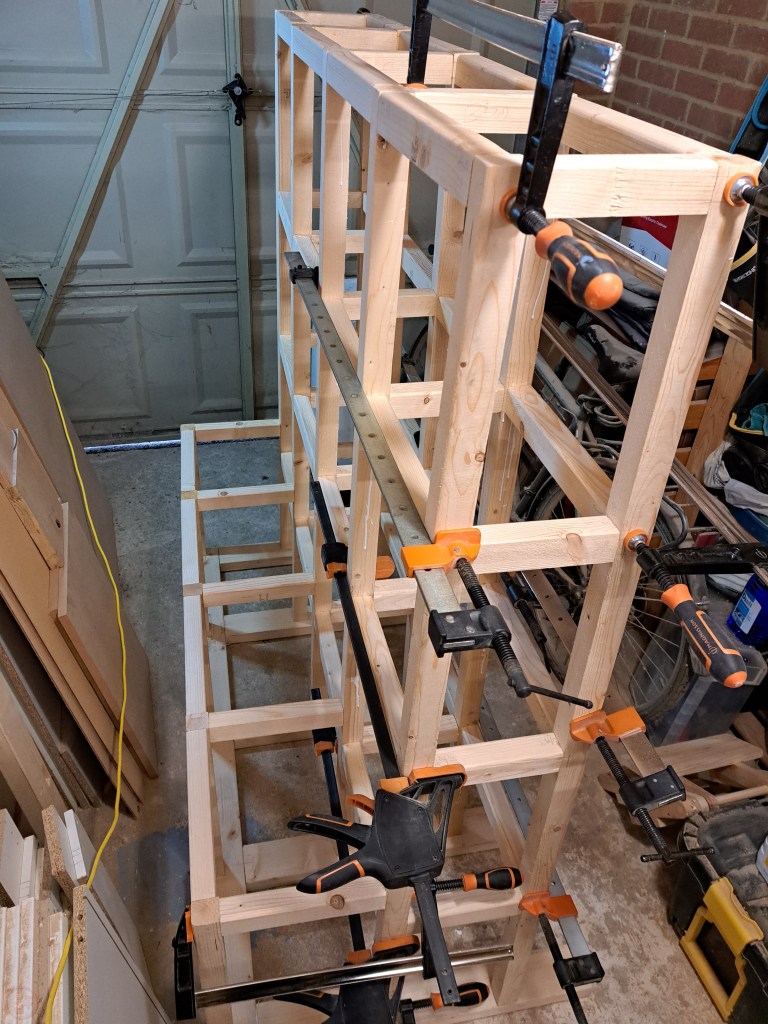
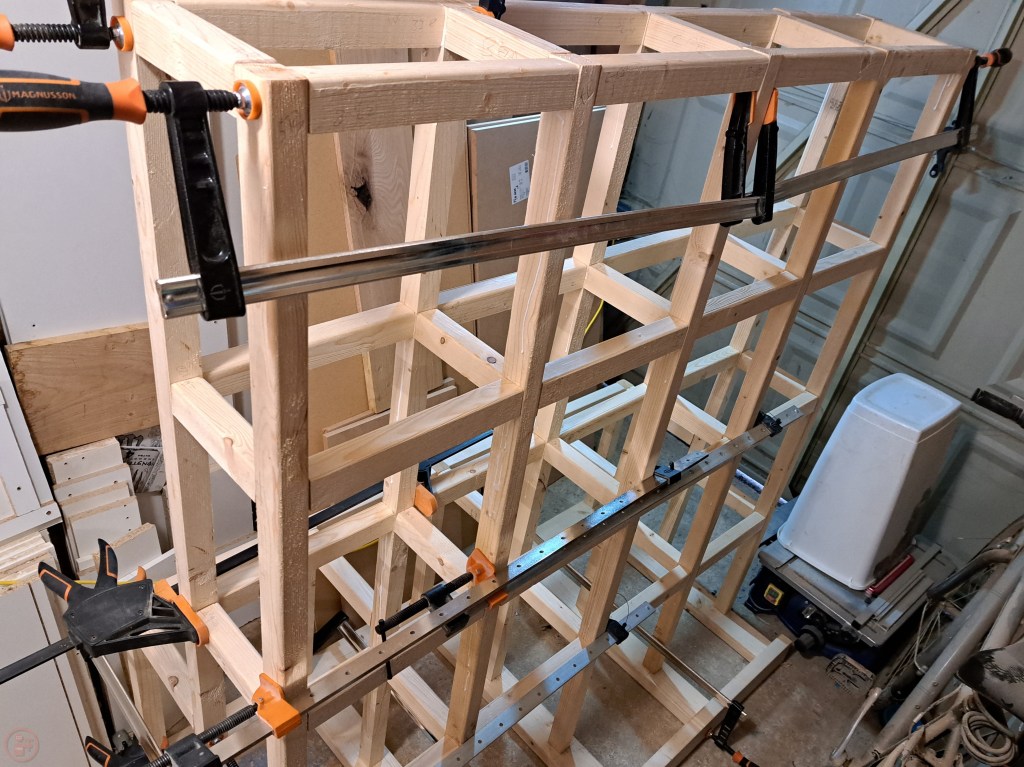

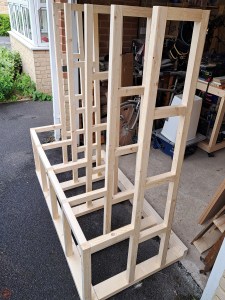
I moved to the glue up phase and worked from one end to the other, securing the first A-frame into the base beam with the dividing bins and then fitting the next A-frame and the connecting pieces between the two. This was a little fiddly to align all the tenons into the correct holes for eight cross pieces simultaneous, so I figured out a process using a loose-fitting clamp to help me keep some tension on the joints as I aligned the remaining ones. After a lot of very sticky hands from all the glue and some persuading with a rubber mallet a few times (!), the skeleton of the frame was assembled. I left it to dry for a couple of days and then mid-week came back to fit some casters after work in the evening sunshine.
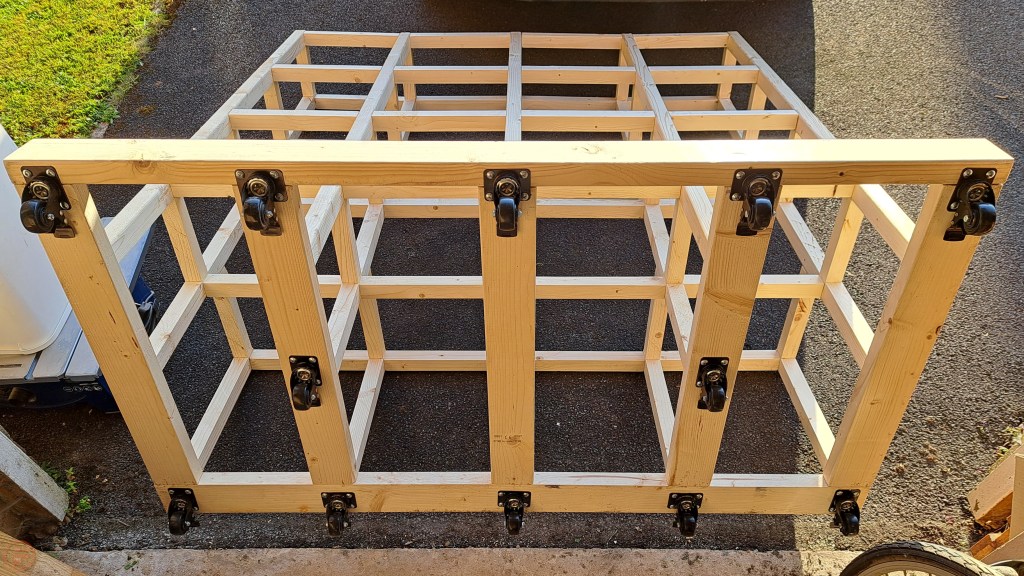
I went slightly overboard with the casters, as each one is rated for a decent load. This way however, it ensure the centre of the frame won’t sag or dip under the weight over time and also ensures that no one caster has to take an excessive amount of weight.
After fitting all twelve casters, I stood back to admire my progress in the evening sunshine glow, ready to progress to the next stage – fitting the dividers, shelves and panels before loading it up! 🔨

1 thought on “Lumber cart – Part 1 – Planning and frame”