Last year my Dad turned 60 and I wanted to give him something really special, something that would show how much he means to me, be personalised to him and be useful and practical so it would last a long time. Dad has lots of tools he keeps in various places (wonder where I get it from?), so I decided a large personalised wooden trunk would give him somewhere to put things, like his tools, to keep them safe and tidy, as well as being a very large happy birthday gesture to show how much I care!
Due to the multitude of steps involved in making the trunk, I am going to be sharing it across 8 posts over the next couple of months. Links to all the associated pages will go live below as each subsequent part gets written and shared and I will put links on each page so you can go through all the posts and follow the entire build sequence from start to finish!
Part 1 Planning and sourcing wood (this post)
Part 2 Framing
Part 3 Lid
Part 4 Panels
Part 5 Corner braces
Part 6 Hardware
Part 7 Initials
Part 8 Final assembly and staining


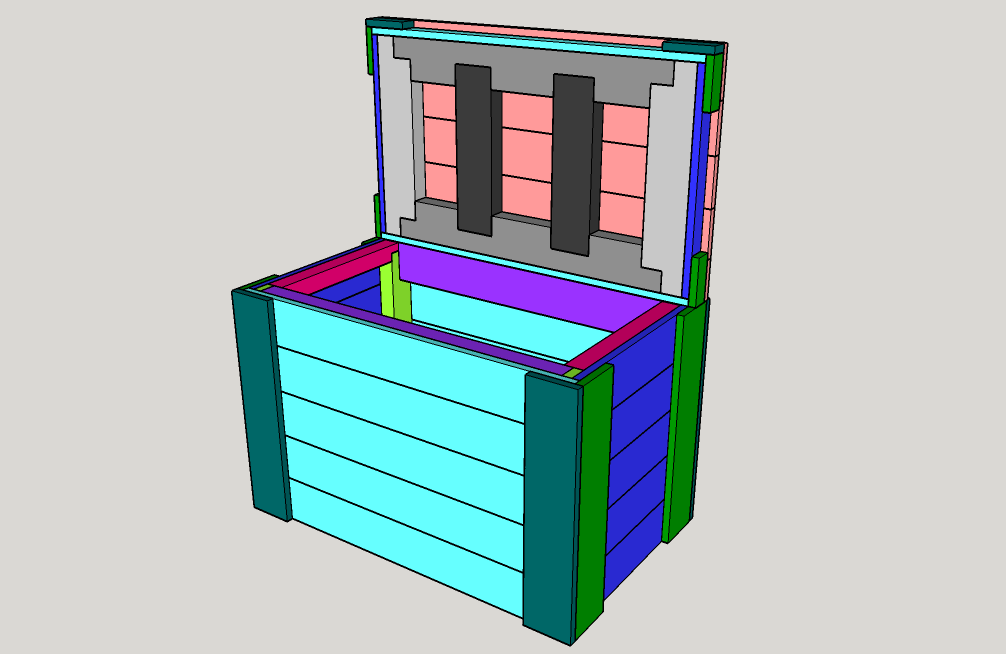
I knew this was going to be a large project, so I began planning well over 6 months in advance! Not only so I had time to make all the various parts of the trunk and source the hardware, but also so I could accumulate enough wood. I decided I was going to try and make it out of pallet wood as much as possible for the outside panels but decided on constructional lumber for the internal frame to make sure I had a solid and stable skeleton to the trunk to hold everything together. I used SketchUp (not sponsored) to create some plans, colour coding all the different pieces to make a clear cut list.
I decided on a mix of 2×4’s and 2×2’s for the internal frame so I had strength and rigidity across the length of the trunk. One of my early concerns was how to make the trunk strong without adding a large amount of weight to it. I planned out strong joints using half lap and mortise and tenon-style joints, so I would have a large surface area for glue. I wanted solid posts in each corner running from the top to the bottom of the trunk to provide additional rigidity. I also wanted the top of the lid to be flat so it could be used as a work surface if needed, so planned out a frame for the lid, over which would be slats running length-ways. Each outside corner of the trunk would also be reinforced with additional vertical slats over the horizontal side panels, helping to hide the joins of the panels but also being a nice decorative feature.

Once I had the plan all worked out, I spent quite a while working out how much lumber I was going to need – constructional and pallets – and then spent several months filling all the surfaces and spaces in the workshop with as much wood as I could fit in! I sourced my constructional lumber from my local DIY store and fortunately I started planning this pre-pandemic, lumber costs were not as high as they are now!

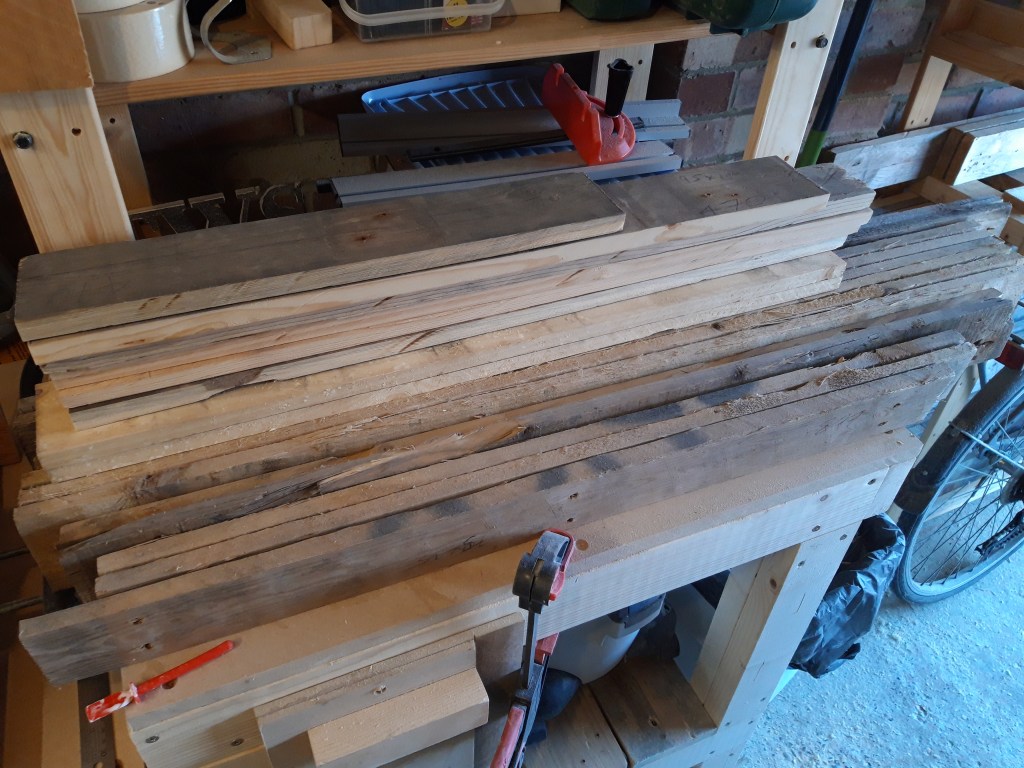
Fortunately after some sorting and tidying there was enough space at the front of the garage so I could dismantle some of the pallets under the shelter of the garage door and didn’t have to rely on the British weather being dry when I needed it! I used my previously discussed process for breaking the pallets down, in the hope of salvaging as much wood as possible, and pleasingly I actually did well and managed to acquire a lot of slats from all the pallets, including a decent number of similar thickness boards which weren’t particularly beaten up or split.
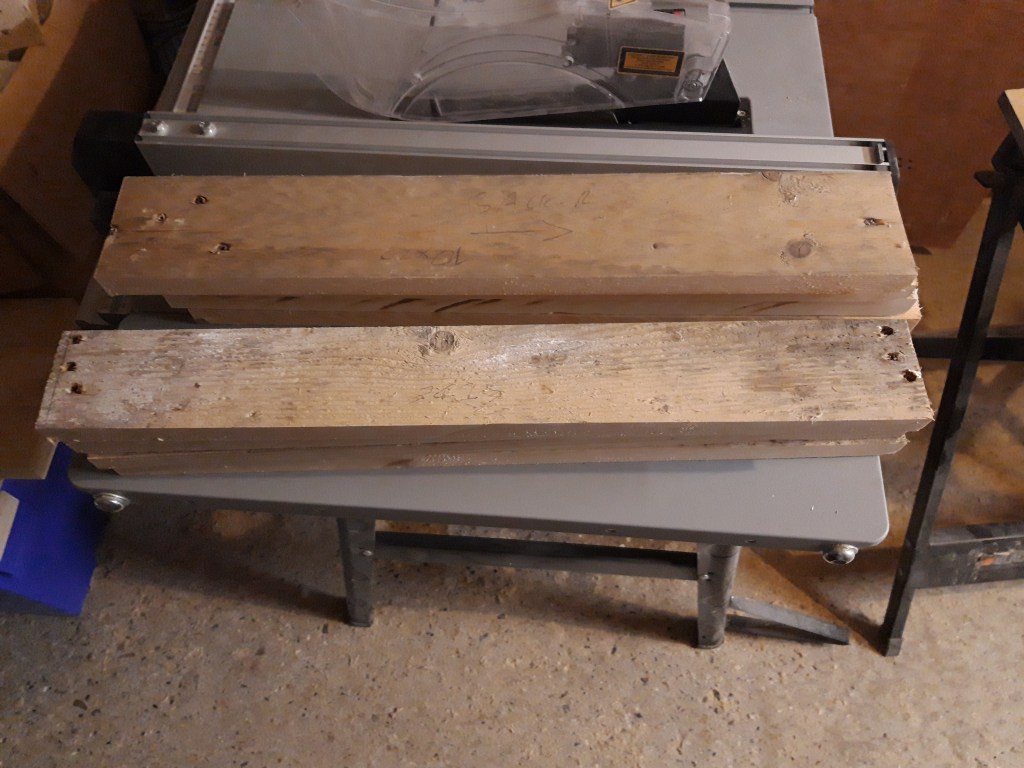
Once I had multiple large piles of pallet slats, I spent a while going through the piles and labelling each piece and sorting them by thickness. I can cut the boards to length on my mitre saw and rip the boards to width using my table saw but as I am yet to invest in a thickness planer (or a jointer) I wanted to save myself hand planing and sanding time by selecting boards for each panel that would only need moderate sanding!
So now I had all my wood organised and ready to be cut to size, I could start assembling the workpiece by building the internal framing! 🔨

It is very interesting to see the stages you went through from the start in creating this amazing trunk of which I am now the very proud owner !
LikeLiked by 1 person
It was a really fun project to work on – I’m really proud of the result and am very happy that you love it so much!
LikeLike