Last year my Dad turned 60 and I wanted to give him something really special – a large personalised wooden trunk! Once the trunk was constructed and all the hardware fitted, I added my Dad’s initials to the lid of the trunk to personalise the gift.
Due to the multitude of steps involved in making the trunk, I am going to be sharing it across 8 posts over the next couple of months. Links to all the associated pages below will become live as each subsequent part gets written and shared and I will put links on each page so you can go through all the posts and follow the entire build sequence from start to finish!
Part 1 Planning and sourcing wood
Part 2 Framing
Part 3 Lid
Part 4 Panels
Part 5 Corner braces
Part 6 Hardware
Part 7 Initials (this post)
Part 8 Final assembly and staining
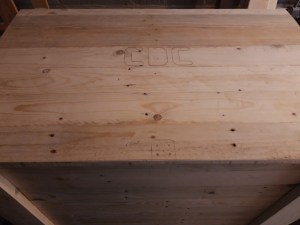
I used some moderately sized letter templates to mark out the lettering in pencil to check it looked ok in the centre of the lid. I then secured the templates to the lid with tape and used my palm router with a straight bit with a bearing to route out the lettering, running the bearing along the edge of the letter in the template.
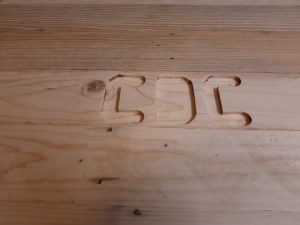
I increased the depth steadily and followed the templates again to gradually remove more material from the letters. I took my time to make sure the templates stayed in place and repeated each letter several times until they were are the depth I wanted.

I then gave each letter a sand with some 80 grit sand paper to remove the router marks and checked the lettering looked good. Time for the last stage of the process now – finishing and final assembly! 🔨

The initials on the top give it a special personal touch and are very much appreciated.
LikeLiked by 1 person