After an extremely busy start to the year, with a lot happening in January and most of February, both at work and with family, I am back with another fun project idea! This COG puzzle is a great and simple gift for someone, which doesn’t take much time to make but will definitely keep the recipient entertained – it did when I gave it to my Dad!
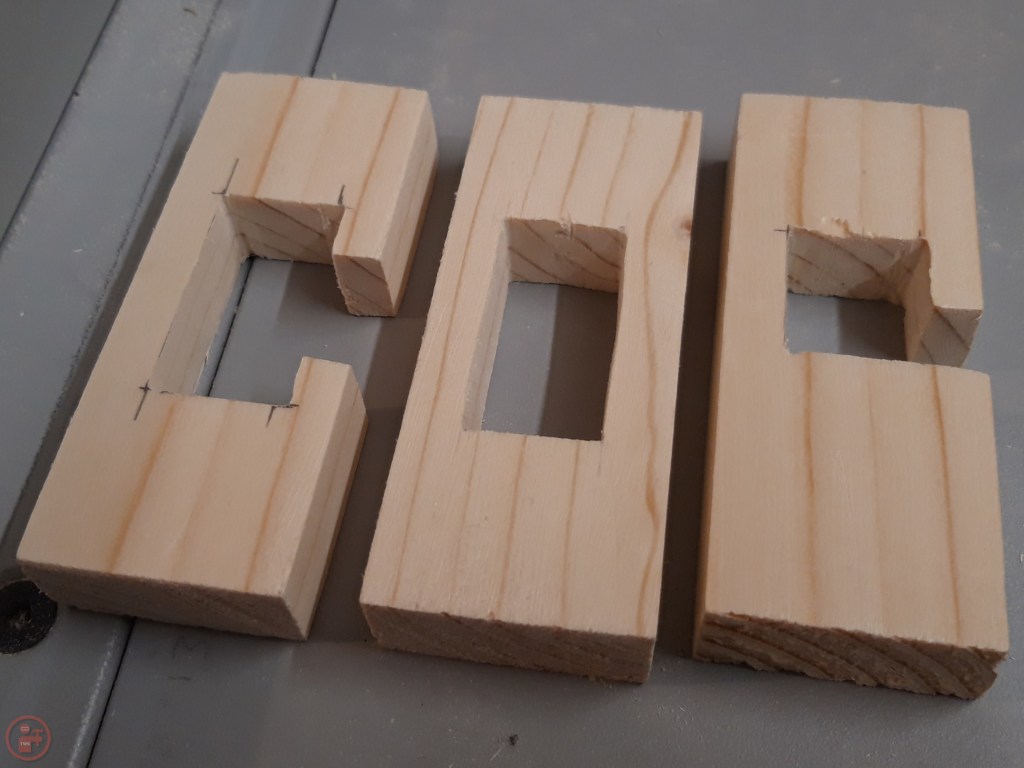
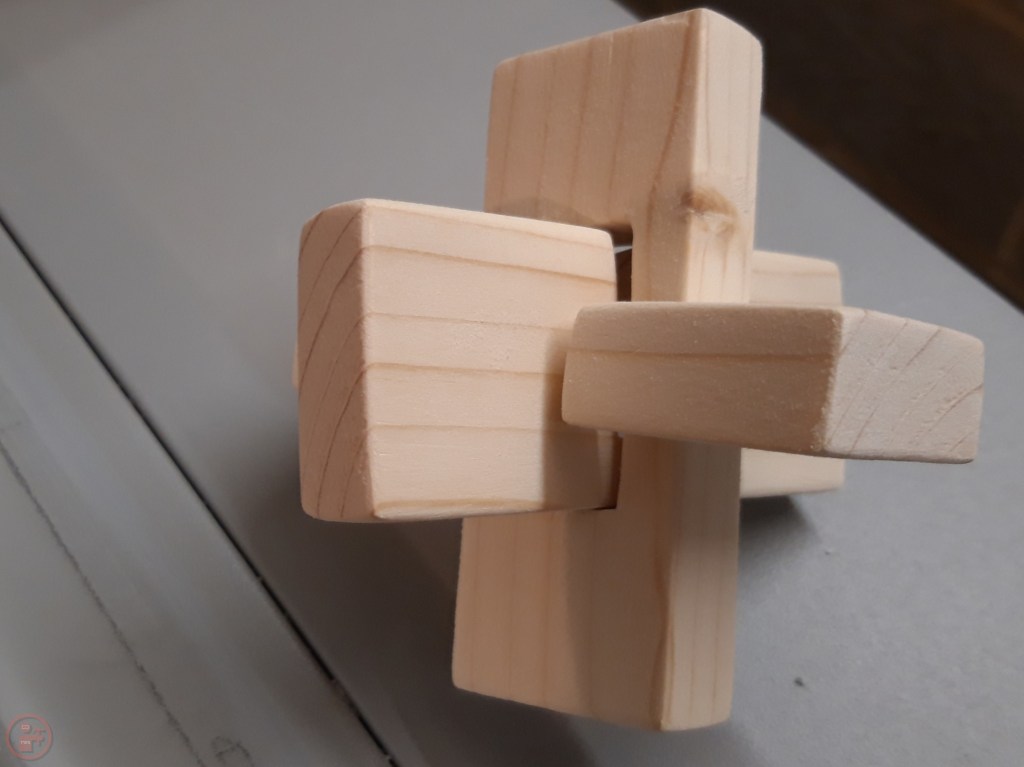
The COG puzzle is so named as the three pieces resemble the letters “C”, “O” and “G”. I got the idea from Steve Ramsey at WWMM on YouTube, who shared it as a Lockdown project video back in 2020. I decided to make one for my Dad last year, as something a bit different and something for him to fiddle with while sitting in his armchair in the living room!
As the lettering needs to be strong in a vertical direction, so the pieces don’t snap in half, I used an offcut of a pine board that was long enough for the letters to all come from the same strip. I could have used smaller scrap pieces but cutting out the inside sections is a little fiddly and much easier if the letters are part of a larger piece for clamping.
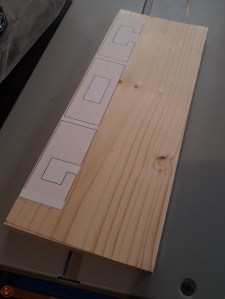
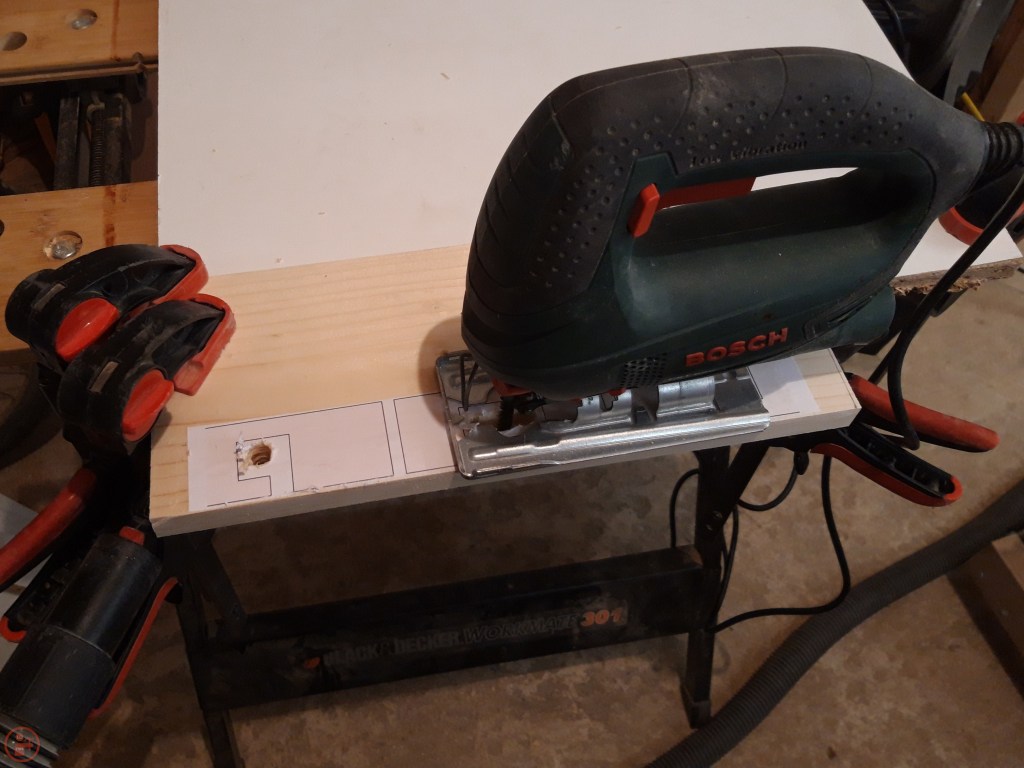
Once I had worked out where to position the printed out template (also from Steve’s video!), I drilled out some sections inside the spaces within the lettering using a medium-sized drill bit. This made it a bit easier to manoeuvre when I used my jigsaw to remove the bulk of the material. I was left with the letters still part of the original board, but with a rough outline of the inside completed.
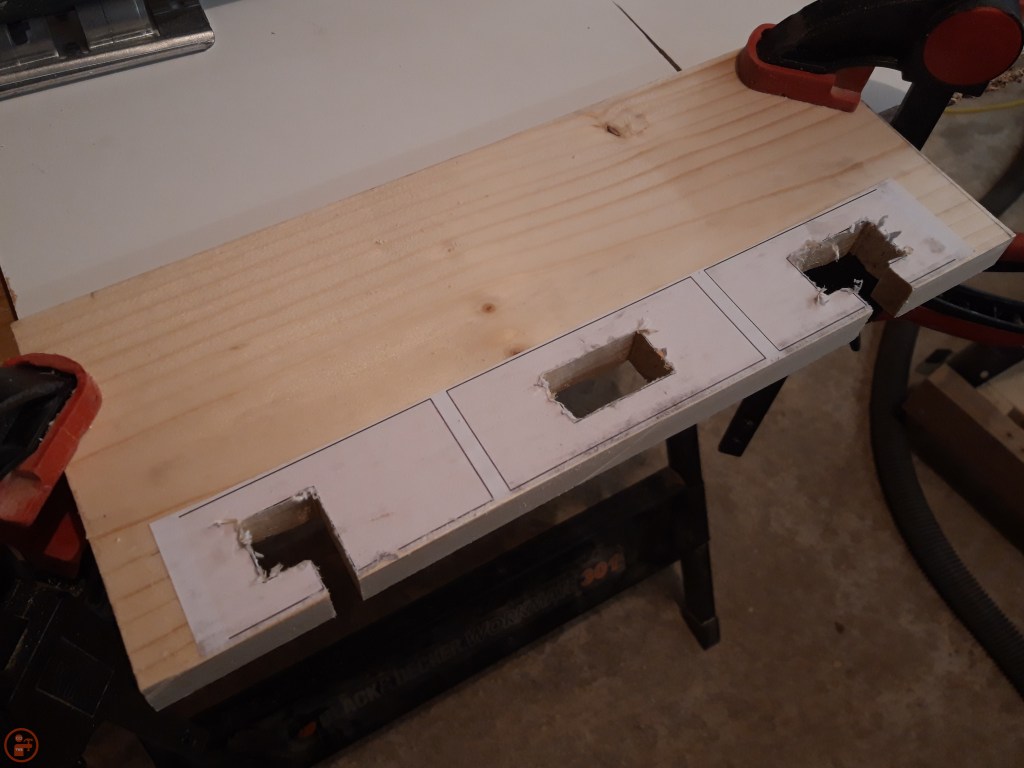
I cut the letters free from the board and removed the glued-on paper template. The rough cutting with the jigsaw had produced letters that were about the right size but when assembled, the fit was a little snug.
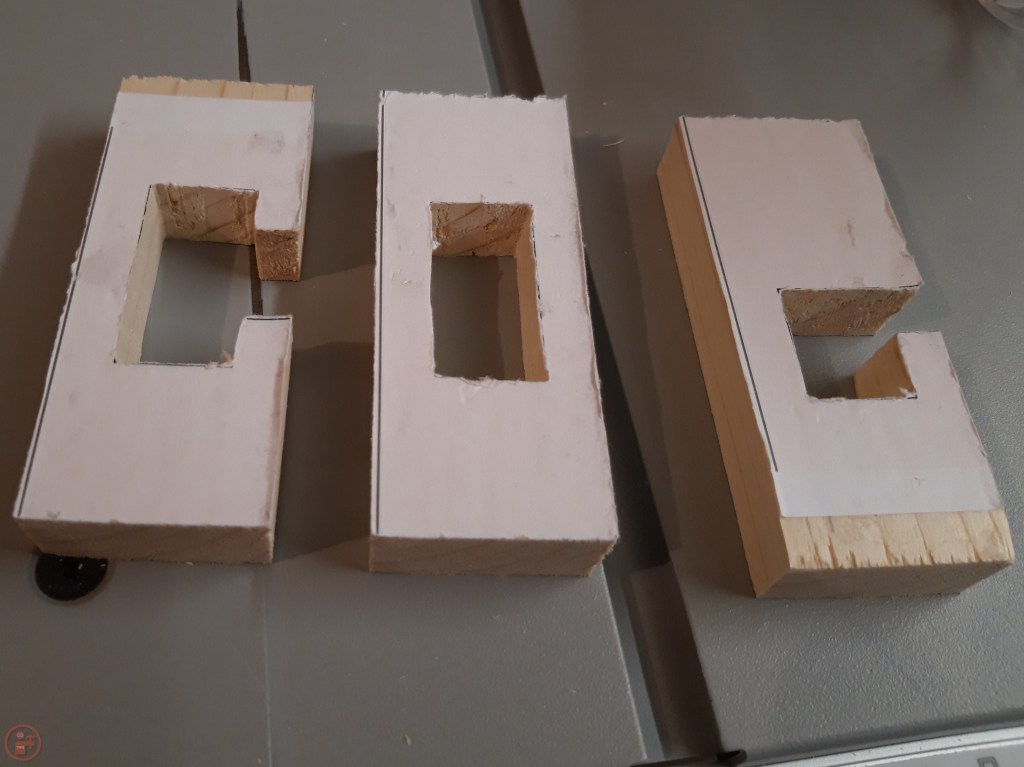
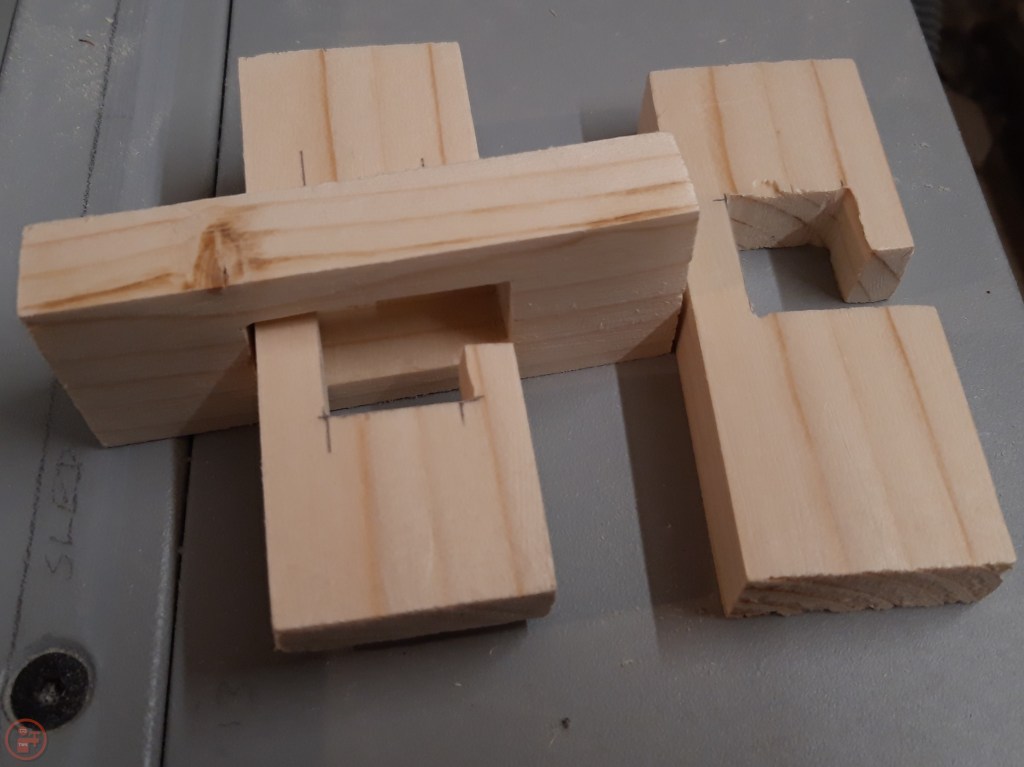
I used some sandpaper stuck on a thin piece of wood to remove material from the inside of the letters, working through each of them in turn, until the pieces could all slot together easily.
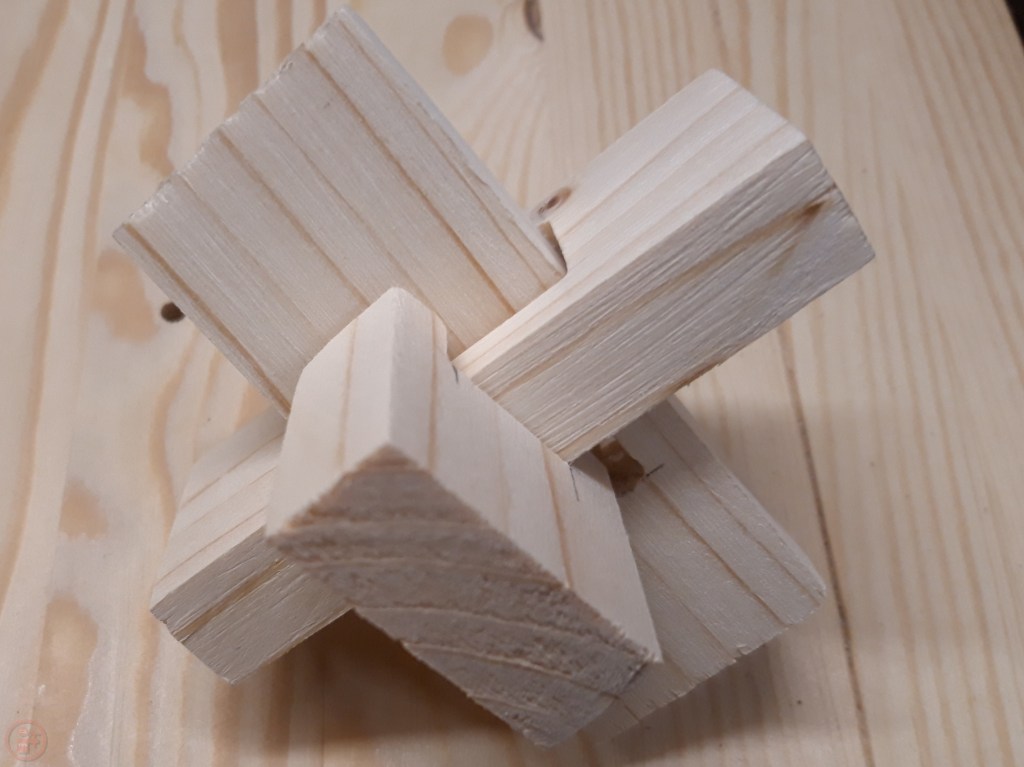
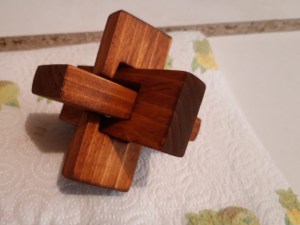
I hand-sanded the letters up to 180 grit, making sure to do all the surfaces of each letter and rounding over all of the edges too. I wanted the puzzle to feel really smooth and comfortable in your hands, so it would be fun to manipulate the pieces and try and figure out the challenge. Once I had finished sanding, I was able to slot the pieces together and apart again really easily – I did have to double check the solution though!
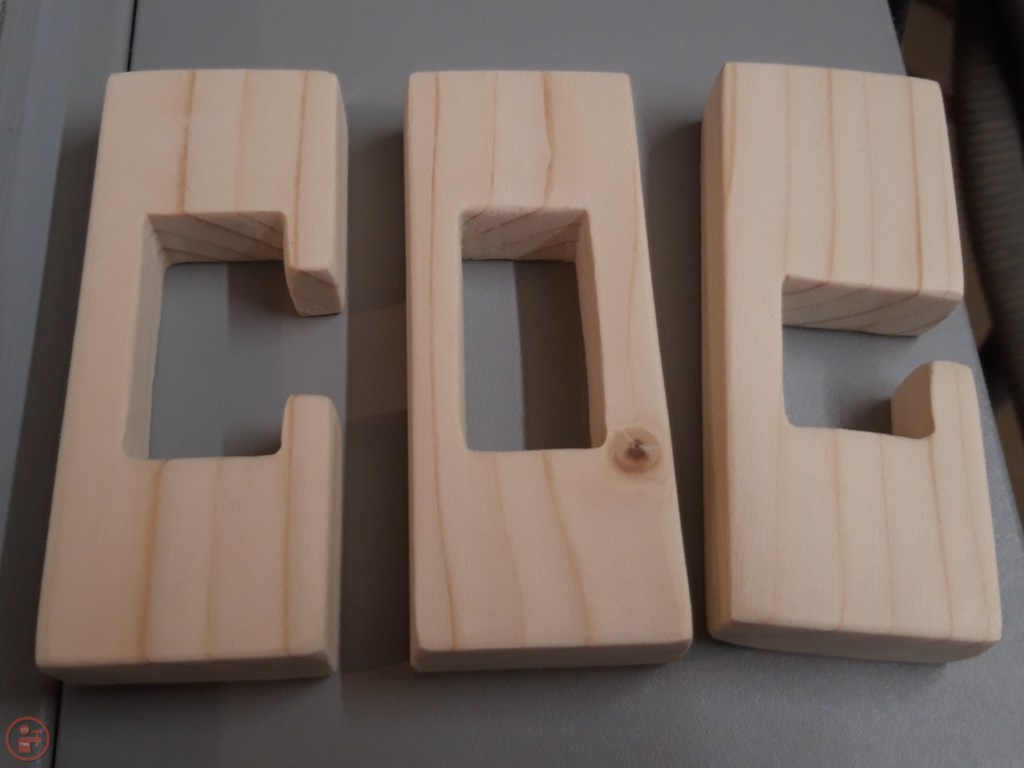
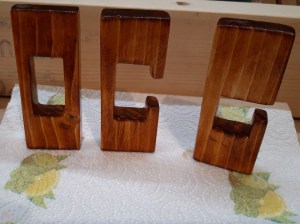
Some people love the pale colour of pine and for some projects, I like to show it off. For this however, I wanted to give the pieces some protection from lots of handling and potentially being slid together and apart lots. I decided on a stain to bring out the grain and then a varnish to make the soft pine more hardwearing. To give the pine a darker colour, I chose a mahogany stain, which really highlighted the grain pattern and made the paler vertical stripes of grain very vivid on each of the letters. Once the pieces were fully dry after being left overnight, I checked the fit again to make sure everything still slid smoothly together and apart.
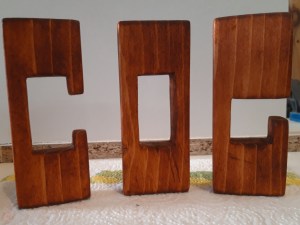
I applied a matt varnish to further protect the pieces from repeated handling, wiping off the excess and leaving the pieces overnight again for the finish to completely dry.
A final test of the assembly again and this project was ready to be wrapped up!

I disassembled the puzzle, secured the three pieces together with some string, and wrapped the neat little bundle in wrapping paper.

I gave this gift to my Dad as a fun birthday present – it took him a few minutes to figure out how it all went together, but he was successful in the end and loved the challenge! 🔨

I certainly found it quite diverting as the photo shows !!!
LikeLiked by 1 person